Inspiring
November 22, 2017
Answered

"Oil" effect on feathered selection

  • November 22, 2017
  • 3 replies
  • 1118 views

Hi all,

I am coming from old Photoshop CS6 and recently upgraded to CC2018.
I have some plugins that create dark edges around the frames of my pictures, however I noted a flaw that was not occurring in the previous version of PS.
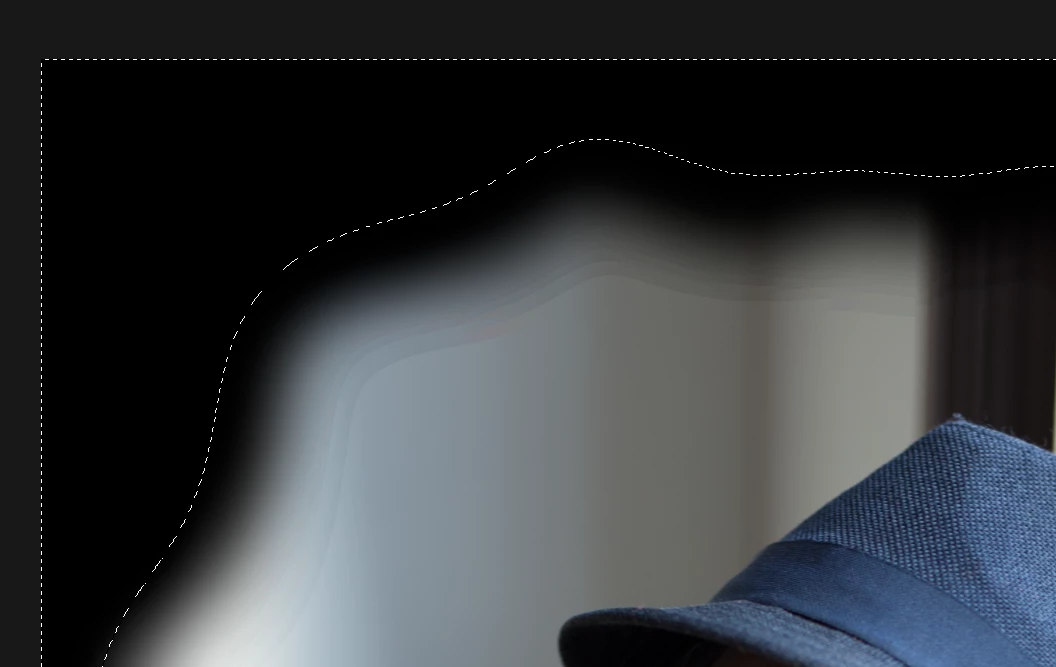
By applying the action steps one after the other I identified the problem to be the selection feather, it creates what I would call an oil effect in which we can basically see the transition between the various intensity levels of the feather whereas in the previous version the feather was completely smooth.

Above you can see the illustration of that, to reproduce it just make a selection with a feather of around 150px, invert it and paint the whole image in black.
Can you see those aweful transitions? This looks quite horrible in the pictures. Again, I am completely sure that this was not occuring in version CS6 since I applied this technique quite frequently.
Are you aware of that, if so, is there a way to prevent it?

Thank you.

    This topic has been closed for replies.
    Correct answer daze507

    So, I found the problem and it makes me feel very stupid:
    Since I installed this new version, Camera Raw once again imported my images in Photoshop in 8 bits but I was convinced to work in 16 bits (as with the previous version).
    I tried again in 16 bits and this effect is almost not visible anymore.

    3 replies

    daze507AuthorCorrect answer
    Inspiring
    November 23, 2017

    So, I found the problem and it makes me feel very stupid:
    Since I installed this new version, Camera Raw once again imported my images in Photoshop in 8 bits but I was convinced to work in 16 bits (as with the previous version).
    I tried again in 16 bits and this effect is almost not visible anymore.

    davescm
    Community Expert
    Community Expert
    November 23, 2017

    HI

    Use the fill rather than brush and it will go from "almost not visible" to not visible

    Dave

    daze507Author
    Inspiring
    November 23, 2017

    I can confirm, now it's perfect.

    Thanks for the help guys!

    davescm
    Community Expert
    Community Expert
    November 23, 2017

    Hi

    Can you describe your process exactly.

    I get the selection , the feather and the invert but then you say you "paint the whole image in black". Are you using a brush or a separate layer with a fill ?

    I ask as the banding in post 1, does not follow the feather exactly - it looks in the corners like separate brush strokes. Also the marching ants usually show the 50% selected point - whereas your image shows the gradient from the marching ants inwards

    I would make the selection, feather it, invert the selection then add a solid color layer set to black (which will take on that selection as a mask) or just add a curves adjustment layer (again that will take the selection as a mask).

    Dave

    daze507Author
    Inspiring
    November 23, 2017

    I used a black brush to paint directly on the selection. As you and Steve (message bellow yours) I will try to use a fill or curve layer and let you know if there are any differences.

    Inspiring
    November 23, 2017

    That kind of "banding" is sometimes just a screen artifact depending on zoom ratio or display resolution. Try zooming to 100% and check if it's still visible. Also if possible try making a print and see if it's in the print too, or not. If not then it's your display resolution. If it is definitely in the image, and not related to zoom ratio or display, then adding 1%-3% noise (Filter>Noise>Add Noise) usually gets rid of banding. Hope that helps.

    daze507Author
    Inspiring
    November 23, 2017

    Hi Steve, thanks for the answer.
    Yes, it is actually the first thing I checked, unfortunately, in this case it was not due to the zoom ratio and the effect was still visible in 100%.
    Here is one example of the full image and if you look closely you can see it even when it's displayed full size:

    Broadway by Raphaël - Photo 236441705 / 500px

    I will try the noise tricks however if seems to me that this behaviour is an important regression from the previous version.

    daze507Author
    Inspiring
    November 23, 2017

    I do see it and yes, it's annoying. I don't have a definitive answer other than finding an updated plugin (or changing the plugin settings, which you've probably already tried). But adding 3% noise, Gaussian, Monochromatic - to a duplicate layer and then painting away the unwanted parts of the "noise" layer with a layer mask - does blend in those artifacts. It's up to you whether that's a worthwhile tradeoff.

    One more thought, wondering if you change image size or resolution would you get a better result from your plugin. I assume you're running the plugin on a 300 PPI document, but for instance if you use Image Size to double document size, would that improve the result.


    I will try to play with these settings to see if there are improvements but again, it's not an issue with the plugin itself but with how Photoshop handles the feather in this version, which is definitely different from the way it handled it in previous versions.