Participating Frequently
September 29, 2021
Question

Re-Imported images look different

  • September 29, 2021
  • 1 reply
  • 471 views

Searched but couldn't find a solution:

Macbook Air 2021

Mac OSX 11.5.2

Photoshop 22.5.1


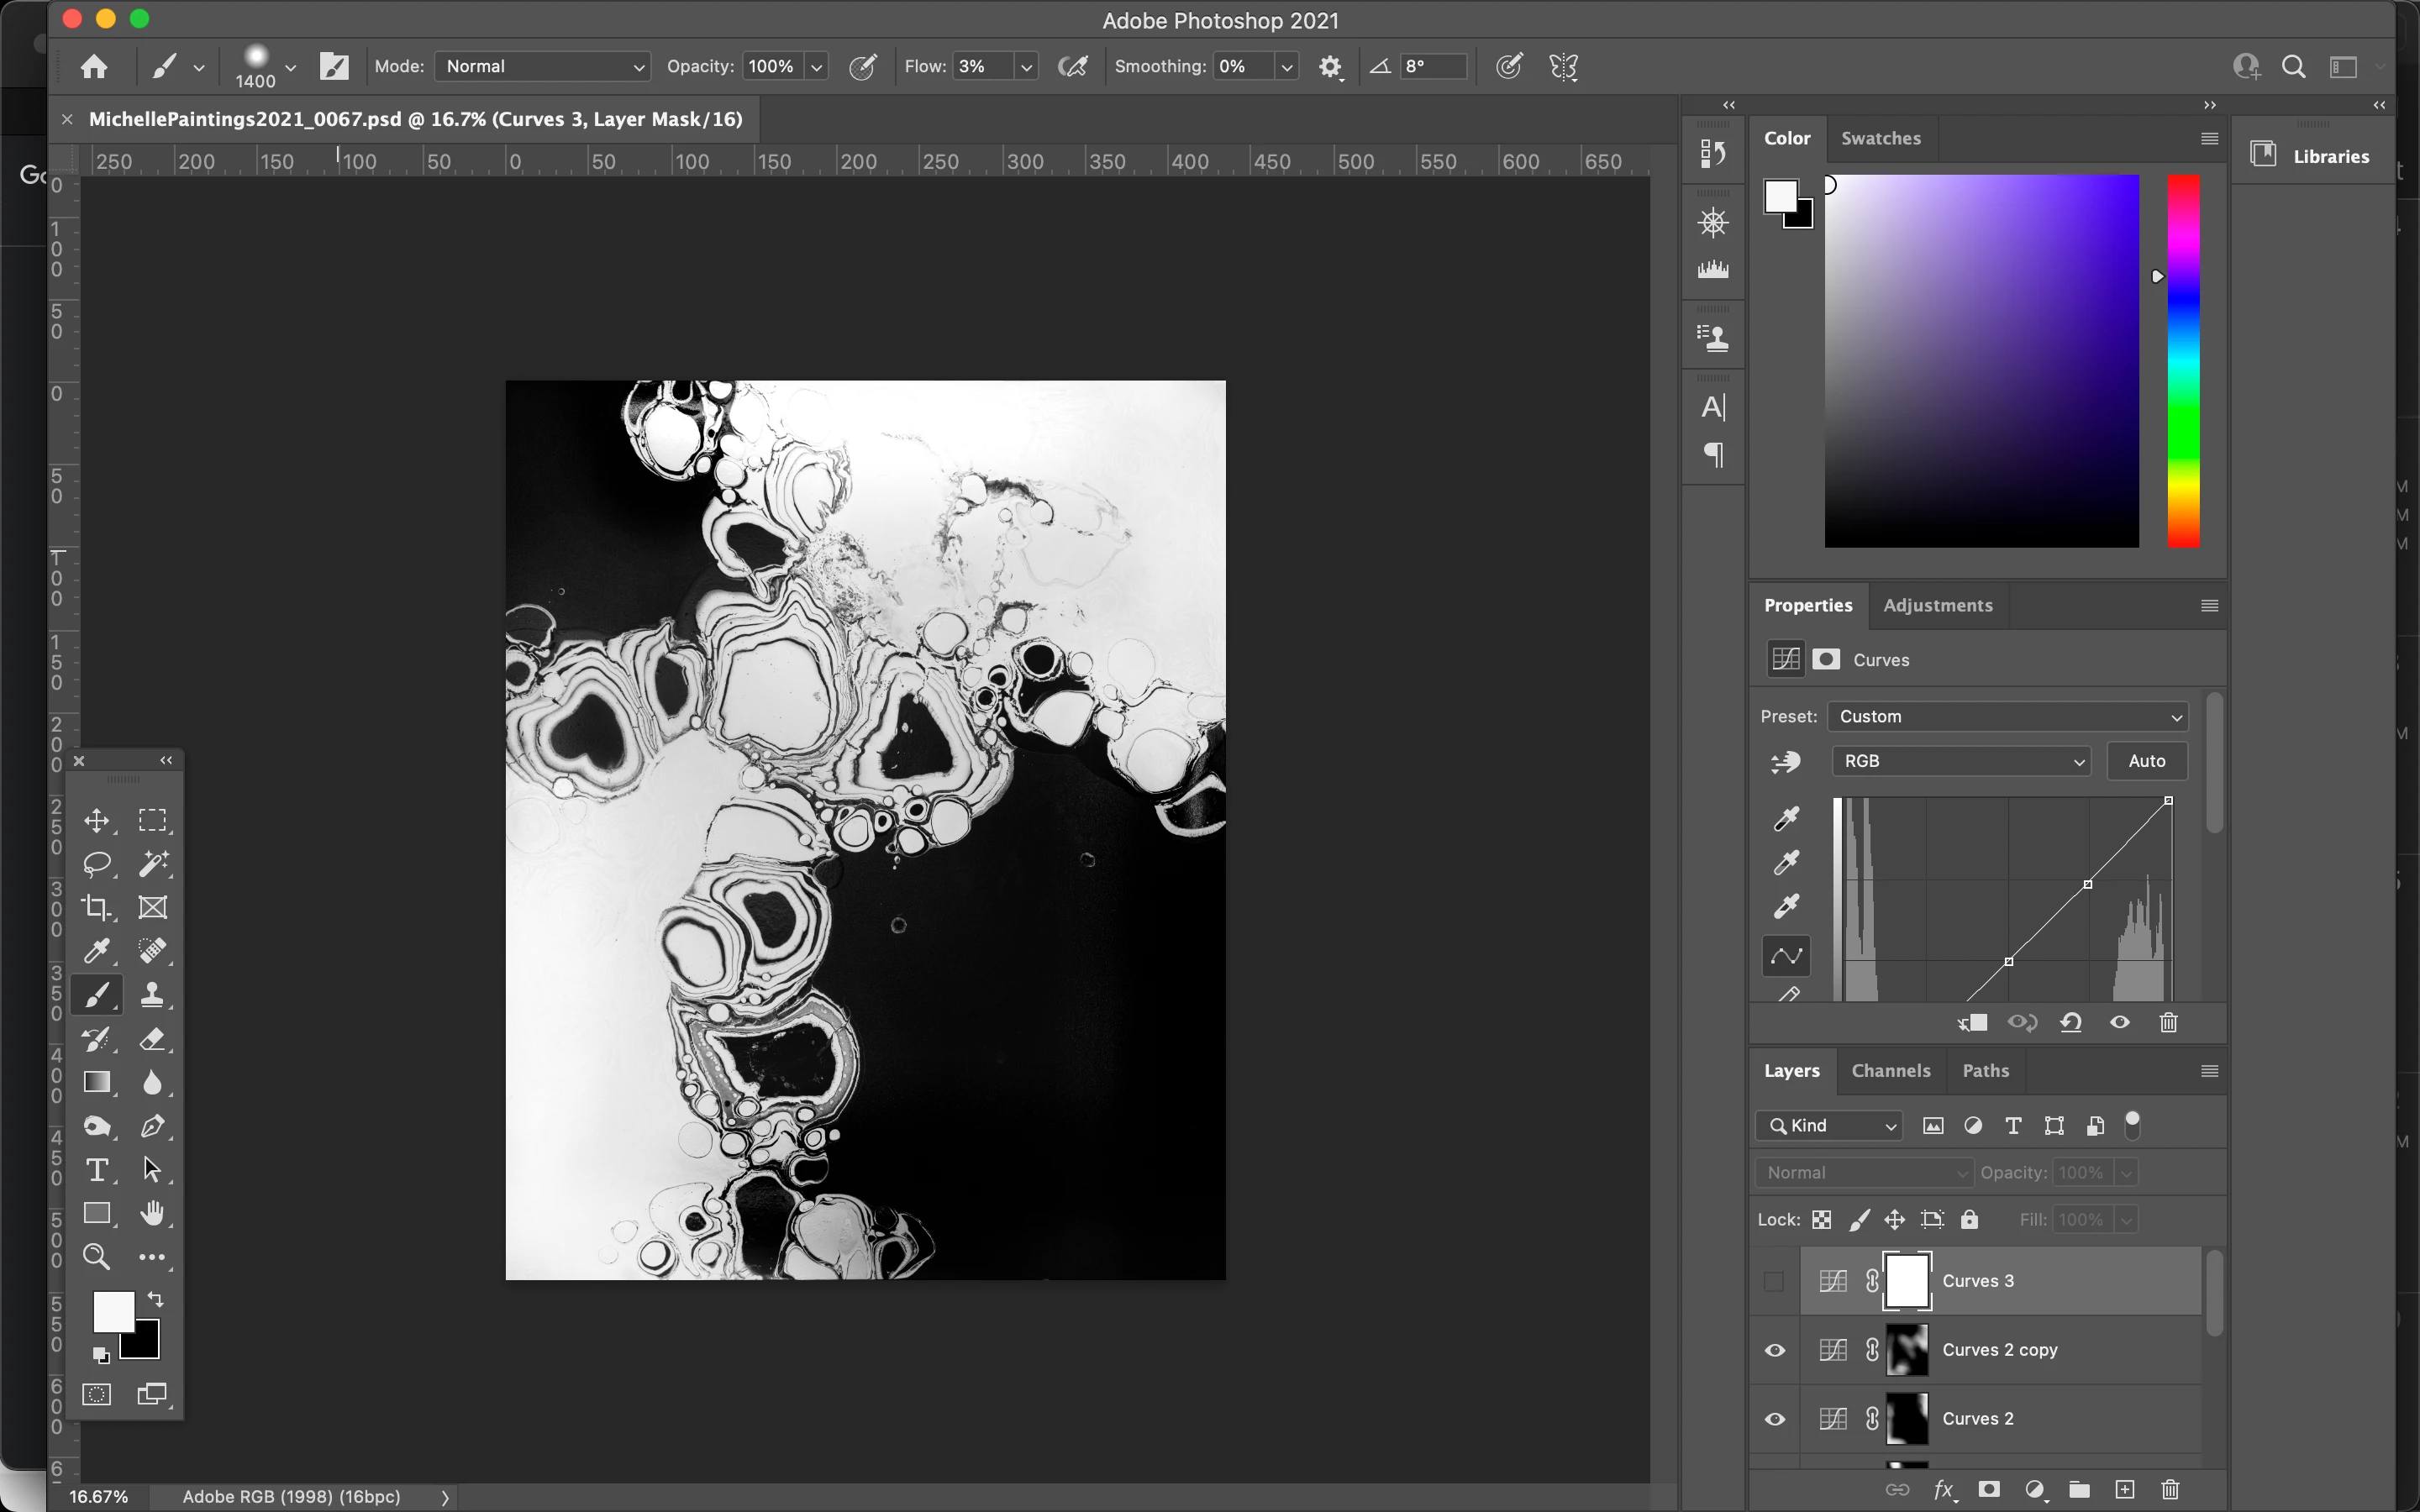
I have a photograph that I've edited inside of Photoshop.

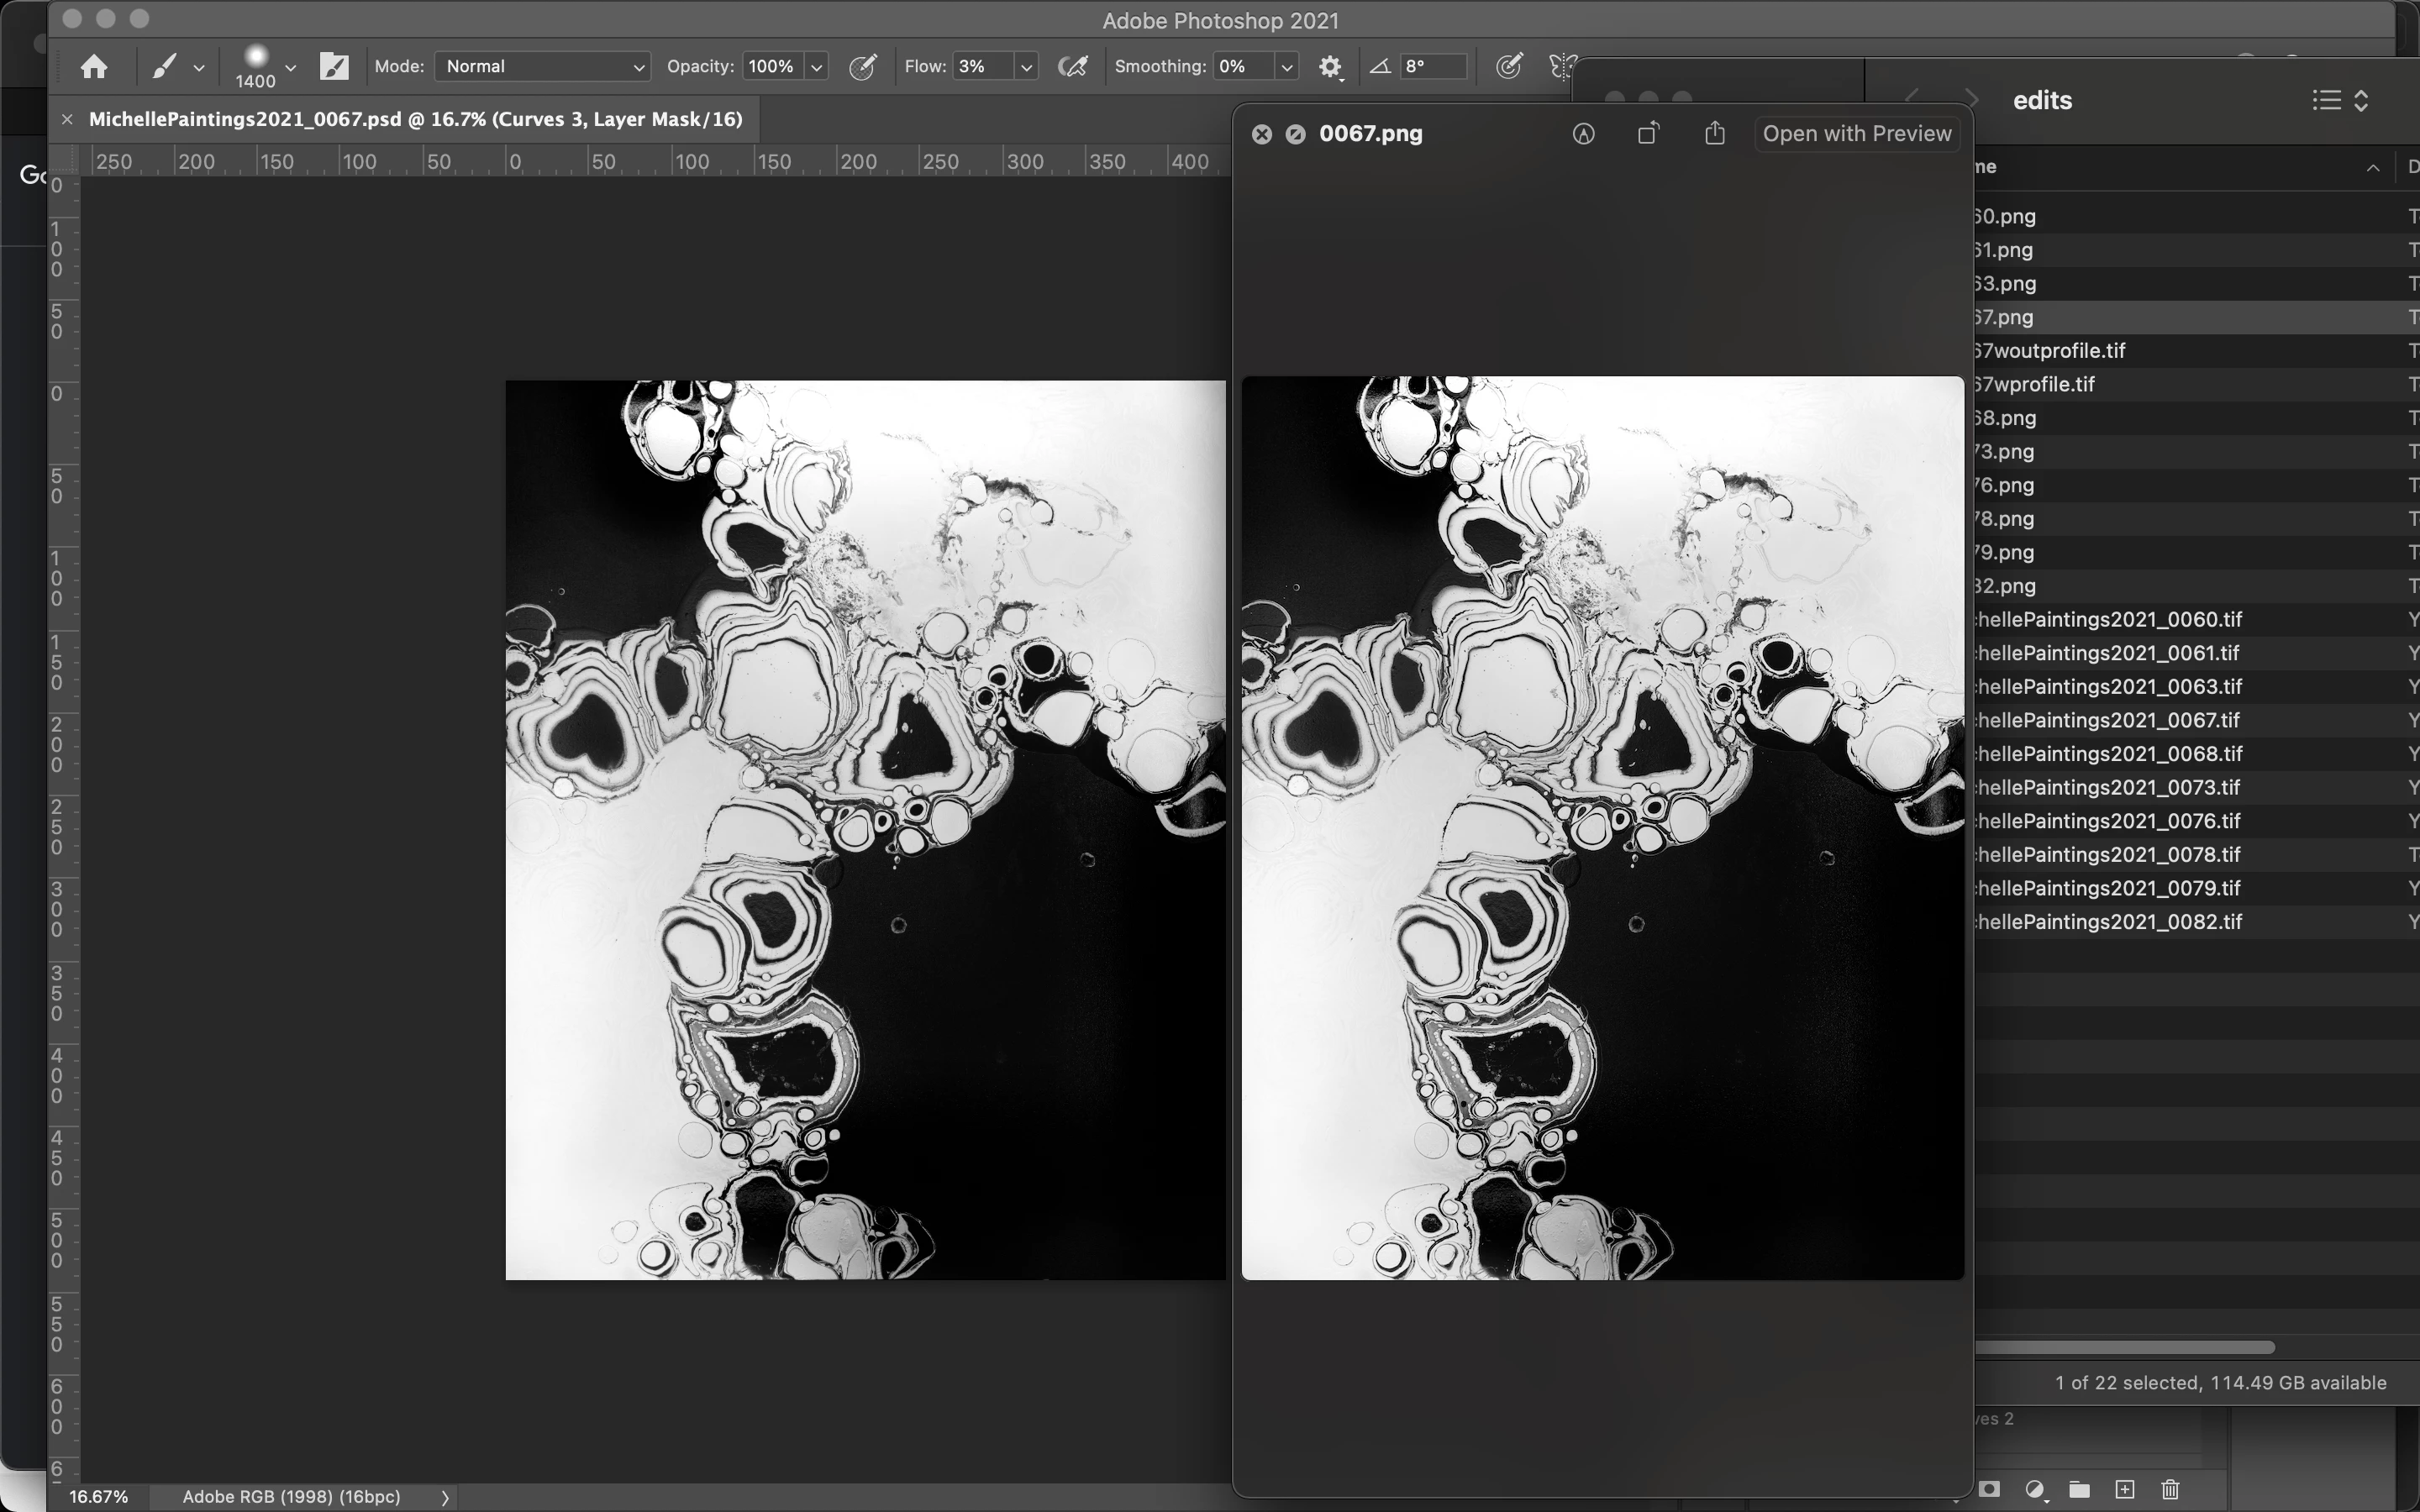
When I export the edited image, it looks the same as it did in the Photoshop file I was editing in.

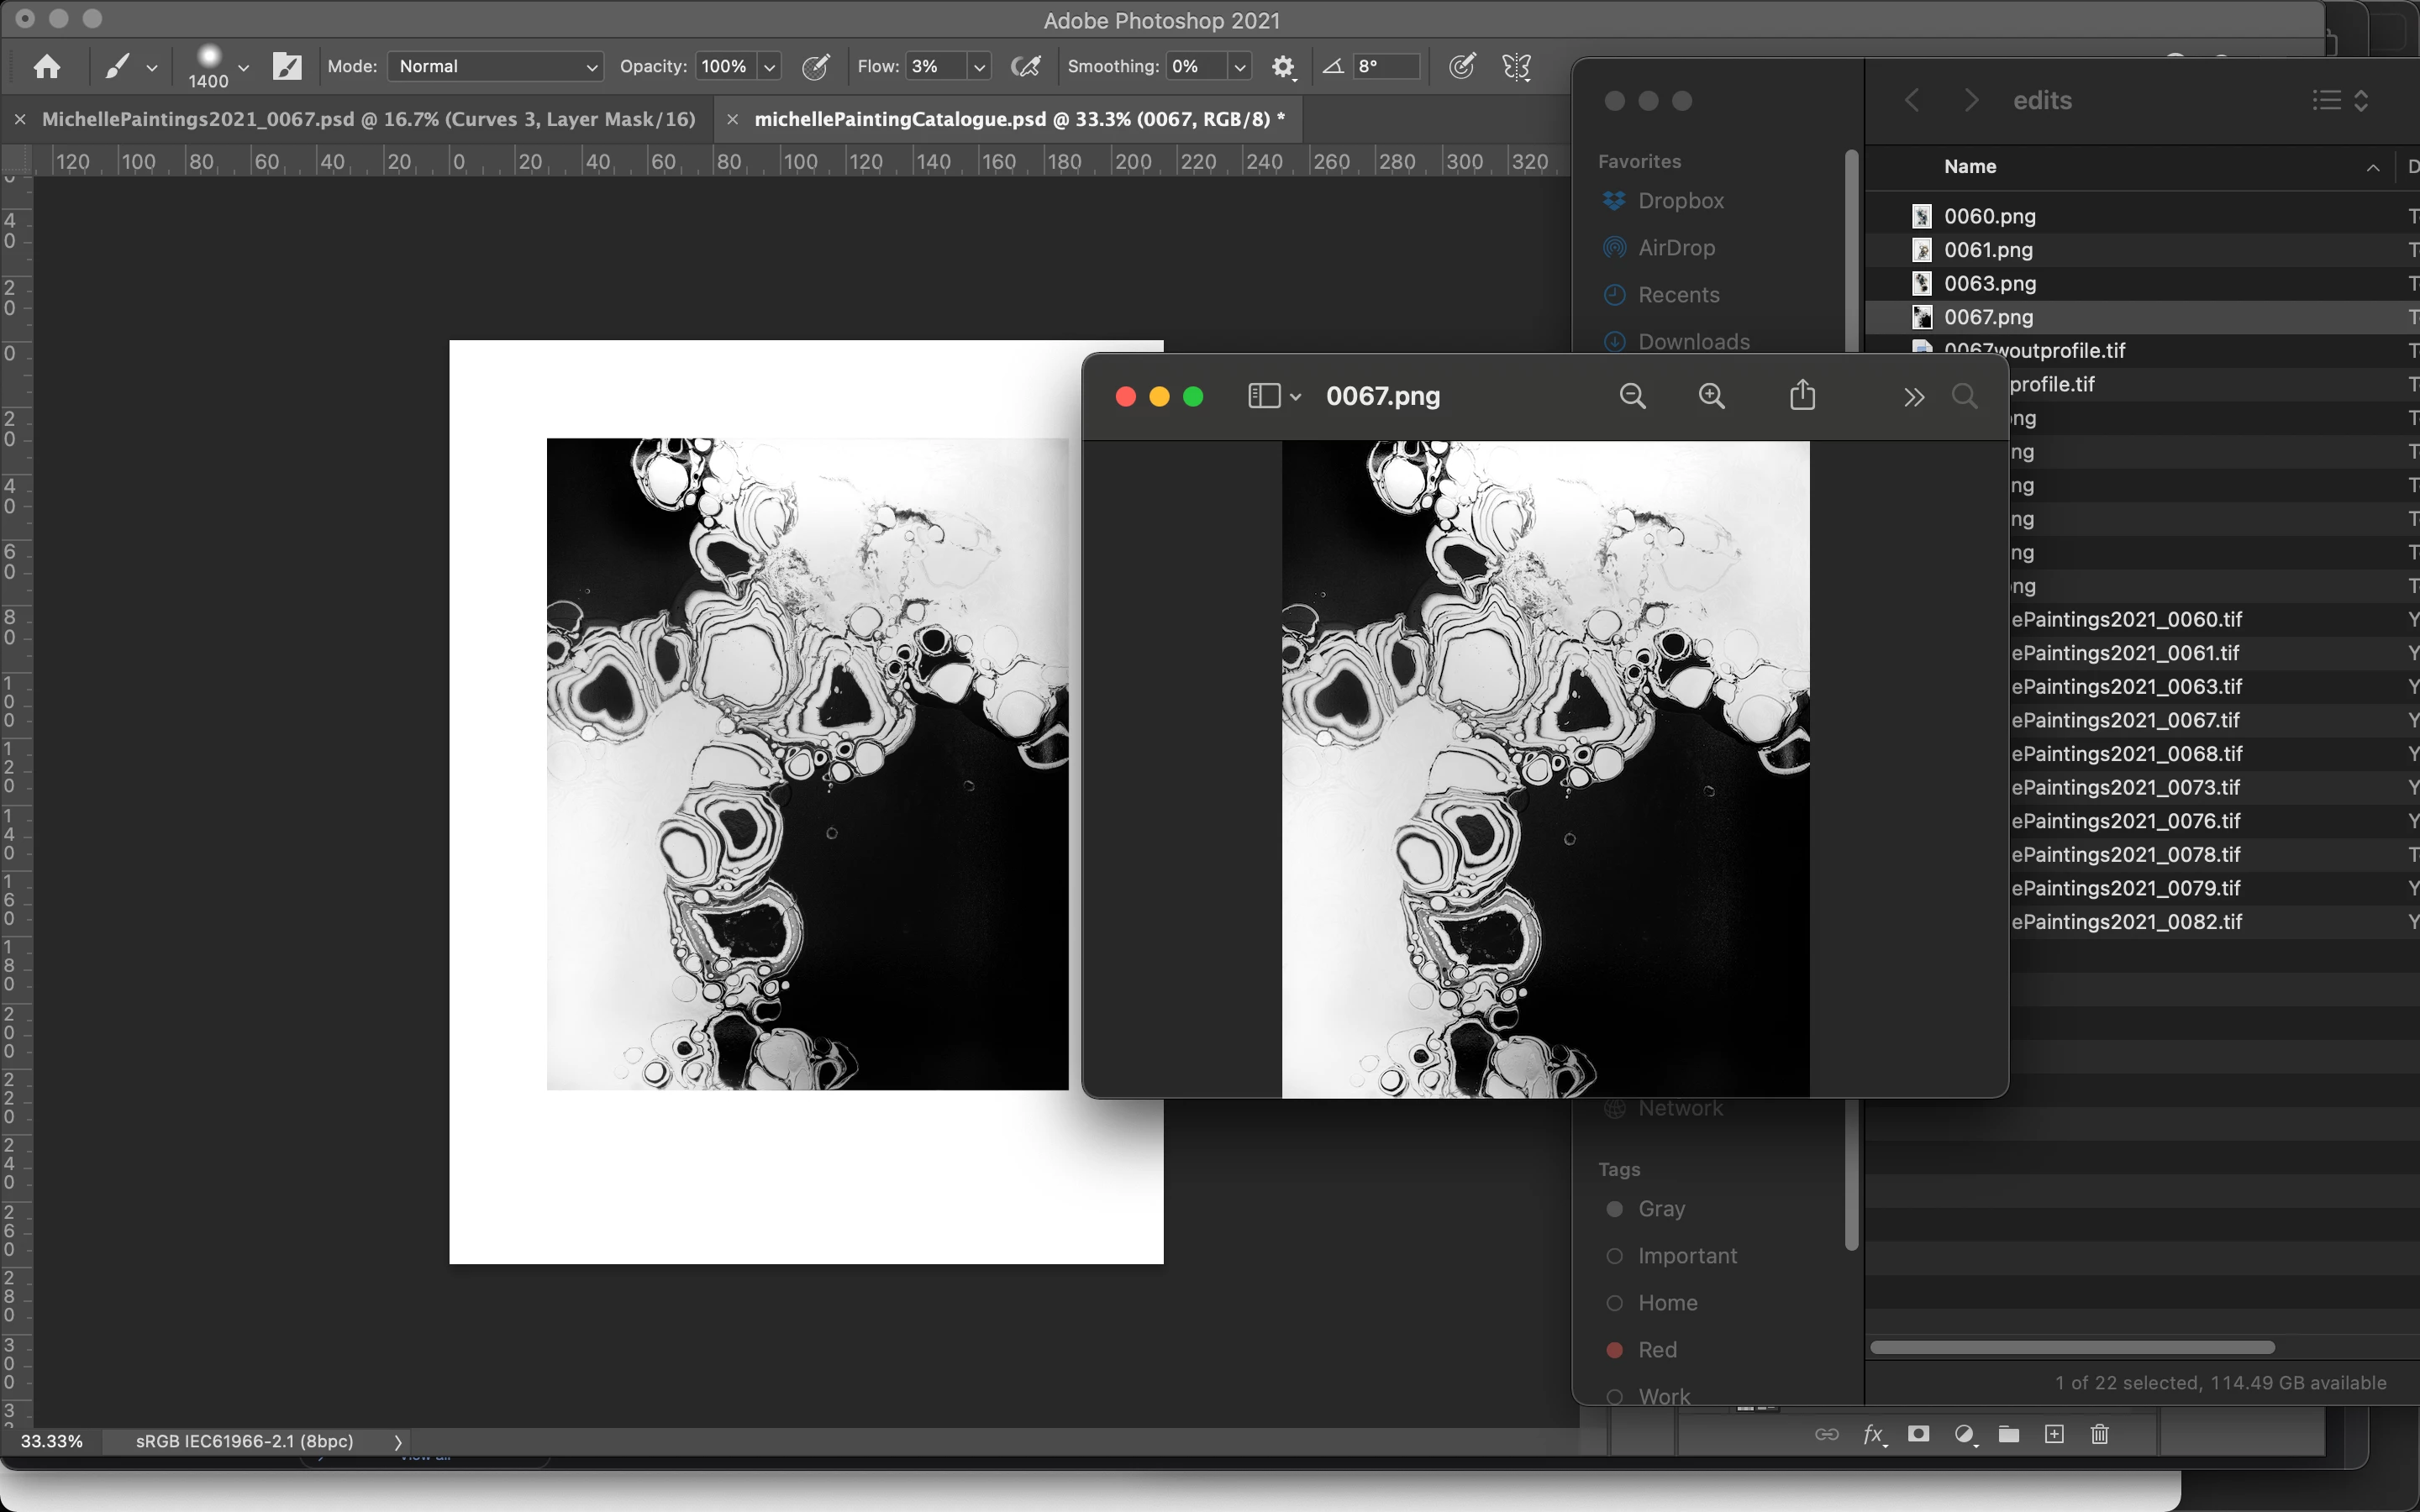
When I take the exported image and re-open in a new Photoshop session, the image is quited different.

I've tried .png, .jpg, and .tiff (both with and without color profile)


This topic has been closed for replies.

1 reply

mglush
Community Expert
Community Expert
September 29, 2021

Hi!

Just so we are on the same page, tell us what you see as being different in the image? Also, why would you re import the image upon export and not use your original photoshop file to make any further adjustments?


The png and jpg files have a compression applied to them on export, so there would be changes associated with that file format. The tif file format, depending on what options you choose on export, might also have some of those same compression issues. 


Anytime you compress a file, Photoshop makse decisions that will affect the look to make it fit the parameters of the file format. Always keep your original photoshop file so you have the cleanest version everytime you make a change and export.


Please give us a little more information on the changes to your file that you are concerned about so we can help you more effectively.

Thanks,

Michelle

Participating Frequently
September 29, 2021

Hey, Michelle.

Thanks for the reply.


I mentioned in my third image's caption, but you can see that the luminence is slightly lower along with what appears to be vignetting in the top right and bottom left corners. (In the 3rd screenshot: The left image is the re-imported image, the right image is the image in Preview)


I have 15 pieces of photographed art each with their own photoshop file to clean them up. 

I have a separate file where I'm creating a flyer that contains text, borders, etc. that will be common to each photo... so I'm building the template once and just adding all 15 photos to that so I can just turn the layers on/off and export them with the copy and borders. (I'm sure this is a good use case for Illustrator, but I'm using Photoshop)


Thanks again

D Fosse
Community Expert
Community Expert
September 29, 2021

...and here's an export of the re-imported photo in the new session:

You can again see the darkening in the corners.


Yes, then that's it. You always have to check your adjustment previews at 100%. Zoomed out they may be unreliable, for the reason I mentioned above. Make it a habit to always press cmd+1 to check at 100%.


It's important to realize that this is a misleading adjustment preview. The data aren't affected.


And generally, when applying tonal adjustments such as Curves, keep in mind that they won't do anything if a pixel is already close to 0 or 255. It only works on the middle values, only the middle values are moved by the curve. The same goes for levels, hue/saturation and so on.


But when the calculation is done on a downsampled and softened version, such as a zoomed out adjustment preview, you have a lot of middle values that aren't there in the full data. A checkerboard of black and white pixels average out to one gray pixel.


When you commit the adjustment, the calculation is performed on the full data (the black and white pixels, not the gray pixel).