cuongeke1
Participant
November 19, 2016
Answered

Remove Background?

  • November 19, 2016
  • 5 replies
  • 5898 views

Hi, i really need your help. I am trying to remove the white background from hundred of black & white images.

But the problem is the image after removed background look really really worse.

Please take a look at this image:

I have used Color Range to select black color and then duplicate a New Layer with the Selection

Mean while, a Photoshop Pro show me how did he remove the white background

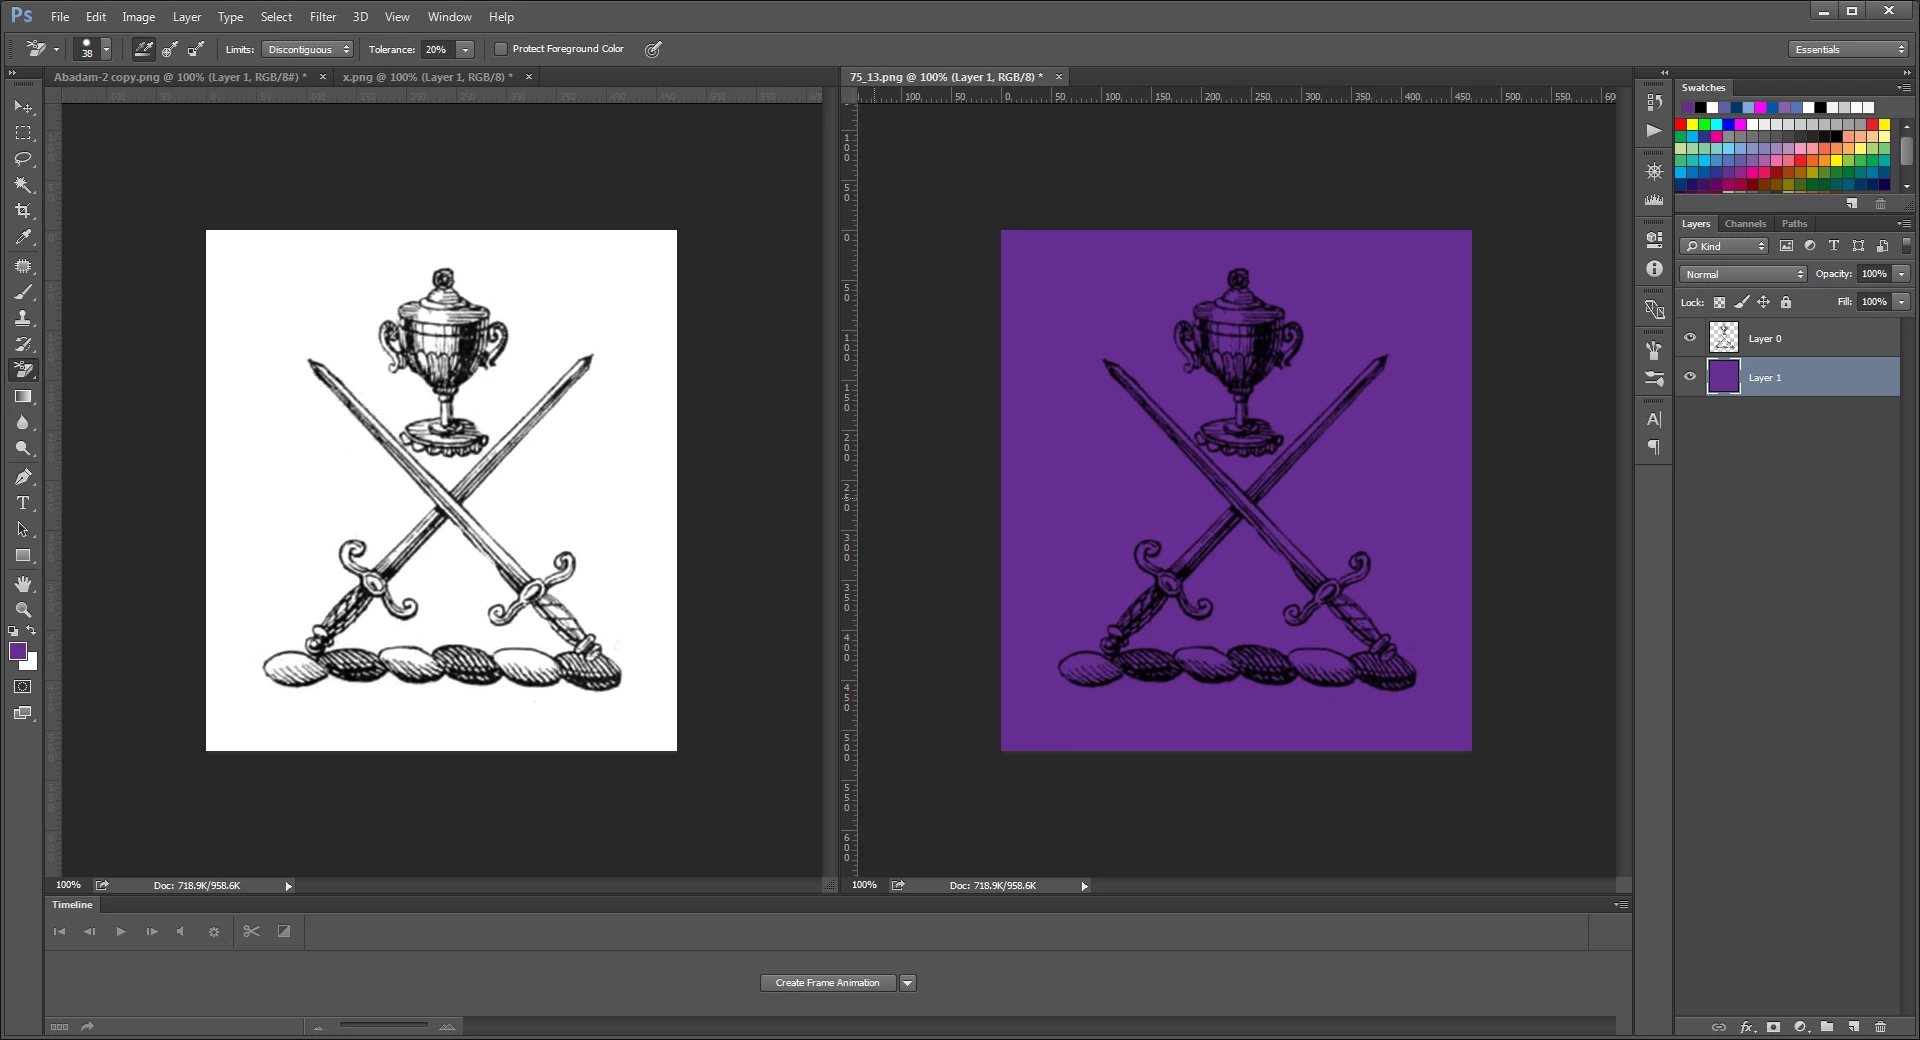
I can't understand how did he do this? The image look so cleanly without any white area (2 image are same size ~500x500px at 72 px/in

Please help me! this is urgent

This topic has been closed for replies.
Correct answer Mylenium

Paste the image as a layer mask on a balck solid and invert it.

Mylenium

5 replies

cuongeke1
cuongeke1Author
Participant
November 20, 2016

Wow! Thank you everyone, i learned new things thanks to your help.

The method of Mylenium is really awesome, i have never imaged that we can

do that to removed background, the result is absolutely perfect.

- I had tried Background Eraser before but the image lost some detail

- I don't really understand how did JJMack removed white background as he said

"Also using copies and blend mode you can actually remove all a white from an image

merging the layers if you need to. Its like lifting the sketch off the paper so you can paint

under your sketch."

Thank you everyone, again, you saved my day

JJMack
Community Expert
Community Expert
November 20, 2016
JJMack
Community Expert
Community Expert
November 19, 2016

It is very easy to remove a white background without removing anything?  You can use blend if gray or simply use blend mode multiply.

Also using copies and blend mode you can actually remove all a white from an image merging the layers if you need to. Its like lifting the sketch off the paper so you can paint under your sketch.

There are also free applications that can trace a sketch and save a vector file like an SVG.  Which could be place into Photoshop or opened with Photoshop. Unfortunately Photoshop does not open SVG files as vector layers but you can use the layer alpha channel to create a path you define a custom shape with.  These applications work best when the Image is pure black and pure white.  Grayscale image can look quite good converted to a shape however it will depend on the tolerance the application uses to trace black. How well it will work.  Adjusting the gray with the Levels middle gray slider to adjust the grayscale sketch can be used to create different shapes by tracing the adjusted sketch.

JJMack
Terri Stevens
Legend
November 19, 2016

Just to prove there is more than one way to do things, an alternative is to use the background eraser tool. To be honest your images arn't as sharp as the coat of arms image but as you can see below you can get reasonable results.

Simply press 'shift E on the keyboard until you get the the 'background eraser ' tool as seen below.

Set the properties like I have below and click the white background to set the erase color. Paint over the hand removing the white and leaving behind black and grey.

Then simply use a 'levels' adjustment layer clipped to the hand layer (layer 0) By adjusting the sliders you can get a fully black image with whatever brightness you want.

Participant
December 16, 2017

Thank you!! This is EXACTLY what I needed to see! I didn't know about the background eraser tool

Mylenium
MyleniumCorrect answer
Legend
November 19, 2016

Paste the image as a layer mask on a balck solid and invert it.

Mylenium

cuongeke1
cuongeke1Author
Participant
November 19, 2016

This is some image files if you want to try

davescm
Community Expert
Community Expert
November 19, 2016

Mylenium's answer is absolutely correct - but just in case you struggle with the step "paste image into layer mask" - you do it by Alt clicking the mask then pasting

So step by step:

1. Highlight you image layer in the layers panel

2. Ctrl + A to select All then Ctrl - C to copy

3. Alt+LWO  to bring up the New fill layer dialogue

4. Press OK and from the colour picker fill with black

Your layers panel should look like this (with the new fill layer highlighted) :

5. Now Alt click on the mask – your image will turn white (and your channels panel will look like this ):

6. Ctrl V to paste the copied image into that mask

7. Ctrl I to invert it

8. In the layers panel and turn off the original image layer by clicking on the eye tool

You can now add whatever background you like

Much longer to write than to do

Dave

Participant
December 8, 2016

I have a similar challenge and your directions here were very clear. . .I have a bunch of old maps and engravings where I want to remove the background - when in color this is usually yellows and when in b&w grays.  I've tried using levels and curves, but always seem to have color in the background.  I keep thinking, especially with b&w there should be someplace that I can tell PS to remove any gray that is less than a certain tone (like remove any gray that is <25% black).  I am a novice, and just keep trying. . .any ideas?  Thanks