Participant
April 29, 2020
Question

Removing all color from an image besides shadows

  • April 29, 2020
  • 5 replies
  • 7595 views

Hi!

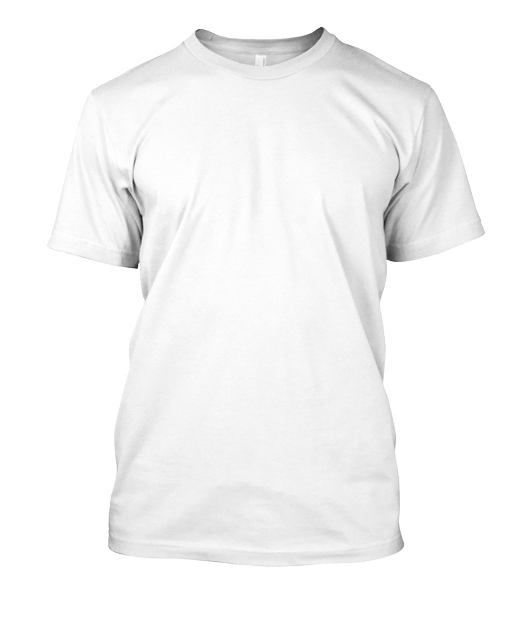
I have been using photoshop a lot more recently and I was trying to create a t shirt mask which retains the shadows like the image attached. I have gone through a million t shirt mockup template tutorials but I still cannot find one that leads to the results similar to the one shown below. I field like I get so close but I am not sure exactly how to remove all white from my images and leave only behind the shadow. I removed saturation, then click on the blending options and try to change things in there but nothing is ever as smooth as this image I have below which was created by someone else. I am just trying to recreate this for other products so I can use for my online website which uses color swatches to change product color as shown here:

https://docs.lumise.com/product-mask-image/


I followed this tutorial to a t (pun intended) :http://www.michaelhoss.com/blog/how-to-create-a-t-shirt-mock

However, it doesnt fully remove all other colors like the image below. 


This topic has been closed for replies.

5 replies

JJMack
Community Expert
Community Expert
May 1, 2020

If you start with a light gray T-shirt with texture and shadow. All you may need to get the shadows, highlights and texture is a good mask for the t-shirt on a group of layers to overlay and blend into the replacement fabric. You can also add a smart Distort Displacement filters to the Fabric Smart object layer to distort the fabric to fit the models contours some.

The most important thing is a good masking job.


JJMack
Trevor.Dennis
Community Expert
Community Expert
April 29, 2020

Would a luminosity mask do what you need?


This the Sven Stork extension which is free from Adobe Exchange (Linked from the Photoshop Window menu).  I chose Luminosity > Midtones from the UI and moved the slider to the right a wee bit to get this.

I chose Selection as the output, and filled the selection with black in a new layer. 

So to demonstrate, a solid colour template of the t-shirt...


Can be overlaid withg the shadows layer that you will have saved as a transparent PNG file and you have your shading.  You'd need to fine tune your settings.  I probably had the Luminosity mask slider pushed too far right resulting in too strong a selection — remember the 'marching ants' only outline pixels 50% grey or darker, but the lighter tones are still selected.


https://svenstork.com/

https://exchange.adobe.com/creativecloud.details.12307.interactive-luminosity-mask.html

mglush
Community Expert
Community Expert
April 29, 2020

Hi!


I also have a couple of thoughts for you: First, could you show us a photo of what you've been able to accomplish so that we can tell you how to get from where you are to where you want to be? And second, along with Barbara's great suggestion of using a color layer and a blending mode of Multiply, you can set the color layer to normal and overlay the T-Shirt art and set that to a blending mode of Multiply. That wayall of the white will be completely gone. You will just need to put the T-Shirt layer on top of the Layer stack.


Let us know if that helps?

Michelle

sbrady6Author
Participant
April 29, 2020

Thanks and I have included some more documentation above. I am actually trying to create this layer so it will work outside of photoshop. Can that be done with multiply still despite that is a photoshop function? If you see the original image above i posted its what I am trying to create but as you can see in the results above I am failing miserably ha!

barbara_a7746676
Community Expert
Community Expert
April 29, 2020

You could try this -- the idea is to get the shadows much darker.

This is what my dialog boxes look like:


barbara_a7746676
Community Expert
Community Expert
April 29, 2020

Another way to do this.

Select the t-shirt and click the Layer Mask icon at the bottom of the Layers panel to add a mask.

Add new layers filled with the color you want. With the color layer active, choose Create Clipping Mask from the Layers panel menu. Change the blend mode of the color layer to Multiply.


sbrady6Author
Participant
April 29, 2020

THank you for that shortcut for clipping masks! Unfortunately, I am trying to create a png mask so that this can apply to stuff outside of photoshop say just a colored swatch behind it on a website. I am afraid my understanding of multiply is its dependent on the layers underneath hence if i am using this I need to do everything in photoshop (ie, make a mockup of a product). I am just trying to create a transparent layer as shown in the original post. I could be misunderstanding though because multiply does make it look good in photoshop but when i go to save as a png it doesnt seem to look the same.

barbara_a7746676
Community Expert
Community Expert
April 29, 2020

As long as the layer is not a Background layer, you should be able to double click on the right side of the layer to bring up layer styles. Move the highlight slider to the left. Hold down Alt/Option to split the slider for a smoother transition.

If you want to darken the shadows a bit you could move the shadow slider to the right.

sbrady6Author
Participant
April 29, 2020

WOW holding alt really helps the transition. I will say though I still am having issues removing all the white and only leaving the shadows behind. I add a blue box behind the layer to show what it would look like on a blue shirt and I get this glowing effect despite the transition is way smoother now as you say.