A lot can be salvaged by optimal sharpening after resampling.
I'd recommend the Bicubic Smoother algorithm. Nevermind that it says (enlargement). The point is that it has no sharpening built in. You'll do that yourself later:
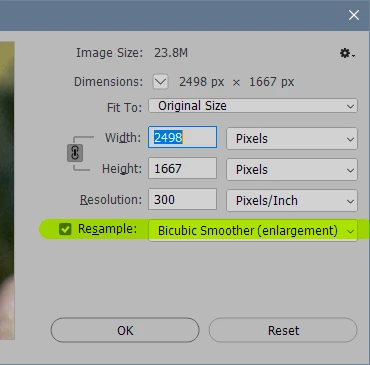
The problem with the other algorithms is that they all tend to oversharpen and introduce ugly artifacts in the process. A small image like this will be particularly affected by that.
For the sharpening, I'd recommend the Camera Raw Filter. Pay particular attention to the "detail" and "radius" sliders. Again, for a small image you'll probably want to keep both at low values.
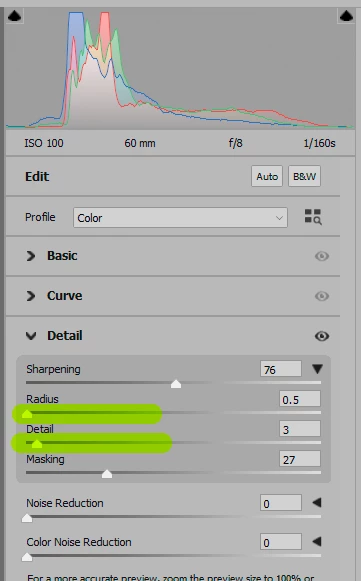
Other than that, it's impossible to give you any fixed numbers. It will vary with the type of image. Push the sliders around a bit and see how it looks. When it looks right, it is right.
When you do this, it's very important to view at 100%! Yes, it will be small, it's a small file. But 100% means you see each image pixel mapped to exactly one physical screen pixel. It's the only way to see the true pixel structure of the file directly on screen, without any screen scaling.
