Inspiring
October 19, 2024
Question

Select Color Range not functioning as expected

  • October 19, 2024
  • 2 replies
  • 1979 views

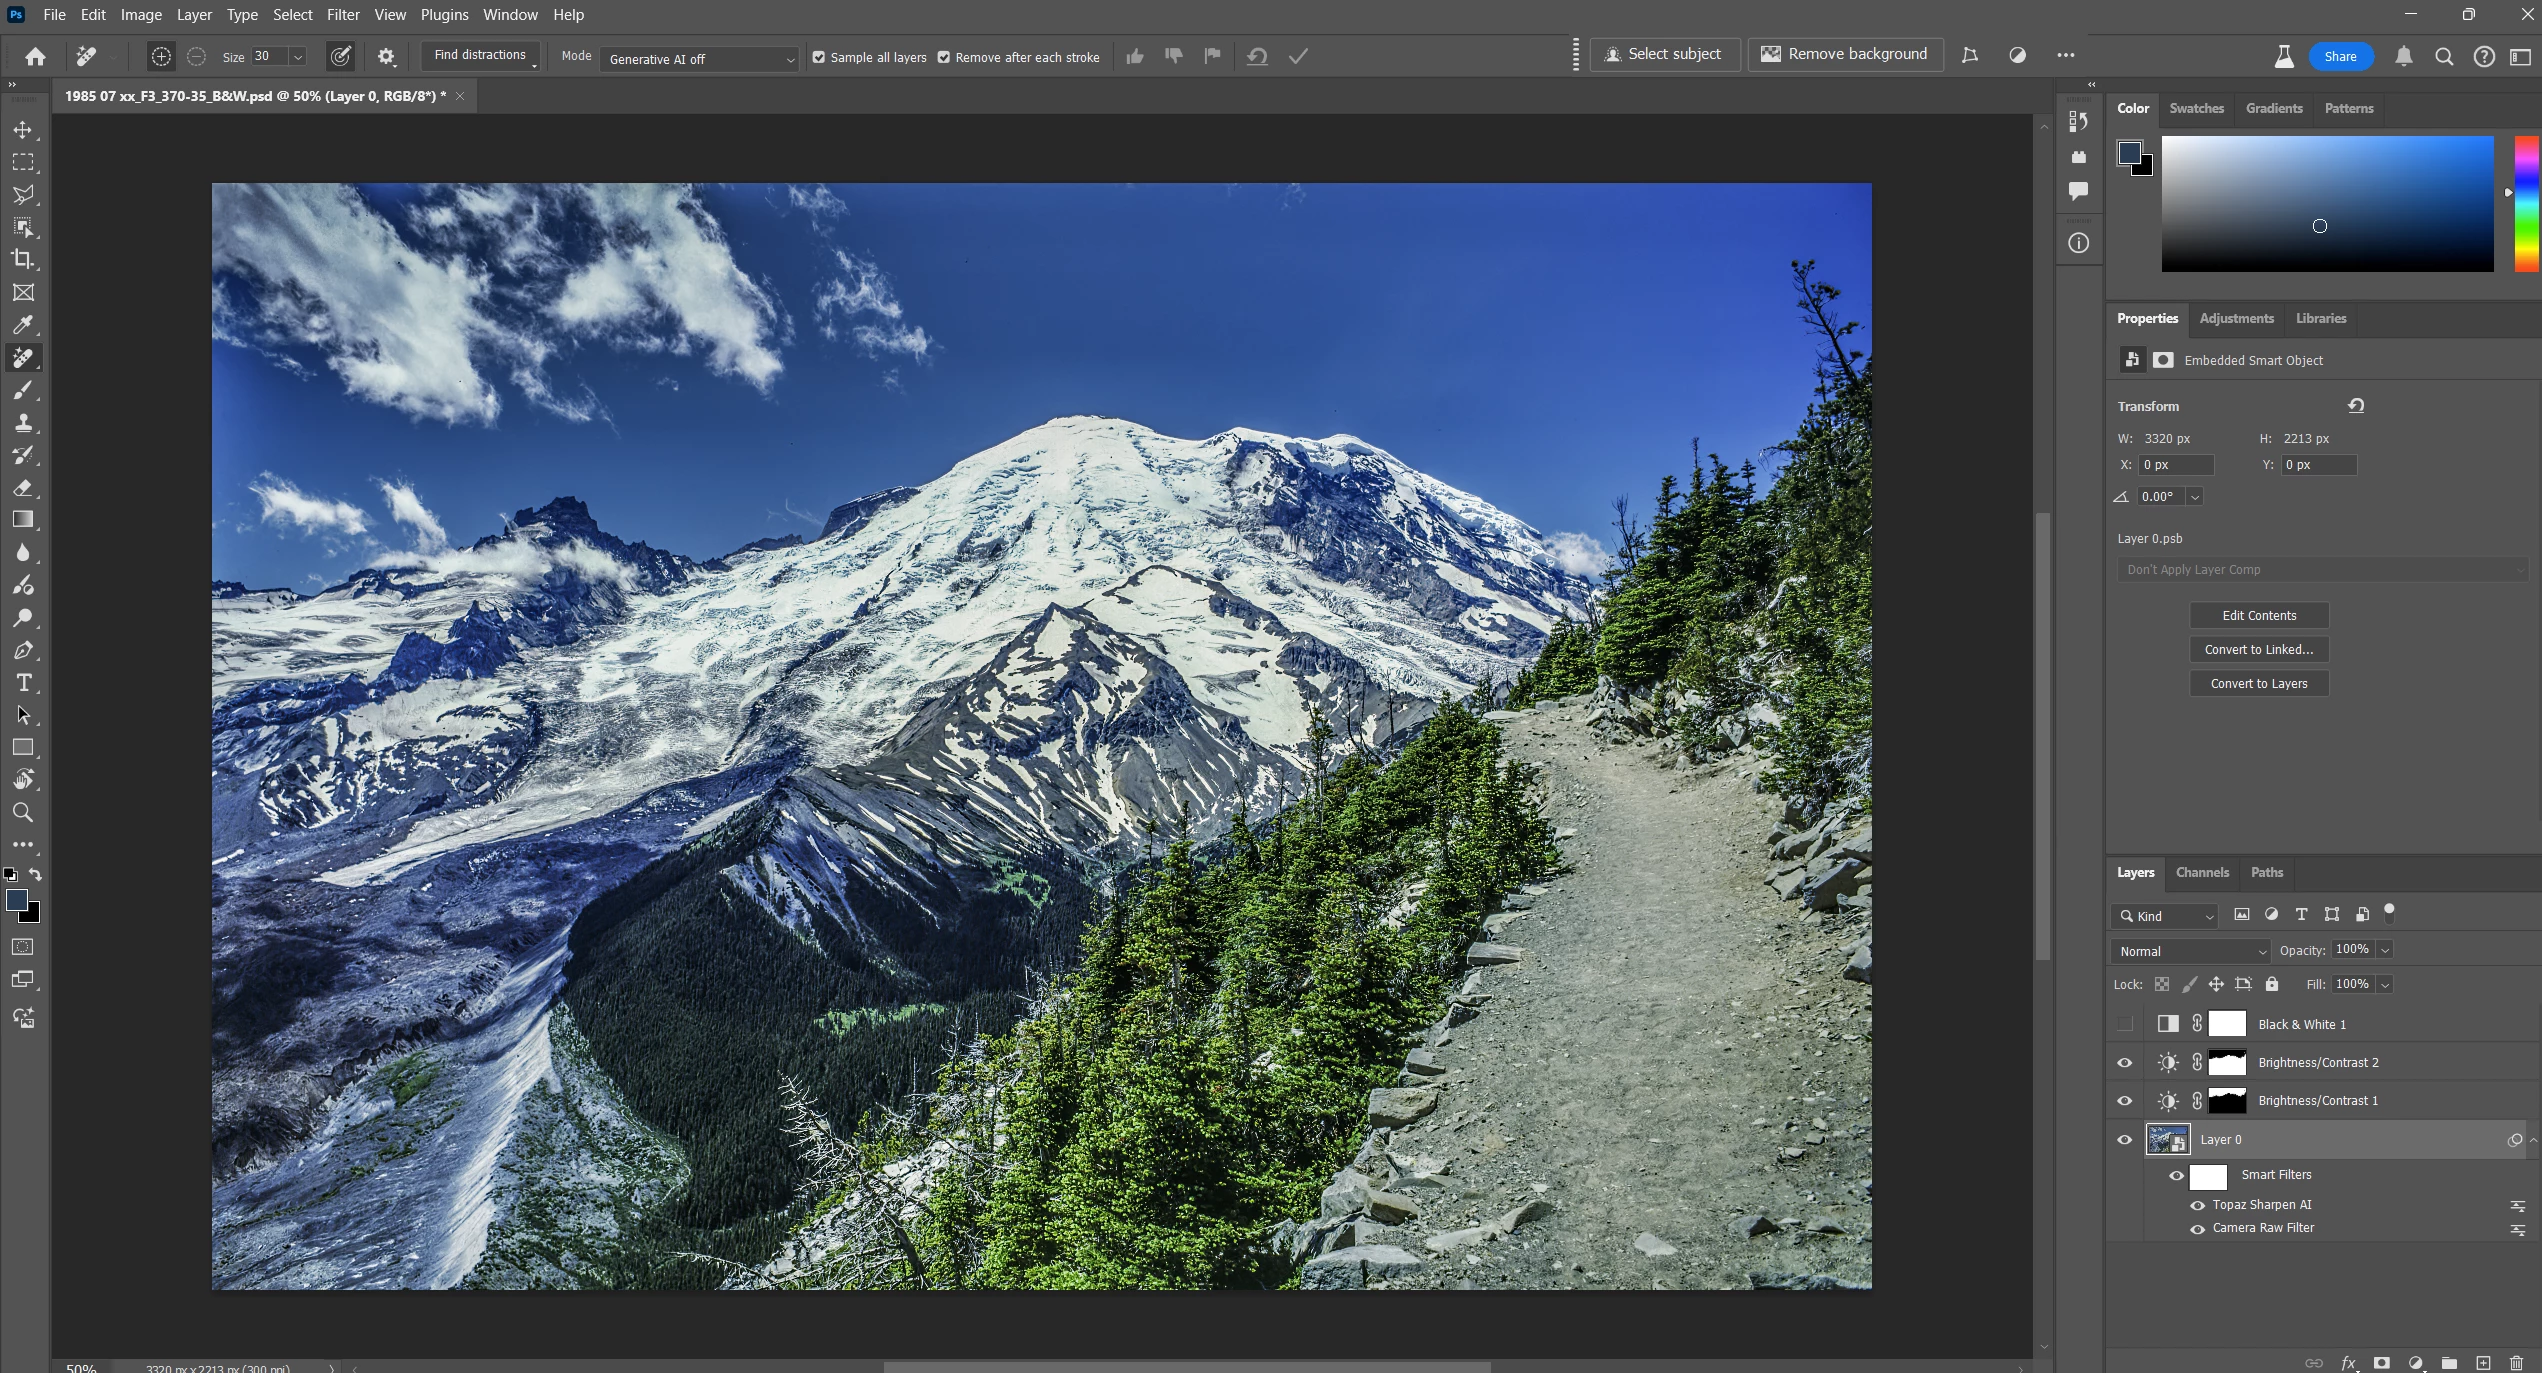
Here is an image to which I want to make some localized adjustments.  I thought I would use the Select Color Range tool to isolate the dark green trees along a ridge at the base of Mt. Ranier.  I'm eventually making this into a B&W unage and want to be able to control the density of some specific areas.


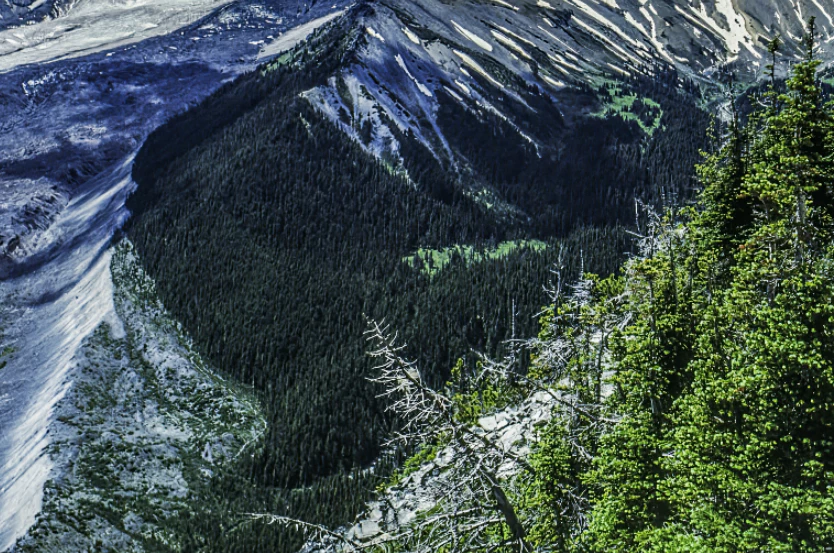
Here's an enlargement of the area I want to select from, only selecting the dark green trees.


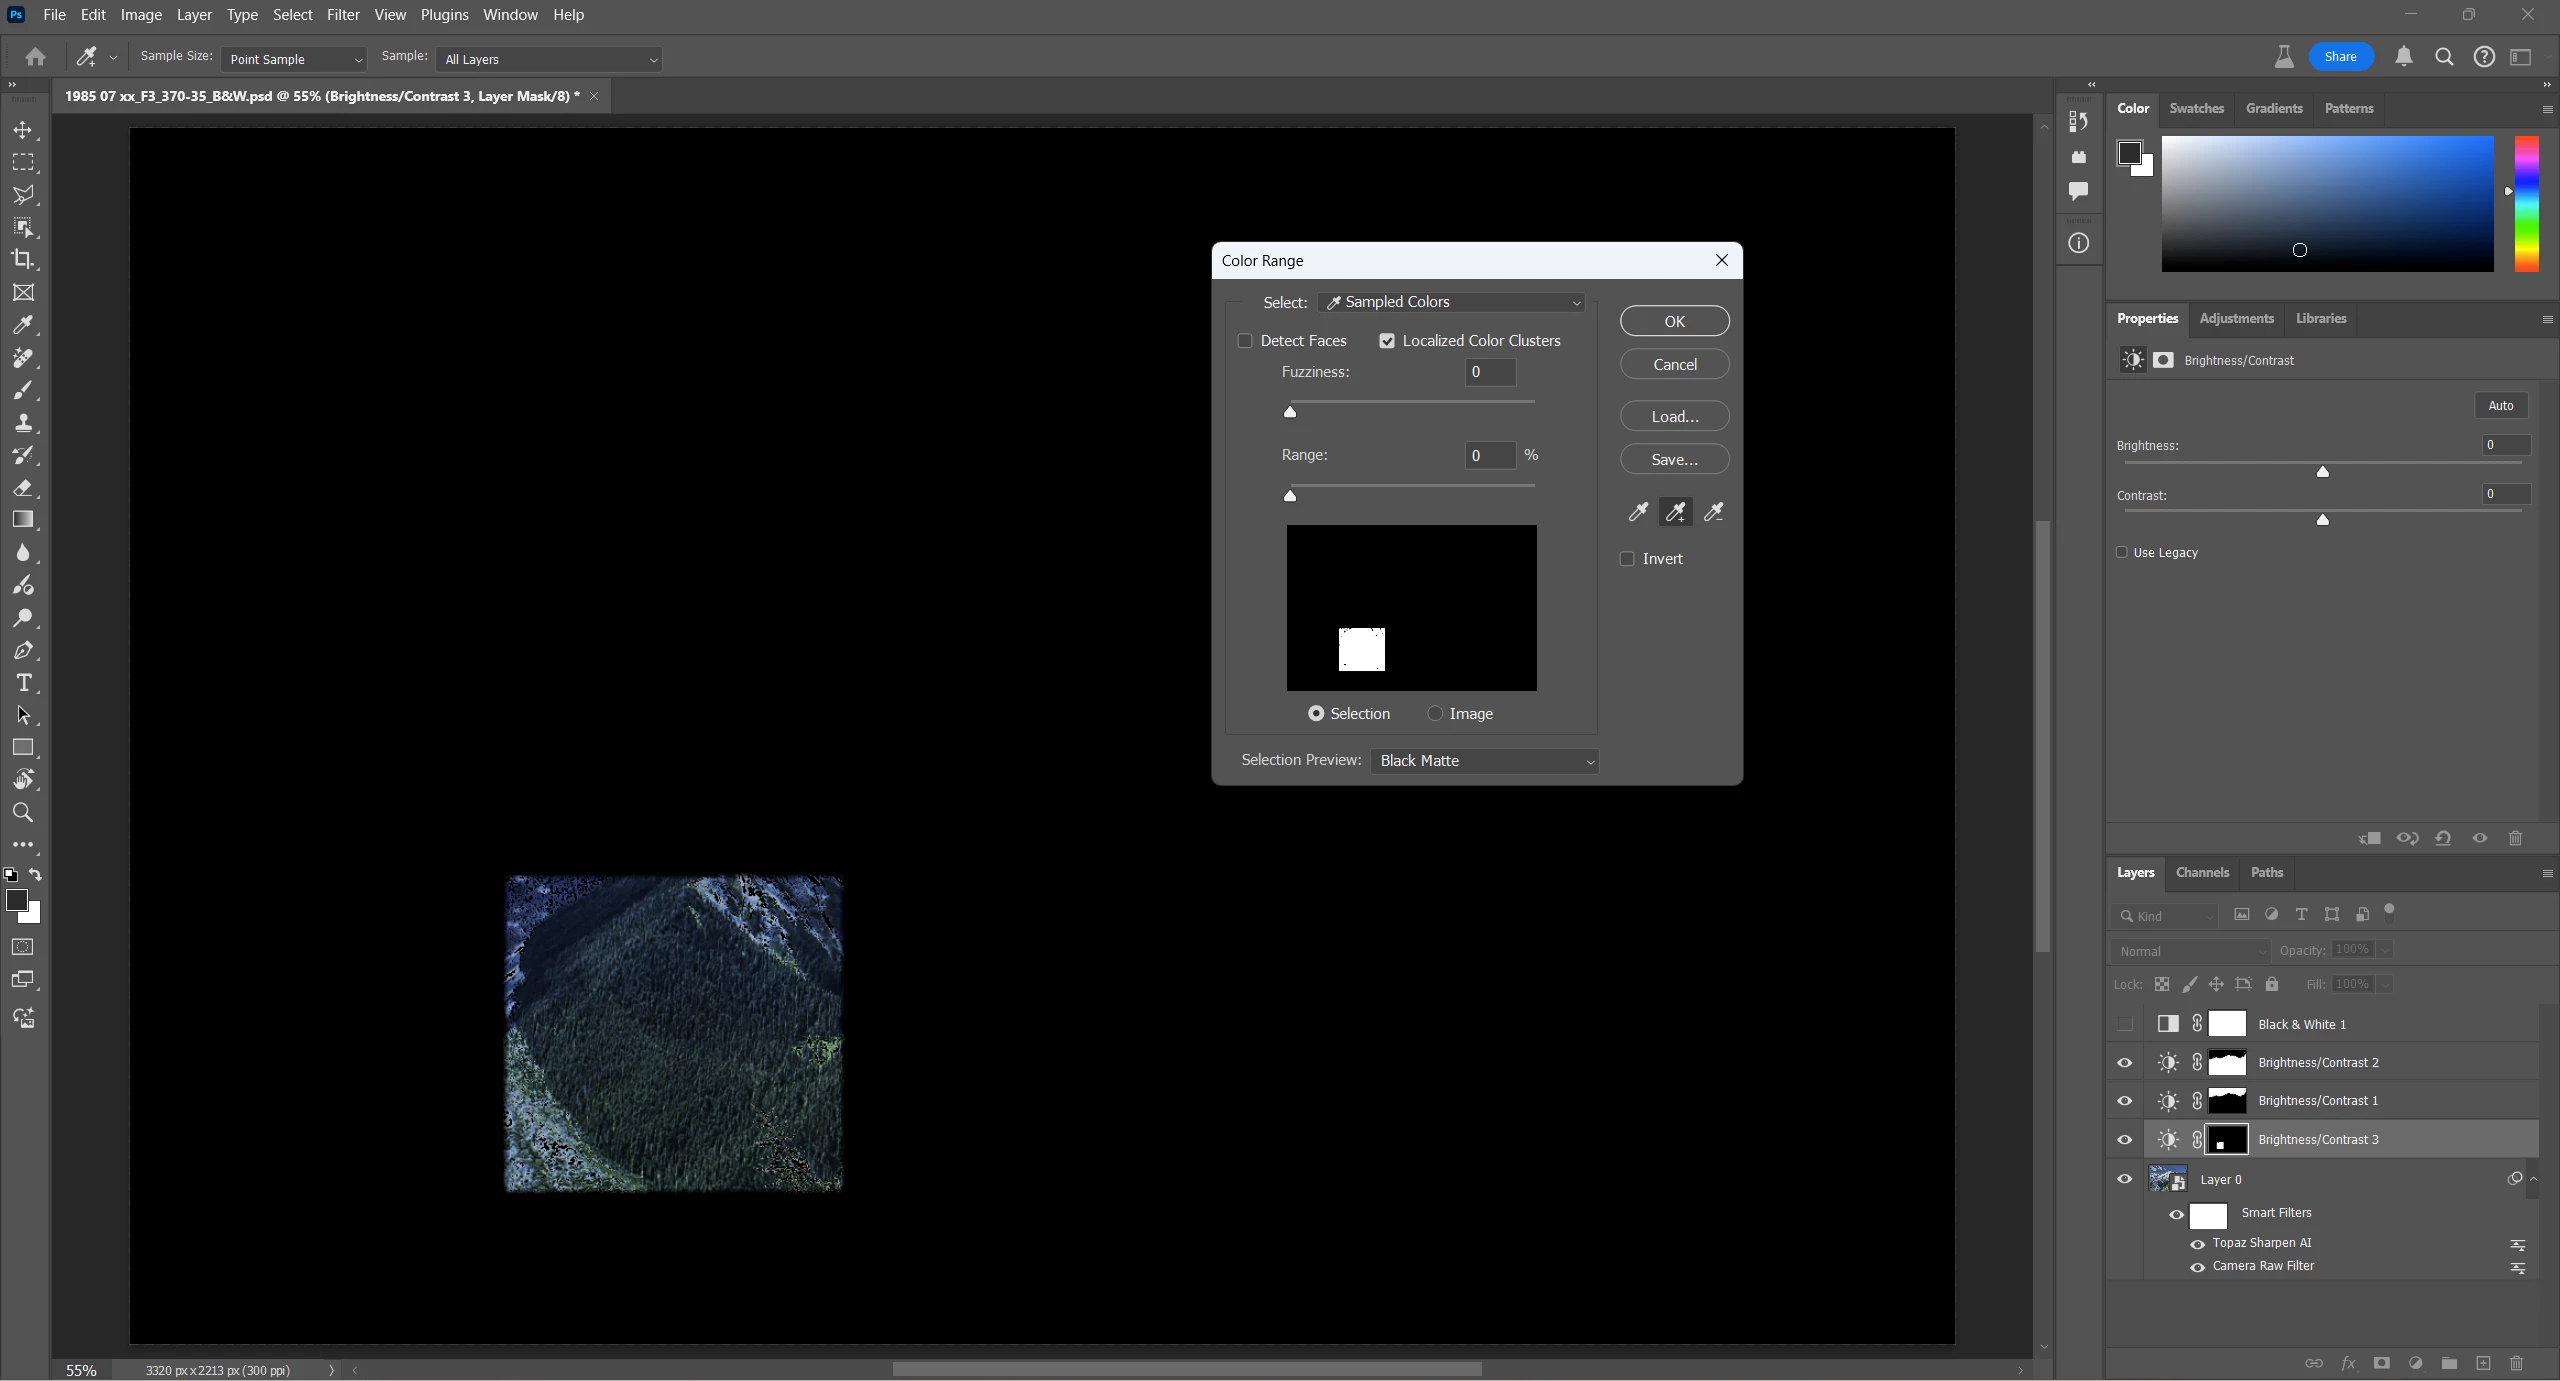
In the end, when I applied the Select Color Range tool to the dark green trees I didn't get what I expected.  I started with Fuzziness set to 0 and Range set to 0 thinking this would provide the greates limitation on pixels selection.  I first used the left eye dropper to select an initial color, then I used the middle eyedropper to add more of the dark green trees to the selection.  What seemed odd was that the first selection with the middle eyedropper appeared as a square.  Each time I added a little more from an adjoining area the square had another rectangle added to it keeping it a square.  As I moved closer to the edge of the dark greek trees, instead of selecting only the dark green trees, it added another rectangular area to the side that included the trees and other parts of the image which were not dark green.  I had expected to get an irregular shape that was mostly the dark green trees and from there I could adjust the Fuzziness and Range values upward to get the most useful selection.  I didn't seem to work that way. 


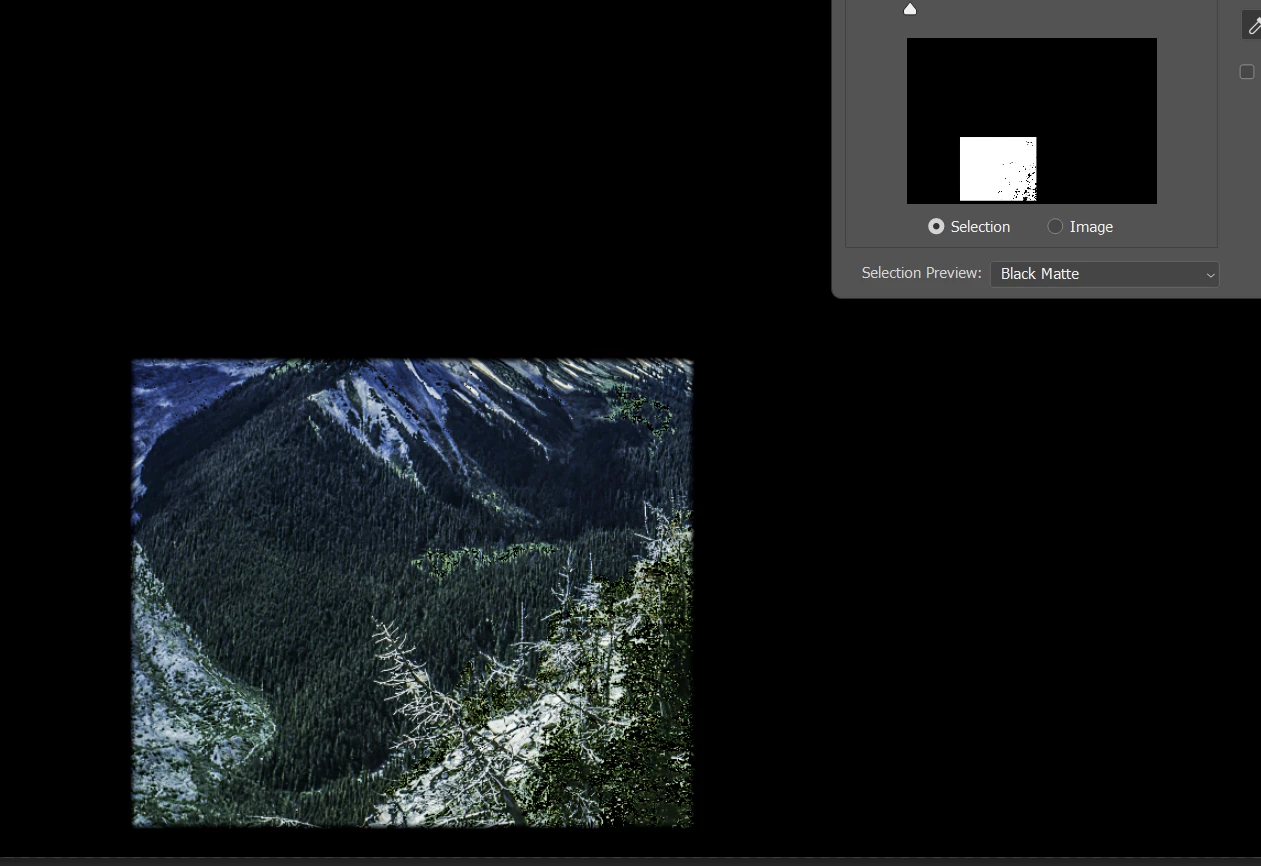
Here's a closeup of the selected area.


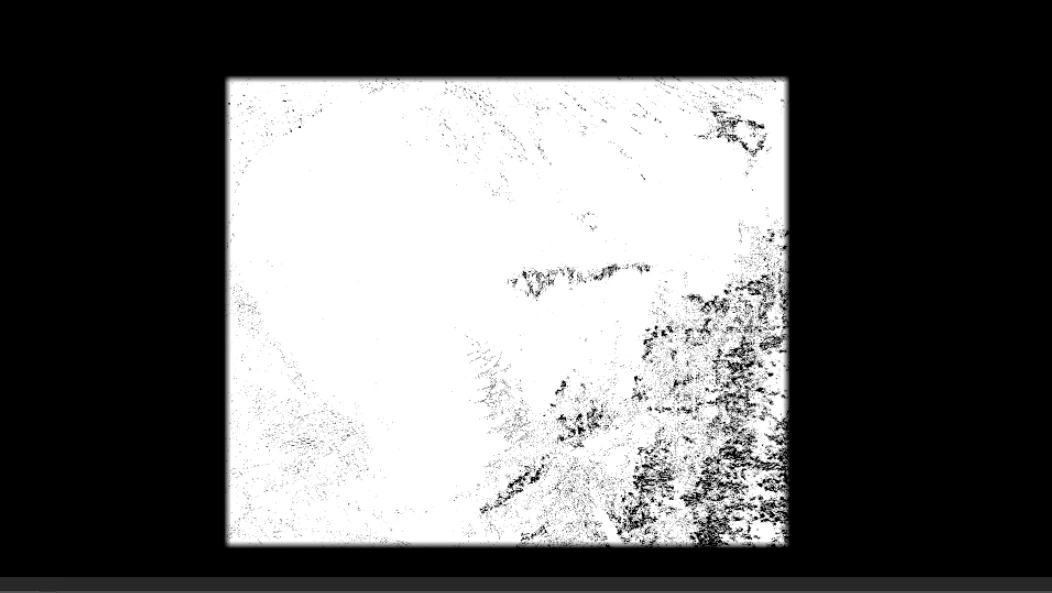
Here is the mask that was added to a Brightness/Contrast layer as a result of this selection with the Fuzziness set to 0 and Range set to 0.


I've used this approach on other images and it seemed to work as expected on some and not on others.

What am I missing in this siuation? 

This topic has been closed for replies.

2 replies

davescm
Community Expert
Community Expert
December 1, 2024

@Bill Junk 

Try resetting the Select Color Range tool and also  check your eyedropper settings for sample size and layers.

I downloaded the corner of the image that you supplied in your first post and all is working as expected here, I could not replicate your full square selection.


Dave

Bill JunkAuthor
Inspiring
December 1, 2024

your use of the Select Color Range looks fairly good.  I went back to that image and tried again on Layer 0 with the same settings you used:  Localize color clusters unchecked, Fuzziness set to 23.  The first click with the selection eyedropper added stuff from all over the image.  Then after using the add eye dropper almost the entire image was selected. I tried it in both the standard release of Photoshop and also the beta release.  I also tried several different sampling sizes.  The larger the sampling size was the better the selection was up to a point. but I could never get it as isolated as you were able to do.  What I did notice is that if I have Localize Color Clusers checked, then the closer the Range value is to zero the more the selection takes on a rectangular appearance.  I did go into ACR and tried the Luminace selection tool on another image and I was able to get a much better selection of an irregularly shaped region than I could have obtain in Photoshop.  It's too bad that Photoshop doesn't have a similar selection capability with similar controls, particularly being able to feather the brush easily.

AlanGilbertson
Community Expert
Community Expert
December 3, 2024

The two easy ways to do brush selections in Photoshop are with the new Selection Brush (which is circular only, but has a full range of hardness), and the pro's faithful standy, Quick Mask. The latter involves first applying a black fill (which shows as red in Quick Mask), then painting white with whatever brush size and hardness are suitable. When you exist Quick Mask mode, whatever parts of the image you painted with white are selected. You can use either method to fine tune a selection.

cmgap
Community Expert
Community Expert
November 29, 2024

Have you tried using the Camera Raw filter with a color range mask and point color? Hope the screen shots will show you enough to see if this will give you the control over areas that you want to modify.


Bill JunkAuthor
Inspiring
November 29, 2024

Thank you for the suggestion.  I have not tried using Camera Raw to do more than basic, overall image correction.  I prefer to make more targeted adjustments within Photoshop and have them on layers where I can adjust the layer mask if needed.  I will go back to that image and see what I can make happen.  

AlanGilbertson
Community Expert
Community Expert
November 29, 2024

The ACR filter is nondestructive, since you've made the image into a smart object already. Alternatively, you can use ACR on the original, direclty from Bridge (Ctrl/Cmd+R or File > Open in Camera Raw. The masks that you create in ACR or the filter are more flexible than the one you create with masks in the main Photoshop UI, and remain fully editable.