

- Home
- Photoshop ecosystem
- Discussions
- Re: Selection/Masks/Creating a white background
- Re: Selection/Masks/Creating a white background
Selection/Masks/Creating a white background

Copy link to clipboard
Copied
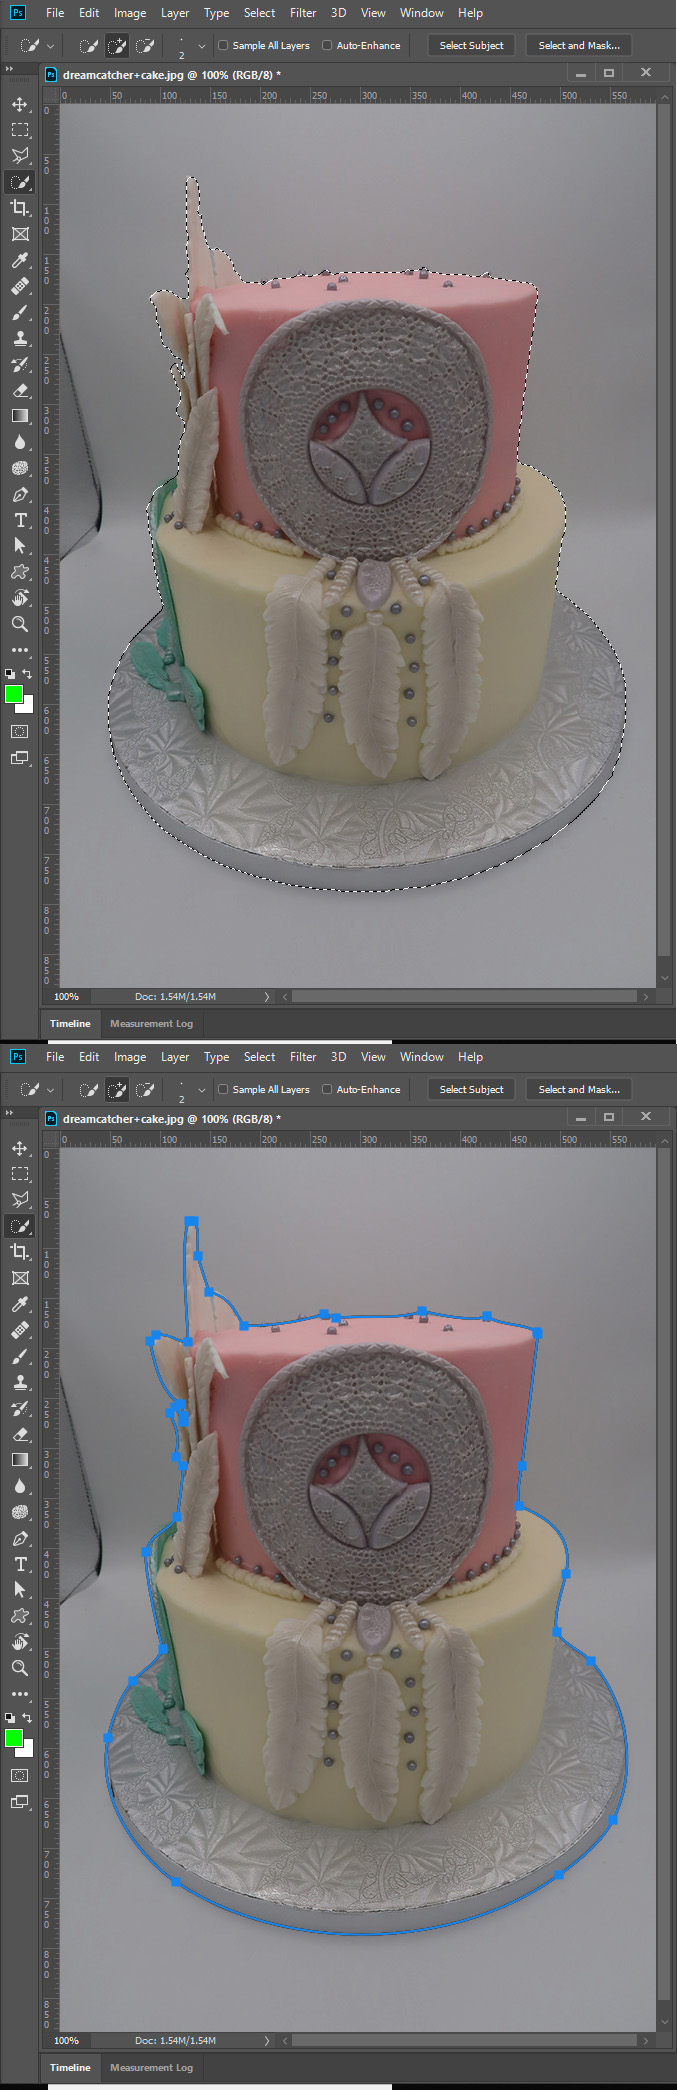
Hello everyone, I consider myself to be an advanced beginner in PS. I've been using it for years, but never learned it fully. I own a bake shop and take pictures of my baked goods mostly in a photo box with a white backdrop and foil reflectors on the sides. The raw image comes out with the background looking grey (see below). I am trying to make the background a true white but no matter how close I make selections, it's never smooth. My final image isn't perfect and has softer edges VS sharper (which is what I am aiming for). I am using a laptop but considering buying a pen; is it necessary? I think I am on the right track but i just cant figure it out. If someone can help, I'd really appreciate it.
Raw JPEG Image:
After using selection tool, creating a mask, and using a paint brush (in black/white) to refine the edges the best that i can.


Explore related tutorials & articles
 23
Replies
23
23
Replies
23

Copy link to clipboard
Copied
There are lots of ways to make a selection and an image like this, you can use several different techniques. I used the quick selection for most of it, then the base, I used the pen tool to make a nice smooth outline. Once you make your selection, you can use select and mask to refine it, but I've alway had difficulty with this tool and prefer to use other methods. for example, you mentioned brushing the edges, It's best to use overlay mode with the brush, as it will allow you to darken or lighten gray areas, depending upon your brush color without affection pure whites or blacks. This makes cleaning up edges easier.
Copy link to clipboard
Copied
Oh wow, that is an amazing job! I am still here trying to work on it. I also used the quick select tool. I get pretty close but my issue is tackling the edges. I am going to try the overlay when using the brush. Thank you for the help!
Copy link to clipboard
Copied
Just wondering, once the selection is made, how did you apply the overlay to use the brush?

Copy link to clipboard
Copied
Get the exposure right first! That in itself will make it look much more inviting.

The auto-exposure in the camera will try to make everything middle gray. That's how it's designed to work. For inherently light subjects you need to increase exposure! I could have done more than this, but that would blow out the highs because of uneven lighting.
Which brings up the second problem. This light "tent" isn't well designed at all. The good ones are translucent all the way, with an adjustable camera opening at the front, and are meant to be lit from the sides/front, whatever suits the subject.
I'm really bothered by the light fall-off in the front.
In this case I would probably just use a large soft box slightly above the camera position. Very simple and very effective - but softboxes require studio flash units. Although you could probably get something to work with a portable flash and suspended thin fabric or a translucent plastic sheet as diffuser.
Copy link to clipboard
Copied
I actually have an opening in the front and on top (where the light is). So you're saying to use a soft box or flash (I have a bounce flash and diffuser available) to fill in those areas?

Copy link to clipboard
Copied
I doubt that flash will work well. It will probably cause undesirable shadows.

Copy link to clipboard
Copied
Try using the pen tool to make a good cake selection. Add a vecror layer mask to cut out the cake. Add a layer style to give the cake some depth.

Copy link to clipboard
Copied
Wow, that looks great. I am horrible when it comes to the pen tool. I think that is the hardest for me, actually. It might be the trackpad on my laptop that makes it difficult. Either way, I am going to give it a go. Thank you!
Copy link to clipboard
Copied
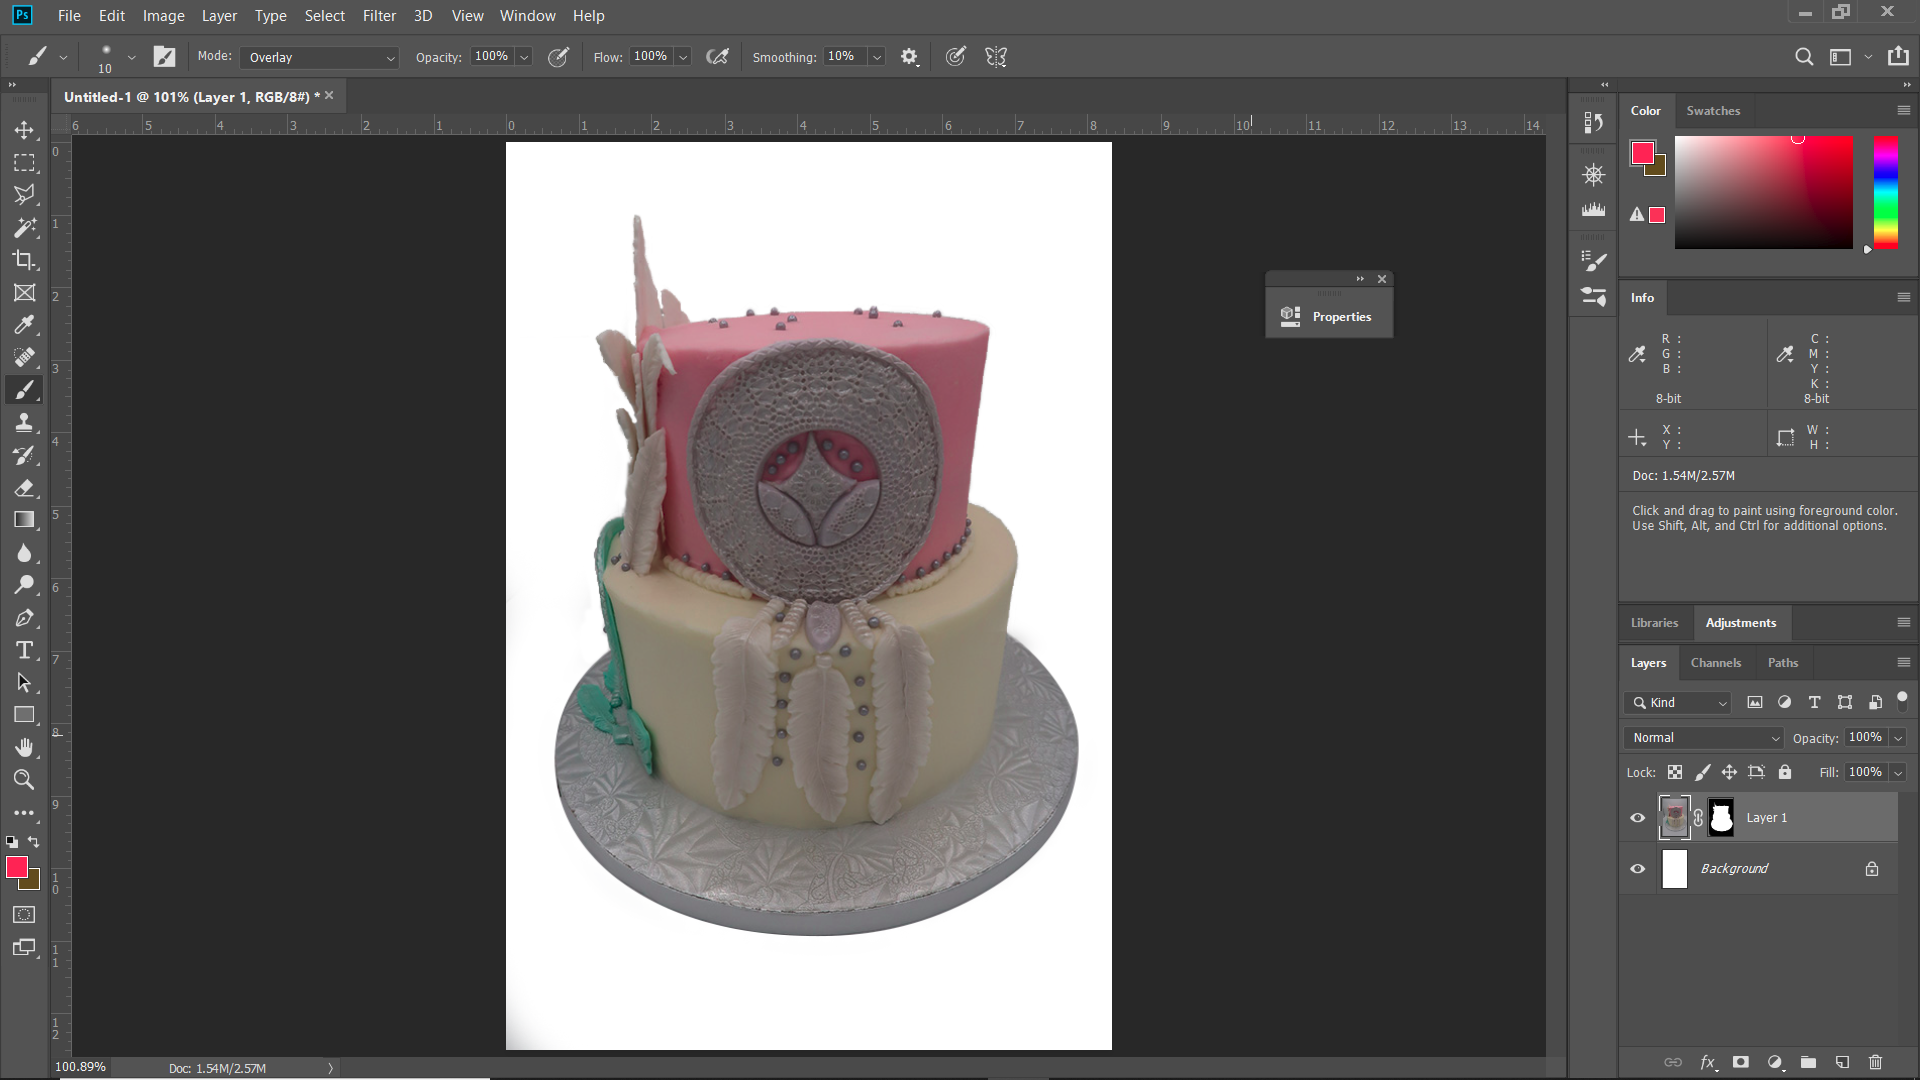
It is well worth while to learn how to use the Pen tools and Path editing tools in Photoshop. You can quickly create a ruff path to cut out an object. Then refine the path with the path editing tools and other pen tools options. The new curvature pen tool makes it even easier to do these days. When you use a Pen tool the Path you make need not be perfect. You can edit the paths you create to make them better before you actually use the path to do something in Photoshop.
You can also use other selection tools to make a selection and have Photoshop convert the selection into a vector path selection then edit the Path Photoshop created.
There are areas in you image where selection tools will not work well so I would suggest starting with the Pen tool or curvature pen to begin with. The best I could do using Photoshop's Quick Selection Tool which took some work with the modifier keys so was not very quick. I the had Photoshop convert the selection to a vector path. You can see the path is not and better that the selection was. The path needs to be edited.
Copy link to clipboard
Copied
Thank you so much for the info! I went ahead and used the curvature pen tool with my new pen and pad (instead of the mouse pad) and it worked amazing! I then used the quick select tool to select everything else and went down to a small px on the brush to get in closer. I tried the refine tool in "select and mask." It helped a bit but was sort of erasing certain areas. I managed to do a way better selection and finalize what I am ok with posting on my website and social media. It is not perfect, definitely a work in progress. It is, however, a huge improvement to my first image.
Copy link to clipboard
Copied
To save time in Photoshop, try to get the lighting and camera settings first. You'll need two lights on either side of the subject and behind the subject that illuminate the background. You may want to consider using a softbox, like Digitent, and there are many others.

Copy link to clipboard
Copied
Also try the cake on a peddle stool to remove casting a shadow on the ground. This will allow you to display a flat white background instead of the the curved piece which will have different tones. So may remove the need to cut the cake out in the first place.
Other than that, i personally would use the pen tool if you go slowly and add smooth curves you will get the cleanest cut out. Others like marquee or quick selection will work but not as precise or controllable.
Copy link to clipboard
Copied
I usually switch it up, pedestal, cake drum, etc. Unfortunately, since the cake was so tall, it wouldn't fit in the photo box on a pedestal. The point of this photobox, is to remove shadows, as the light comes from above and is supposed to bounce on all 4 sides to be even. I am still working on that. Business just starting booming faster than I expected. I am going to attempt the pen tool. I just hate using the mousepad on my laptop. Thank you!
Copy link to clipboard
Copied
Having a mouse will be a great help. Using the Pen with mouse pad is going to be too difficult. I concur with the rest who recommended using the Pen tool as the most accurate way to cut out the subject in the photo you posted.
Copy link to clipboard
Copied
Thank you, I just ordered a pad and pen to try and get a more precise line.
Copy link to clipboard
Copied
Great! The mouse or pen will be very helpful when using the Pen tool. But hopefully, once you get the lighting right, you won't be doing a lot of work with the Pen. The Pen is precise, but also tedious and time-consuming.
As far as the lighting setup, having a softbox is not an absolute necessity, and it sounds like your cakes are sometimes difficult to fit into a softbox.
You could give it a try without softbox.
This lighting set up needed is kind of hard to explain with words, but I'll give it a try.
You need a white wall or white seamless paper -- somehow you need to set up a white background. Before you put the cake in front of the background, set up the lighting to make sure that when you take a photo of just the background by itself you are getting pure white. After taking a photo of the background you can check the histogram in the camera or in Photoshop to make sure that the background is white. If the histogram shows that the background is not pure white, adjust the lights to increase the amount of light on the background. Check the histogram again. If it isn't absolutely pure white, but very close, that's okay because you can fix it in Photoshop. (If the background is mid-gray, as in the image you posted, that is more difficult to fix in Photoshop.) In fact, just a little off white on the background can be good because if you get it too white, the light might bounce back and wrap around onto the cake. You'll need to experiment a bit. The light bouncing back onto the cake would not be an issue if the background is far enough away from the cake, but often there isn't enough space on the table to get that distance. The more distance you can get, the easier it will be to set up the lighting on both background and cake.
Once the background lighting is in order, put your cake in front of it. Your camera needs to be on a tripod.
Get a separate light on the cake so that the cake looks good.
With the light that illuminates the cake and the lights that illuminate the background -- all of the lights on -- take a photo of the cake and background.
Copy link to clipboard
Copied
Thank you! I completely understand what you mean. I think I have the equipment necessary to achieve this. I will post a picture or list what I have available.
Copy link to clipboard
Copied
There's a great competitive advantage in good photos, so an investment in some additional gear might be well spent. It doesn't have to be very elaborate or expensive, but here are some of the basic techniques:
Flash units need to be diffused, and that's what a softbox does. Here's a very quick demo. Note the soft shadow, even when the white wall is immediately behind. This is a very simple setup and my immediate go-to unless there are special considerations (which of course there often are):

Something similar can even be done with an on-camera flash unit, by suspending some sort of diffuser from the ceiling and directing the flash at that. I have done something similar here, an extra diffuser in front to increase the surface a bit:

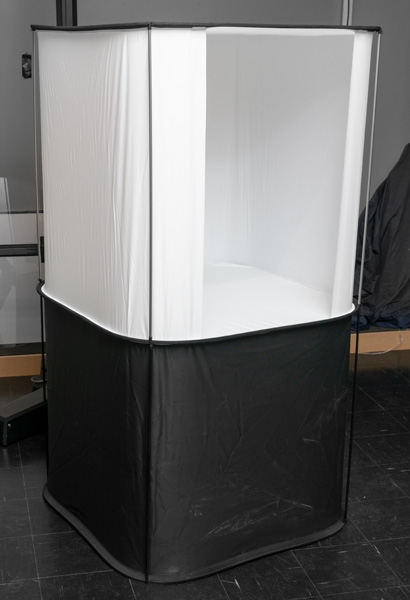
And then there's the tent. Didn't have time to light it up, but this one can be lit from the base separately, so eliminating all shadows. Some additional pieces diffuse the interior background and narrow the front opening if needed:
Copy link to clipboard
Copied
Thank you so much for this very detailed information. I actually use a photo box for all of my pictures. I take the photos with my Canon G7X Mark II. I use manual mode. Settings are usually f/3.5 or f/4, Shutter Speed between 1/60-1/125, ISO 125. My goal is to get more detail VS boken in the background. I think next time I will boost the ISO, lower the SS, and maybe use an f stop of 4+. That way I can also put the light up in the photo box and hopefully avoid the grey. I also shoot in raw (because I know I'll have to edit in PS). I also have a bunch of LED lights, a ring light, a Canon t7i with a few lenses, and different color backgrops (which now that I think about it, I could use). Maybe I could use a black backdrop on lighter cakes to make it easier?
I'll gladly take any advice. Thanks again.
Copy link to clipboard
Copied
That is my goal! I invested in the box because it has the light above that can be adjusted. Unfortunately, I cannot put any lights on the sides because it is meant to be closed. The light from above should bounce on all sides, removing shadows. I am still trying to work on it.
Copy link to clipboard
Copied
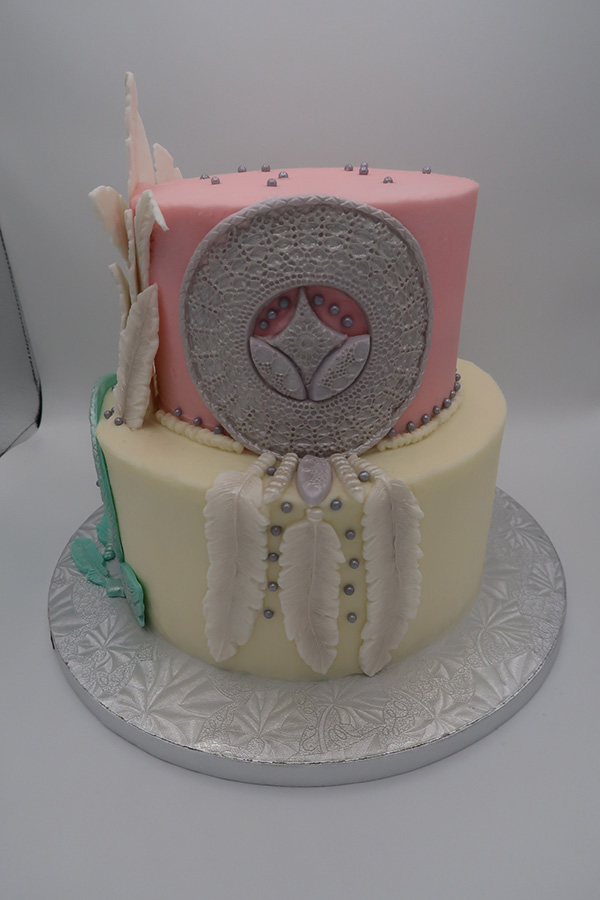
When the brush tool is active, you can change its blend mode in the menu bar to get overlay.
Copy link to clipboard
Copied
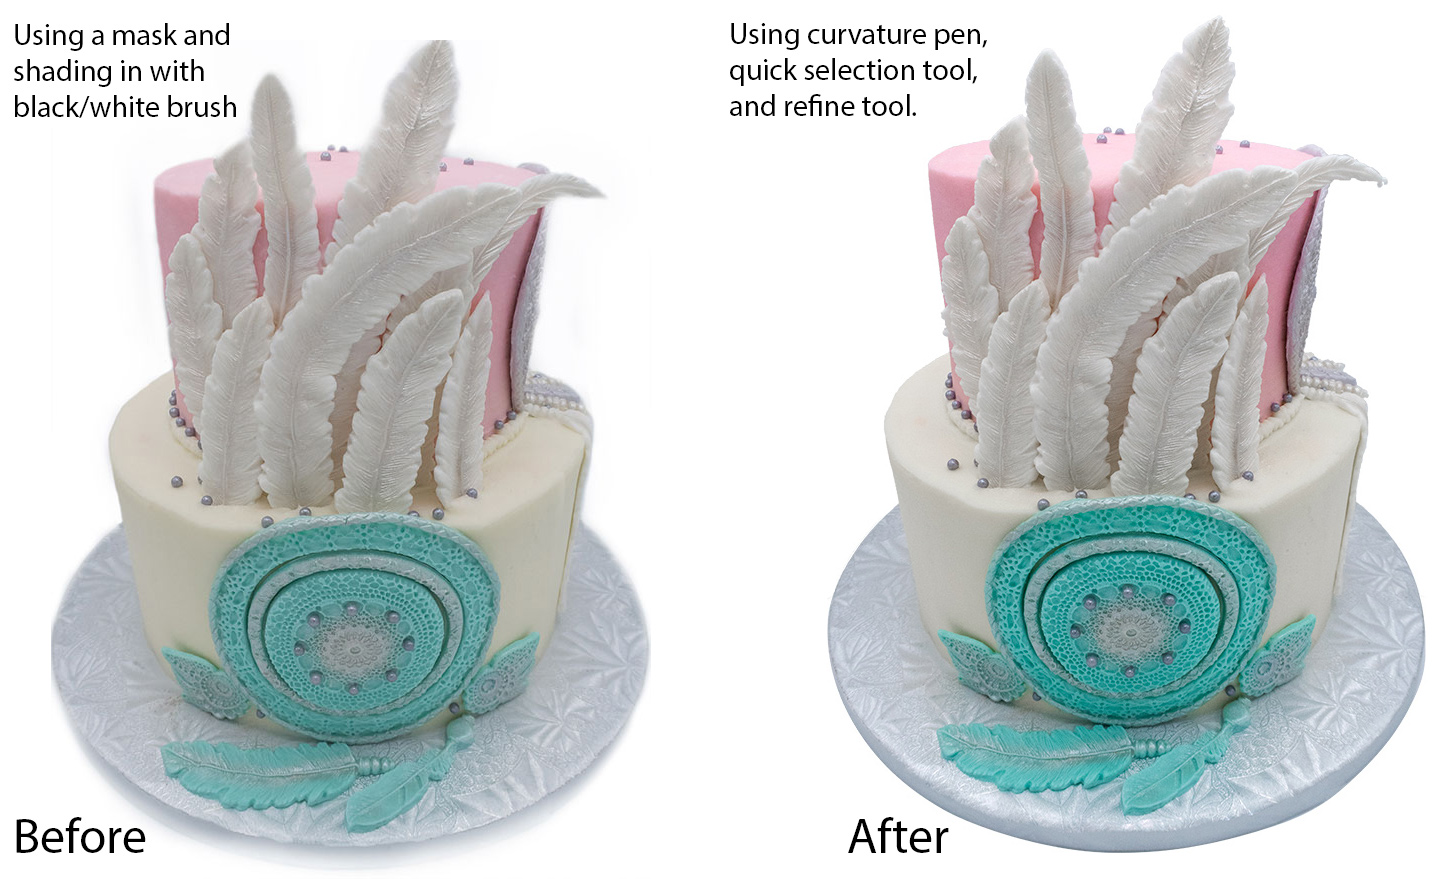
After about 4 hours of trial and error, getting used to using a pen vs mouse, and experimenting with new techniques...I think I am done. Below are my new edits. I was able to use the tips you all gave me and was able to achieve a sharper, more defined selection. I also brightened it up and gave saturation a bit of a boost. The new pen and pad I ordered worked way better than the mouse pad! Definitely a Great investment. The final photo isn't perfect but I am way more satisfied with this VS the previous image. I am now noticing that the previous image was dull, not sharp whatsoever, had very soft edges, and I even cut some areas off. Thank you all again for the help. I'd gladly take more advice.

Copy link to clipboard
Copied
It's still too drab and dull. Give it some pop! Bring up the highlights and tighten the shadows - just make sure you don't blow out the highs completely. If you err on color balance, better to do it on the warm side:

You asked about black or white background. White is always more delicate. Use black only when you have to.

Find more inspiration, events, and resources on the new Adobe Community
Explore Now
 AdChoices