Exit
  • Global community
    • Language:
      • Deutsch
      • English
      • Español
      • Français
      • Português
  • 日本語コミュニティ
  • 한국 커뮤니티
3

Shadows/Highlights adjustment makes changes without my input

Explorer ,
Dec 29, 2023 Dec 29, 2023

I'm laying out a print book of paintings for an artist, and a couple of the images printed darker in the proof than their originals. The printing house suggests that I "reduce the shadow gamut by 5%" on anything that prints dark.

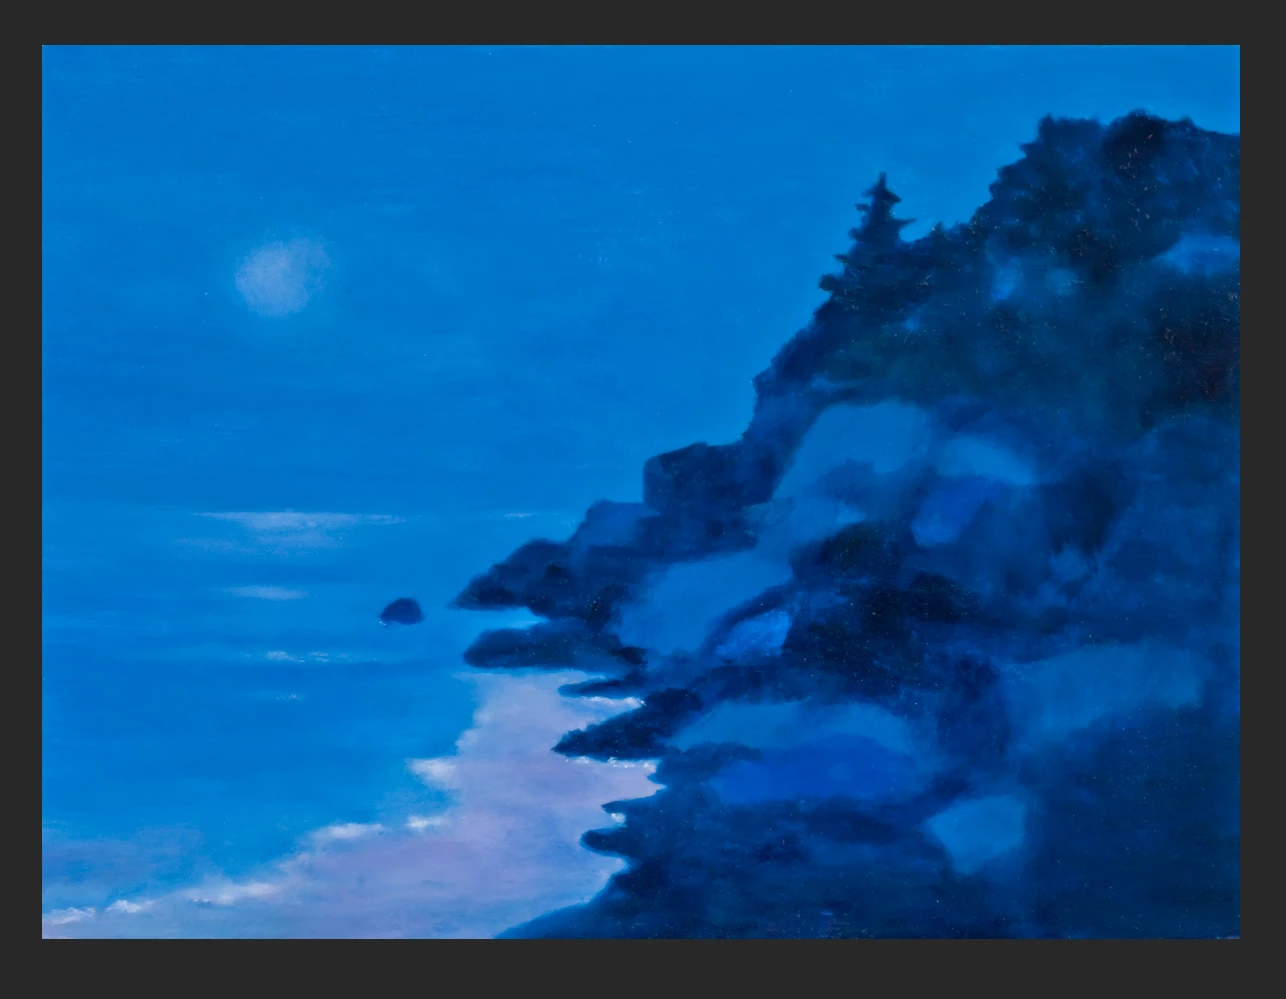
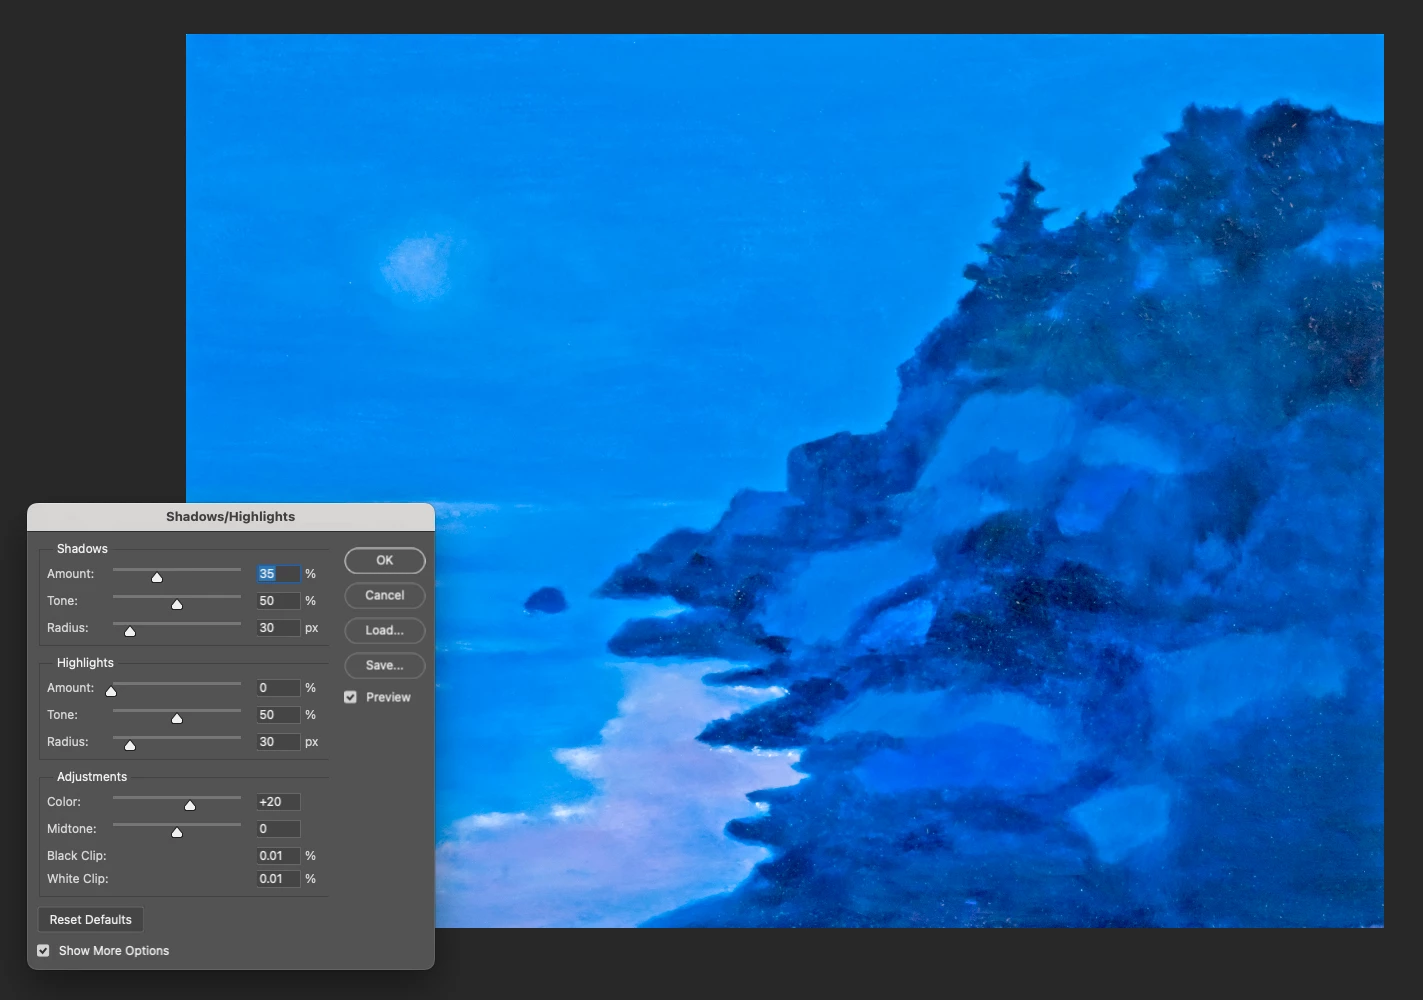
When I tried to make this adjustment in the Shadows/Highlights adjustment panel, the entire painting changed just by virtue of opening the panel - I hadn't even entered any change in the values in any fields, but all the colors changed when the panel was opened.

Is there any way I can get the Shadows/Highlights panel to open without changing the image? Can I get it to show me what the original settings are so I can then make the adjustment the printing house wants?

I've attached a screenshot of the original - then a screenshot after I've opened the Shadows/Highlights panel (but not made any changes to the settings).

Other question: Is there somewhere else I should be making this gamut reduction besides in the Shadow/Highlights panel?

I'm running PhotoShop 2024 on a MacBook Pro, OS 13.6.1 (Ventura).

ORIGINAL.jpgAFTER.jpg

TOPICS
macOS
1.1K
Translate
Report
Community guidelines
Be kind and respectful, give credit to the original source of content, and search for duplicates before posting. Learn more
community guidelines

correct answers 1 Correct answer

Community Expert , Dec 29, 2023 Dec 29, 2023

Your print service provider's instructions are not that helpful IMHO.


Is the entire image too dark? Or is it just that deep shadows are losing detail? Or both?


Only you know how much to lighten the dark images based on the proof. 5% would seem to be very subtle.


The Shadow/Highlight command is not really intended for overall brightening or darkening as you would use levels or curves for. 


You might need an overall lightening from levels or curves with additional Shadow/Highlight compensati

...
Translate
Adobe
Community Expert ,
Dec 29, 2023 Dec 29, 2023

Take a closer look at the panel. It already has values applied.

Translate
Report
Community guidelines
Be kind and respectful, give credit to the original source of content, and search for duplicates before posting. Learn more
community guidelines
Explorer ,
Dec 29, 2023 Dec 29, 2023

Yes, I understand there are values in the fields. However, the image has been altered from the original without me touching it. If I click okay in the panel without changing any of the values it brings up, the image remains in this altered state, with all colors changed from the original. I need to be able to adjust the shadow value on the original, not on this altered version, without any other changes to the image.

Translate
Report
Community guidelines
Be kind and respectful, give credit to the original source of content, and search for duplicates before posting. Learn more
community guidelines
Community Expert ,
Dec 29, 2023 Dec 29, 2023

The values are already applied because they’re the default values, as a suggested starting point. The reason the image changes when you click OK is because clicking OK accepts all of the changed values, including the ones you did not make. If you wanted none of the changes to apply, you’d click the Cancel button instead. If you want to apply just your change to the Shadows fields, then all other fields should be set to 0.


The answer to fixing this might come in two parts depending on whether you want to change this just once, or all the time in the future.


1. To set the starting point so that no changes are made to the image just this one time, the answer is to enter a 0 for all values where you want no change applied. A quick way to do this is to enter 0, press Tab to advance to the next field, enter 0, and repeat those steps until 0 is in all of the fields (except in the Shadows fields that you actually want to change).


2. To make all zeros the default in the future, first do step 1, then click the Save Defaults button. From that point on, you won’t have to do all that work again because it will always open with all fields set to 0.


In the image below, the left side shows the default values, and the right side shows what it should look like if you start with no image changes by zeroing out all of the fields.


Photoshop-Shadow-Highlight-defaults.jpg

Translate
Report
Community guidelines
Be kind and respectful, give credit to the original source of content, and search for duplicates before posting. Learn more
community guidelines
Community Expert ,
Dec 29, 2023 Dec 29, 2023

Your print service provider's instructions are not that helpful IMHO.


Is the entire image too dark? Or is it just that deep shadows are losing detail? Or both?


Only you know how much to lighten the dark images based on the proof. 5% would seem to be very subtle.


The Shadow/Highlight command is not really intended for overall brightening or darkening as you would use levels or curves for. 


You might need an overall lightening from levels or curves with additional Shadow/Highlight compensation.

Translate
Report
Community guidelines
Be kind and respectful, give credit to the original source of content, and search for duplicates before posting. Learn more
community guidelines
Explorer ,
Jan 29, 2024 Jan 29, 2024
LATEST

The printer replied that it was the LEVELS setting I should be adjusting, nothing else. 5% looked pretty subtle to me, but  the artist was satisfied when she got the new print proof, so all is well now.

Translate
Report
Community guidelines
Be kind and respectful, give credit to the original source of content, and search for duplicates before posting. Learn more
community guidelines
Community Expert ,
Dec 29, 2023 Dec 29, 2023
quote

The printing house suggests that I "reduce the shadow gamut by 5%" on anything that prints dark.

By @kathleend82868475


It just occurred to me…shadows aren’t typically discussed in terms of “gamut.” It’s possible that they said “gamma.” But if that was the case, the correction would not be done in Shadows/Highlights, but probably by adjusting the tone curve in a Curves adjustment. In any case, it might be a good idea to ask them exactly which tool to use to correct it. But, if they said Shadows/Highlights already, then I’m just overthinking it.

Translate
Report
Community guidelines
Be kind and respectful, give credit to the original source of content, and search for duplicates before posting. Learn more
community guidelines
Community Expert ,
Dec 29, 2023 Dec 29, 2023

Hi Kathleen,

Are your images in RGB or in CMYK? And in what colorspace are you sending them to printer?


In addition to the Levels and/or Curves adjustments suggestions noted above, I would also suggest trying to lighten the shadow areas using Camera Raw to see if that gives you the value changes you are looking for.

Michelle

Translate
Report
Community guidelines
Be kind and respectful, give credit to the original source of content, and search for duplicates before posting. Learn more
community guidelines
Community Expert ,
Dec 30, 2023 Dec 30, 2023

On a closer look, it's pretty clear that this has nothing to do with shadow values. It's about color gamut - specifically, the blue being out of gamut in any printing process.


This is how the screenshot opens in the embedded (sRGB-type) "Display" profile:

red_clipping_1.png


As you can see, the red channel is massively clipped here, and even if the original is in a larger color space like e.g. Adobe RGB, it is clear that this will be very hard clipped in any CMYK process. Probably very much more than in the screenshot here.


That much clipping will never look good in print. That's what they're asking you to fix. You need to reduce the blue saturation considerably. It won't survive in print anyway, so there's nothing to lose.


Find out what CMYK profile is used in this process (ask them), and then soft proof to that CMYK profile to see how the final result will look. What you need to do is known as gamut remapping. It could either be a wholesale saturation reduction (crude approach), or a more targeted adjustment directly aimed at the red channel (better result, but more tricky).


In CMYK it will obviously end up in other channels (cyan mostly), but the core problem here is the missing information in the red channel.


Gamut remapping is a large subject that I don't have time to go into here. What I can say, is that it's often more cost-effective to do this to raw data in ACR/Lightroom than on a fully rendered file in Photoshop. But that assumes the original is photographed rather than scanned.

Translate
Report
Community guidelines
Be kind and respectful, give credit to the original source of content, and search for duplicates before posting. Learn more
community guidelines