- Home
- Photoshop ecosystem
- Discussions
- Re: Shrink hole in center of image?
- Re: Shrink hole in center of image?
Copy link to clipboard
Copied
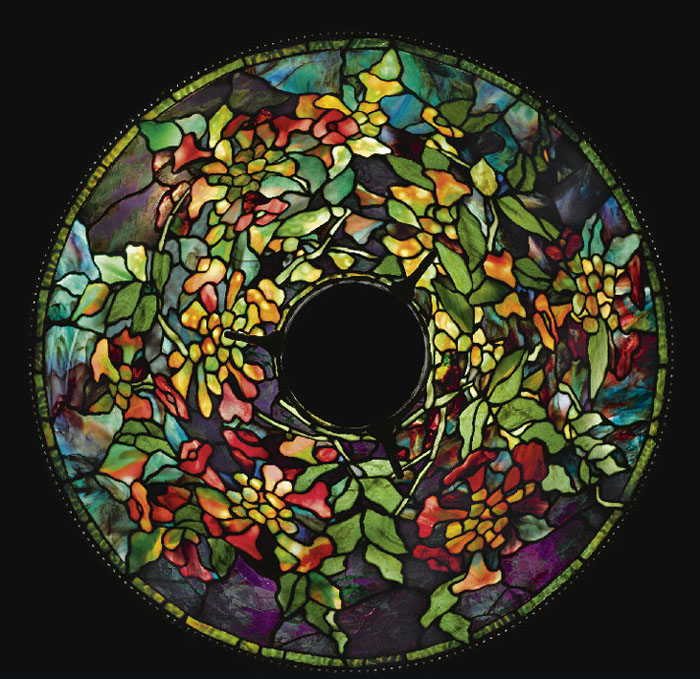
I have an image of a disk.

How can I shrink the hole in the center without shrinking the outer dimensions.
I do understand the the flowers and leaves will be slightly stretched, but that is okay.
I'm using Photoshop CS2.
 1 Correct answer
I'm sure there are many solutions, but here's an exciting one:
Filter/Distort/Polar Coordinates... Click the Polar to Rectangular button.
Use the marquee tool to select as much of the top as you need to.
Edit/Free Transform. Drag the top of the selection handle upwards, to make the top edge closer to the top of the picture. You may need to experiment.
Filter/Distort/Polar Coordinates... Click the Rectangular to Polar box.
It should be back to how it originally was, only with a smaller hole, and only
...Explore related tutorials & articles
Copy link to clipboard
Copied
I'm sure there are many solutions, but here's an exciting one:
Filter/Distort/Polar Coordinates... Click the Polar to Rectangular button.
Use the marquee tool to select as much of the top as you need to.
Edit/Free Transform. Drag the top of the selection handle upwards, to make the top edge closer to the top of the picture. You may need to experiment.
Filter/Distort/Polar Coordinates... Click the Rectangular to Polar box.
It should be back to how it originally was, only with a smaller hole, and only the inner part of the pattern got distorted.
Copy link to clipboard
Copied
Very clever Colin ![]()
Dave
Copy link to clipboard
Copied
An alternative way is the Liquify filter using the "Pucker tool"
If you do it in a few steps, varying the brush size, you can choose and spread the stretched area


Dave
Copy link to clipboard
Copied
Hi Jones,
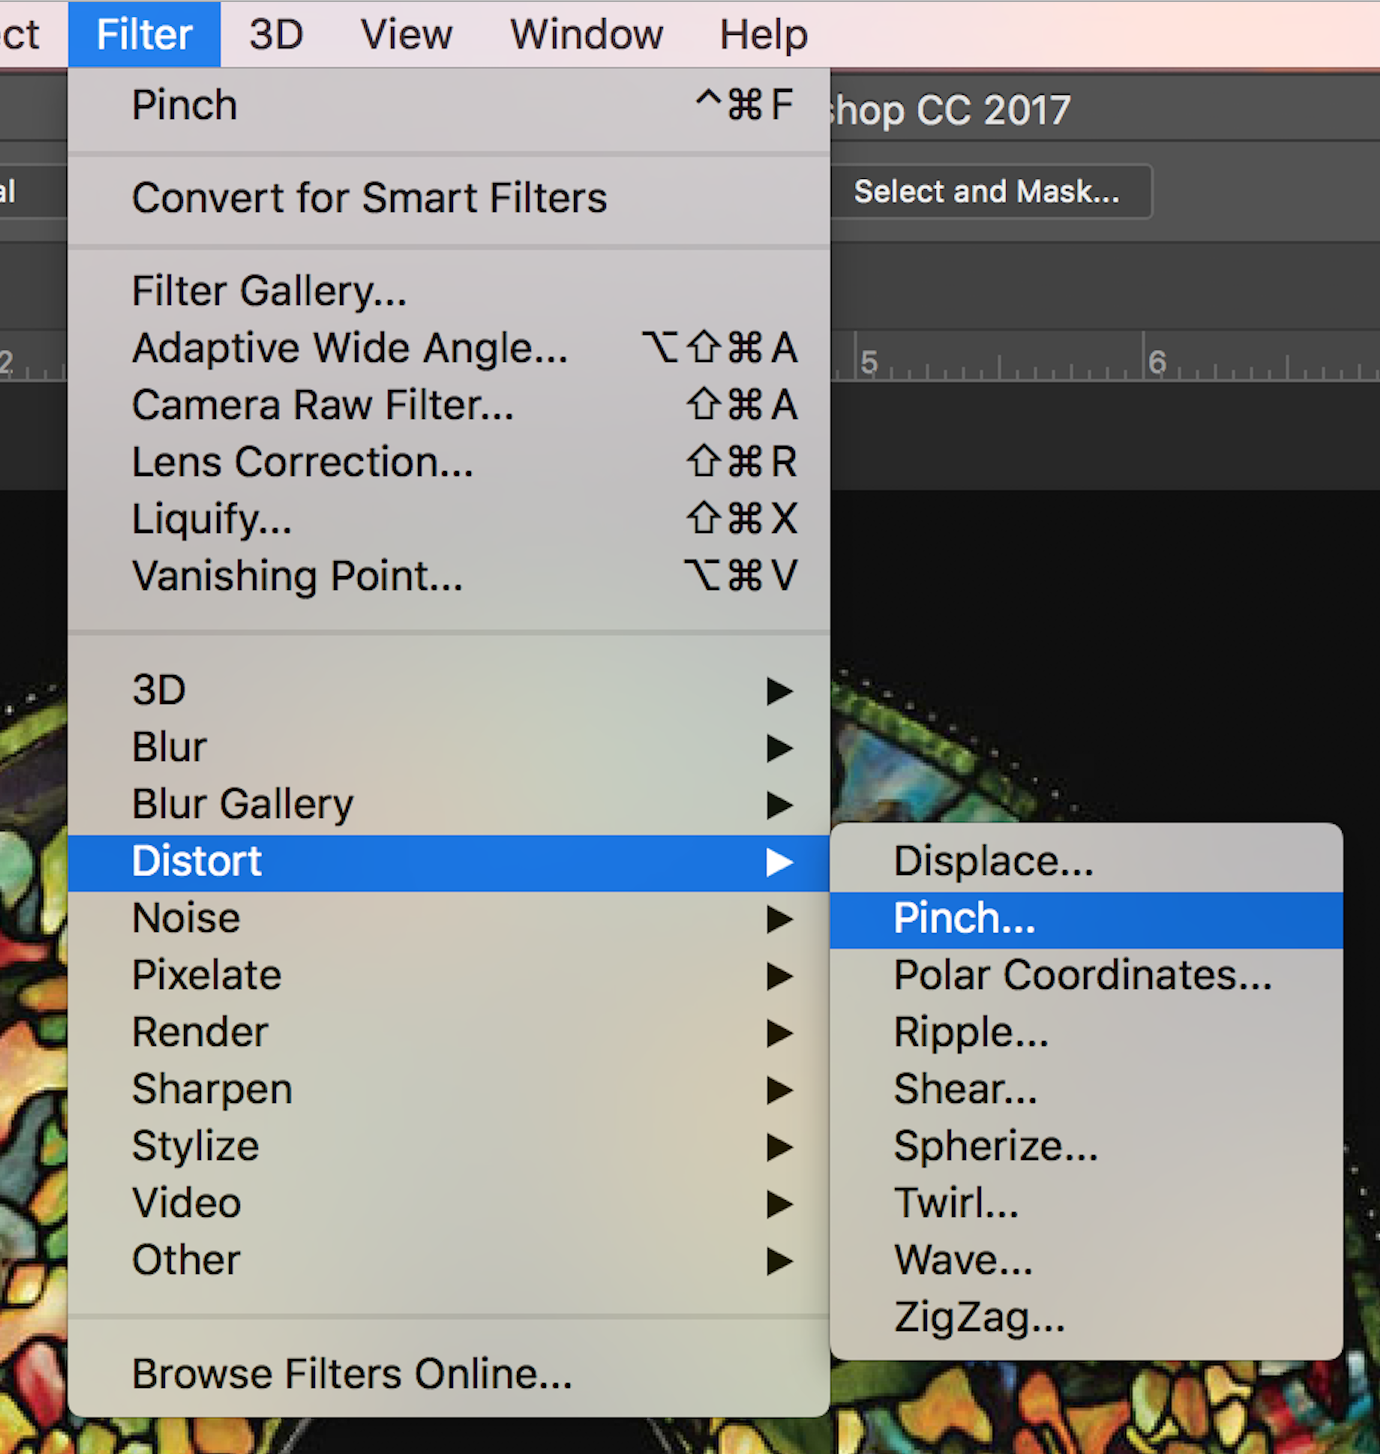
You can use Filter>Distort>Pinch 

Copy link to clipboard
Copied
Wow, thanks Ahmed, it seems like my impossible problem has multiple solutions. Thanks.
Also a Correct Answer.
Copy link to clipboard
Copied
Colin, dude you are a Photoshop God.
Correct answer, problem solved.
Copy link to clipboard
Copied
In fact, I'm just a forum moderator who saw the message coming in! But I happened to answer another question about polar distortion a few days ago, so it was fresh in my mind. I quite like the Pinch solution too, and the others were also good.
Copy link to clipboard
Copied

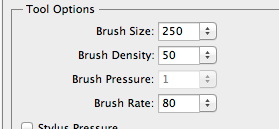
I am a little late to the party (Filter > Liquify > Pucker was already suggested) but decided to include it because the additional hint of inverting the image made placement of the center mark for the distortion easier to see. These were the adjustments I used.

Find more inspiration, events, and resources on the new Adobe Community
Explore Now