Copy link to clipboard
Copied
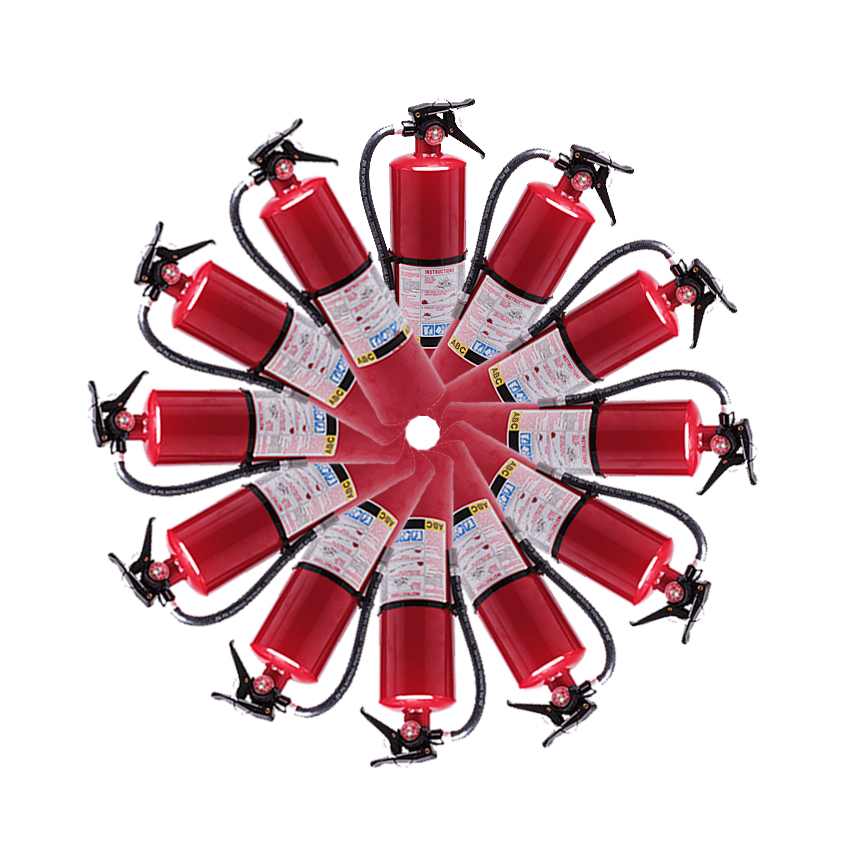
Hello, i'm trying to recreate the effect seen in this image, it basically involves duplicating/scaling down from the centre and repeating the action several times

 This is what happens when i try to repeat the action
 1 Correct answer
Have you commited the transform (with Enter or clicking on the Tick in the options bar) before repeating with Shift+Ctrl+Alt+T ?

Dave
Explore related tutorials & articles
Copy link to clipboard
Copied
Have you commited the transform (with Enter or clicking on the Tick in the options bar) before repeating with Shift+Ctrl+Alt+T ?

Dave
Copy link to clipboard
Copied
While the objective of the technique you described is somewhat different from those shown below I believe you will have little trouble adapting the instructions to your own project. This is a copy of a Tech Sheet devoted to the subject. I distributed it to my students as the class worked at their computers.
***
Step-and-Repeat

To replicate the effect shown above – create equally spaced duplicate images – begin by opening the file containing the master image. Then
1. Open a new file of appropriate size to hold the finished Image. (File > New)
2. Choose the master image file and select the object. In the example above, the Magic Wand was used to select the area surrounding the object and then Select > Inverse to create marching ants around the object.
3. Choose the Move tool. Click and drag the object onto the new file and in position it at the left. It will become the start of the row.
4. Select the object. Once again, the Magic Wand was used to select the area surrounding the object and then Select > Inverse to create marching ants around the object.
5. Hold down Cmd+Opt+Shift and choose Edit > Free Transform. Be sure to release the mouse before releasing the keyboard keys.
6. Hold down the Shift key for alignment and drag the framed image to the right. Do not use the center mark in the image when dragging. When dragging you may completely separate this image from the one at the left, or allow it to overlap the one at the left as shown above. Then key Return. The second image wlll display marching ants.
7. Hold down Cmd+Opt+Shift and strike the T key repeatedly. Each time you do, another duplicate will appear, following the spacing you designated.
8. Select > Deselect to remove the marching ants. Job done.
Note that all of the duplicate images appear on one layer.
Variations on a theme:

To change the duplicate images so that each one in the sequence repeats the adjustment made when the first duplicate was positioned (as seen above): in Step 6, before striking the Return key, drag one of the corner handles diagonally to change the image size, and reposition the image if necessary. Then strike the Return key and follow on to the next step.

To place each duplicate on a separate layer so that each image may be treated differently from the others later, after the technique is complete, skip Step 4.

This pinwheel variation is produced this way:
1 Open a new file of appropriate size to hold the finished Image. (File > New)
2. Choose the master image file and select the object. In the example above, the Magic Wand was used to select the area surrounding the object and then Select > Inverse to create marching ants around the object.
3. Choose the Move tool. Click and drag the object onto the new file and in position near the top, centered (approximately) left and right.
4. Select the object. Once again, the Magic Wand was used to select the area surrounding the object and then Select > Inverse to create marching ants around the object.
5. Hold down Cmd+Opt+Shift and choose Edit > Free Transform. Be sure to release the mouse before releasing the keyboard keys.
6.. Hold down the Shift key to ensure a vertical drag and drag the center mark in the image below the object about 1/4”. In the Options Bar set the angle to 30. (Thirty into 360 degrees will produce a 12 image pinwheel.) Then click on the Commit checkmark in the Options bar.
7.. Hold down Cmd+Opt+Shift and strike the T key repeatedly to complete the circle of images.
8 Select > Deselect to remove the marching ants. Job done.
(I could send you my PDF version if you are interested. Send a private message with your email address.)
Copy link to clipboard
Copied
In general its replication

Copy link to clipboard
Copied
The cloud image looks like it was done with clone stamp.
Copy link to clipboard
Copied
If I can understand what you want then I can help you with my free action https://www.designeasy.co/2015/02/free-droste-effect-action-for-photoshop.html
Find more inspiration, events, and resources on the new Adobe Community
Explore Now
