- Home
- Photoshop ecosystem
- Discussions
- Re: Simulating a specific stain/paint color on raw...
- Re: Simulating a specific stain/paint color on raw...
Simulating a specific stain/paint color on raw wood
Copy link to clipboard
Copied
Problem:
I have a newly built wooden deck, which has not been stained or painted. I am trying to simulate staining or painting the deck with a specific color from a stain/paint swatch. More exactly, I would like to take a specific RGB color and "apply" it to the photograph.
What I have so far:
- A high-quality PSD of the deck, with both shadow and sunlit areas, highlights and shadows slightly decreased and enhanced, respectively.
- A high-quality PSD of the stain/paint swatch (taken outside in near the deck), color-balanced and exposure-adjusted to look on my monitor, just like the thing I'm holding in my hand.
- Masks
- A selection/mask of the wooden part of the deck.
- A selection/mask of the shadows and dark areas between the boards.
- Intersection of the above.
- The RGB value of a desired color - the swatch color
My best shot so far:
- Create color layer on top of the photograph and filled it with the swatch color.
- Blend mode Normal.
- Opacity and Fill 100%.
- Apply third layer mask above to the color layer.
The overall masking seems OK. Everything that isn't wood looks unchanged. Because mask #2 is not completely white, the color layer doesn't completely hide the details of the wood.
However, the color of the wood just doesn't look right. It looks muddy and darker than expected. Because the areas in shadow are more masked, the luminance differences between the shadows and sunlit areas is decreased and now looks like some HDR nightmare.
I've tried adjusting opacity of the color layer, contrast of the mask, even the luminance, saturation, etc. of the color layer.
Again, in an ideal world, I would like to just take the swatch color and easily "apply" it to the photograph.
Thank you for your consideration.
Explore related tutorials & articles
Copy link to clipboard
Copied
Hi
Have you tried changing the blend mode to colour and using the "Deckwood" Mask:

If you want it darker you could then add a curve with the same mask:

Dave
Copy link to clipboard
Copied
Thanks, Dave. Yes, I tried using blend mode, color. But the effect is too weak. The stain type I'm considering is a "solid color", which means that it's more assertive.
The problem with my final result is that it's too dark, at least in the way that I'm using it.
That said, I need to try adding a curve adjustment layer with the same mask. I'll let you know how that works out.
Again, thanks!
Copy link to clipboard
Copied
Hi
Normal blending mode will overwrite the luminosity variation hence the muddy look. Color will apply hue and saturation and leave luminosity from the underlying layer. However specific colors rely on correct luminosity so a curve is needed to simulate them whilst retaining variation so that the detail is not lost
Norman is correct Lab allows you to completely separate control of colour and luminosity channels. But the same principle applies.
Dave
Copy link to clipboard
Copied
Since you have the precise color reference, much of the final result may rest with the tonal scale and modeling which is inherent in the wood surface. The trouble is, since you are working in RGB, any change in tonal scale affects color as well, and a change in color (to reduce a muddy area, for example), affects tonal scale. Based on your description, I suggest you consider working in Lab Color where color is discrete from tonal scale and offers flexibility not available in RGB.
Copy link to clipboard
Copied
Norman and Dave, you are correct in that working in LAB and using a blend mode of Color made a huge difference. Now, for darker "stain" colors, the effect is not as dramatic as with lighter colors. I am experimenting with adjustment layers on both the original and the color layers, both masked to the wood.
Still learning. Will update later.
Thank you!
Copy link to clipboard
Copied
Using a stain palette brochure is problematic. The sample size is very small and doesn’t really represent how the stain looks on the actual real wood. So many things affect the appearance - texture, lighting angle of incidence, etc.
So I decided on a low-tech approach. For $5 Sherwin Williams will sell a small sample of actual paint mixed to a specific color. OK, it’s not stain, but because I will be using a “stain with color”, it is the same exact pigment mixture and would get me close.
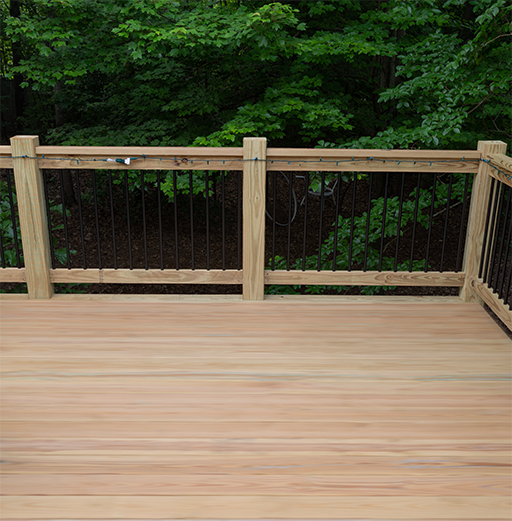
I chose three colors, Ranchero Red, Cabin Brown, and Sahara and painted these on a scrap piece of plywood.
I then photographed the deck with and without the plywood with paint samples. The idea was to convert the wood of the deck to the same color as the plywood with the paint samples. This part should be pretty easy.
Removing the grain of the wood without making it look too fake was not so easy. To do this, I decided on a two-stage approach.
- Clone out the bigger, darker knots
- Motion-blur the remaining grain
Cloning out the knots didn’t take too long. Blurring was a different matter. But because my first photo was at an angle, motion-blur didn’t work well. The boards are “wedge” shaped, so the motion-blur affected the boundaries between the board - I wanted to preserve those.
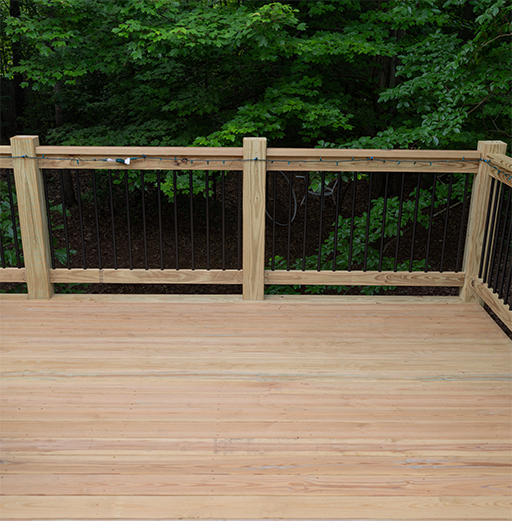
So I took the photos from a perspective that would make it easier to motion-blur. The second one was REALLY easy. Here are the two photos with the plywood.
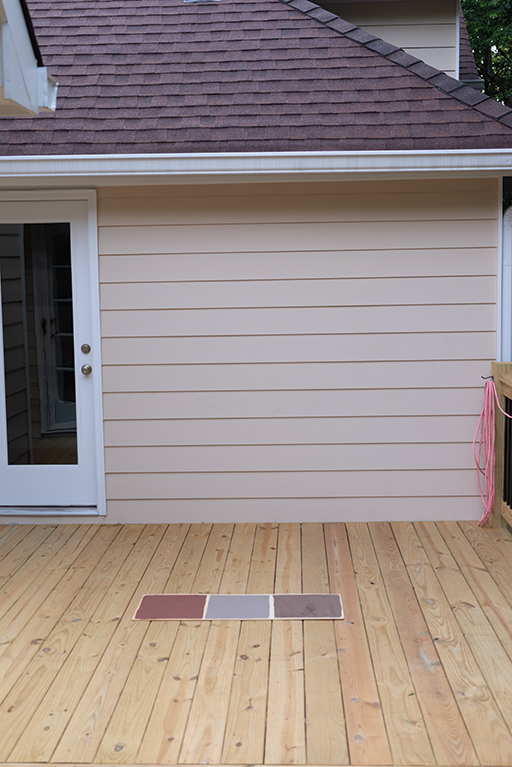
Without knots
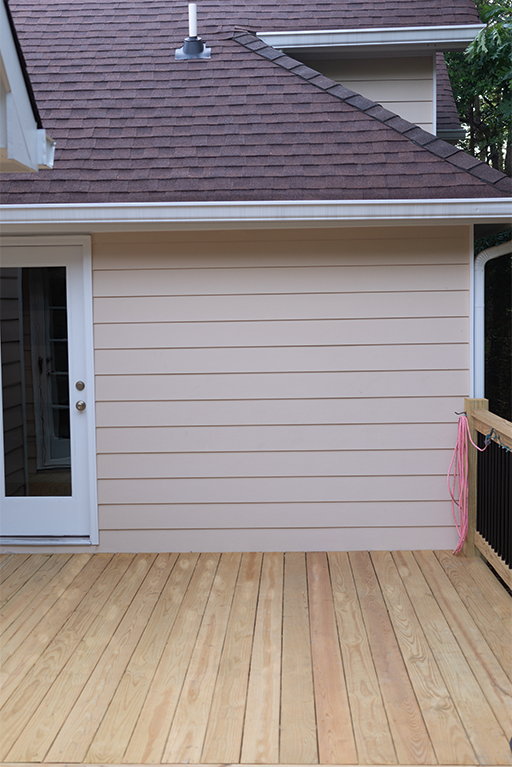
Before motion-blurring this image, I had to perspective-transform so that the board widths were consistent across the image. I then transformed it back. Some clipping/masking was required to remove the edge effects of the motion-blur.
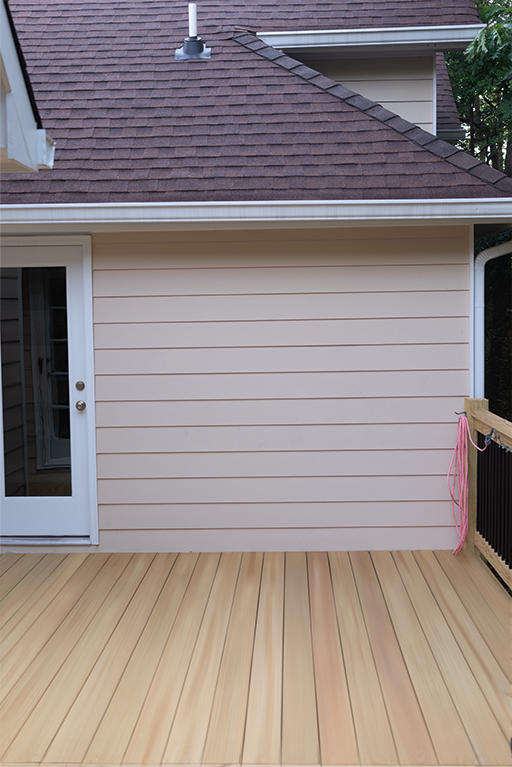
The second image with the same transitions.
Without knots.
Motion-blurred. This was easy - no transforms required.
The rest was relatively easy, thanks to the advice from those on this thread.
- Add a layer with just the paint sample, Blend Mode: Normal. This is just for reference.
- Pluck an average color from the paint sample layer and create another layer below that, colored completely with this color, Blend Mode: Color.
- Add a mask to this layer so it’s only visible where there is wood.
- Add the blurred wood layer at the bottom.

The problem is that the color of the resulting wood does not match that of the paint sample.
By adjusting the curve of the blurred wood layer, I eventually got it to match the original paint sample. But this made the rest of the image too dark.
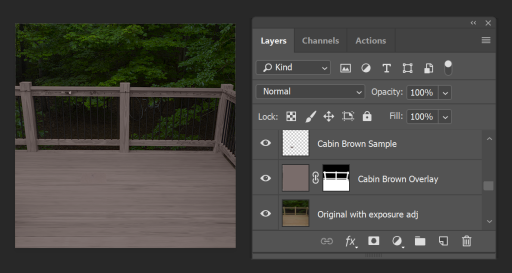
So, I masked the blurred wood layer to only show the wood and added the original blurred layer below that to restore the original background (although any of the originals would work - we just needed the non-wood areas).
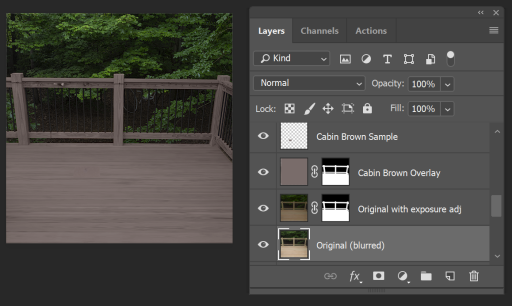
It still looks fake. But I am confident that it is much closer to the reality of what we will achieve. With the blurred wood layer and wood mask, it’s easy to try another paint sample. Here's the same set of images for the other perspective.
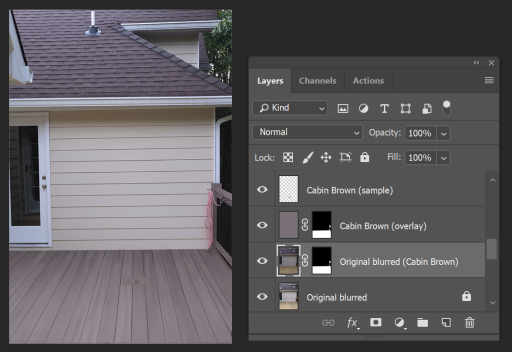
I circled the area showing the original painted plywood to demonstrate how it matches the deck wood.

But here’s the cool part. We didn’t really like any of the colors. But we speculated that perhaps a mixture of the Ranchero Red and Cabin Brown might be good. It’s easy to do that. Just display the composite (merged) Brown layer at 50% opacity above the composite Red layer.
As an experiment, I actually mixed the paints (not precisely, so not the most objective of experiments) and made a new paint sample and photograph. I had to adjust the exposure of this new photo to match the originals (deck wood area, house siding, etc.). The lighting conditions just weren’t the same. But they were close.
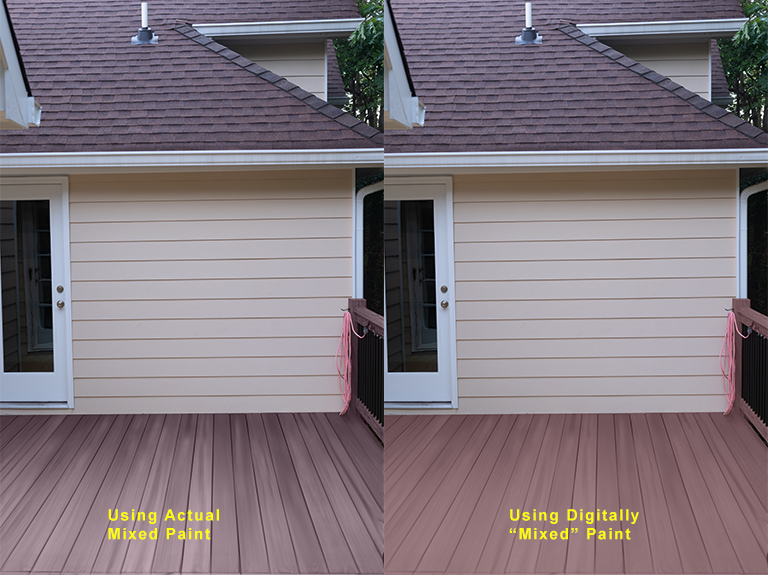
Below is a comparison of the digitally mixed Red and Brown along with the version using actual paint-matching. I think the differences are due to my imprecise mixing of the paints.
After we get the deck painted, I will update with a photo of how it looks.
Thanks again to Dave and Normal for their advice. It's been a learning experience.
