- Home
- Photoshop ecosystem
- Discussions
- Something for the Weekend - Part 214 - Go nuts!
- Something for the Weekend - Part 214 - Go nuts!
Something for the Weekend - Part 214 - Go nuts!
Copy link to clipboard
Copied
Hi,
Thanks for all the great creations in our previous, salmon leaping, challenge.
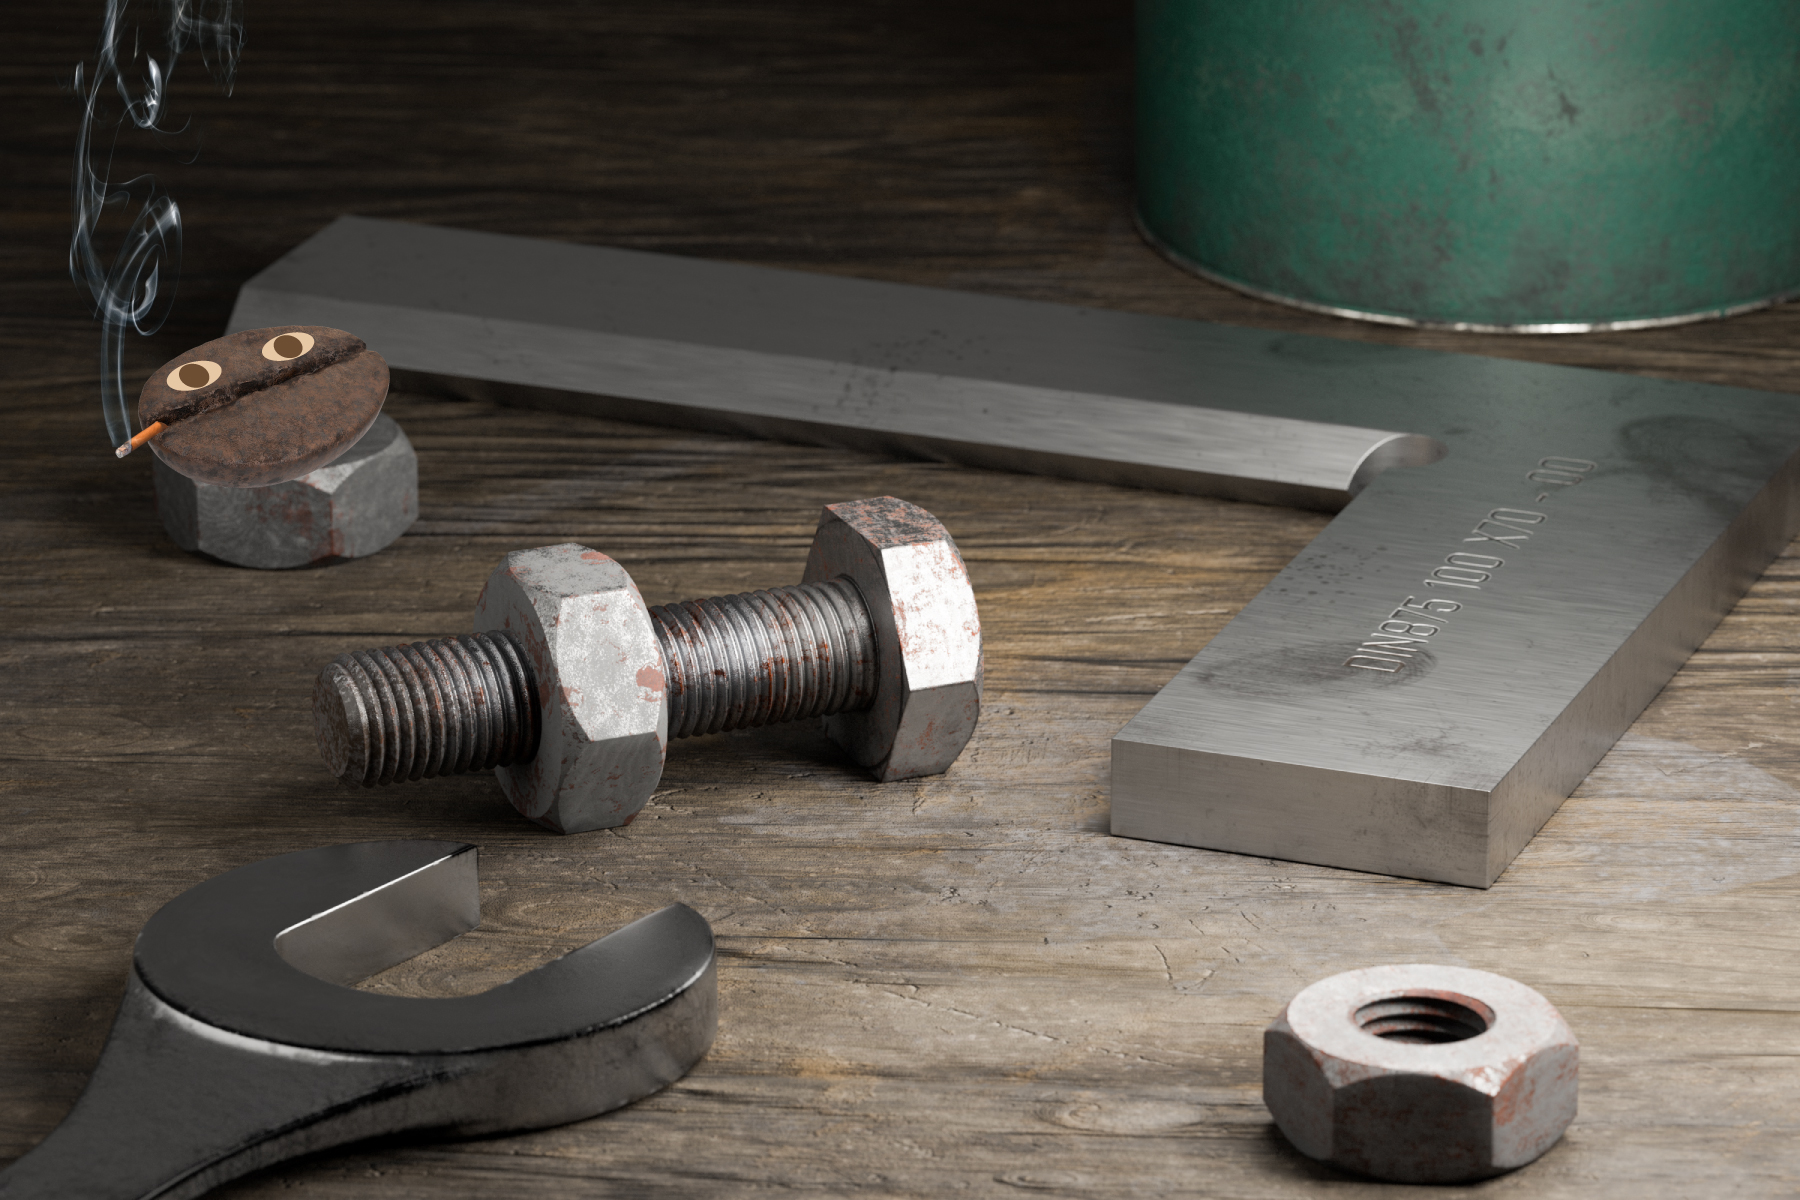
This week, we start with an old workbench. What story can you tell us with this?
The “rules”:
- Use the starter image as at least part of your own image entry.
- Anything goes, as long as it meets the forum rules on decency, copyright, etc.
- Anyone, and everyone, is welcome to have a go, whether you are a complete beginner or a Photoshop expert. This is not just for our forum “regulars”.
- There are no prizes apart from the chance to practice, show off your skills, or bring a bit of humour and fun. Don't be shy, join in and have a go!
- The starter image is made available for you to use in this forum challenge only.
To download the image, hover over the image and click on the circle with the arrows at the top right.
Then, when the image opens in its own window, right click and choose “Save Image As/Save Target As” (or similar depending on your browser).
When posting back your image — please use the blue reply button in this first post and use the 'Insert Photos' icon at the top of the reply box. If posting a comment on someone else’s entry, then please use the grey reply button next to their image post.
Have fun!
Dave
Explore related tutorials & articles
Copy link to clipboard
Copied
I love the rust and dents in your render Dave! This will be fun!
Jane
Copy link to clipboard
Copied
I modelled it in 2019 Jane, it has been lying around untouched on the disk since - hence a bit of rust 🙂
Dave
Copy link to clipboard
Copied
Hi Dave,
I just stumbled upon this nice work of yours. May I ask what you used to generate this image?
You wrote: "I modelled it in 2019" It doesen't say much what was involved.
I used to do 3D stuff in Cinema 4D but it's not affordable for me as a side programm after it became a rent only app.
Nice modelling on the wrench btw. and the overall look of the picture.
I miss reflections of the metal and that the dents blend in the wood-texture of the ground.
Is that better achievable these days?
Greetings,
Pat
Copy link to clipboard
Copied
Hi,
I modelled it in Blender 3D where I also UV unwrapped each object. I then textured the objects using Substance Painter before going back to Blender 3D for lighting and rendering, using Blender's Cycles rendering engine. Then it was off to Photoshop for finishing.
Yes, reflections and surface displacement are bread and butter although I chose to keep reflections off these 'old' tools. I actually used real displacement on the bench surface using Blender's Adaptive Subdivision, which subdivides the surface according to how it appears in the render, i.e. more subdivision closer to the camera and less further away. I drove that with a height map from Substance Painter.
Thanks for your interest.
Dave
Copy link to clipboard
Copied
Okay wow ^^ thx for the promt reply!
Blender was my first choice after leaving (partially leaving Cinema 4D [Maxon] still running on an old Mac Pro 7.1).
Is there a chance to contact you personally after you mentioned Blender and
as it's not the Adobe space?
Copy link to clipboard
Copied
@PS-D. Sure - drop me a PM and I'll try and answer your questions
Dave
Copy link to clipboard
Copied
Dave, I adore the dents and corrosion in your render! It will be enjoyable to do this!
Copy link to clipboard
Copied
Copy link to clipboard
Copied
I think it's a 'has bean'... 🙂
Dave
Copy link to clipboard
Copied
Can't beat the shopping channel 😉
Copy link to clipboard
Copied
That sounds like an Irish furniture shifter 🙂
Dave
Copy link to clipboard
Copied
Keep away from eyes and young children. Perfectly safe for your nuts. 😉
Copy link to clipboard
Copied
Copy link to clipboard
Copied
Bringing in all the old SFTW tools there Jacob 🙂
Dave
Copy link to clipboard
Copied
Indeed, Dave, some are out of the box.
Copy link to clipboard
Copied
Wow, Dave. This is my favourite starter image for a very long time, and another amazing render. I especially like the 'Precision Square' I bought one just like that from Bangood, and the inside and outsides were not even parallel, yet alone square. Note: It is possible to rotate the inside and outside squares to each other and still be relatively accurate, but it is not a good look, and does not inspire confidence. In this case, I can say for sure that the 'Precission Square' was not accurate.
II think the engineering square is a Moore & Write, and I tested that against a Starrett and they showed to gap. The gap below is not huge, but it certainly isn't 'precise'. I used the planner because it has a ground cast surface. I did clear the sawdust from under the squares btw.
I set up the panel saw at my Menz Shed a few weeks ago, using a framing square that belonged to the shed. When I double checked with a DTI it was miles out. I am talking a full degree! I looked around and found several more squares, and they were all hopeless. I have at least a dozen different squares at home, and I found that one of my big woodworking quares was not great. Way better than the Shed's though. My framing squares were pretty good, and my engineering squares all as near spot on as makes no difference.
OK, now I need an idea for this 🙂
Copy link to clipboard
Copied
Thanks Trevor, it is an issue if you get two 'precision' measuring tools and find they are different. Do you go for best of three? 🙂 I suppose you could check them by marking out a square and checking the diagonals, but you can't really adjust the one piece square.
Dave
Copy link to clipboard
Copied
Trevor, Dave, how about a bit of milling?
Copy link to clipboard
Copied
Copy link to clipboard
Copied
In my youth I took the gearbox out of a car to replace the clutch. On re-assembly, I had one bolt and one hole left. Sounds good but the bolt was too long for the hole. Back around them all looking for a short bolt in a deep hole! 🙂
Dave
Copy link to clipboard
Copied
Health Nut.
K
Copy link to clipboard
Copied
Kathryn: That's not a bolt and nut. This is a bolt and nut.
Copy link to clipboard
Copied
Brilliant!
Dave
Copy link to clipboard
Copied
Someone mentioned nuts?
Find more inspiration, events, and resources on the new Adobe Community
Explore Now


