 Adobe Community
- Home
- Photoshop ecosystem
- Discussions
- Re: Splitting image into three tonal ranges
- Re: Splitting image into three tonal ranges
Splitting image into three tonal ranges
Copy link to clipboard
Copied
I'd be grateful for advice on how to split up a coloured image into three tonal ranges. What I want to do is split the image into one layer for the darker tones (values), another for the mid tones, and another for the light tones. I want to be able to paint from these three versions of the image with the Art History Brush (or another cloning tool).
Thanks.


Explore related tutorials & articles
 9
Replies
9
9
Replies
9

Copy link to clipboard
Copied
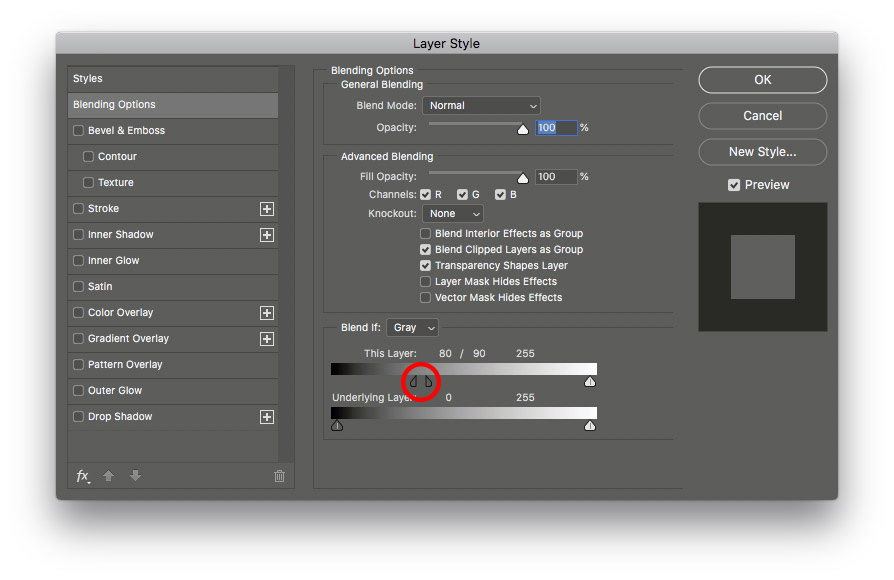
What you can do is this. Make two copies of the image in a new layer. Select the top layer and go to Layer Styles - Blend if. Move the left slider to 170. That make make the top layer transparent for each pixel that is below 170.

Select the middle layer and do the same, but for this layer set the slider to 85. That will make the middle layer transparent for each pixel below 85. So you now have three layers: all pixels below 85 will effectively be in the background layer, all pixels between 85 and 170 will be in the middle layer and all pixels above 170 will be in the top layer.
The transitions will be hard, however. If you want smoother transitions, then hold down the Alt-key and drag on one half of the slider. That will split the slider into two parts, and the transition will be between the two parts. For the middle layer you could set both halves to 80 and 90, for example.

Copy link to clipboard
Copied
David, it sounds like you are talking about a classic luminosity mask. Tony Kyper is probably the best known producer of a LM extension, but his are not free. In use Sven Stork's Interactive Luminosity Mask extension which is free, and works really well.
https://www.adobeexchange.com/creativecloud.details.12307.html
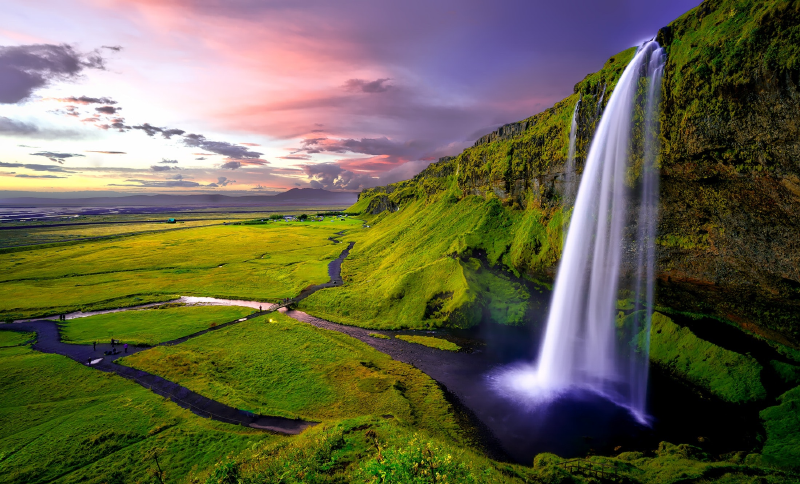
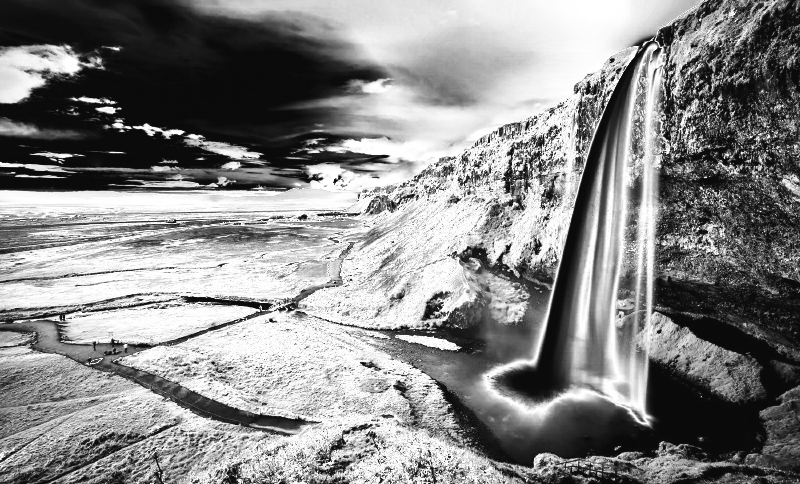
So if I start with this high contrast landscape
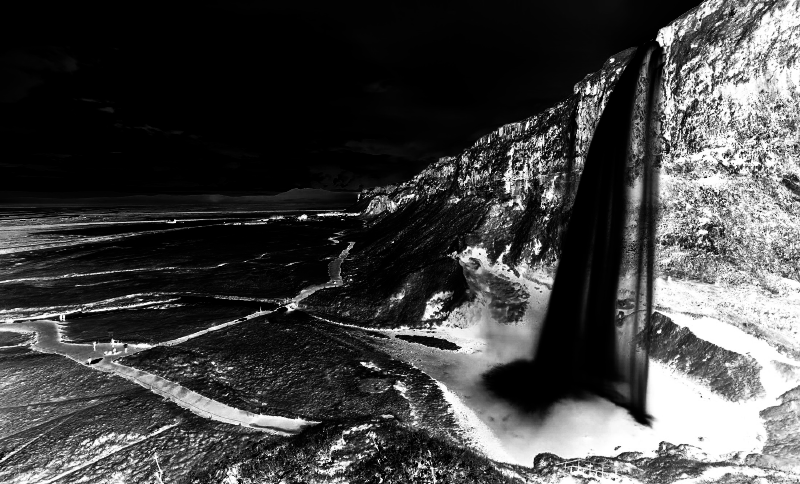
I can split it into Highlights
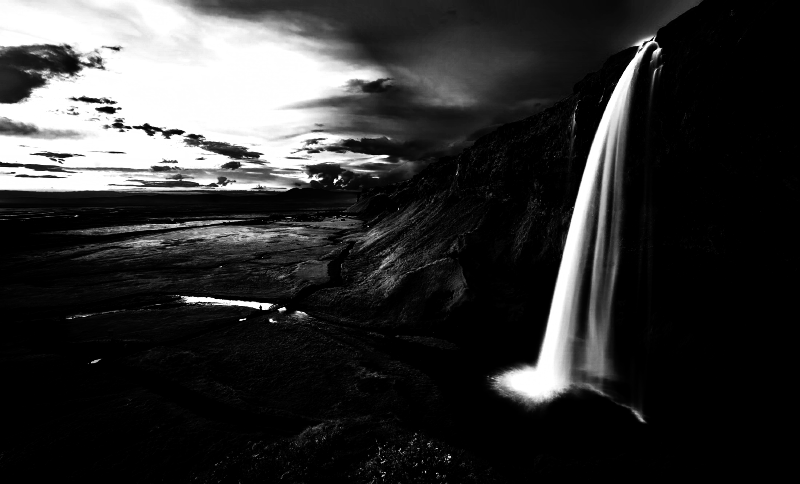
Midtones
And shadows
It will also produce Saturation masks.
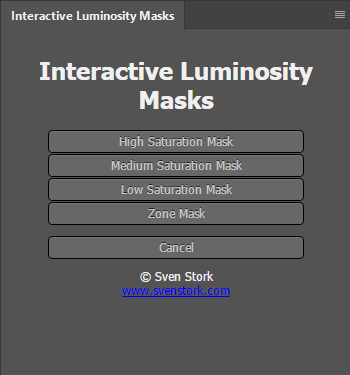
I've never used the Tony Kyper tools, so I don't know exactly how they compare.
Copy link to clipboard
Copied
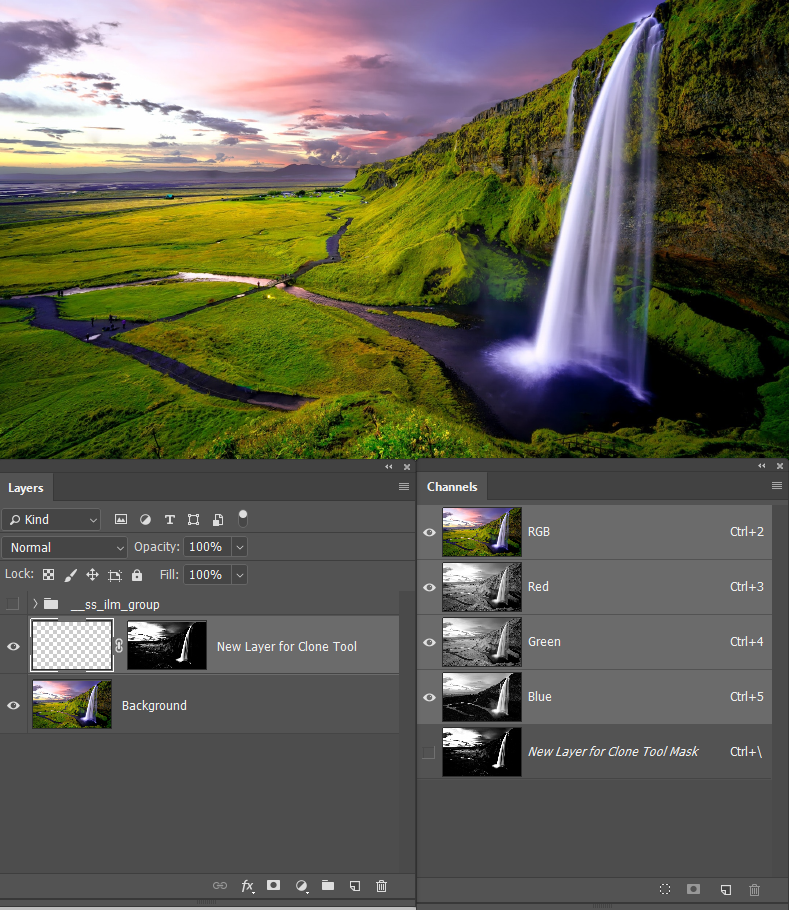
Incidentally, and I hope I am not teaching you to suck eggs, but one way to achieve your end goal is:
Having produced the first Luminosity Mask — in this case the Highlights
Add a new layer (I have named it Clone tool)
Ctrl (Cmd) click any of the Channels to load it as a selection.

And add a layer mask to the new layer.
Turn off the Luminosity Mask group, and you are good to go.
I am sure you knew all that, but it might be helpful to someone.
Copy link to clipboard
Copied
Thank you Johan and Trevor. I do not know about luminosity masks and have not yet grasped your full replies that may both be correct. If they are I am happy to mark both as Correct if that is possible. Your layers do not at first glance look like what I was after. I was looking for three versions of the same colour image one with just the highlights showing (but still in colour), another with just the mids, and a third with just the darks. So in the first case I need my starting image with mid and dark tones removed, and in the second, the starting image without the light and dark tones removed and so on. I don't know how to remove these tonal ranges from an image. If this would be the result of your procedures please let me know.
Apologies for my dimness. Thanks again.
David
Copy link to clipboard
Copied
There is no reason to remove anything. Both methods are based on masking, meaning that the unwanted parts of the layer are transparent. To see how that works, try my method and then make one layer very different (use Hue/Saturation for example and check the Colorize box). You will see that in the final image only the highlights, or the midtones, or the shadows are colorized (depending on which layer you selected for the test).
Copy link to clipboard
Copied
Thanks very much. Under this process, of which layers would I make snapshots to use with the Art History brush?
David
Copy link to clipboard
Copied
I have been being dumb. The easy way to do what I want is to use the Select/Colour Range and target Highs, Mids and Shadows. Then copy the selection for each range and paste it on a blank layer. That gives me what what I need. Sorry to trouble folks here.
David
Copy link to clipboard
Copied
This procedure can isolate the tonal ranges ok but unfortunately, the blank (unselected) areas of the image that remain next to the area of highs, or mid, or low tones, paint as white (no transparency) using the art history brush tool. I can't see a way around this.

Copy link to clipboard
Copied
Hi. I use a couple of very simple, free apps to do this. See Value is one, and there is another...
Value study. They are simple and very effective. In Value study you can get a live on screen split of the current scene on camera.....wonderful. This feature will set you back £1.99 though!!

 AdChoices