
Stop Motion GIF Animation Using Photoshop
How To Create a GIF Animation Using Stop Motion in Adobe Photoshop
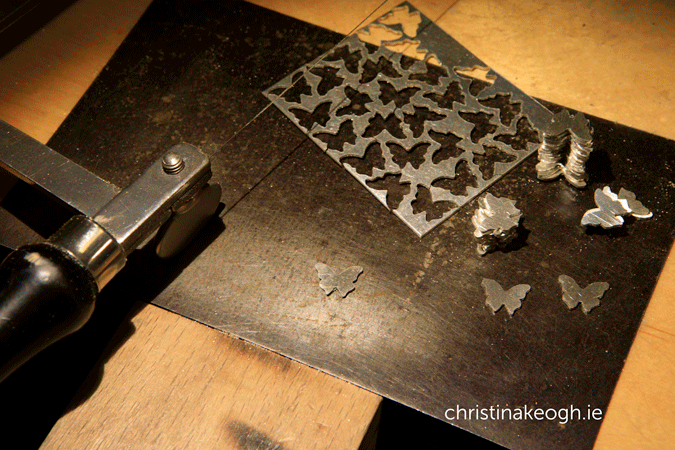
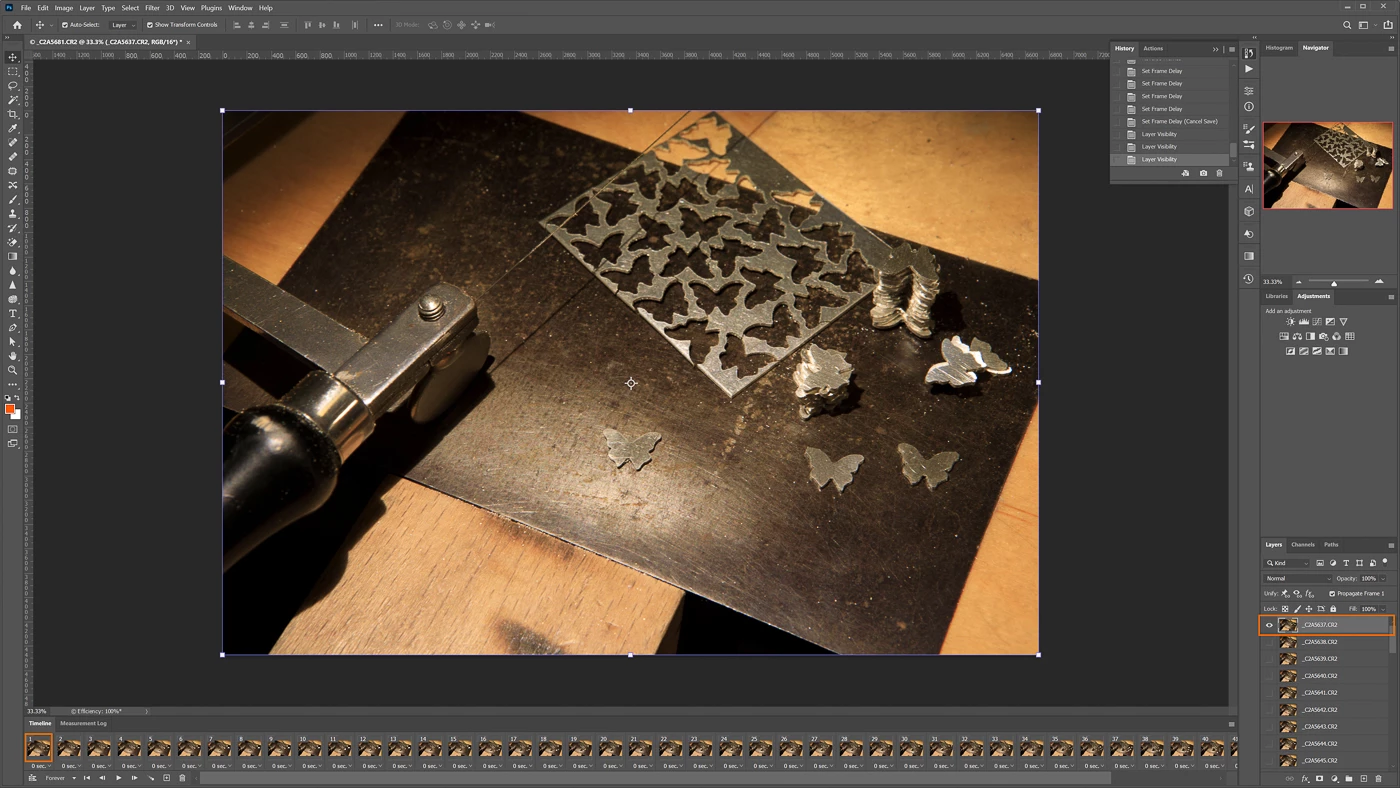
I recently made a short stop motion GIF animation for a friend using Photoshop.
First up was to photograph the frames, I was shooting in RAW, using a tripod and added the images into Lightroom.
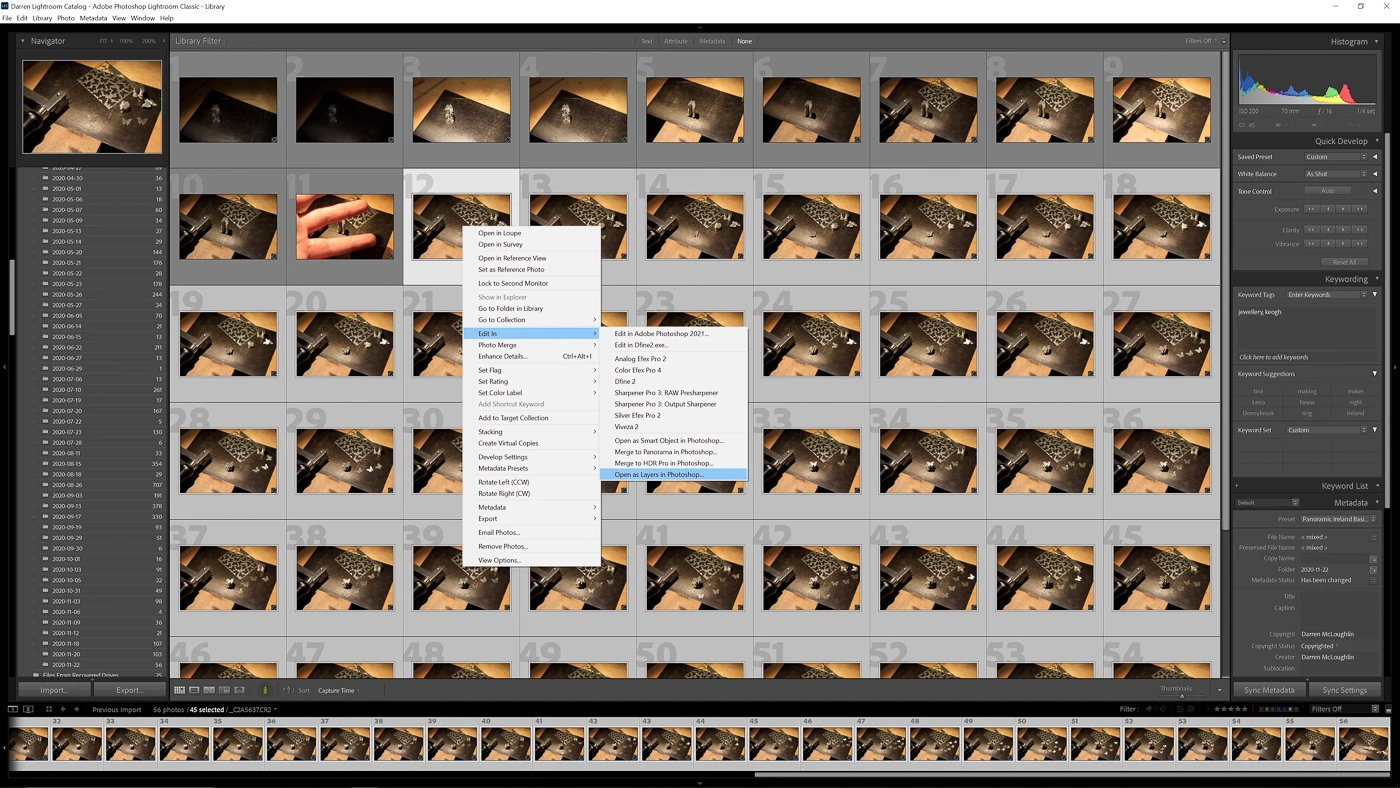
❶ In Lightroom I selected the images that I wanted to use, 45 in this case - right clicked then Edit In > Open as Layers in Photoshop...
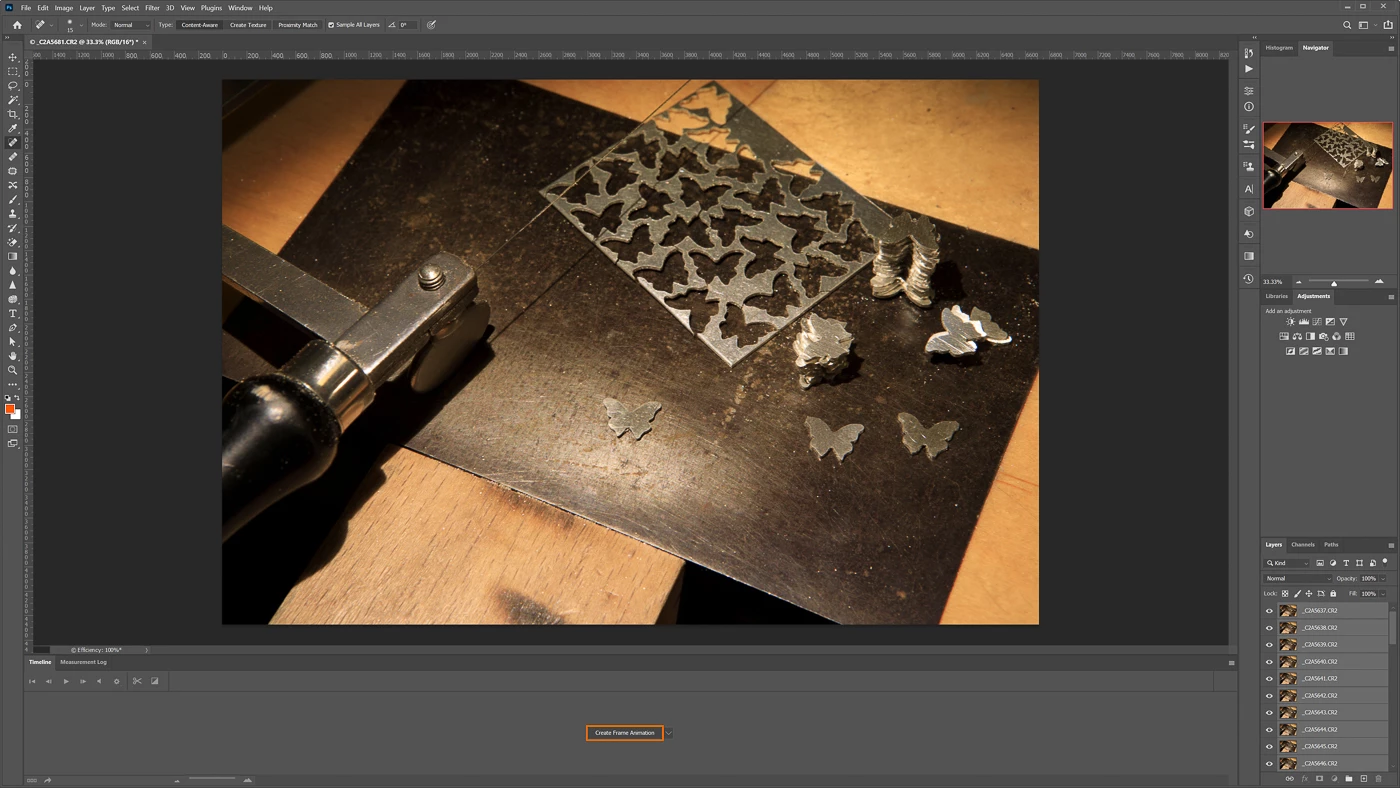
❷ In Photoshop bring up the Timeline by going to Window > Timeline

❸ Click on Create Frame Animation
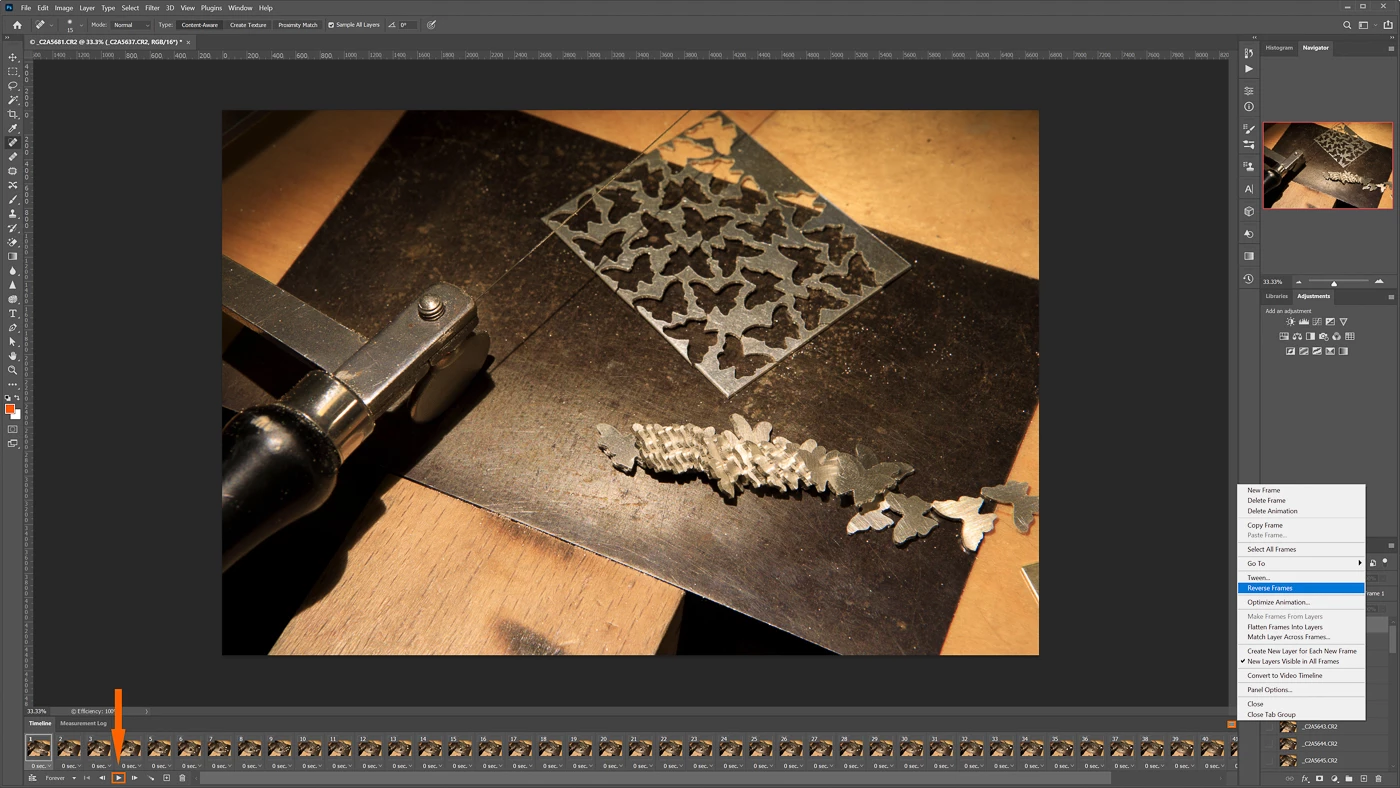
❹ Click on the small menu on Timeline
- Choose Make Frames From Layers
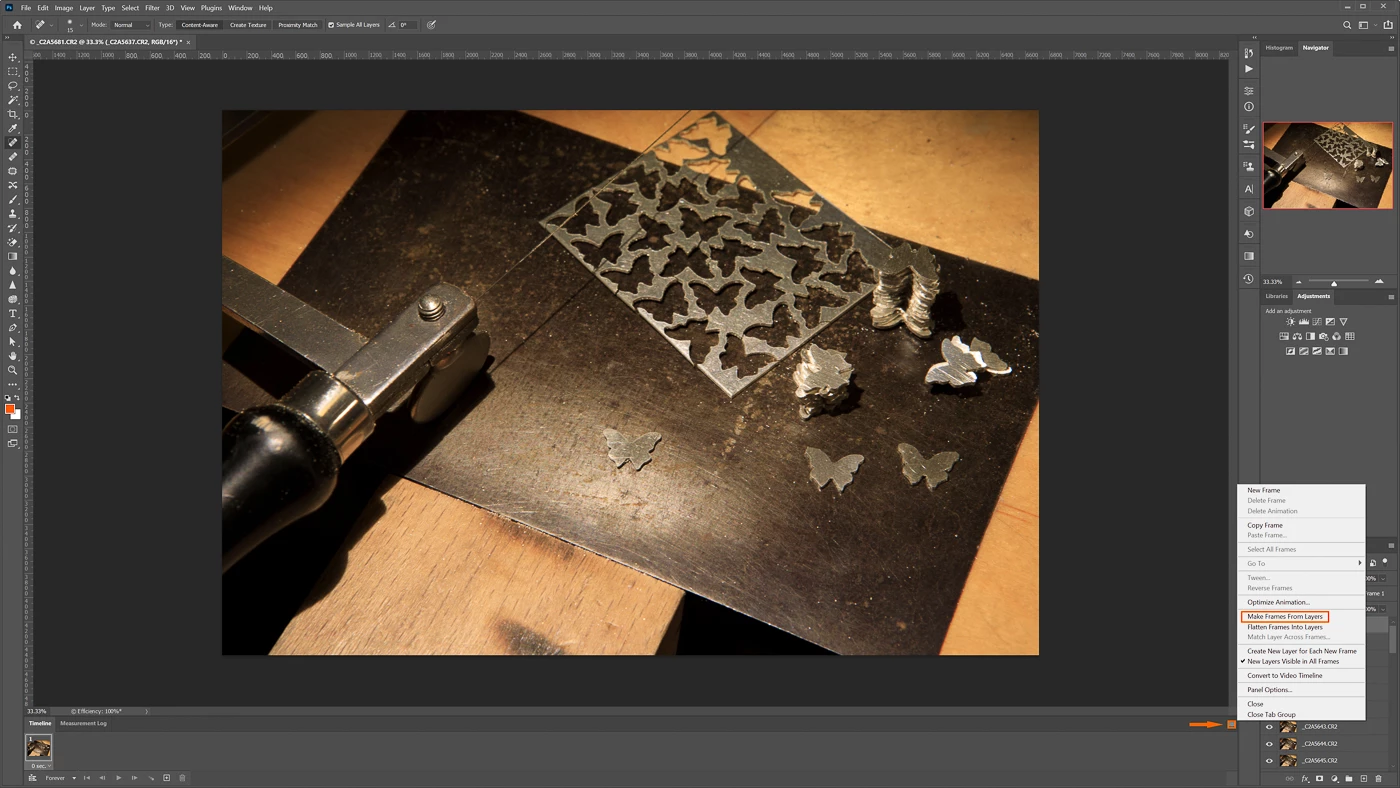
- Press Play and see if the animation plays backwards or forwards
- If backwards go to the small menu again
- Choose Reverse Frames
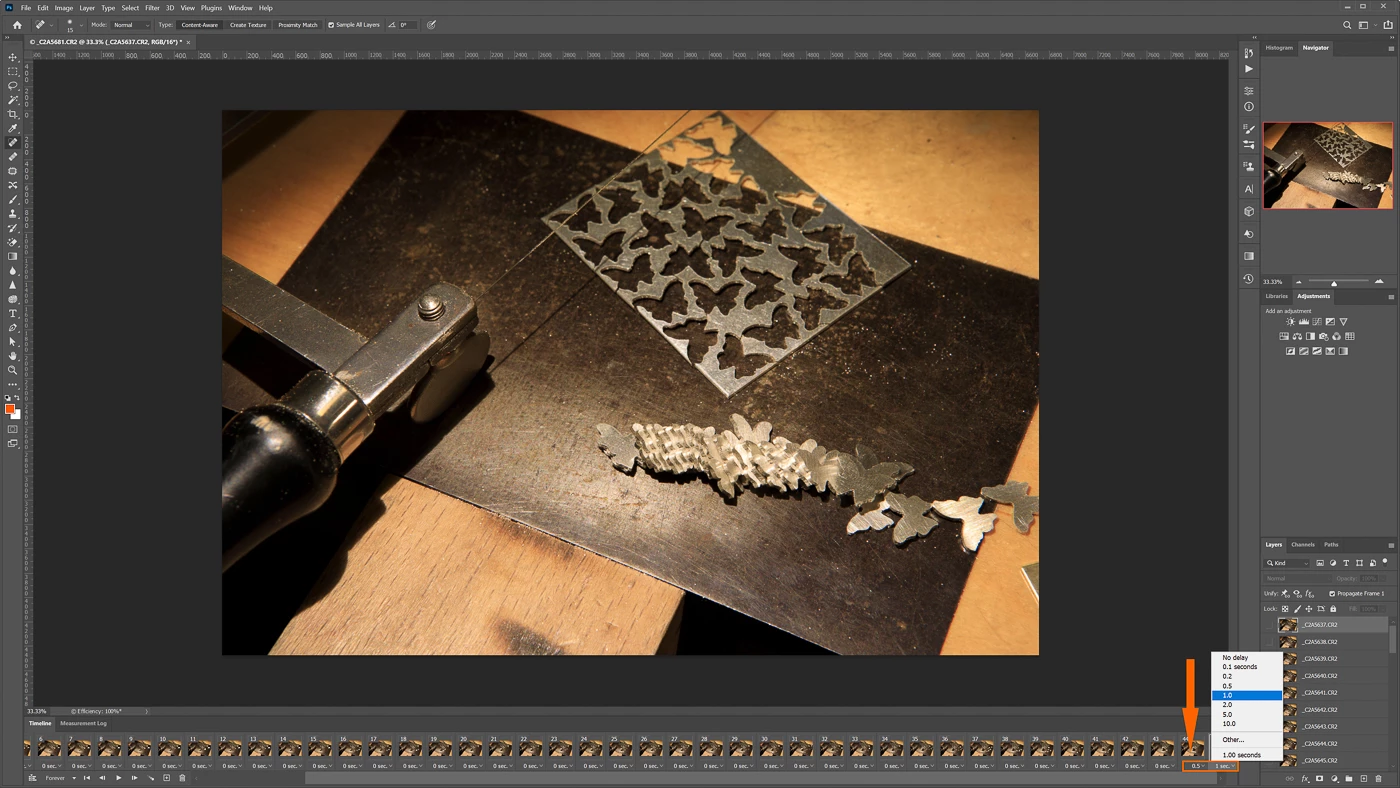
❺ Adjust the timing between frames, by default it is 0, by clicking on the down arrow under any frame
- Here I have added a small delay of 0.5 and 1.0 seconds to the last two frames to add a little pause
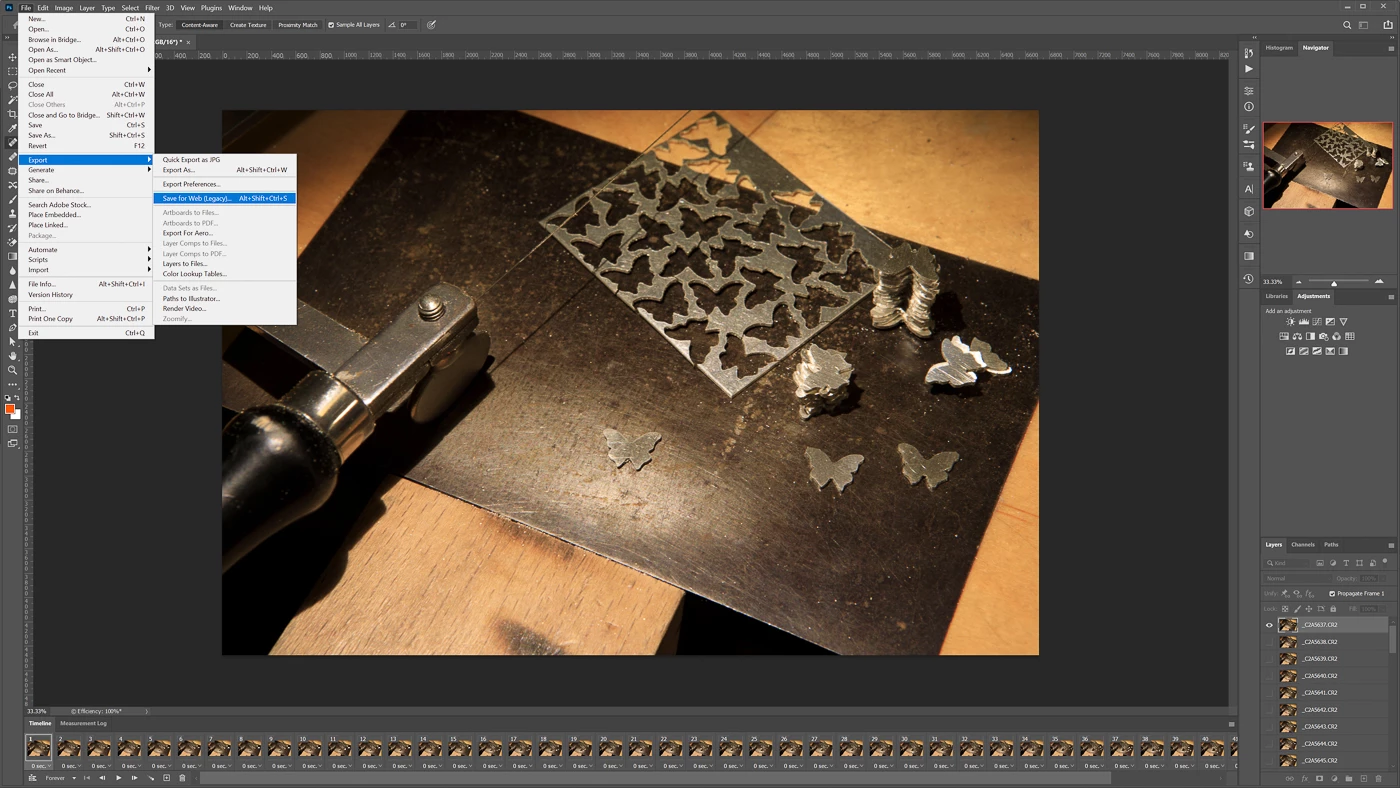
❻ To export the GIF go to File > Export > Save for Web (Legacy)...
- Resizing is the best way to reduce GIF size without compromising quality so here I have chosen a width of 1120 but you could use height or percent as the determing factor
- Choose Forever, Once or a specific number in Animation: Looping Options - here I have chosen Forever to make the GIF play over and over
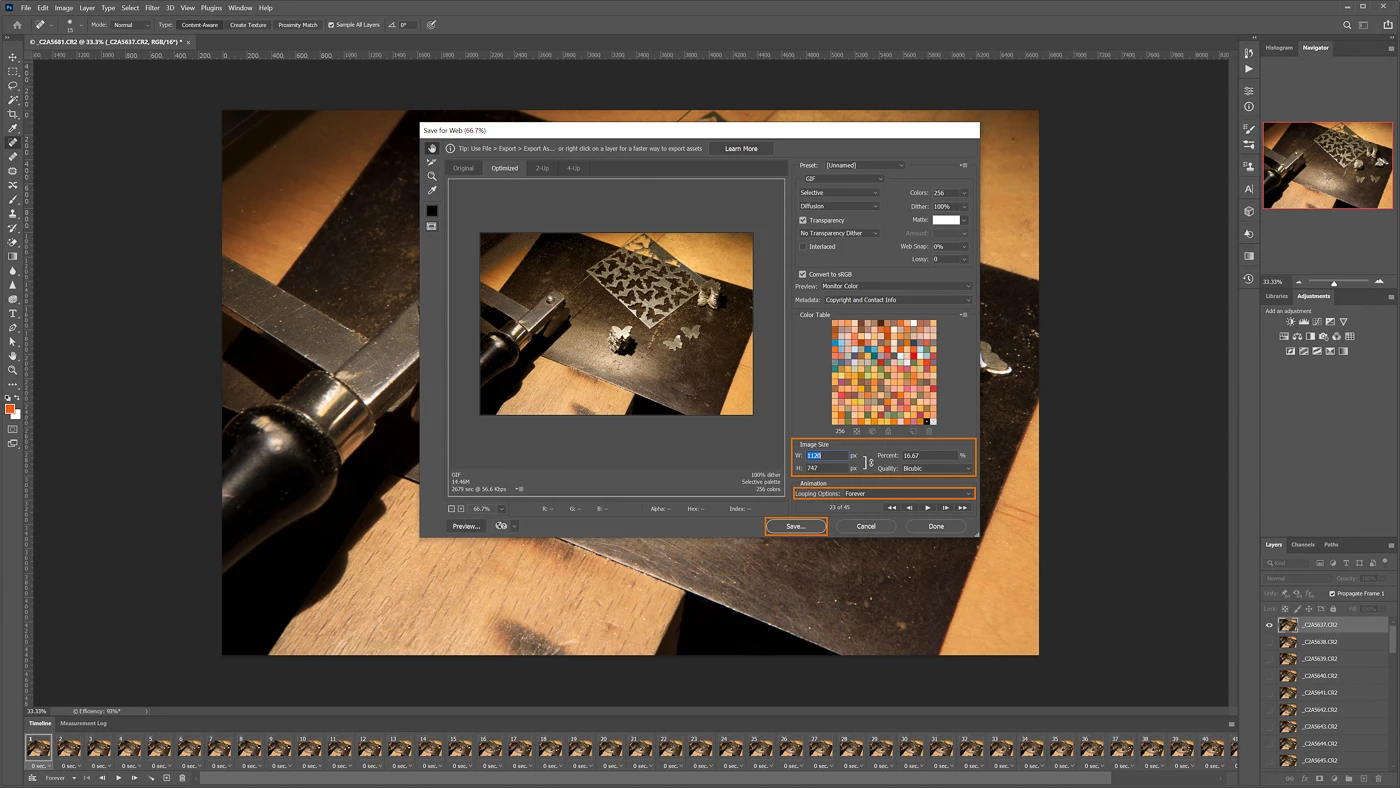
❼ Save...
That's it, you can make it as complex or simple as you like. To add text overlay see steps below.
❶ Click on the first frame in the Timeline window and make sure that the layer is visible
❷ Choose Type Tool or press T
- enter your text
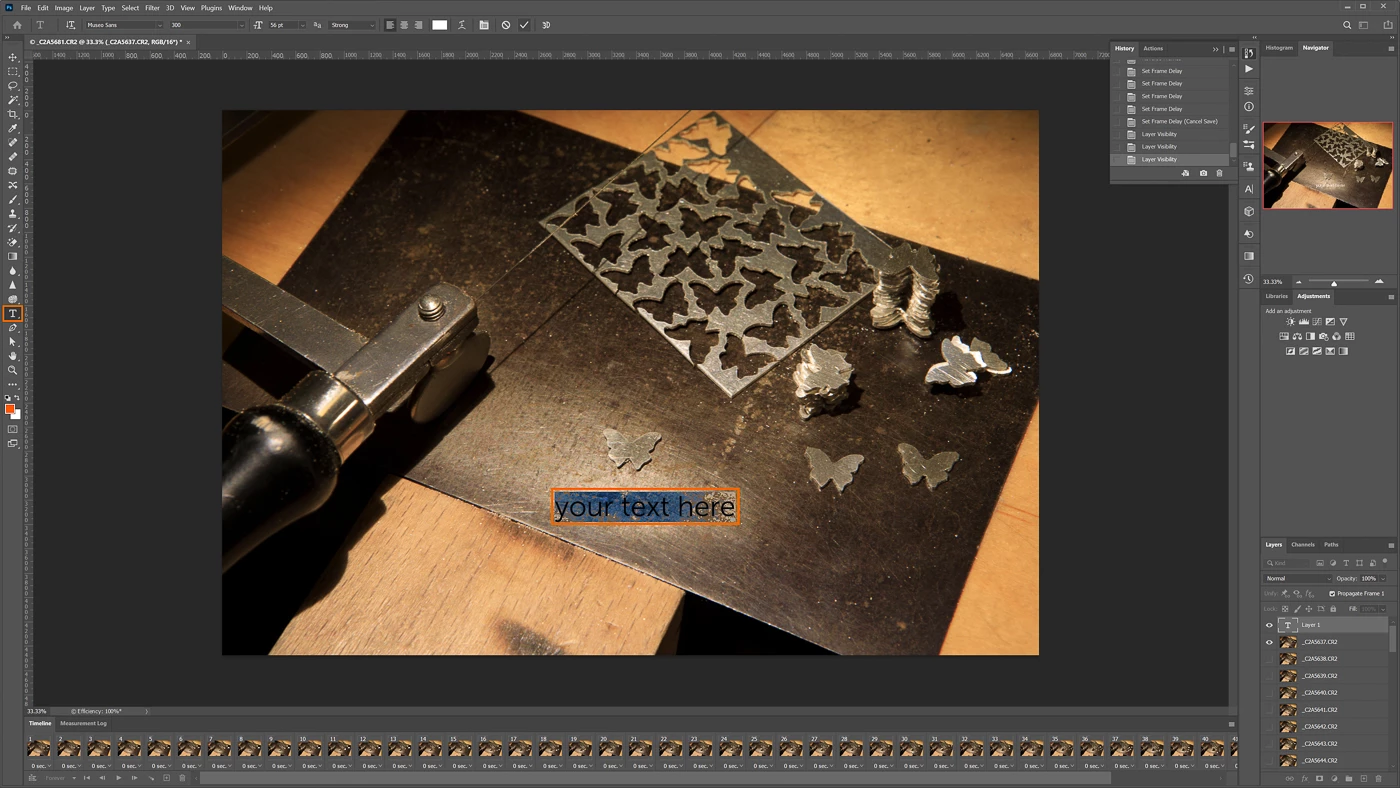
❸ Go to Step ❻ above