That's nice work, but I'm guessing it was not done with 3D tools because there is no perspective. That makes it much easier to do, because all the poster elements have the same angles.

If you have Windows, then Lazy Nezumi Pro — which is primarily a line smoothing plug-in for Photoshop — does a ton of other things including isometric constraints, so you would grid out your shape like below

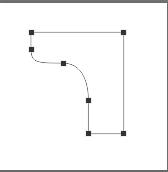
To make your rounded corners, you need to make an isometric box with equal length sides using LNP again (if you have it), and draw in your ellipse with the Pen tool.

You can't actually move a work path, so use Free Transform on the path to position and size it. What I would do then, is edit the path to create the outline. Start by placing new points at the 10 o'clock and 4 o'clock positions on your elliptical work path. Then select the new points one at a time, and delete them. That breaks the elliptical path leaving you with the lower left segment.
Copy that by dragging the path to the new path icon, and Free Transform the new path and FT rotate 180°. Copy this path, select the first path, and paste. Use the pen tool to complete one side like this: Note I have reduced the opacity of the grid we made earlier so you can see what is going on.

Repeat the earlier process to add the right side to the left.

Then join the two sides together. I am sure you can take it from here, but keep the right side path to move into position for the inner windows.

Use the brush tool to create any extra isometric lines you need, and make your first image window:
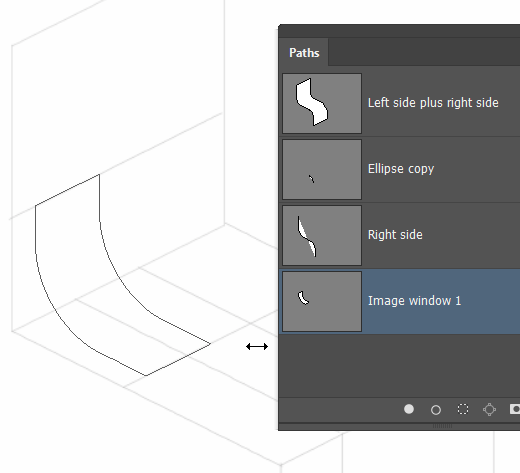
What you need to do now, is Ctrl click the path to load as a selection. Make a new layer, and give it a layer mask. You also need to unlink the mask from the layer contents, by clicking on its chain icon (highlighted in green)

Paste your first image into the layer, and FT to size and warp it. So long as your images don't contain straight lines, you actually don't need to warp them much. To make life easier, copy the image layer, relink the layer mask so you can move it, and place ready for image two. Unlink the mask again, and pasted in and FT image 2.
I am sure you can take it from here.


 6
Replies
6
Replies


 AdChoices