

- Home
- Photoshop ecosystem
- Discussions
- Re: swapping head from one image to another with s...
- Re: swapping head from one image to another with s...
swapping head from one image to another with same skin tone
Copy link to clipboard
Copied
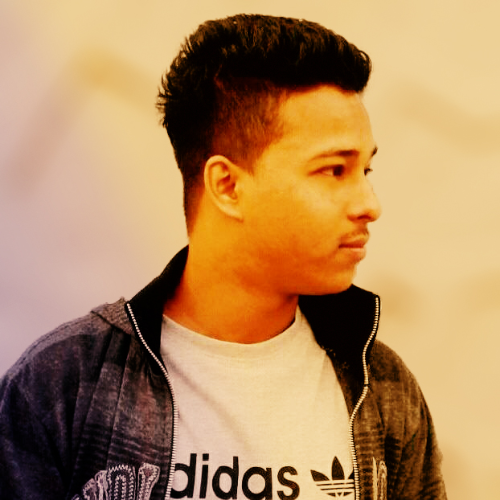
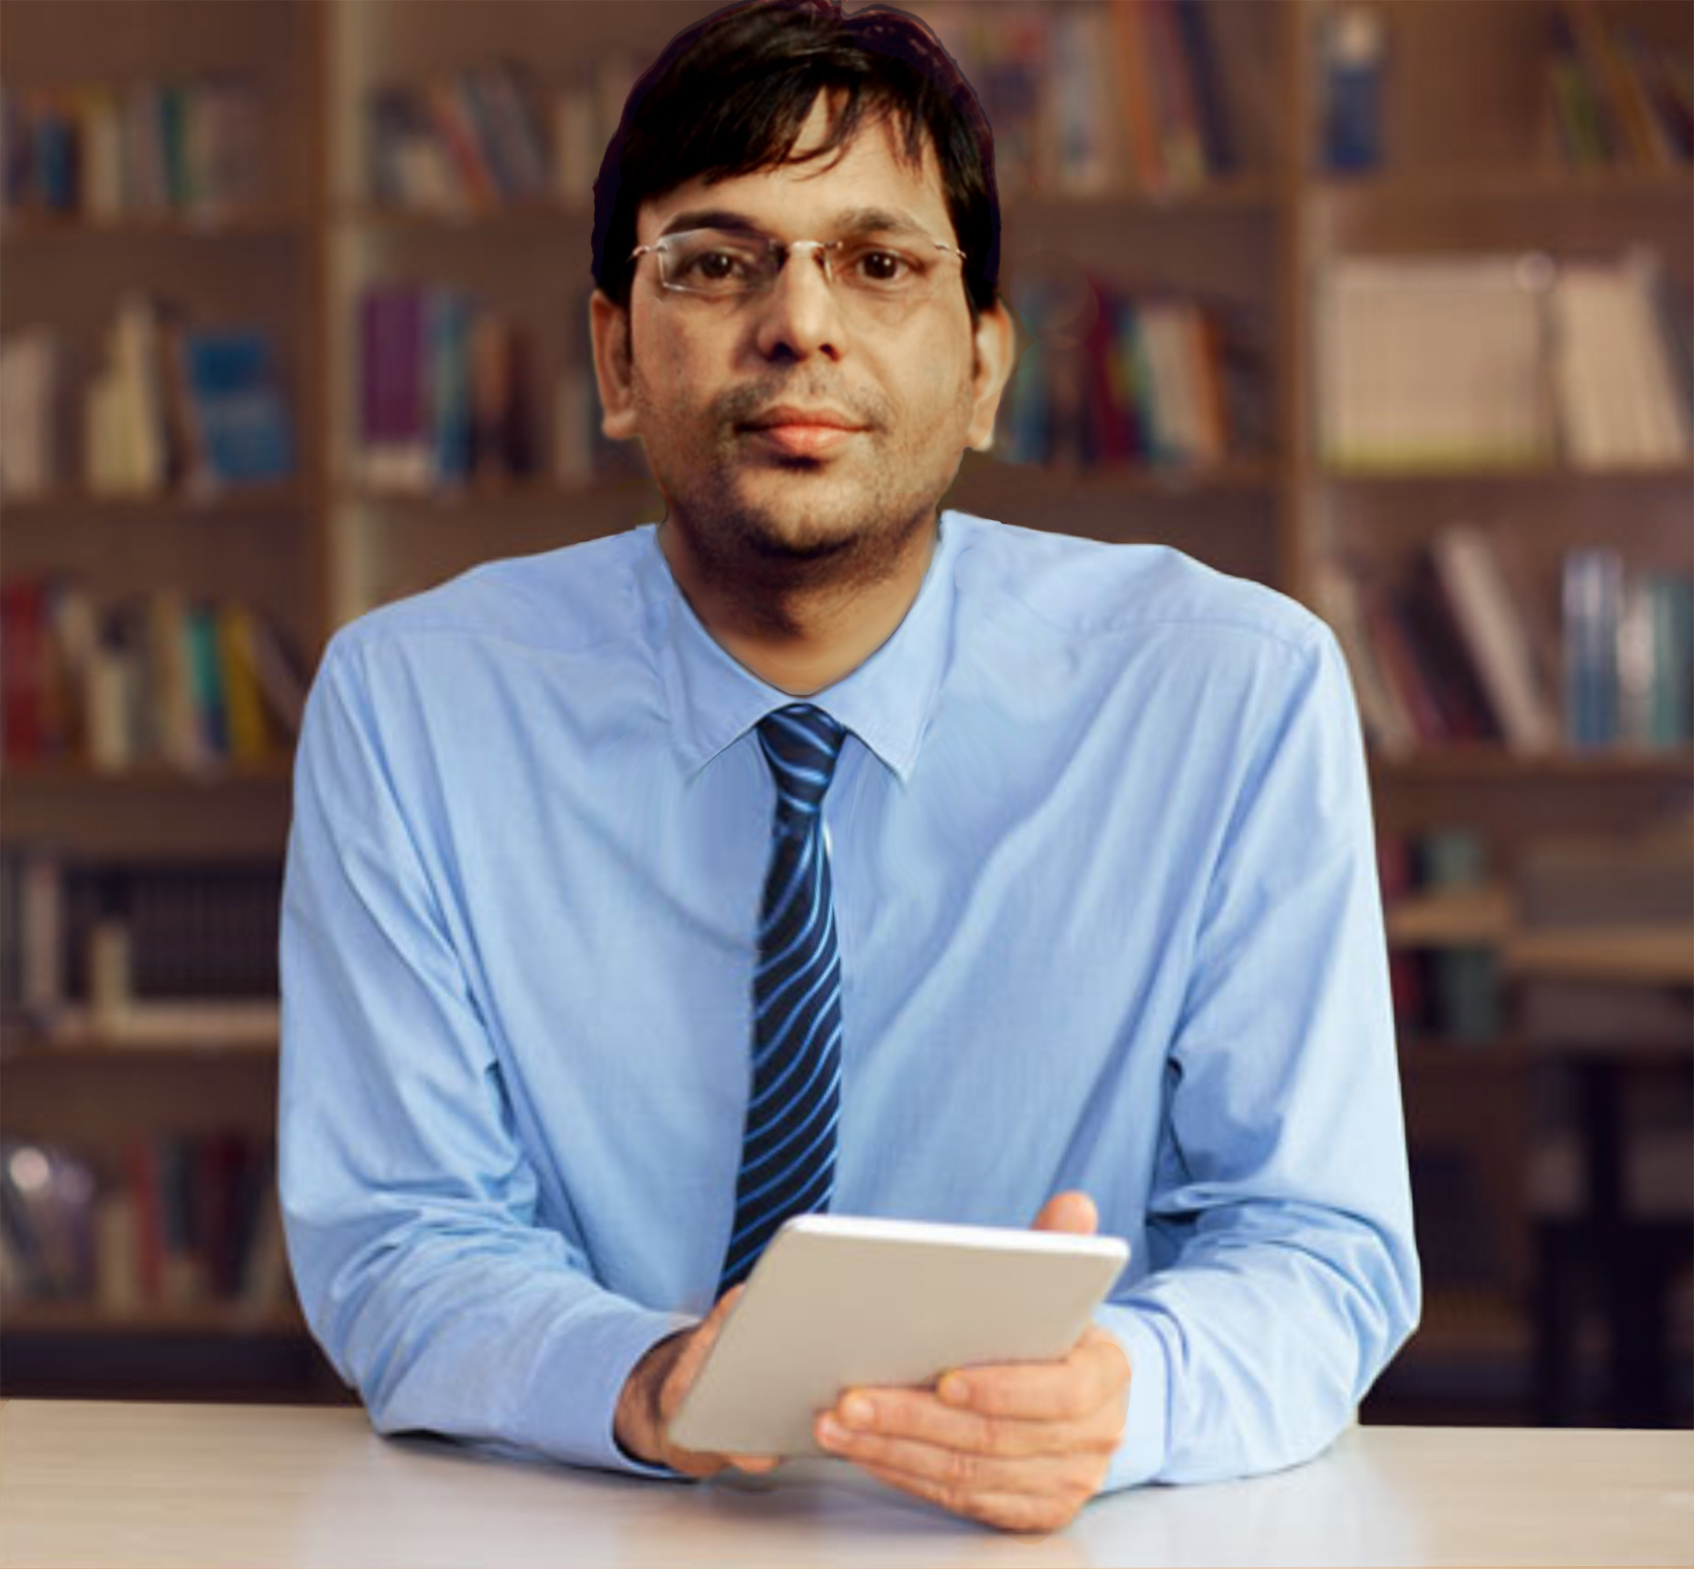
I got struck with an image can anyone help me out....i want to swap this person's head...
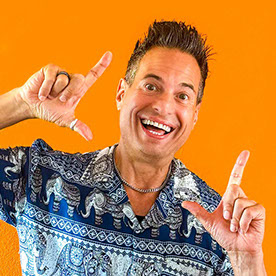
Into this person's head....along with the perfect skin tone to this image
make sure the skin tones blends and the head aligns well

Thanks,
Dan


Explore related tutorials & articles
 14
Replies
14
14
Replies
14
Copy link to clipboard
Copied
Not sure we can get the exact skin tone. But you can surely resize the head to fit on a layer with a low opacity so that you can scale to size. Then you can mask out the background and mask some of the features or the entire face. Then you can try using adjustments layers such as levels and color balance to play with the colors.
From the looks of it, you can take the top man with darker skin and mask the entire face and neck inside his shirt. Then all you will have to do darken his hands to match the face and neck. Just select his hands and apply some adjustments using levels, hue/saturation and or color balance to darken the hands of the man with the tablet.
hope that helps! This sort of stuff is fun!
Cheers,
mark
Copy link to clipboard
Copied
can show me a demo...here's mine 80% done

thanks,
Mark
Copy link to clipboard
Copied
I don't think you need a demo. Looks like you did a great job! Maybe you just need to zoom in and clean up your mask a little bit. You can use a soft brush with the airbrush checked, lower the flow, zoom in tight and use a small brush with a low flow (under 20%) and slowly clean up around the head.
Maybe scale it a tad bit more, add a levels adjustment to play with the darks and lights, maybe sharpen it a little bit....and I think you would fool everyone!
Nice work!Cheers,
mark

Copy link to clipboard
Copied
Fhere is no single combination of RGB or CMYK values in Photoshop that produces the only “correct” flesh tone. In addition, the image provided as a guide is different enough in contrast that an attempt to match channel values in order to match color will not suffice. We can, however, come up with some guidelines that may be applied when using Curves to correct what we recognize to be unnatural skin color in a digital image.
For me, skin tones are more easily and precisely adjusted in CMYK mode. In that context, satisfactory Caucasian skin tone is rendered when the yellow value of the skin is similar to the magenta – certainly within ten points -- and the cyan is one-third to one-fifth the value of the magenta. More often than not, the yellow is a bit stronger than the magenta, but it is not a hard and fast rule. For example:
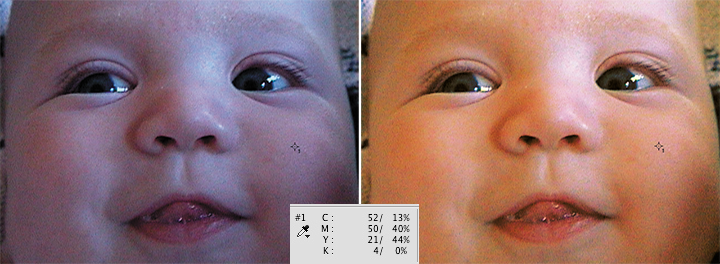
That was the guide with the OP image. Then then it was changed to RGB mode.
A. pThis Curves sample of the baby as a PNG shifted to be too warm. Easy to adjust. A point or two less M.
In addition, to add modeling to the OP image, I added a dupe layer, then Image > Apply Image > Green channel set to Normal. Then in the Layers panel the Blending Mode for this added layer was set to Luminosity. (Chose Green because its equivalent in CMYK is Magenta, the channel that usually carries the most accurate modeling.) The image was not sharpened but can use it.

Copy link to clipboard
Copied
Try this tutorial
Copy link to clipboard
Copied
i've gone through this video...
thanks
jjmack

Copy link to clipboard
Copied
What sort of information do you need?
Are you wanting to know more about how to move the head from one to the other?
Or do you want to know more about how to correct the skin tone?
Copy link to clipboard
Copied
both at the same time..
#fletch

Copy link to clipboard
Copied
https://forums.adobe.com/people/Daniel%27s+Design
Dan, this is not an easy fix. I'm not even going to show you my Layers panel, because it is an over complicated mess with five curves layers, two Hue/Sat layers, and a Vibrance layer.

But as a starting point with fixes like this, I like to try and make it easy for myself by giving myself some numbers to guide me, and that's done with the Colour Sampler tool. This takes out the guessing, as the numbers don't lie

So this has #1 and #2 matched. It's too saturated, but an overall sat decrease will fix that.
Roughly sort out the local area with the layer mask, and do the reset of the sample points.

Like I said above, it took a few layers with some of the fine tuning being to reduce the contrast in the new head, and reduce saturation behind the hair. The bottom line is that this is really not an easy fix, so kudos to anyone who can get a perfect match.
Copy link to clipboard
Copied

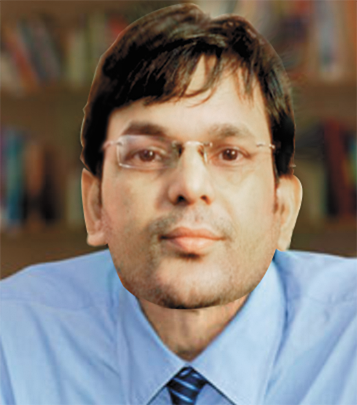
I came up with this...but i need to fix the neck area...can anyone help me out !
Thanks,
everyone
Copy link to clipboard
Copied
wow! you've tried hard for it..you know what, it took me long time to get the image done 90% of it
i didn't used much adjustment
cheers,
Trever.dennis
Copy link to clipboard
Copied
Use the origanl neck and age him

Copy link to clipboard
Copied
I don't want to age him up...his whole face will be changed with respect to the original image #jjMack
Copy link to clipboard
Copied
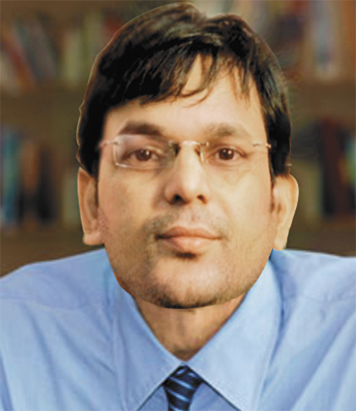
I came up with this...any helpful advice to make any correction will be appreciated & Mack you did a great job... thanks

Find more inspiration, events, and resources on the new Adobe Community
Explore Now
 AdChoices