- Home
- Photoshop ecosystem
- Discussions
- Taper Stroke Paths at Intersections
- Taper Stroke Paths at Intersections
Taper Stroke Paths at Intersections
Copy link to clipboard
Copied
I've been working on Fan-Art, T-Shirt designs, as well as practicing to start my own webcomic, and would love to find a simpler way to taper points, namely for hair, eyelashes, edges of clothing, etc, than what I've been doing. Additionally, I am struggling to get used to using a graphics tablet (probably because it doesn't have an actual display), which is why I'm not using the tablet except for sketches, and instead, create extremely complex paths to prepare and ink all of my lineart.
Does anyone know how to stroke paths and have the tips of intersecting path points (particularly those with a narrow angle), come to a hard/sharp point?
From what I'm aware, this is apparently quite the simple process when using Adobe Illustrator.
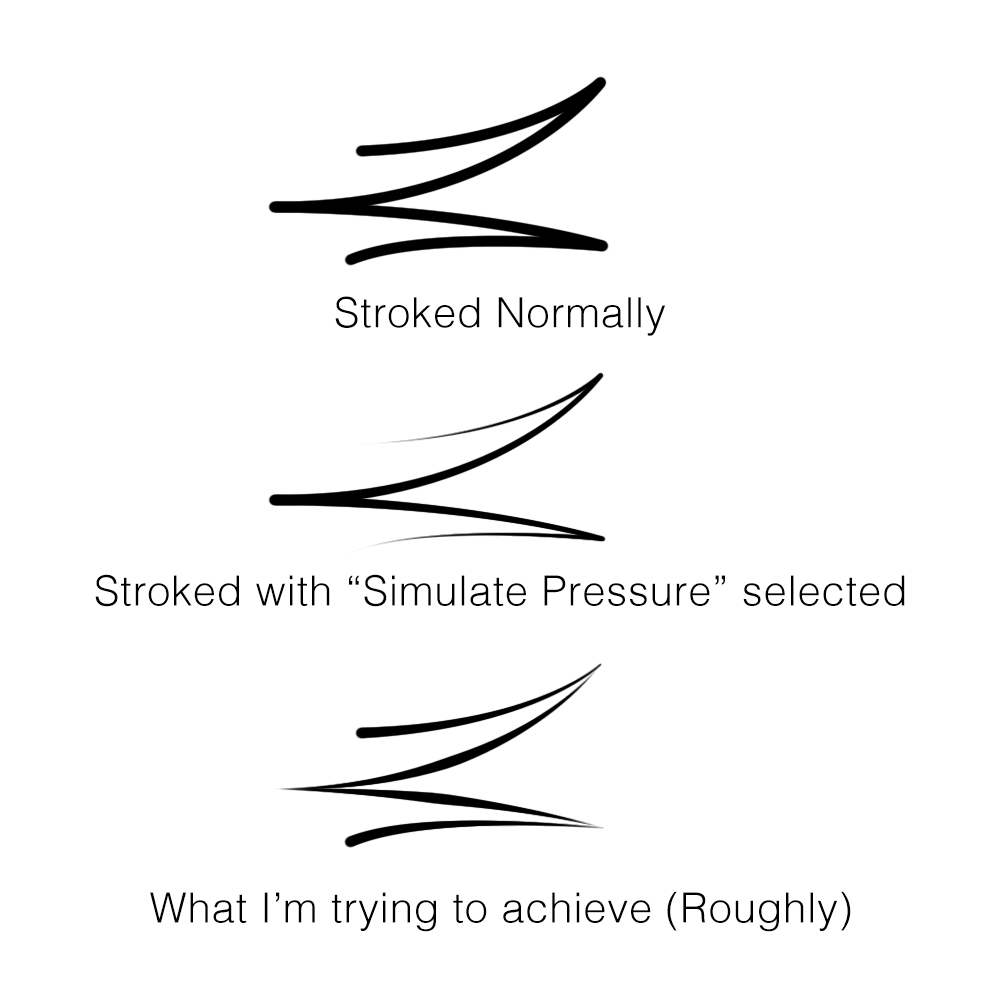
- When I stroke a path normally, without simulating pressure, or using a "fade" brush effect, I get a solid thickness across the entire path, which results in the first stroke below. My current, highly time consuming, process is to use a combination of the eraser and brush to fine tune the lines.
- When I stroke a path and simulate pressure, the lines start thin, become thick, and end thin once again, which will work for me in some circumstances (like a singular hair strand hanging between the eyes for example), but very rarely.
- The third stroke below took me about 15 minutes to properly simulate what I'm trying to achieve. I couldn't get it right with my eraser and brush method, so I had to break up the line into 4 separate segments and brush them each with differing methods of tapering. Either of these two methods would take far too much time, when attempting to push out a full color multi-frame comic page each week and the once in a blue moon 3-5 minute full color manga style music video to boot.

Before someone asks why I don't just simply use Illustrator…
My problem is that I just can't afford to subscribe to every other Adobe app under the sun that may find a use for me here and there. Unless they make it so we can have Photoshop and Illustrator for $20/mo rather than $20/mo for Illustrator on top of $10/mo for Photoshop and Lightroom (the latter's a waste of my ssd space) (Heck, I barely use photoshop often enough (work/life balance and all) to make it worth the $10/mo I put into it), I'm stuck using Photoshop only.
Frankly, I'd consider using the "all apps" subscription, but I would only find myself consistently using about 3 of them (Photoshop, Illustrator, Animate) reasonably often, with 12 of the others (minus Lightroom, Lightroom Classic, InDesign, Premiere Rush and Pro, Acrobat Pro, Audition, Media Encoder, and InCopy) being ones I may use from time to time or after establishing a business from my hobby. As such, on top of my already dire financial circumstances (too much debt, not enough income), I just couldn't afford it.
If Adobe is watching, two things could help…
- Bring back perpetual licenses. Having to pay monthly for years when I could pay the equivalent of the year subscription to keep a specific software version, and pay a fee to upgrade, is better for many of us in less stable financial circumstances.
- Allow a "Pick your own" plan, where the free apps are accessible, but the discount from the full $20/mo per app is adjusted depending on the number of paid apps being selected. E.G. all the apps would be the $52 you normally charge, selecting 7 would cost about $40, selecting 2 would be about $25. I feel more users would be willing to subscribe to more apps if they could pick and choose better.
Thank you to anyone who knows a solution to my tapering question (other than "get used to using a drawing tablet" or "get faster at your current processes" that is).
Anyone who knows a solution will be a legitimate life saver, and I'd hope to possibly meet and give thanks in person some day.
Explore related tutorials & articles
Copy link to clipboard
Copied
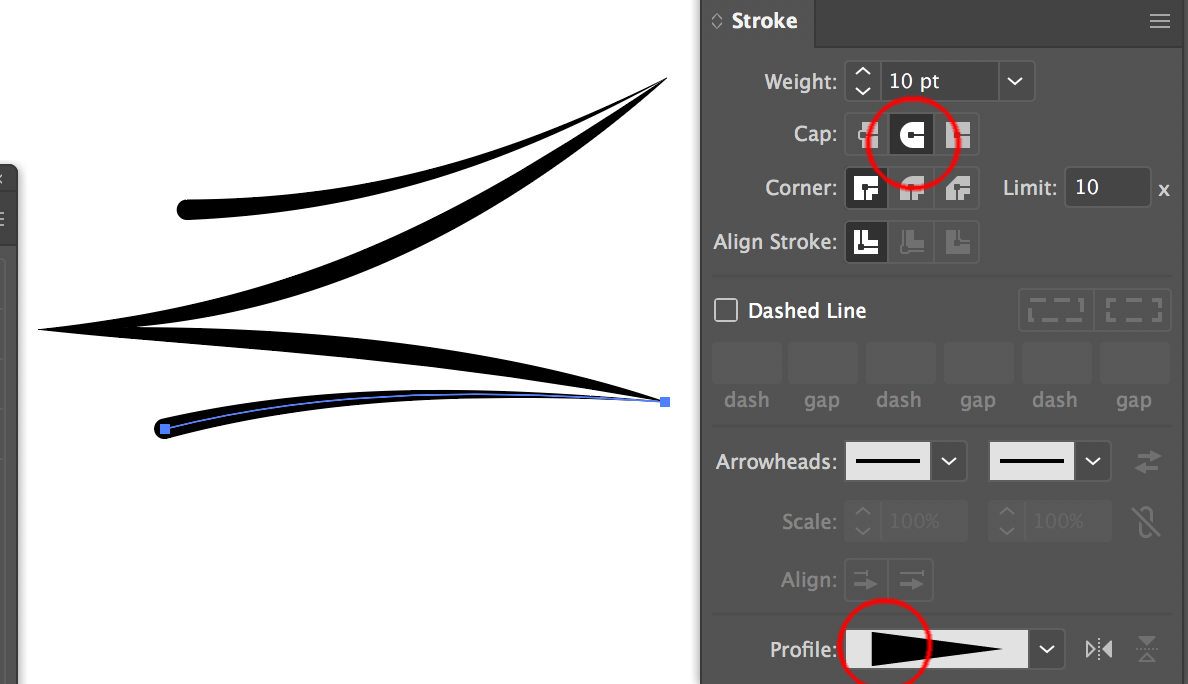
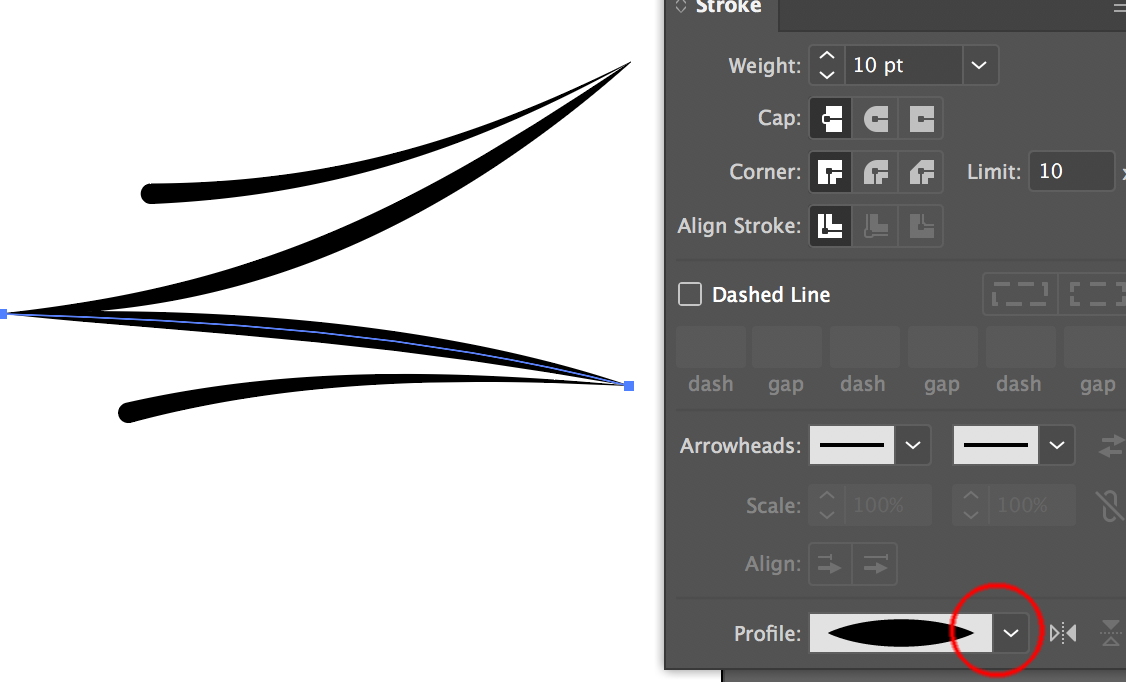
Easier to achieve in Illustrator using stroke profiles & endcaps.


Copy link to clipboard
Copied
In Photoshop, you could do this, but it wouldn't give quite the results you're after:
Start with your original path, and use the Direct Selection tool to select one sub-path (just click on that section of the Path) and copy it to the clipboard. Create a new path, and paste the clipboard into it. Do this for all the sub-paths, so you have an separate path for each, and you can stroke all of these with simulate pressure.
The gotcha, of course, is that the first and last segments will taper on both ends.
Find more inspiration, events, and resources on the new Adobe Community
Explore Now
