- Home
- Photoshop ecosystem
- Discussions
- Transforming sky from bleak to blue
- Transforming sky from bleak to blue
Transforming sky from bleak to blue
Copy link to clipboard
Copied
Hi all,
I've been using this technique to change the sky on an image:
How to QUICKLY Replace Overcast Skies in Photoshop - YouTube
It works pretty well until I have a really fine detail or element of a photo that breaks into the skyline. I can't make this look as clean as the original and thus it makes the image look obviously Photoshopped.
Does anyone have any tips of how I can smooth this out/avoid this happening?
Any help appreciated!
Thank you,
Tom
Explore related tutorials & articles
Copy link to clipboard
Copied
Much depends upon the individual image. Sometimes a channel mask is an appropriate solution, sometimes the Blend If or some other strategy works well. Please post the image here.

Copy link to clipboard
Copied
I'm not a big fan of Blend-If. It relies on the pixels you want to retain being darker than the pixels you want to mask out, and it is almost always going to lead to compromise.
An alpha channel is probably (as Norman says, it depends on the particular image) going to be a better option. This is the un-edited blue channel from the video tutorial.
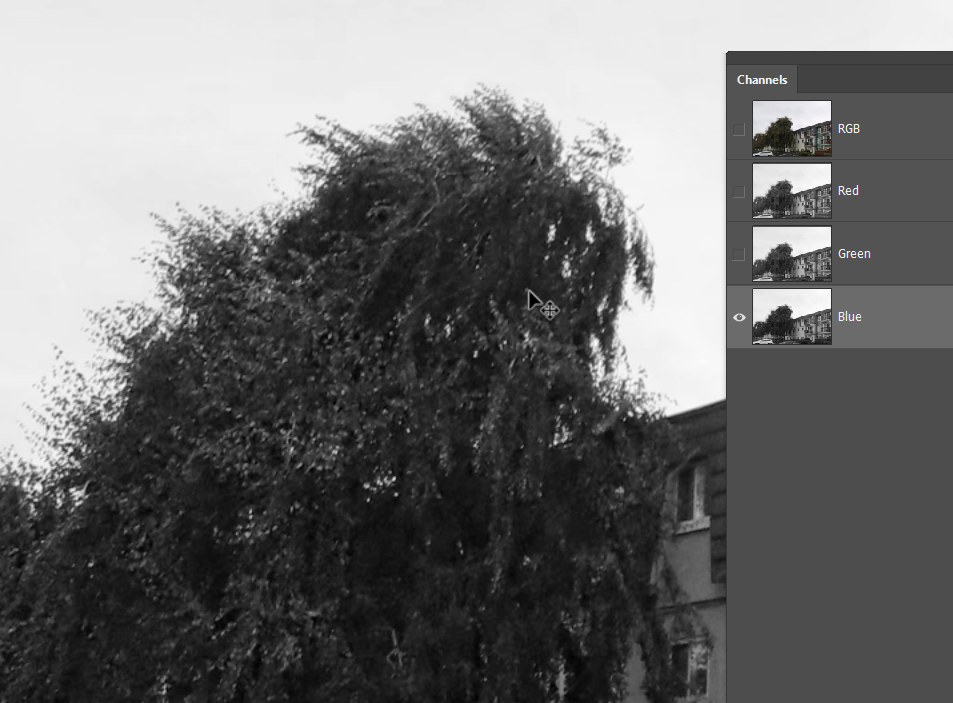
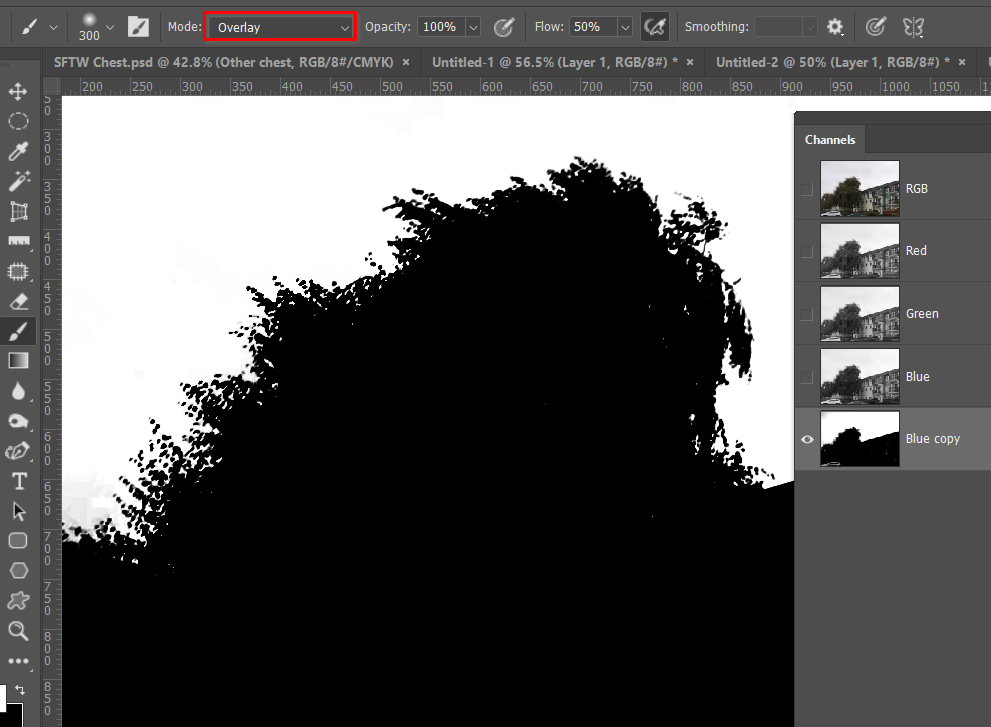
Wee copy the blue channel, and apply a levels adjustment taking care with the white slider to retain as much of the leaf detail as we can, while making the background near to white.

We then use the paint brush set to Overlay in the Options Bar, and paint with black to reinforce the blacks, and white to bring the light grey to full white
If we need to tidy it up, we select around any grey objects and fill with black
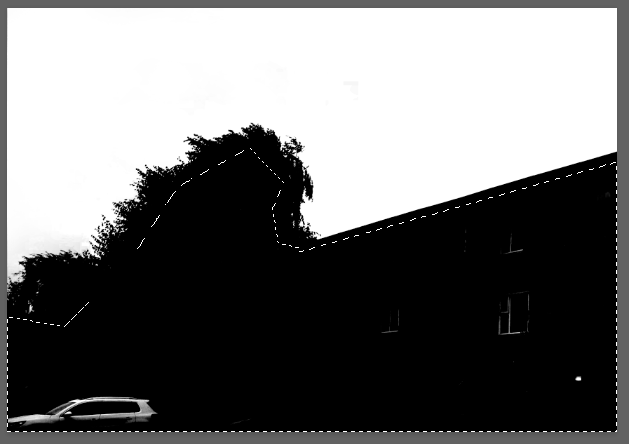
That gives us our alpha mask. The easiest way to use it is to Ctrl click it in the Channels panel, which loads it as a selection. In this case I had to invert that selection, and use it to copy the foreground to another layer. In my opinion it is usually best to take this approach, as we can place the new sky behind the copy ensuring no issues with anti-alias. We are sure that the foreground overlaps the new sky.
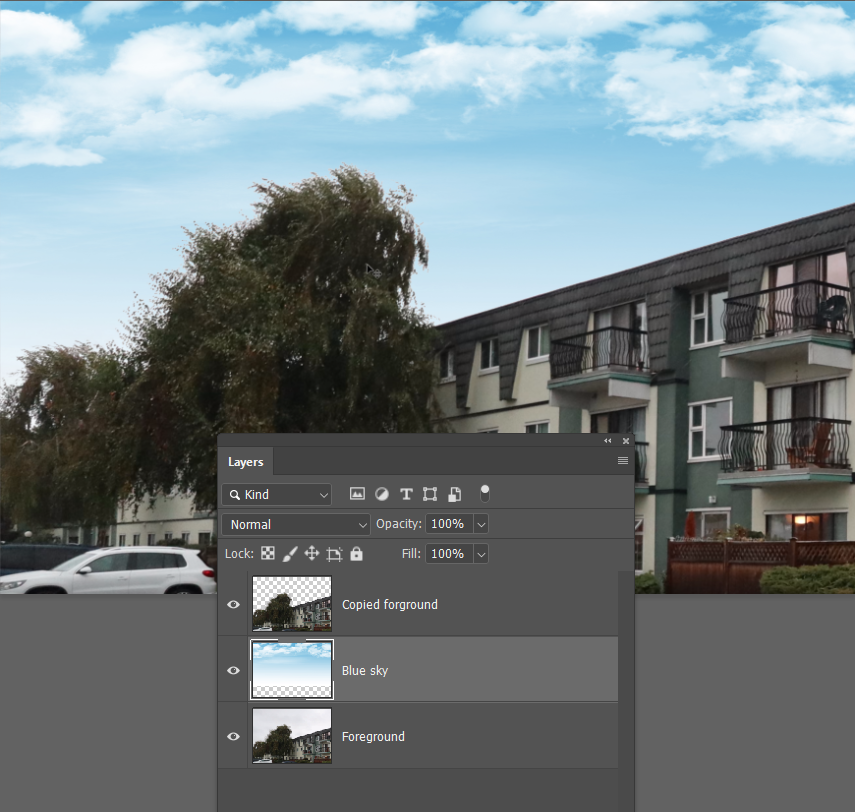
Note we have to be careful not to chose a sky with dark tones, as it would reveal a lighter toned halo effect on the edge of the leaves.
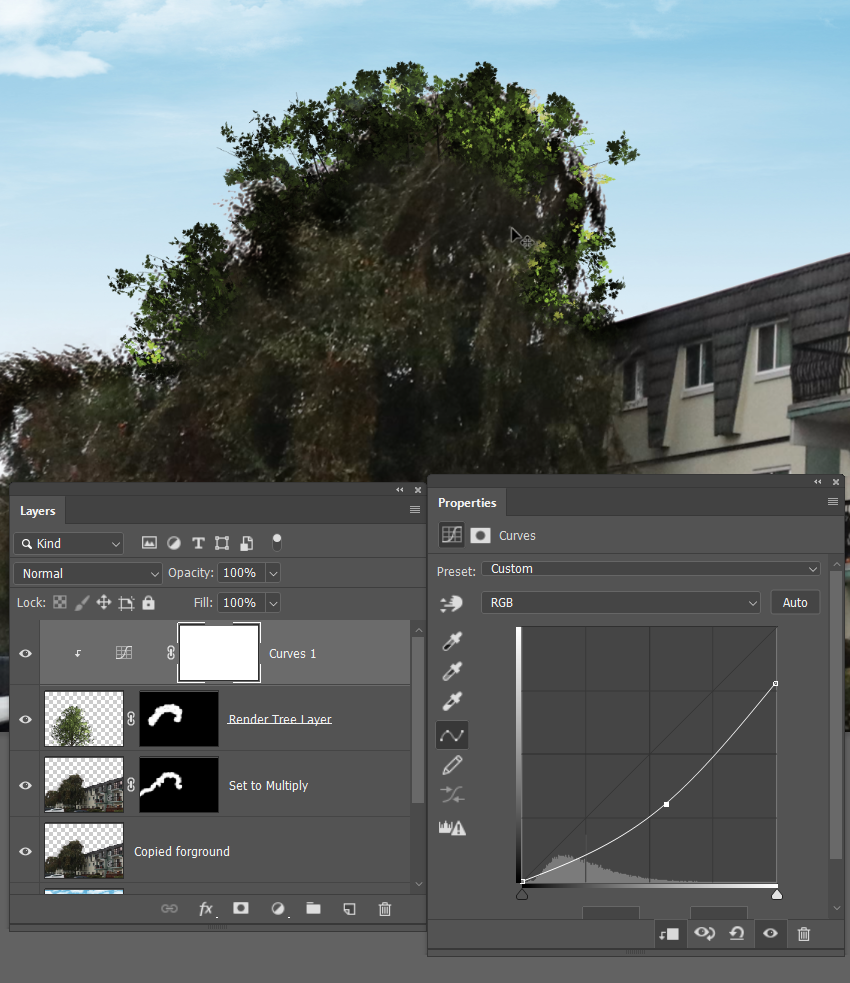
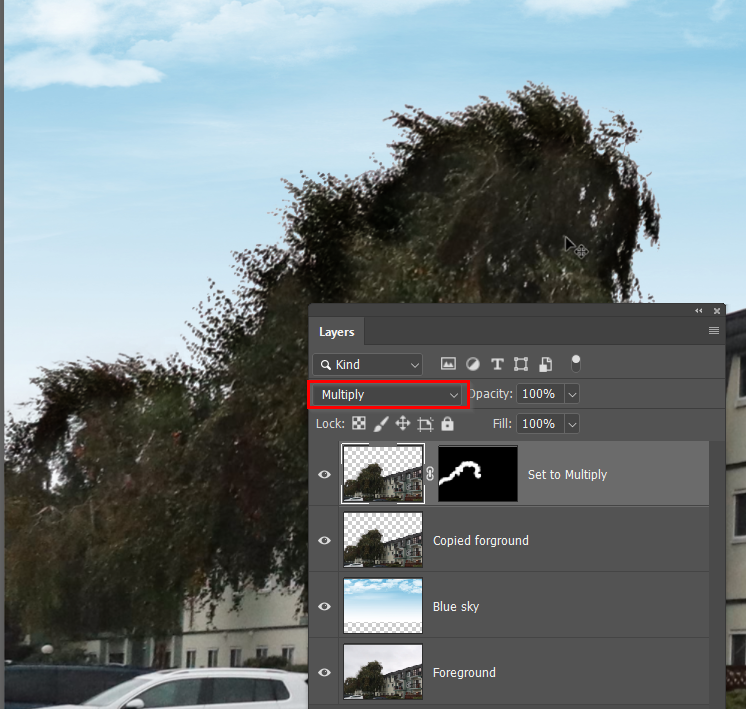
We can further control this by copying the foreground again, and setting it to Multiply. Then masking in the edge of the leaves.
You can take this a step further by adding some new leafy branches. You could look for a suitable brush, but I just use Filter > Render Tree. Goodness knows what those trees are, but Ash looks like it will do the job. We are only going to use some of the periphery remember.
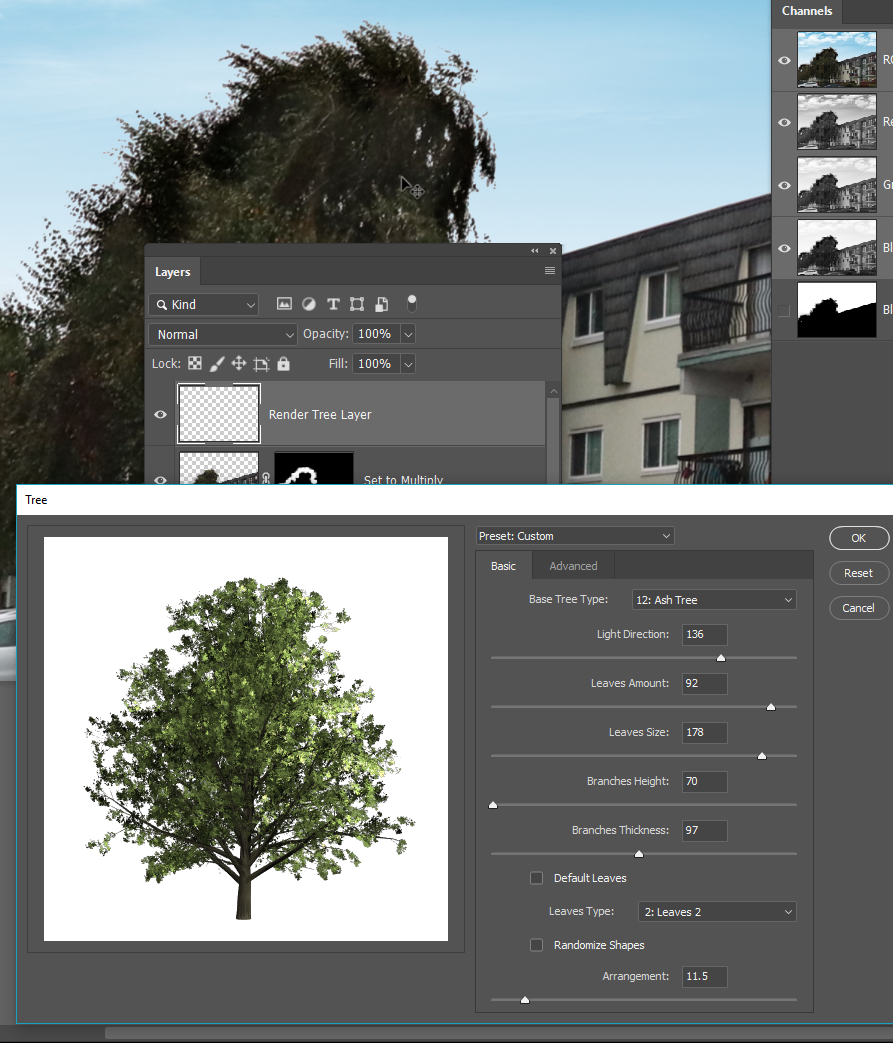
Placing the new tree behind the copied foreground reveals those lighter tones I mentioned.
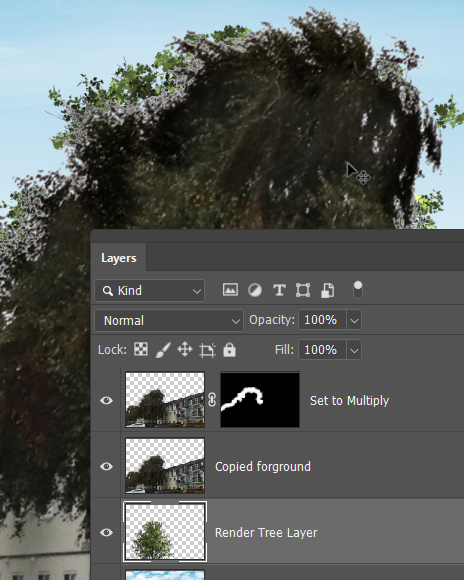
So I have moved it to the top of the stack, and masked in the outer extremities of the new tree.
It was too light, so a clipped Curves layer has brought into line with the background.
Just look at that lovely detail. It is so much nicer than the thin wispy leaves left by the alpha mask, and orders of magnitude nicer than what Blend-If would give you.
