• Global community
    • Language:
      • Deutsch
      • English
      • Español
      • Français
      • Português
  • 日本語コミュニティ
    Dedicated community for Japanese speakers
  • 한국 커뮤니티
    Dedicated community for Korean speakers
Exit
1

Trying to flatten image while retaining overlay effect.

Community Beginner ,
Jun 12, 2020 Jun 12, 2020

Copy link to clipboard

Copied

I am trying to overlay colour onto a black and white image on Photoshop. When I try to flatten the image all the colour disappears. Can anyone please advise how I can fix this issue?  Attached are some pictures to explain further. 

Screenshot 2020-06-12 at 17.01.40.png

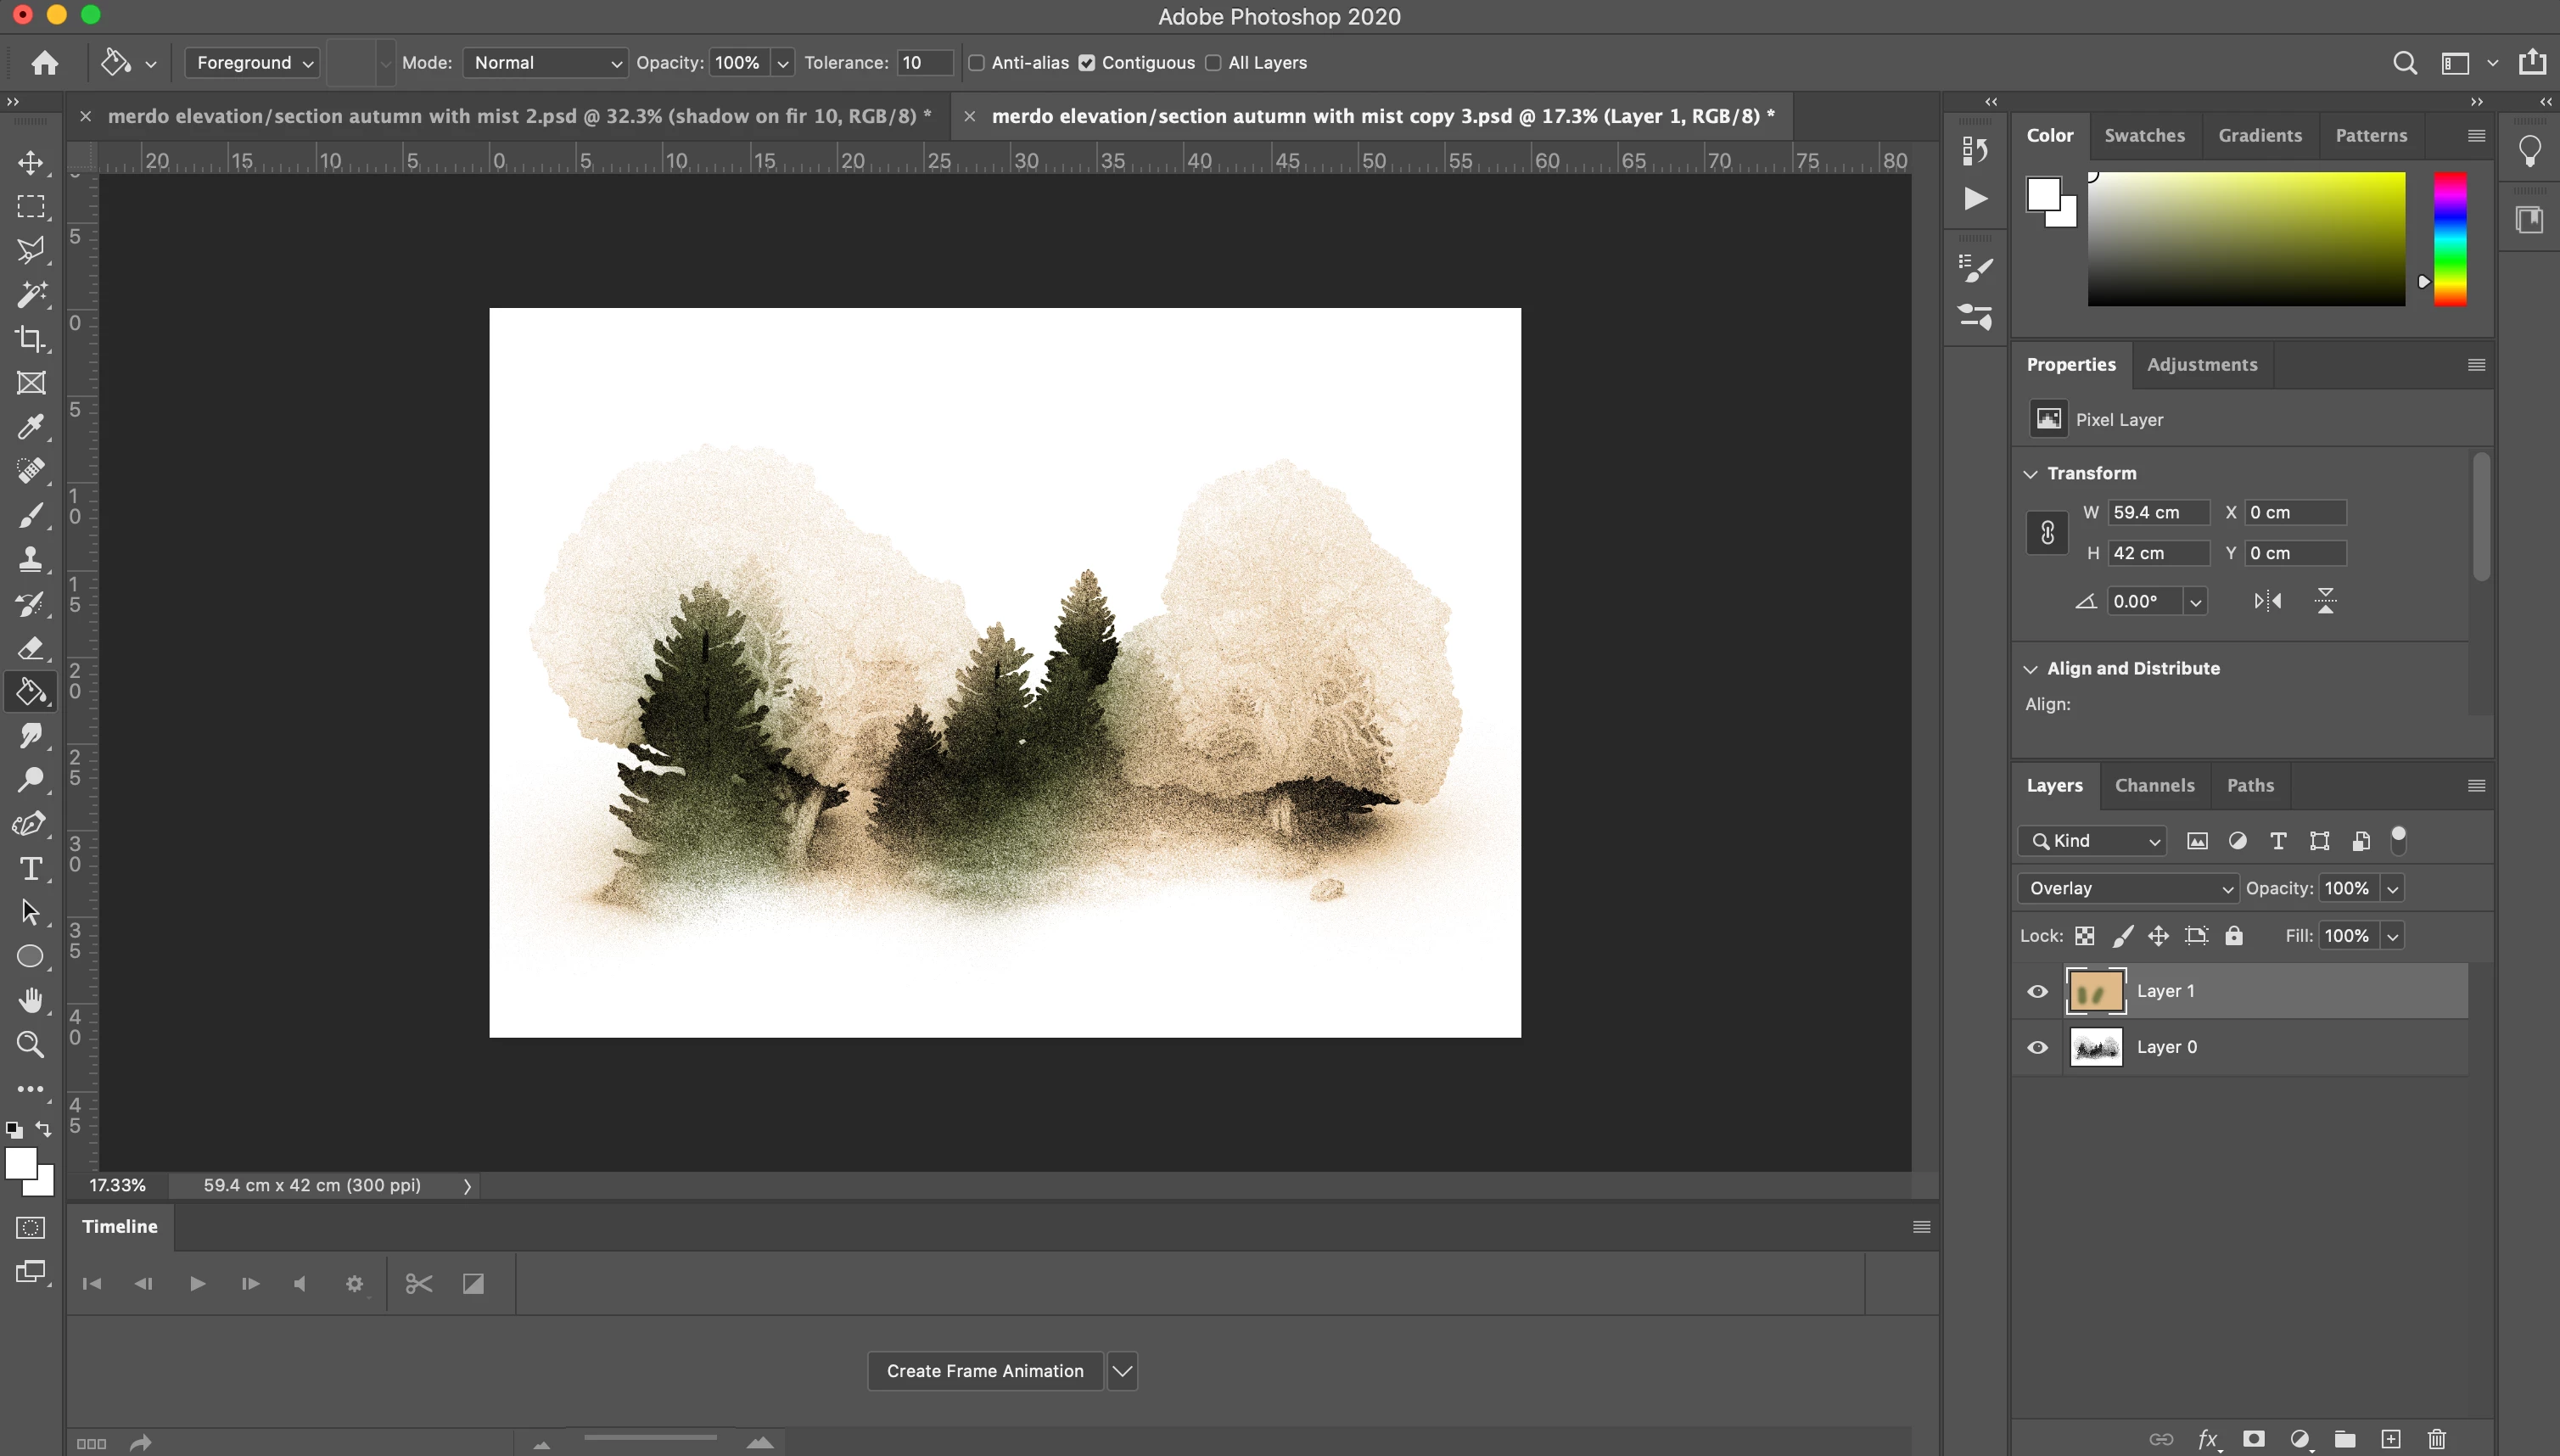
this is before flattening and how I want the image to look when flattened  


Screenshot 2020-06-12 at 17.01.56.png

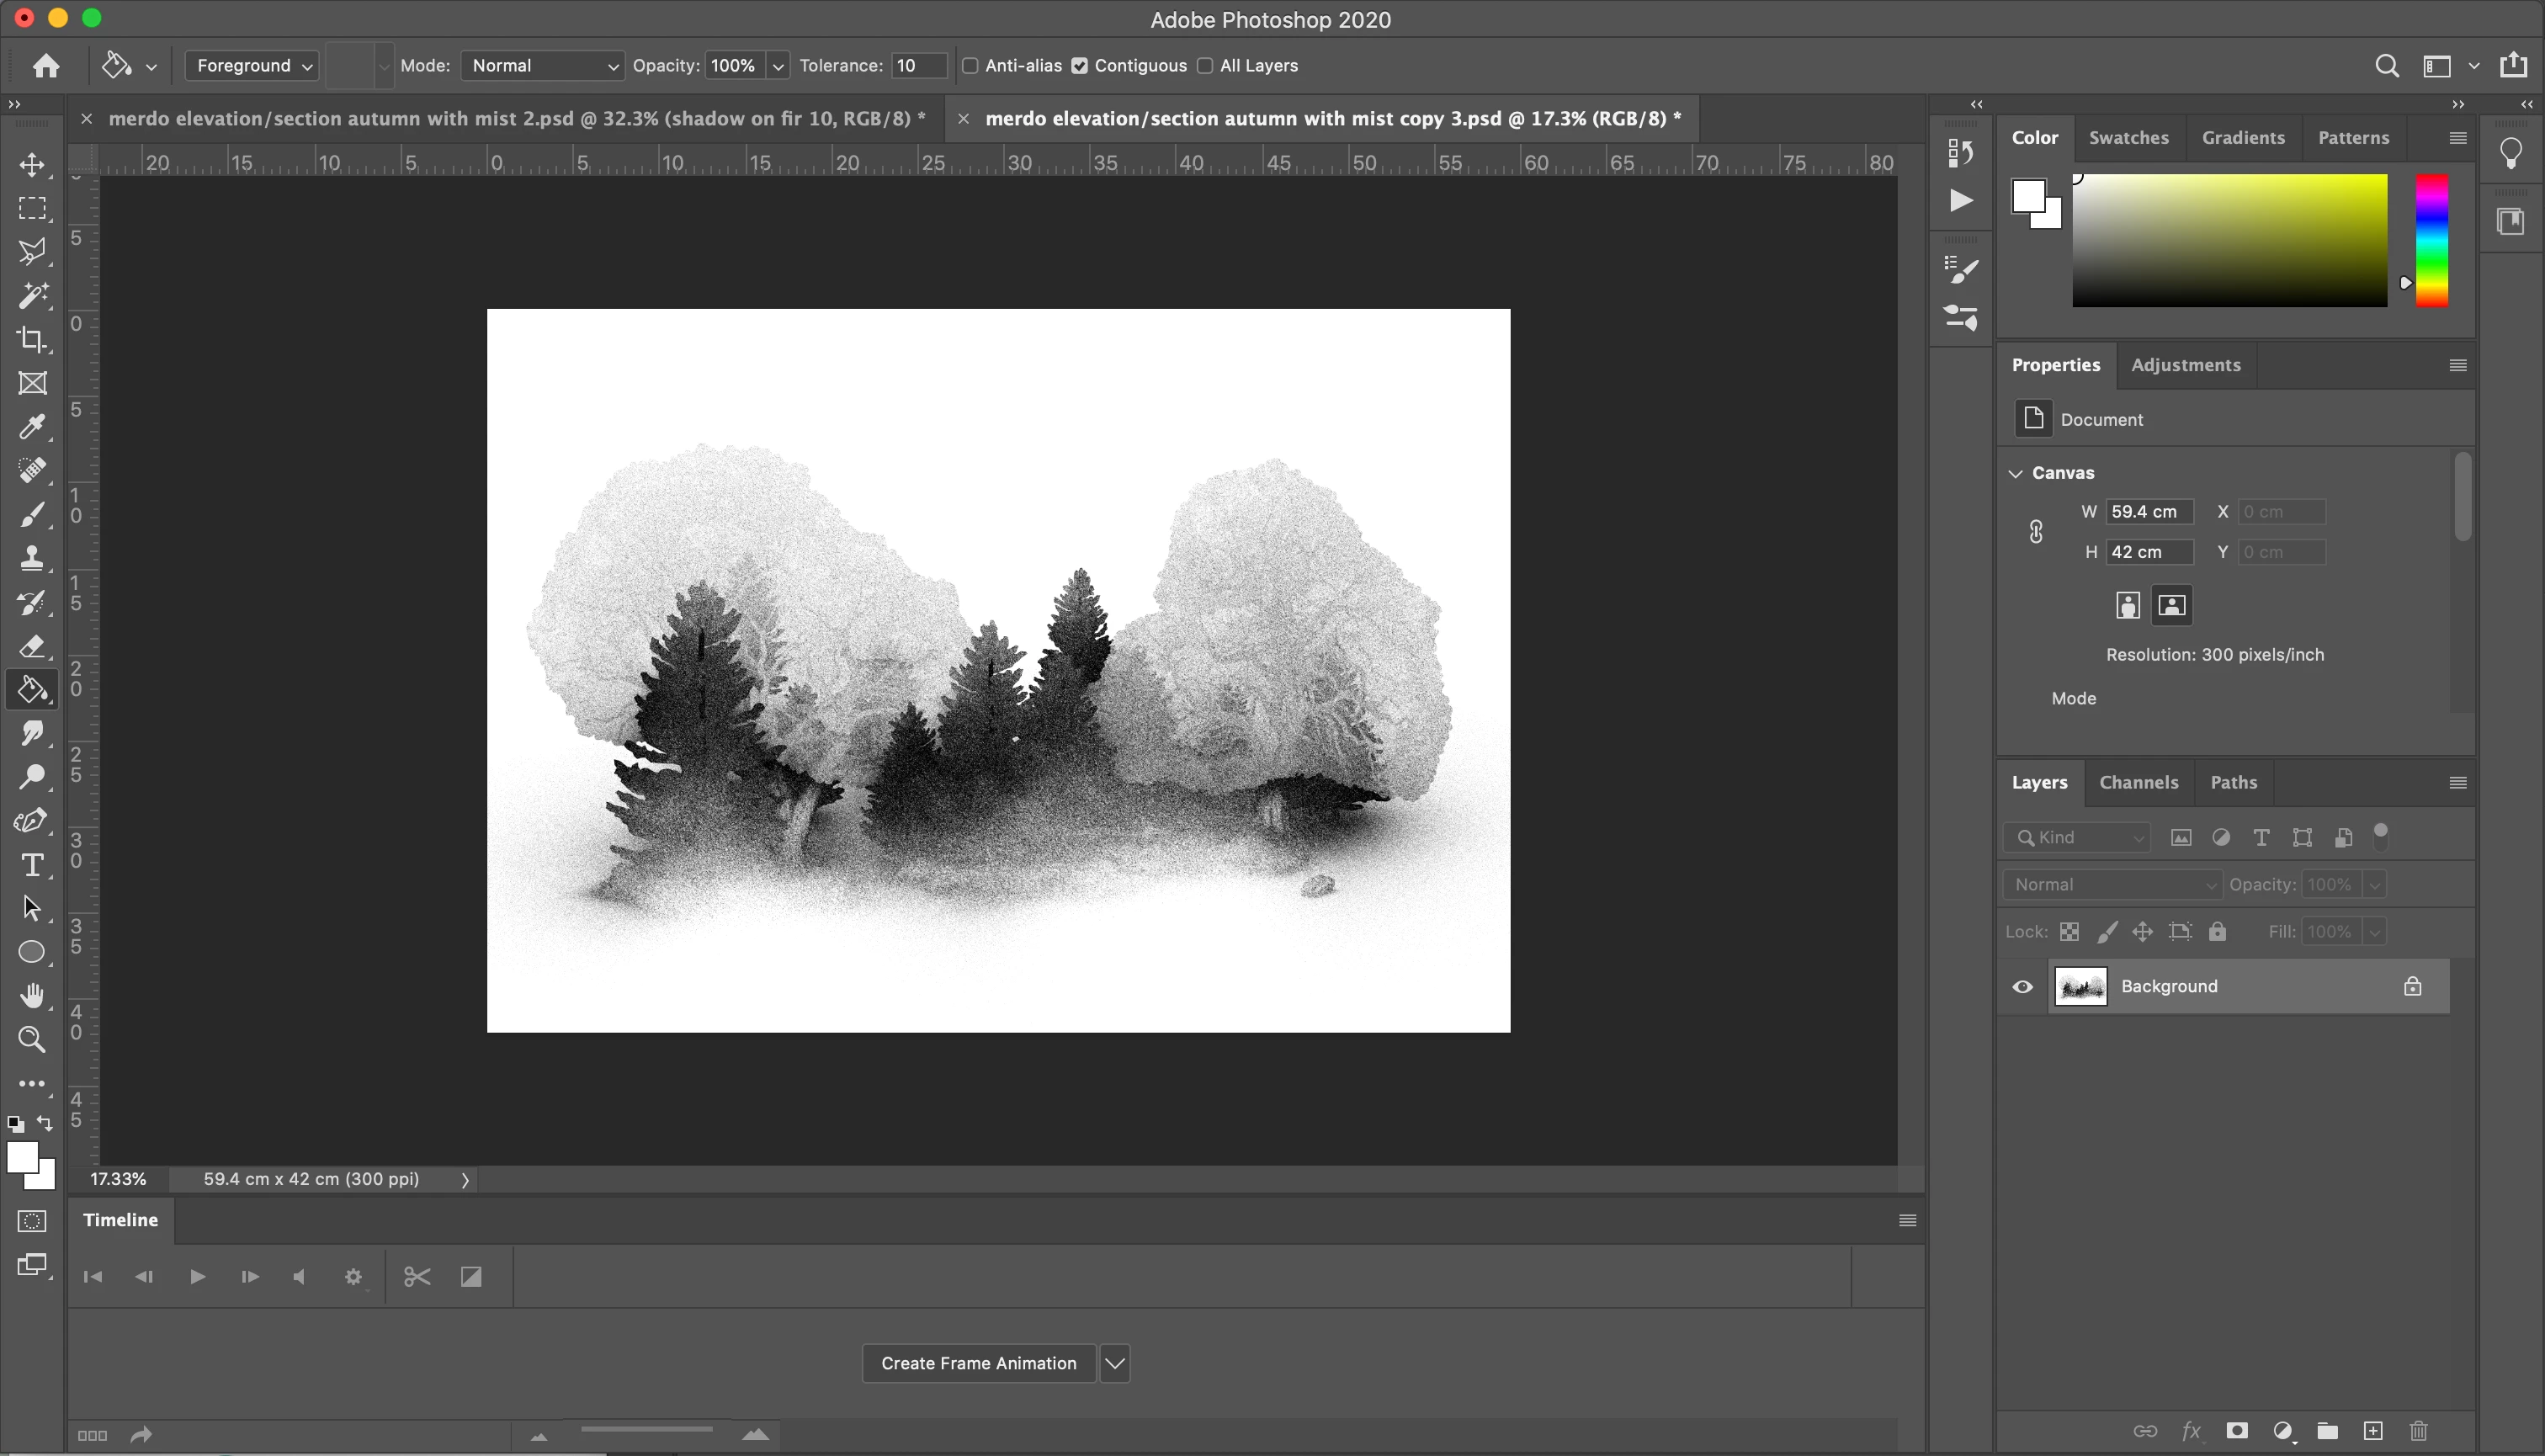
 and this is after flattening where all the colour disappears which I don't want to happen. 


Any help would be greatly appreciated


many thanks

James

Views

1.0K

Translate

Translate

Report

Report
Community guidelines
Be kind and respectful, give credit to the original source of content, and search for duplicates before posting. Learn more
community guidelines

correct answers 1 Correct answer

Community Expert , Jun 12, 2020 Jun 12, 2020

You must view the before and after at 100%.


Your image looks like it is made of fine "noise" i.e. dots of black and white. Overlaying on black or white results in black /white.

The issue you are seeing is that when zoomed out, the preview is formed by combining those individual black and white dots  to form a grey shaded pixel. Overlaying on that grey colour is giving a coloured image.  So on an image like that always check your layered colouring at 100% zoom, where the full image data is used

...

Votes

Translate

Translate
Adobe
Community Expert ,
Jun 12, 2020 Jun 12, 2020

Copy link to clipboard

Copied

You must view the before and after at 100%.


Your image looks like it is made of fine "noise" i.e. dots of black and white. Overlaying on black or white results in black /white.

The issue you are seeing is that when zoomed out, the preview is formed by combining those individual black and white dots  to form a grey shaded pixel. Overlaying on that grey colour is giving a coloured image.  So on an image like that always check your layered colouring at 100% zoom, where the full image data is used to blend the preview.


When flattening all image pixel data is used , so it will match what happens at 100% zoom.


Dave


Votes

Translate

Translate

Report

Report
Community guidelines
Be kind and respectful, give credit to the original source of content, and search for duplicates before posting. Learn more
community guidelines
Community Beginner ,
Jun 20, 2020 Jun 20, 2020

Copy link to clipboard

Copied

thank you very much, you have been a great help! 


James

Votes

Translate

Translate

Report

Report
Community guidelines
Be kind and respectful, give credit to the original source of content, and search for duplicates before posting. Learn more
community guidelines
New Here ,
Aug 31, 2021 Aug 31, 2021

Copy link to clipboard

Copied

Hi,


I wonder if this is the same issue as I have just had happen?:

PS 2021 on a Macbook Pro. Repairing a scanned-in photograph, which was faded b/w. Yesterday In Curves I gave it more contrast and a blend of magenta and yellow. Repairing by using clone tool. Zooming in and out fine. Today, if I zoom in to continue cloning to remove large scratch the colour disappears and becomes b/w, except for one small pasted layer of background, which retains its colour.

If I try cloning an area the clone tool leaves an outline of the brush in the colour I blended.

What can I do? If I zoom out the colour returns, but the magnification is not great enough to work to remove the scratch.


Votes

Translate

Translate

Report

Report
Community guidelines
Be kind and respectful, give credit to the original source of content, and search for duplicates before posting. Learn more
community guidelines
Community Expert ,
Aug 31, 2021 Aug 31, 2021

Copy link to clipboard

Copied

It's possible that it is the same issue but it may be something else.The 100% zoom view is always the correct view.


Can you show your layers panel and indicate on what layer you are cloning. Also the options bar for the clone tool


Dave

Votes

Translate

Translate

Report

Report
Community guidelines
Be kind and respectful, give credit to the original source of content, and search for duplicates before posting. Learn more
community guidelines
New Here ,
Aug 31, 2021 Aug 31, 2021

Copy link to clipboard

Copied

Hi Dave,

Thanks so much for responding. To add a bit more info to my earlier post:

I am zooming in on an A2 image at 300ppi in CMYK as it is destined for a print. To fit on the workspace it's at 25%, and if I zoom in it's fine up to 66.7%, when the colour changes back to greyscale. If I drag the window to enlarge it the colour returns until I release the window. It made no difference changing to RGB.

I subsequently tried reducing the image to A3 at 300ppi and found I could zoom in indefinitely and still retain the colour, so carried on working at that size. 

I'm using the clone tool in normal mode at full opacity. Layer 'Montage 1' is the layer I was working in with the clone tool; that's the layer I tweaked in 'Curves'.

I look forward to hearing your take on this, Dave.


felicity5FF2_0-1630417260101.png


Votes

Translate

Translate

Report

Report
Community guidelines
Be kind and respectful, give credit to the original source of content, and search for duplicates before posting. Learn more
community guidelines
Community Expert ,
Aug 31, 2021 Aug 31, 2021

Copy link to clipboard

Copied

Hi

At 66.7% zoom, the preview switches from 8 bit to 16 bit (even in a 16 bit document). That can also impact the look. I suspect what is happening with your document is that it is noisy and made of individual black and white dots.

When zoomed out those fine dots are averaged and then the layer blending applied (at 8 bits per channel if zoomed out to less than 66.7%)  When zoomed in to 100%, the layer blending is applied to each individual image pixel and at full bit depth. On some images, particularly those with fine noise/dots, this can make the blend look very different. It is the 100% zoom view that is correct.


Incidentally, you mention working in CMYK. Unless your image is destined to be printed on a printing press and you know which particular CMYK profile is correct for that press, then work in RGB. Desktop printers expect an RGB input.


Dave

Votes

Translate

Translate

Report

Report
Community guidelines
Be kind and respectful, give credit to the original source of content, and search for duplicates before posting. Learn more
community guidelines
New Here ,
Sep 01, 2021 Sep 01, 2021

Copy link to clipboard

Copied

LATEST

Hi Dave,

Thanks for that. It's not something I've encountered before - even using physically large sized images and zooming, but then I don't usually work with photos.

It is destined for a press so I'll stick with CMYK, but thanks for the advice.


I'm very grateful for your help - and for you evident wide knowledge!

Best,

Flick


Votes

Translate

Translate

Report

Report
Community guidelines
Be kind and respectful, give credit to the original source of content, and search for duplicates before posting. Learn more
community guidelines
Community Expert ,
Jun 12, 2020 Jun 12, 2020

Copy link to clipboard

Copied

Make sure you're in RBG color mode.

Votes

Translate

Translate

Report

Report
Community guidelines
Be kind and respectful, give credit to the original source of content, and search for duplicates before posting. Learn more
community guidelines
Community Beginner ,
Jun 20, 2020 Jun 20, 2020

Copy link to clipboard

Copied

thanks a lot!


James

Votes

Translate

Translate

Report

Report
Community guidelines
Be kind and respectful, give credit to the original source of content, and search for duplicates before posting. Learn more
community guidelines