KCP44
Participant
December 6, 2018
Answered

USING ADOBE STOCK CLIPART IN PS

  • December 6, 2018
  • 3 replies
  • 2689 views

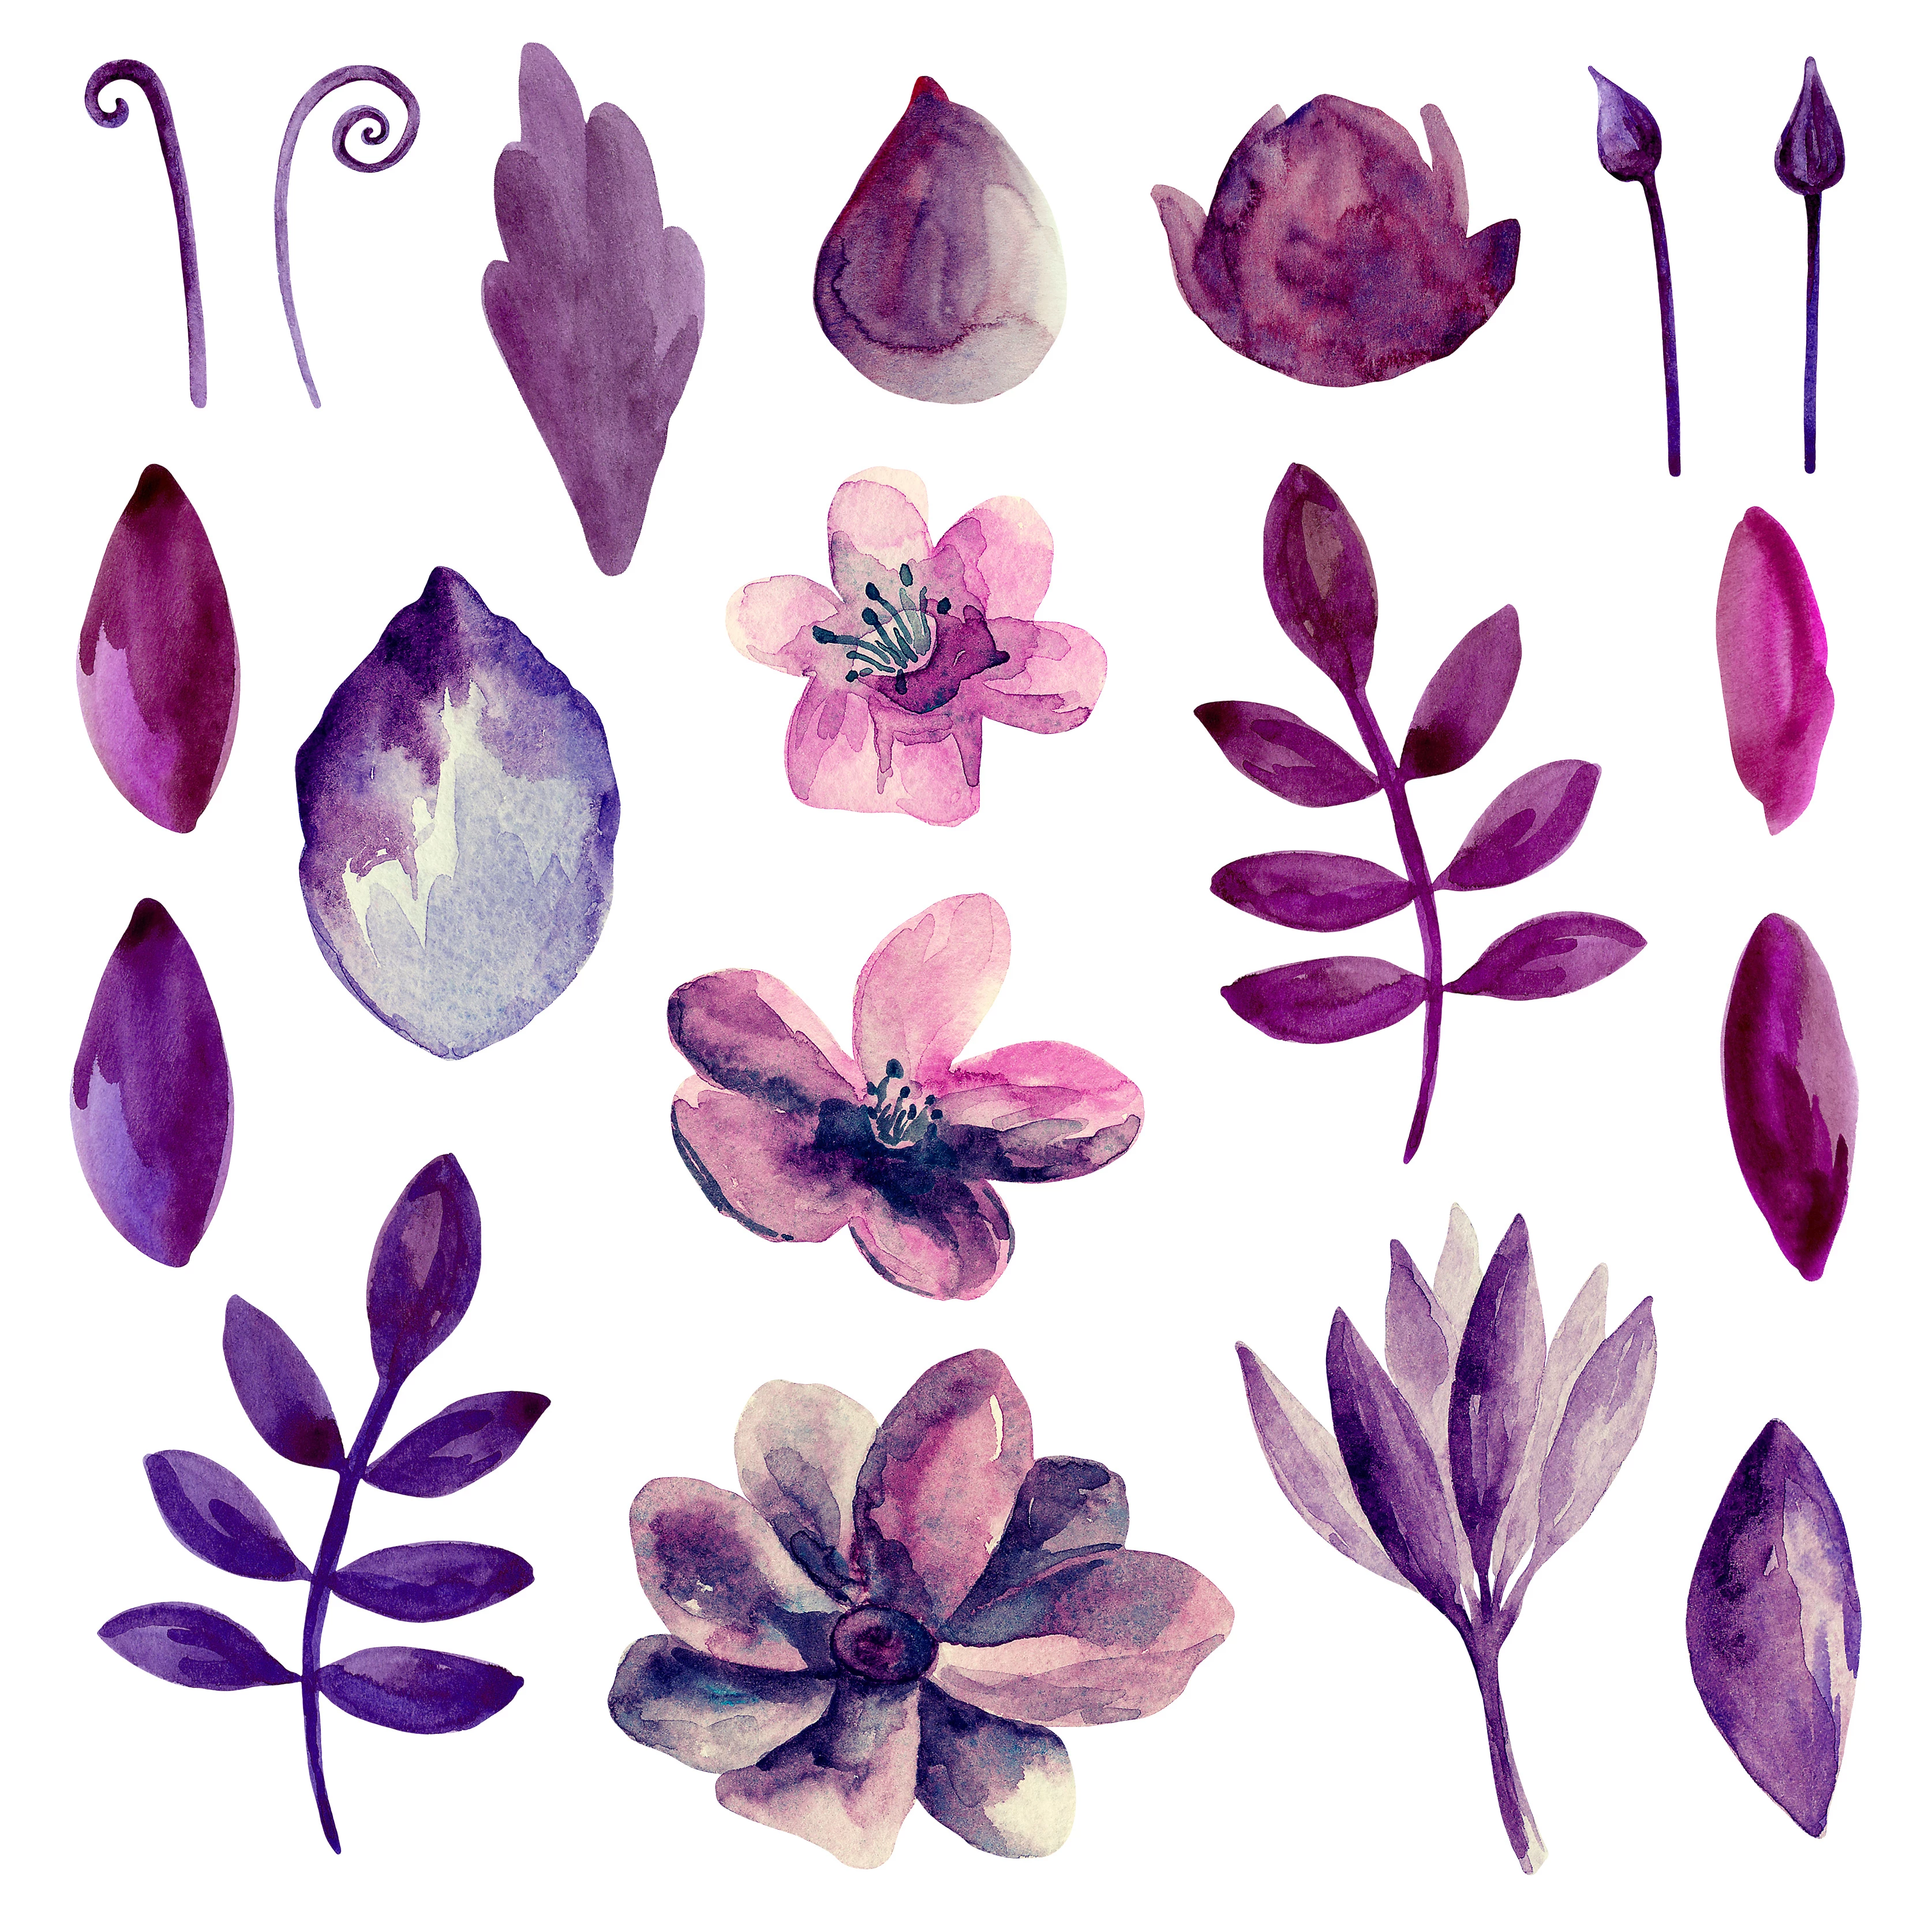
I'm a very novice PS user...so I appreciate any help.  I licensed some art through the creative cloud, different files of watercolor flowers. Some of the files have multiple art...for example a file/image might have ten different kinds or colors of flowers in one file. The end project I am trying to create is a pattern file in PS that I can use as a repeating pattern for wallpaper.  I've done many times in the past, but am lost as to how to take one of the flowers, not all ten, for example, and use that in my patter.

In this file, if I want to use the purple petal in the very right, bottom corner...how do I do that?  How do I turn this file into 20 different files/images/symbols that I can then insert onto a background in PS...so I can easily move them around and resize, etc to great a pattern. Thank you for any help.  -Korey

This topic has been closed for replies.
Correct answer Bojan Živković11378569

In which format you have file? If you have file as JPG file then select icon using any selection method that you know (including the Pen Tool to trace vector outline) then press Ctrl / Cmd + J to duplicate selection on new layer or create vector mask (if you have vector path outline).

The next step will be to drag/save item into some library in Window > Libraries panel so you can quickly and instantly access it (I am assuming that you are using latest or recent version of Photoshop)

Otherwise if you have vector format then open it in Illustrator (if you have it installed) and drag item into Libraries panel. Libraries are available in multiple programs so you can easily access saved items.

3 replies

Catherine M24311203etv6
Participant
May 4, 2022

I have no file with those letters now what do I do

Warren Heaton
Community Expert
Community Expert
December 6, 2018
  1. Open AdobeStock_192595685.jpeg in Photoshop.
  2. In the Layers Panel, double-click on the Background to open the New Layer dialog box.
  3. In the New Layer dialog box, click OK.  The default Layer Name will be “Layer 0”.
  4. In the Tools Panel, select the Magic Eraser Tool.
  5. Before using the Magic Eraser Tool, look at the Options at the top of the document (Window > Options if not showing) and set as follows:
    1. Tolerance: 32
    2. Anti-alias = Enabled
    3. Contiguous = Disabled
    4. Sample All Layer = Disabled
    5. Opacity: 100%
  6. In the document, click anywhere in the white area of the document with the Magic Eraser Tool to erase the white.
  7. In the Tools Panel, select the Lasso Tool.
  8. In the document, make a freehand selection around the flower that you want to isolate on its own layer (click and drag anywhere in the area that was made transparent with the Magic Eraser Tool and draw around the leaf).
  9. Choose Layer > New > Layer via Copy to copy the leaf inside the freehand selection to its own layer. The default Layer Name will be “Layer 1”.
  10. In the Layer Panel, double-click on the Layer Name to give it a more descriptive name.
  11. To isolate other leaves, target Layer 0 and repeat steps 8, 9 and 10.

At some point after creating the layers, save AdobeStock_192595685 as a PSD file.

Bojan Živković11378569
Community Expert
Community Expert
December 6, 2018

In which format you have file? If you have file as JPG file then select icon using any selection method that you know (including the Pen Tool to trace vector outline) then press Ctrl / Cmd + J to duplicate selection on new layer or create vector mask (if you have vector path outline).

The next step will be to drag/save item into some library in Window > Libraries panel so you can quickly and instantly access it (I am assuming that you are using latest or recent version of Photoshop)

Otherwise if you have vector format then open it in Illustrator (if you have it installed) and drag item into Libraries panel. Libraries are available in multiple programs so you can easily access saved items.