Exit
  • Global community
    • Language:
      • Deutsch
      • English
      • Español
      • Français
      • Português
  • 日本語コミュニティ
  • 한국 커뮤니티
0

Vector Smart Objects

Explorer ,
May 22, 2018 May 22, 2018

Hi there,

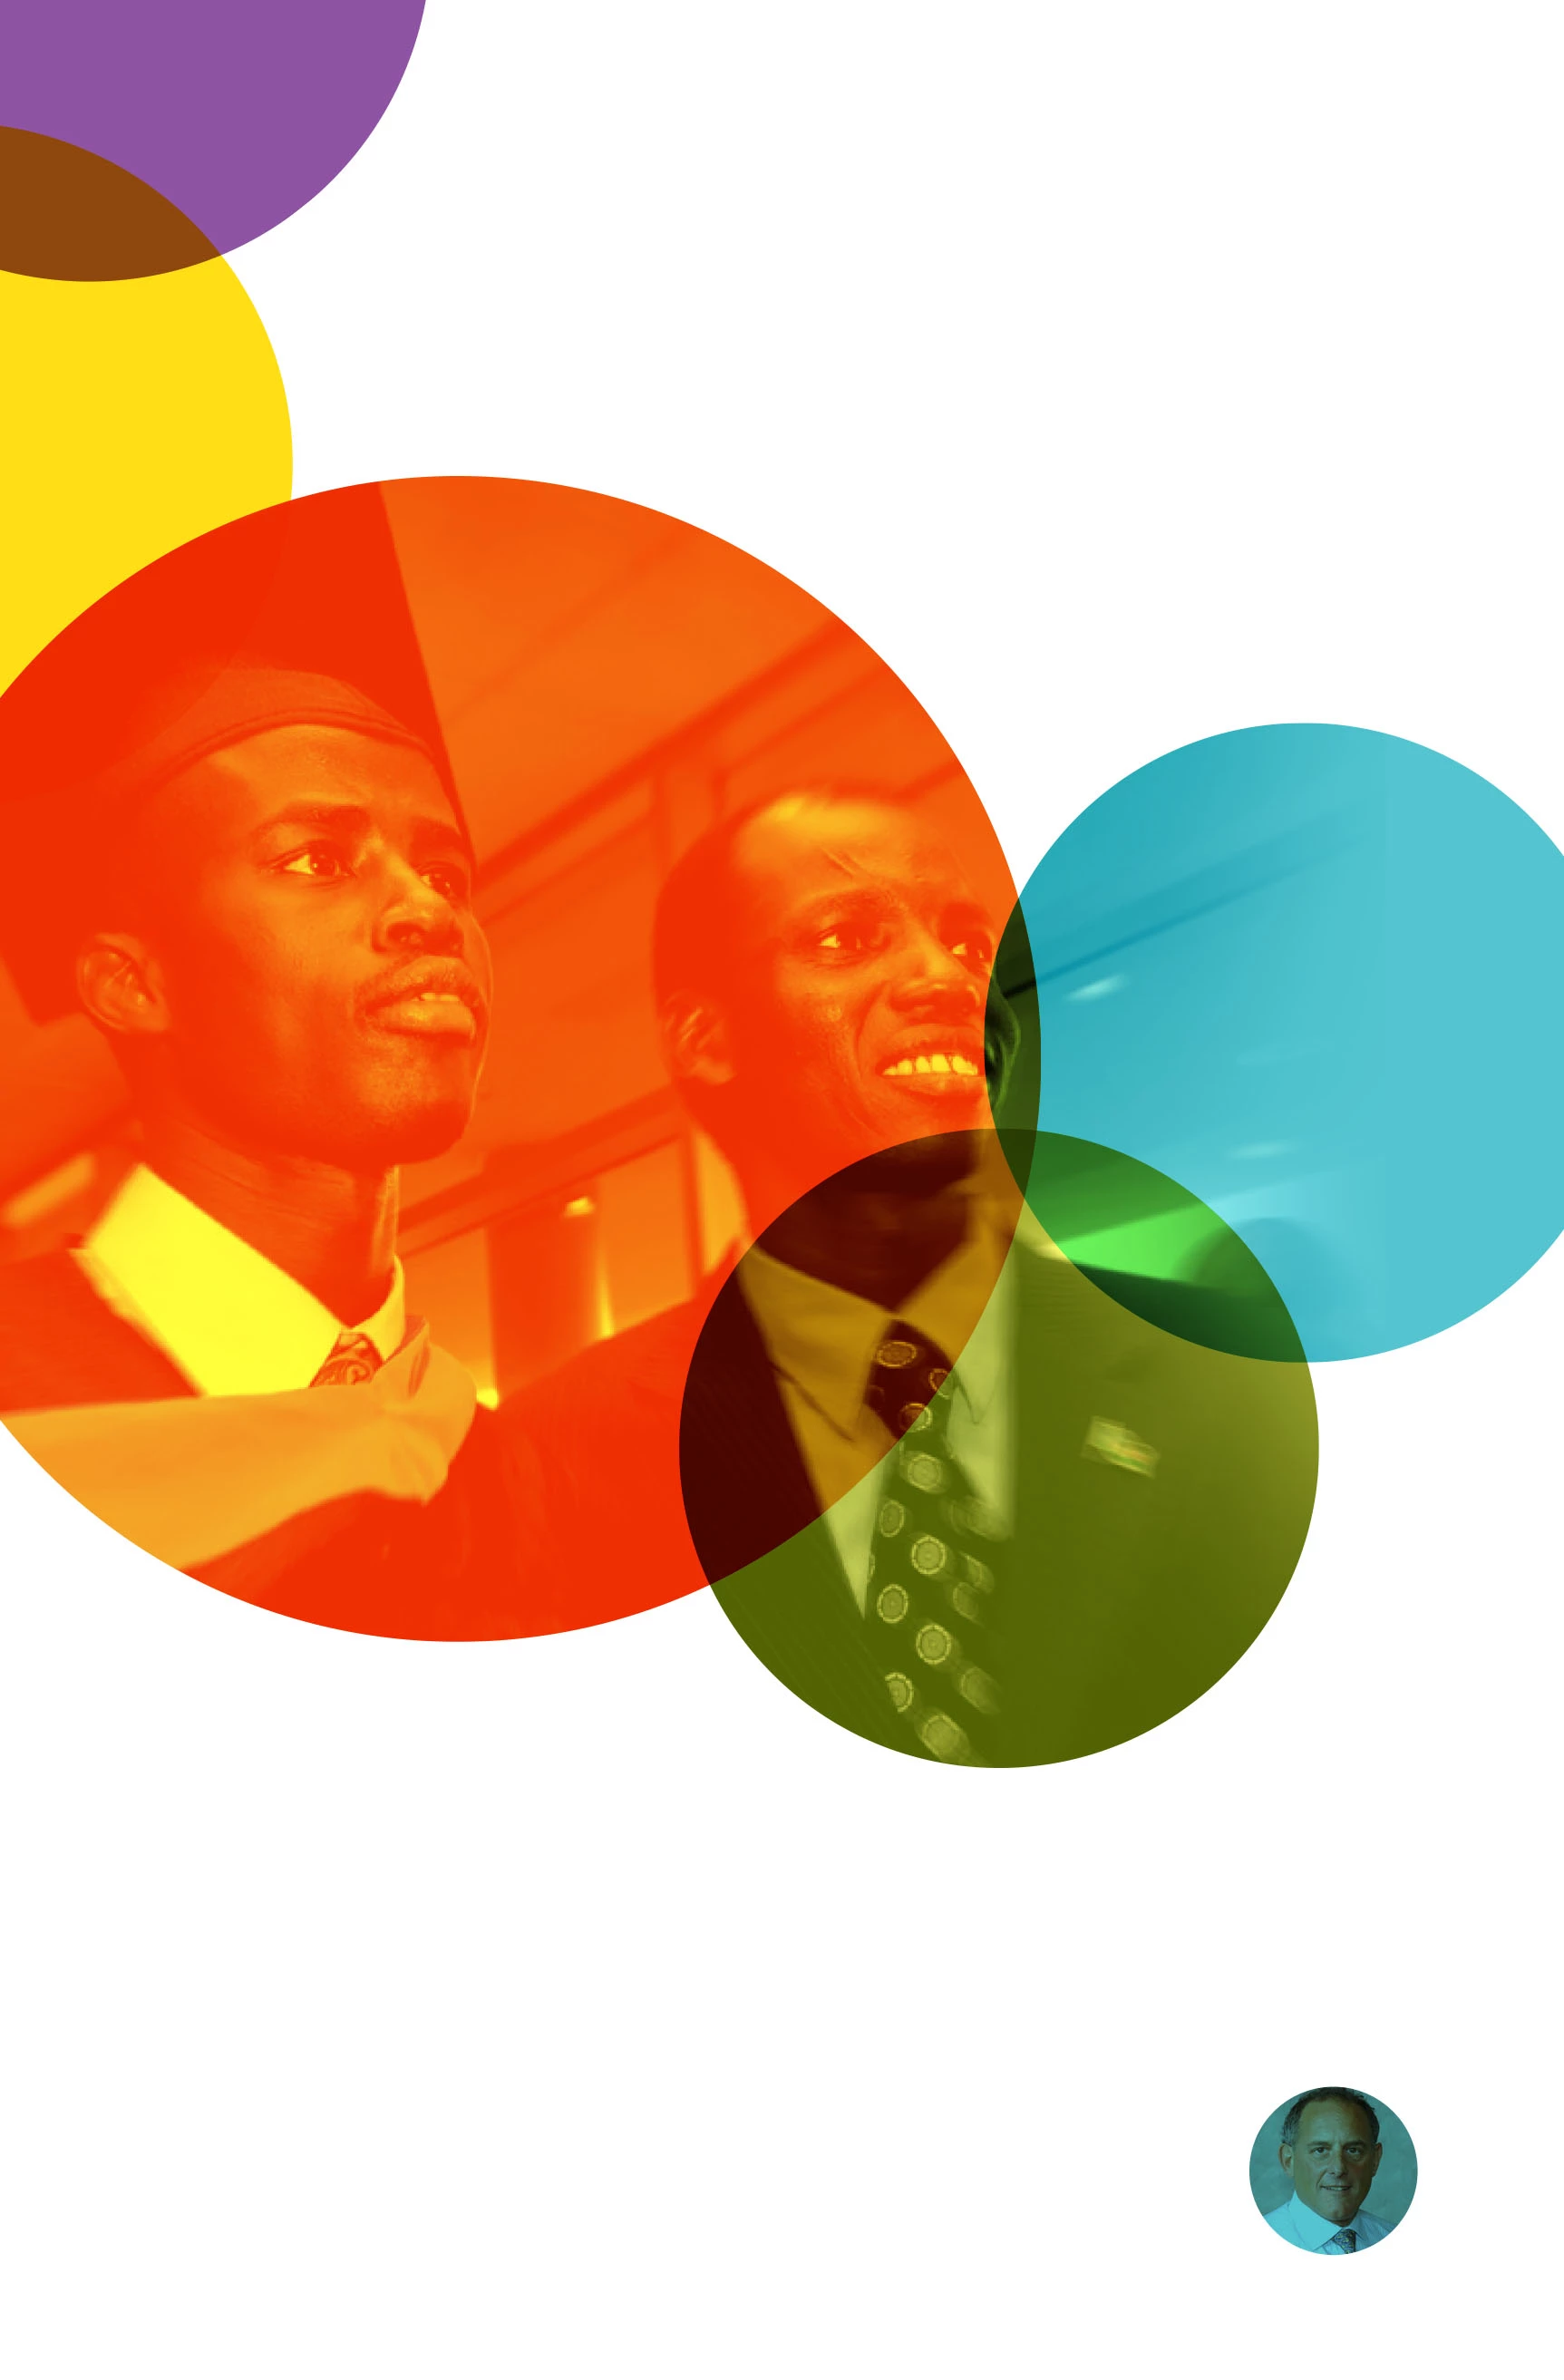
I received the below image as a PSD file from an ad agency and I'm looking to recreate the effects the art director used. I'm using Photoshop CS 5.5 and I assume he used the latest version of Photoshop CC. There are two effects I'm interested in:

1) Getting the photos into the colored circles. I think he used vector smart objects for this, but I'm not sure how to recreate this in CS 5.5 or if it can even be done?

2) Getting the colored circles to overlap each other and appear to have some element of transparency while still being really bold colors. In the layers panel, I'm only seeing the circles as vector smart objects and I can't tell what other characteristics have been applied to them. When I tried to just create colored circles with transparencies, I'm losing the boldness of the colors (see very bottom).

If it helps, I'm using the exact same colors as the art director and I have the hex and CMYK codes for all of them. The original PSD file can be downloaded here: https://spaces.hightail.com/receive/q3Z0EL6Camhttps://spaces.hightail.com/receive/q3Z0EL6Cam

Any thoughts are appreciated!

programCOver.jpg

Here's my version of the colored circles with a 10% transparency. They're much duller than above.

My circles.jpg

760
Translate
Report
Community guidelines
Be kind and respectful, give credit to the original source of content, and search for duplicates before posting. Learn more
community guidelines

correct answers 1 Correct answer

Mentor , May 22, 2018 May 22, 2018

The image itself is put on top of the circles, and the image layer is set to overlay blending mode.

The circles are in a smart object, with web coated colour profile, and each circle is set to multiply. The colour profile prevents the circles from being 100% black, and the multiply blend mode turns the overlapped areas 100% black (silly method, really). This means the circles on a whole become slightly transparent, with the overlapped areas being opaque.

Translate
Adobe
Mentor ,
May 22, 2018 May 22, 2018

The image itself is put on top of the circles, and the image layer is set to overlay blending mode.

The circles are in a smart object, with web coated colour profile, and each circle is set to multiply. The colour profile prevents the circles from being 100% black, and the multiply blend mode turns the overlapped areas 100% black (silly method, really). This means the circles on a whole become slightly transparent, with the overlapped areas being opaque.

Translate
Report
Community guidelines
Be kind and respectful, give credit to the original source of content, and search for duplicates before posting. Learn more
community guidelines
Explorer ,
Jul 29, 2018 Jul 29, 2018

Thanks, that's really helpful. Since you mention that that's a silly method, is there a preferred method?

Translate
Report
Community guidelines
Be kind and respectful, give credit to the original source of content, and search for duplicates before posting. Learn more
community guidelines
Community Expert ,
Jul 30, 2018 Jul 30, 2018

There are several ways to do this.

I would:

1. Creat circles in a transparent layer set to 50% or lower.

2. Then I would import the photo into a separate layer.  This should go below the circles.... line it up how you want it to look in the circles, ignore the outer parts of the photos for the moment. (Probably this image should be black and white).

3. Once set where you want it....

6. Go back to the circle layer and use the magic wand to select the blank space.  Not the circles.

7. Go back to the layer of the photo with the area still selected. Hit delete.

It will give you a similar effect.

You can also toy around with the layer of options of the circles as well.

Let me know if you want me to show you a sample.

Translate
Report
Community guidelines
Be kind and respectful, give credit to the original source of content, and search for duplicates before posting. Learn more
community guidelines
Explorer ,
Jul 30, 2018 Jul 30, 2018
LATEST

Thanks for sending this through. A question: I got as far as step 4/6, but when I try to use the magic wand to select the select the blank space, it's saying I can't use the tool because the "target layer is a fill layer". Are there a couple of steps missing (the list goes from 3 to 6) or am I doing something wrong here? 

Translate
Report
Community guidelines
Be kind and respectful, give credit to the original source of content, and search for duplicates before posting. Learn more
community guidelines