 Adobe Community
- Home
- Photoshop ecosystem
- Discussions
- Re: What is the most effective way to smoothly ble...
- Re: What is the most effective way to smoothly ble...

Copy link to clipboard
Copied
Sometimes when I clone a detail out, the replaced section doesn't look natural. I've tried smudging, which only seems to redistribute the blotchiness.


 1 Correct answer

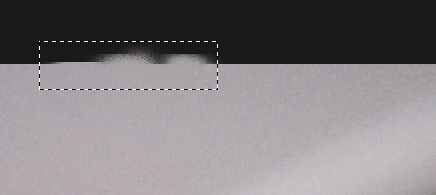
When you have edges like that, the Patch tool is my go to tool. You have to select well into the good area like below
Then with the Patch tool selected, drag along that edge

You could do the same thing with that vent

Making a perfectly blended patch.
I lied about it being perfect as I can see darker tone left behind

But taking a second stab fixes it

The Patch tool is probably unbeatable when it comes to making invisibly merged and blended in fixes.
Explore related tutorials & articles
 11
Replies
11
11
Replies
11

Copy link to clipboard
Copied
Please post meaningful screenshots to illustrate what you are talking about.
Why are you using the Clone Stamp Tool and might the Healing Brush Tool or Spot Healing Brush Tool provide alternatives?
I've tried smudging
Considering that digital photographs usually feature noise that approach seems problematic.
Copy link to clipboard
Copied
Sorry, was using the mobile version and couldn't figure out how to include images.
The first image includes a fixture I wanted to remove: 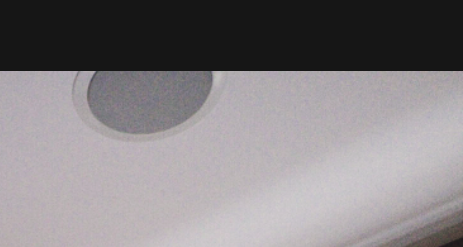
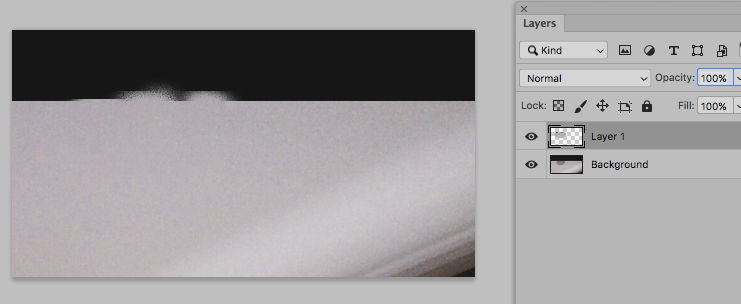
The second is the result of me cloning it out. It looks better than it actually does in real life but if you look closely, it's not totally smooth in terms of gradation:
Still fairly new to Photoshop. Would the healing tool be the best solution? Thank you.
Copy link to clipboard
Copied
Would the healing tool be the best solution?
Well, ultimately that’s for you to find out and it can naturally depend on the image.
But I am not sure about the screenshots, they seem to be clipped too closely to provide a good frame of reference.
And what about the black bar?
Copy link to clipboard
Copied
Oh, the black bar is just a border from the image, not part of the shot. How would you approach removing the fixture and creating the illusion that there's a continuous ceiling?
Copy link to clipboard
Copied
the black bar is just a border from the image
Do you work for film/video?
If not black seems to be the wrong choice.
I expect the Clone Stamp Tool might suffice in this case, but please also try Content-Aware Fill.
With the Clone Stamp Tool it might help to add a temporary Curves Adjustment Layer to increase the contrast in the tonal area to notice discongruencies more easily.
Copy link to clipboard
Copied
This is a still photograph the print actually has a white border but I pulled a quick screenshot off of my phone which resulted in a black border.
I am dissatisfied with the results from cloning so I'll try the content aware fill. Thank you.
Copy link to clipboard
Copied
I think the Clone Stamp Tool may suffice, but you may need s few takes.
Doing it on a Layer of its own may help.
Copy link to clipboard
Copied
You know, I've tried that and it may be a matter of skill, but that hasnt worked for me... The other day I spent over an hour trying to clone a light out of a ceiling and it never looked natural. It was much worse than the example I showed you. When dealing with smooth surfaces that show subtle gradation, this method has not been good for me. I was hoping there was a specific tool or method for this situation.
Copy link to clipboard
Copied
When you have edges like that, the Patch tool is my go to tool. You have to select well into the good area like below

Then with the Patch tool selected, drag along that edge

You could do the same thing with that vent

Making a perfectly blended patch.
I lied about it being perfect as I can see darker tone left behind

But taking a second stab fixes it

The Patch tool is probably unbeatable when it comes to making invisibly merged and blended in fixes.

Copy link to clipboard
Copied
Do you Work with Photoshop CC ?
Copy link to clipboard
Copied
Yeah, Photoshop CC2019

 AdChoices