

- Home
- Photoshop ecosystem
- Discussions
- Re: What settings are there to address 3D extruded...
- Re: What settings are there to address 3D extruded...
What settings are there to address 3D extruded objects from PhototShop before export for use in Blender

Copy link to clipboard
Copied
I am using Photoshop extrude to create specific objects for use in Blender.
I am fine with the process to create what I need in Photoshop - 3D extrude is perfect for what I need... but....boy after export and then import into Blender the objects are HUGE and way off in space.
Is there a process or set of fields I should set to get it to be more centered upon import into Blender?
I know the y axis rule of having it set in Photoshop have the scale and coordinate relationship set to 1/2 but again that does not improve this and since I have many objects when I import them into Blender are not centered and HUGE.
I can resize and recenter in Blender but am I missing a trick that i should know to use before I export out of Photoshop with .obj heading into Blender?
Anyone have tips on this?? Love to hear them!


Explore related tutorials & articles
 10
Replies
10
10
Replies
10

Copy link to clipboard
Copied
Hi
Hopefully davescm will see this post, he's the 3D expert here

Copy link to clipboard
Copied
Hi
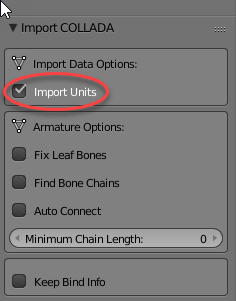
First the scaling issue. It is a matter of matching up the units (by default Photoshop exports in pixels and Blender works in blender units which are sizeless):
When you export make sure you set the units in the export dialogue :
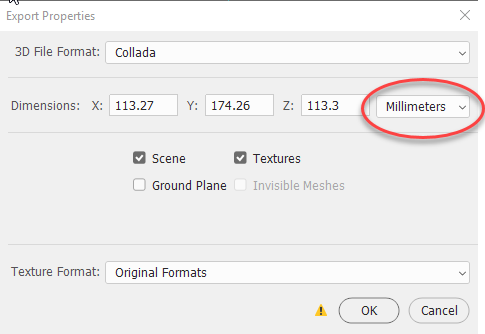
In Blender set the scene units :

On import check the box:
Once imported the pivot point of the model is often misplaced as is the model position. I don't know a way round that other than selecting the object and with the 3D cursor at the (0,0,0) point use:
a. Shift+Ctrl+Alt+C then choosing "Origin to Geometry" to centre the model origin in the mesh
then
b. Shift +S and Choose selection to cursor to move the model to the 3D cursor point
Dave
Copy link to clipboard
Copied
Thank you for your super help! I can't seem to get the import settings box to be able to click the Import Units. That last bit. I'm reading around. I am a bit worried I have to ditch all my settings to redo them to get to this. Yikes. I don't might starting a new file at all from scratch but would like to avoid having to ditch my preferences. seems you took a snap so it must be there somewhere!! Here is hoping! Any tip on finding that check box?
Super thanks again for this help!!
Jules
Copy link to clipboard
Copied
The top screenshot is Photoshop
The bottom two screenshots are Blender. The second appears in the bottom left when you import (so after clicking OK to import)
The units are set by scene - nothing to change in Preferences. In Blender click the world tab (circled in the second screenshot)
For clarity - my last paragraph referred to shortcuts in Blender
Dave

Copy link to clipboard
Copied
Great info Dave, thx!
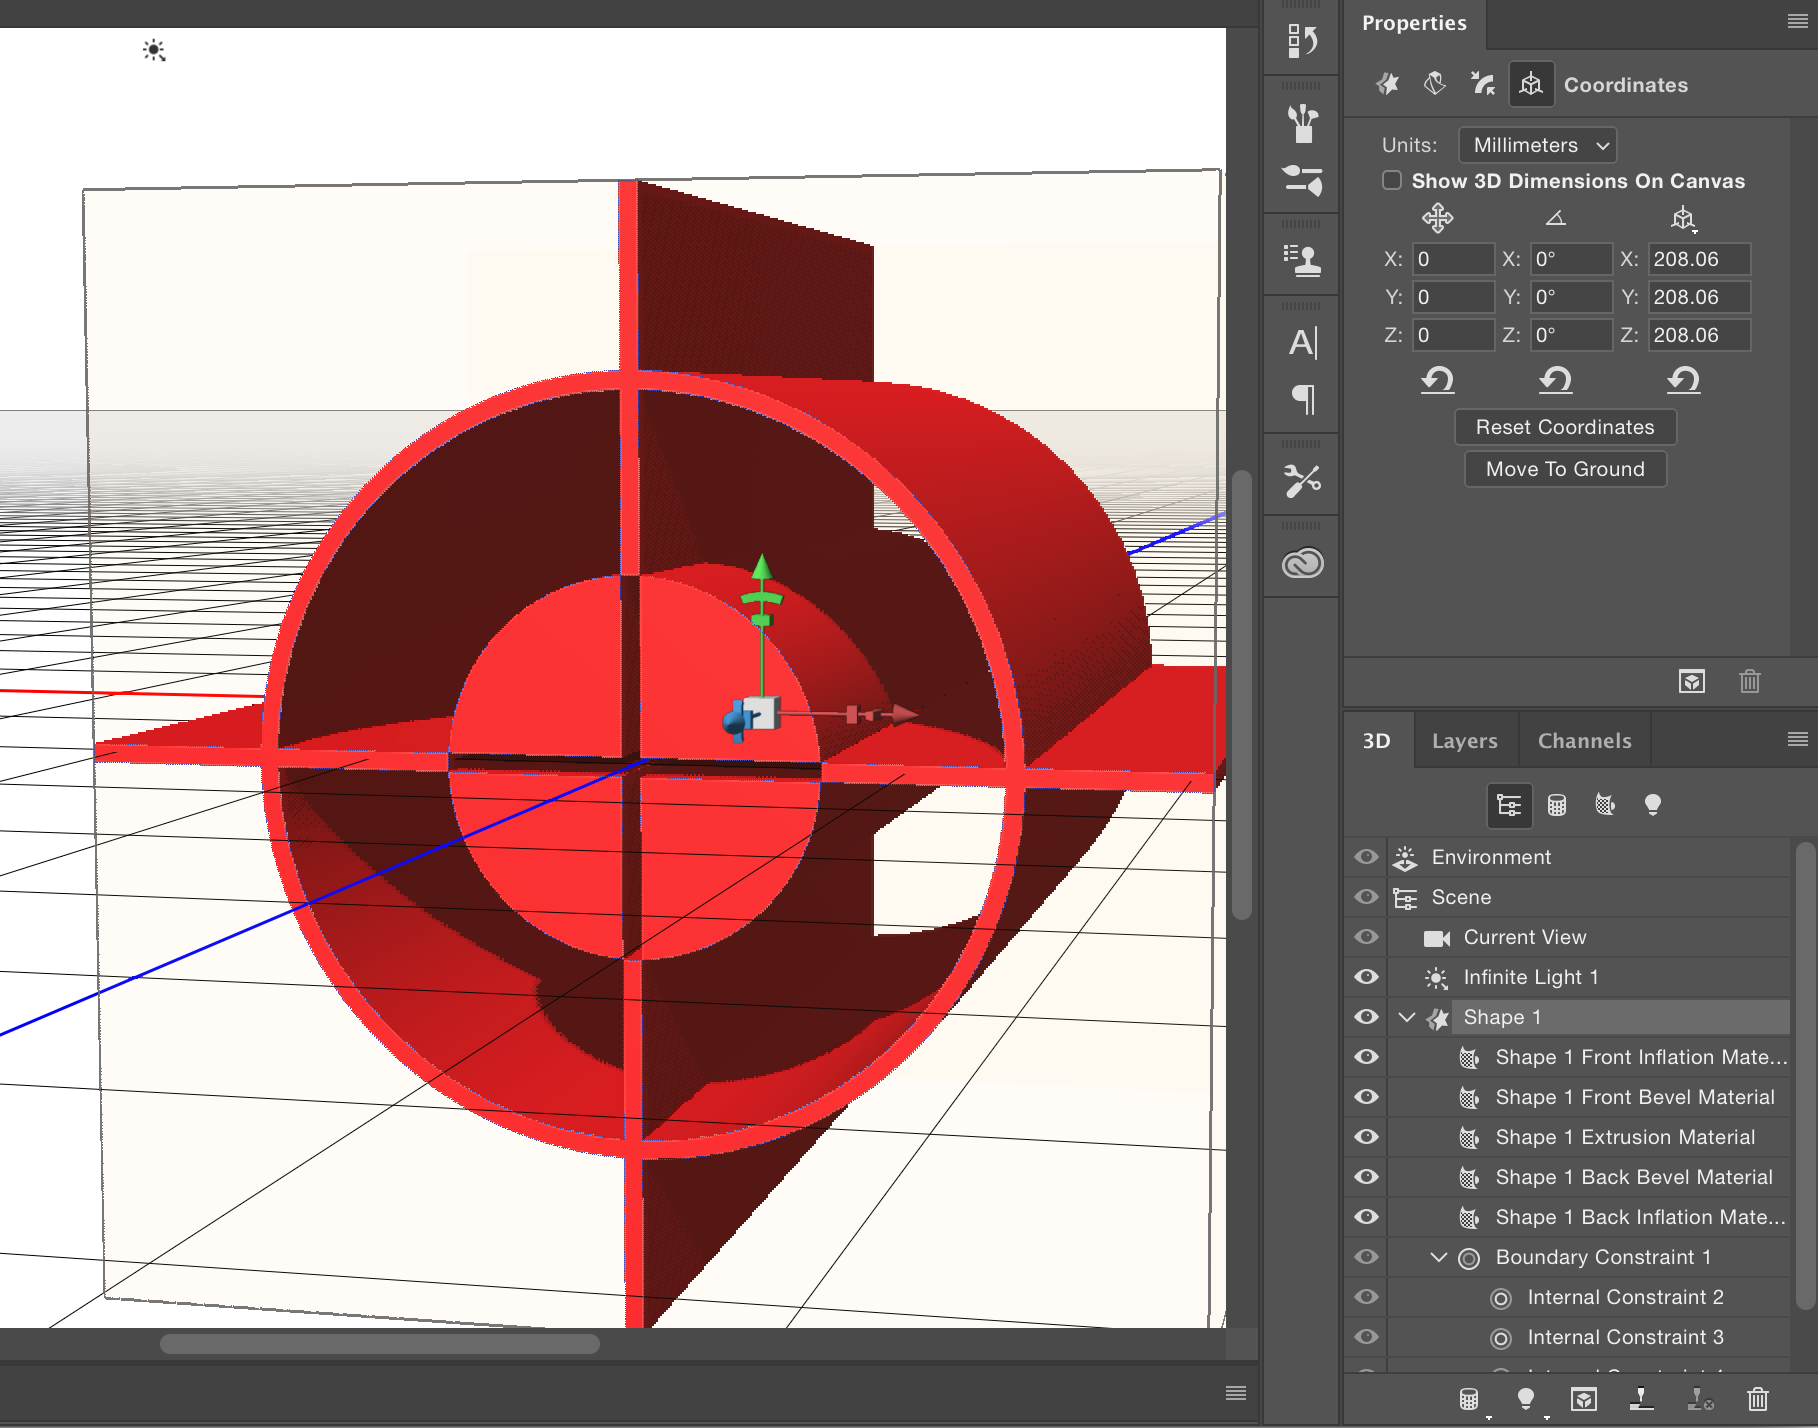
Something else to try in Ps before exporting the 3D layer is to move the mesh location coordinates to 0,0,0.
Target the mesh in the 3D panel scene, then select Coordinates view in the Properties panel.
steve
Copy link to clipboard
Copied
I gotcha on step 1 is Photoshop, steps 2 and 3 are blender but for the life of me I can't get step 3 to happen, no dialog box shows up.
I do file>>import>>wavefront (.obj) and get the file structure. Pick the .obj I want and it just shows up in the scene, no dialog window - just boom the object shows up on import in blender for me so I cant get to that setting your are suggesting in step 3. So wondering if there is some other place I can set this, as it won't show for me at all during import.
Close!
🙂
Jules
Copy link to clipboard
Copied
Hi
I was exporting and importing as a Collada (.dae) file - try that.
Dave
Copy link to clipboard
Copied
Thanks a lot for all the insight - still not getting set on import units, even with Collada.
Setting coordinates all to 0, 0,0 is a no go as each object is in relative placement to others objects I import - parts of larger objects - so want to keep that placement right (need to apply armature in Blender to animate so don't want to guess after breaking up the art work that I put it back just right)
Just so odd that you get the dialog box at each import - I get nothing other than it imported. And I do 1 and 2 just as you suggest and have tried collada and .obj. I can't get to that check box you show in step 3 no matter what I do so far.
Thanks I guess I surrender to Blender on this one. Blender beat me!
Jules
Copy link to clipboard
Copied
Hi
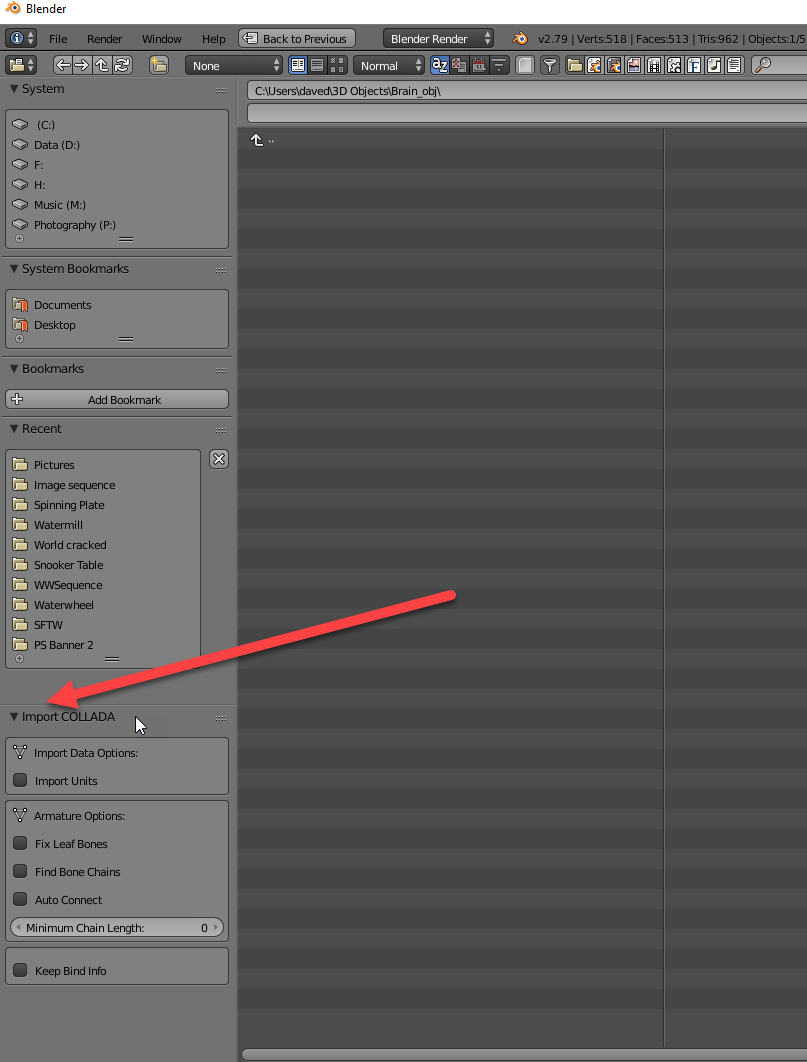
I am using Blender 2.79
When I go to File Import Collada I see this before I even choose a file to import (you may need to click on the little arrow next to Import Collada to twirl down and see the choices)
Dave
Copy link to clipboard
Copied
To move several objects to centre, in Blender, but keeping the relationship in space between them intact - select the objects and press Shift+S then choose Selection to Cursor (Offset)
Dave

 AdChoices