

- Home
- Photoshop ecosystem
- Discussions
- Re: Would love your approach for removing backgrou...
- Re: Would love your approach for removing backgrou...
Would love your approach for removing backgrounds for images with undefined edges

Copy link to clipboard
Copied
Hi, I’m good with Photoshop but no expert.
My question is:
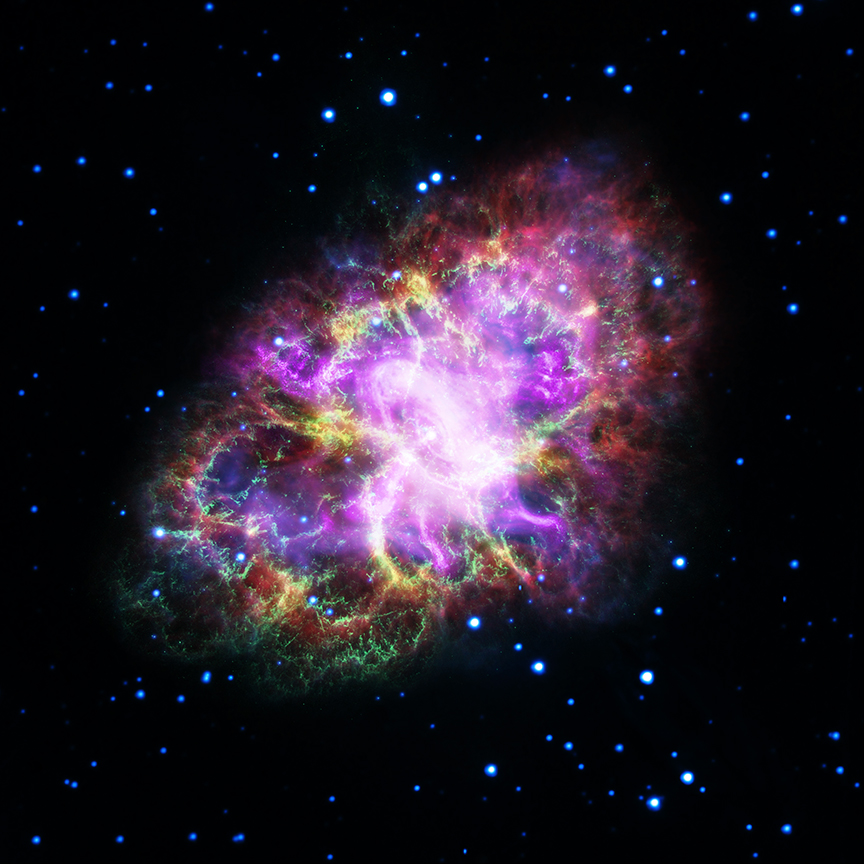
What are good approaches to removing the background from an image like the one below that has such diffuse, undefined edges?
I want to literally lift that nebula in the foreground off that black background of space.
I’ve learned quite a few techniques for removing backgrounds in the last several weeks so I‘m not starting from scratch, but so far I haven’t been able to get a *great* result for the image below.
Any suggestions on techniques appreciated.


Explore related tutorials & articles
 11
Replies
11
11
Replies
11

Copy link to clipboard
Copied
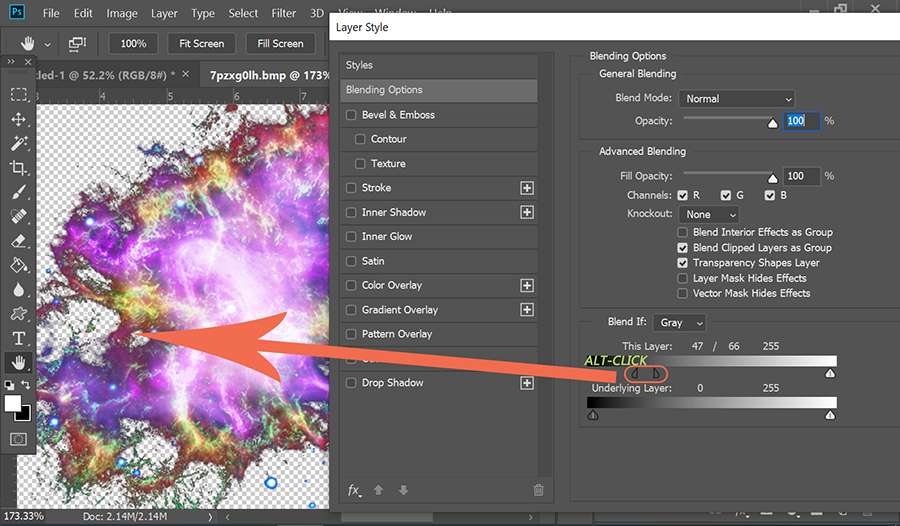
Use Blend If.
- Double click the background layer and move the dark slider to the right until you see a checkerboard pattern. which denotes transparency.
- To add another stop, hold Alt + Click. See screenshot.
- When you're satisfied with background removal, hit OK button (top, right).
Copy link to clipboard
Copied
Thanks Nancy. I’ll try it.
What is the value of adding another stop?
Copy link to clipboard
Copied
The extra stop gives you more control over how much background vs foreground is removed.
Copy link to clipboard
Copied
Moved from Adobe Creative Cloud to Photoshop .

Copy link to clipboard
Copied
Hi,
You could also try a Colour range selection:
Go Select> Color Range
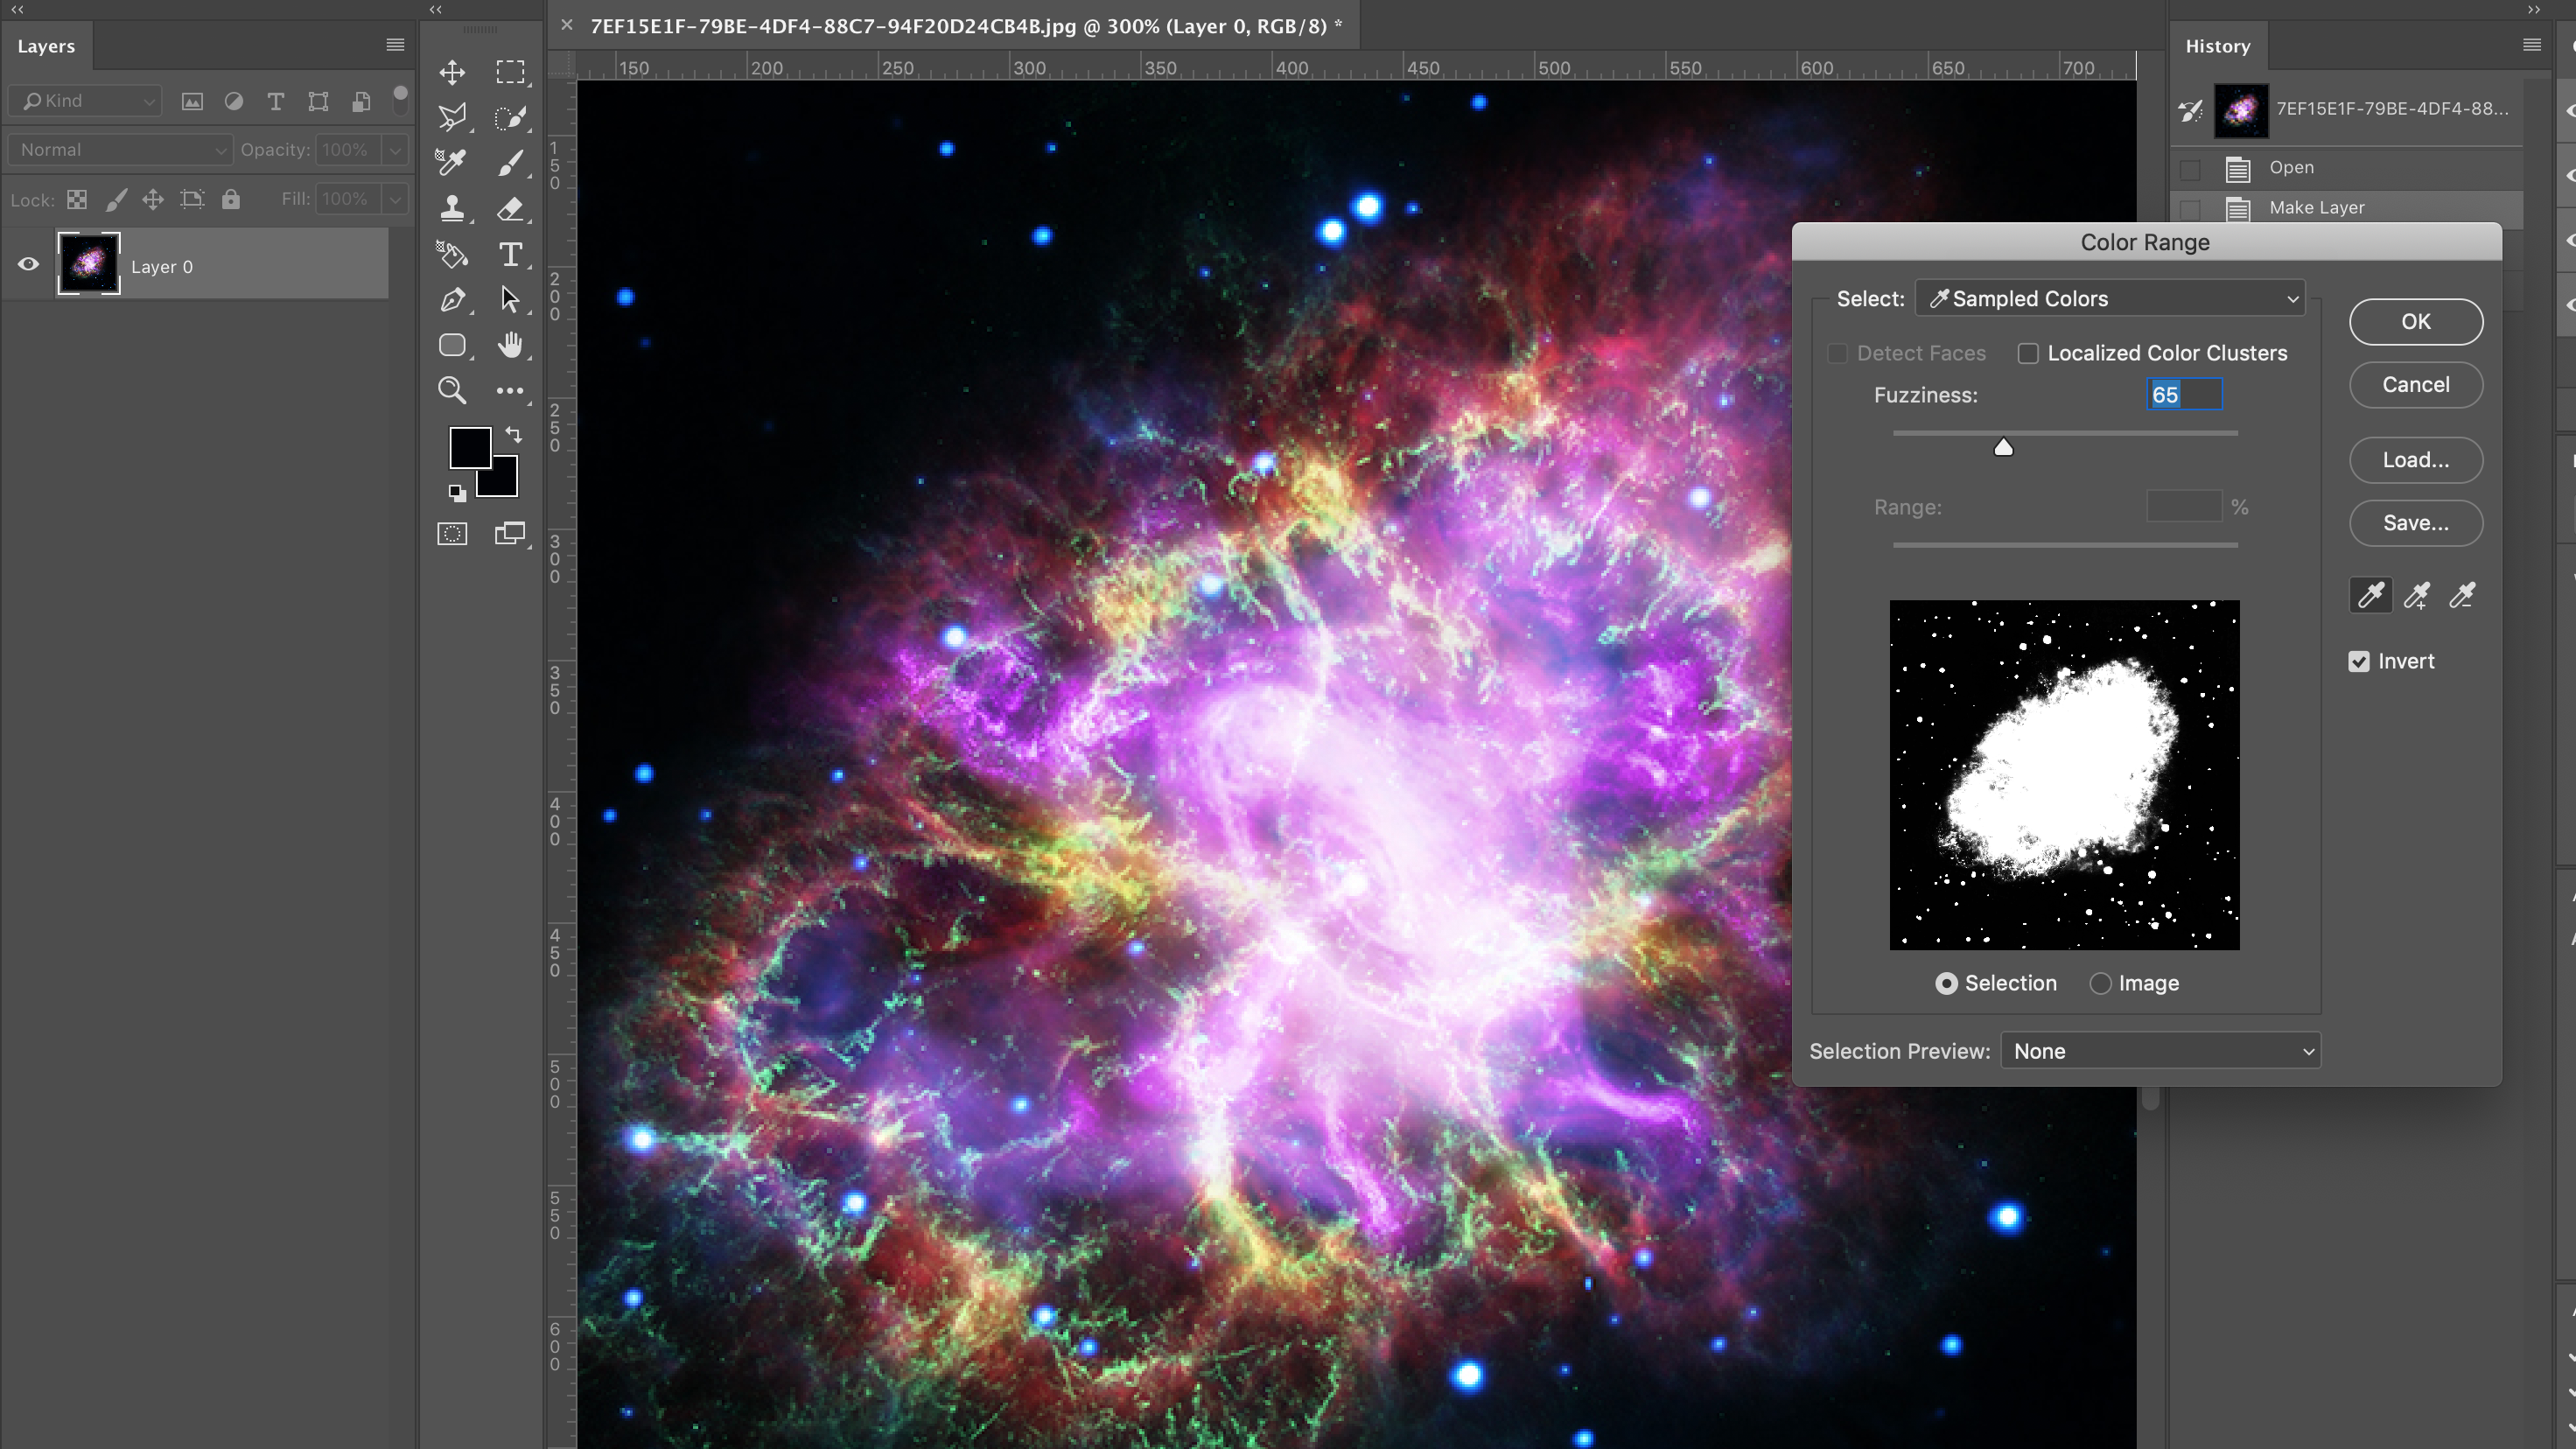
Be sure to check the Invert button and Adjust the Fuzziness slider accordingly and click ok.
Next check the Add Layer Mask button at the bottom of your Layers Palette and this will create a Mask:

I hope this helps

Copy link to clipboard
Copied
Both of the provided solutions are great options, but I will +1 for Color Range, because the mask can be further tweaked and you can make a lot more detailed decisions with this tool.
Copy link to clipboard
Copied
Hi David.
Great, thanks for the +1.
Can you can give me an example of a tweak or detail that would lift this nebula off the black background more accurately?
Specifically, one of the issues I’ve been having is not just finding the primary edge, but the “mist” just beyond that primary edge.
That “mist” is in a sense part nebula, part black space. I don’t need to capture that mist perfectly, but I’d like to maintain the softness of the edge overall.
Do I need to create a custom brush to do that?
Copy link to clipboard
Copied
I'll divert to someone more skilled than I with this tool, as I have had far less interaction than I'm sure other here have. I do know that when using the color picker within this tool you can shift select and option select to add and remove colors to your range, which allows you to define where the edges are more. It is also a good idea to click the \ key with the mask selected so you can see what fragments the mask may have left behind. Form there, you can do a great deal of the work by hand, or by playing with duplicating the object and having different layer styles in use. These types of cutouts can get pretty complex if you want them to be super perfect. Photoshop makes a great deal of tools available to you for this though, so there are certainly many paths to accomplish what you are looking to here.
Copy link to clipboard
Copied
You can also try the background eraser tool.
I made a little overview tutorial for it:

Copy link to clipboard
Copied
Depending on the image, you may need a combination of techniques to get exactly what you want. Use Ctrl+J to copy your layer and experiment with various approaches.

Copy link to clipboard
Copied
If compositing in Photoshop, using a lower layer image in screen blend mode will drop out the black background, then an upper layer image in normal blend with a hand painted layer mask, blend if etc.

Find more inspiration, events, and resources on the new Adobe Community
Explore Now
 AdChoices