Participant
April 14, 2021
Question

Apply image for hi frequency skin texture not working

  • April 14, 2021
  • 2 replies
  • 514 views

Hi, I have an updated creative cloud PS version and have successfully been able to create a HF texture layer in the recent past, but I can't get it to work now. I've looked at older threads and tried options suggested and it is still not working. If someone can please tell me what or if I'm doing something wrong and how to fix it, I'd really appreciate it. Here are the screen shots:

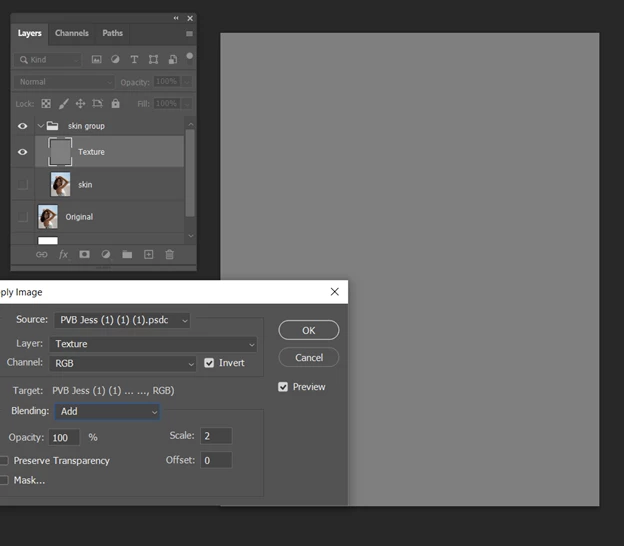
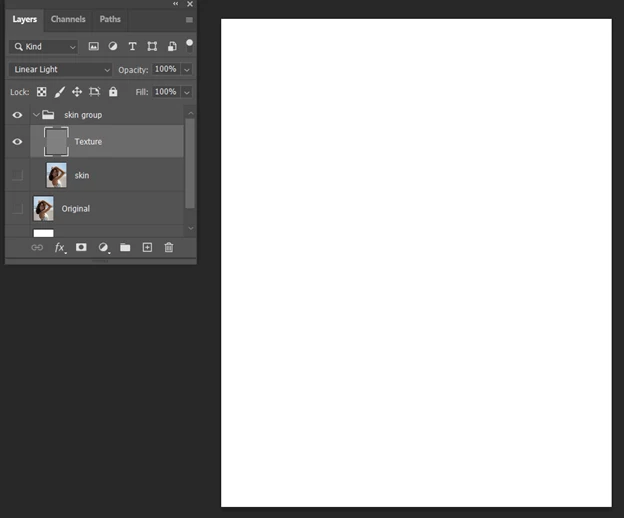
First trying to create a texture layer using the invert/add option. As you can see, I only get an opaque gray layer and when I do the linear light, I get a white opaque layer:

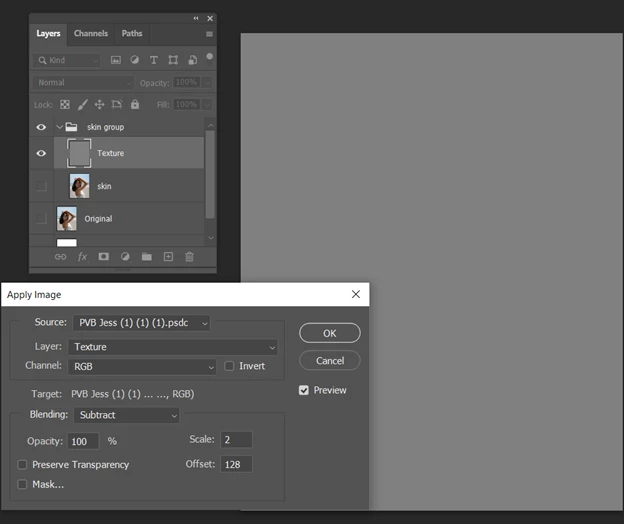
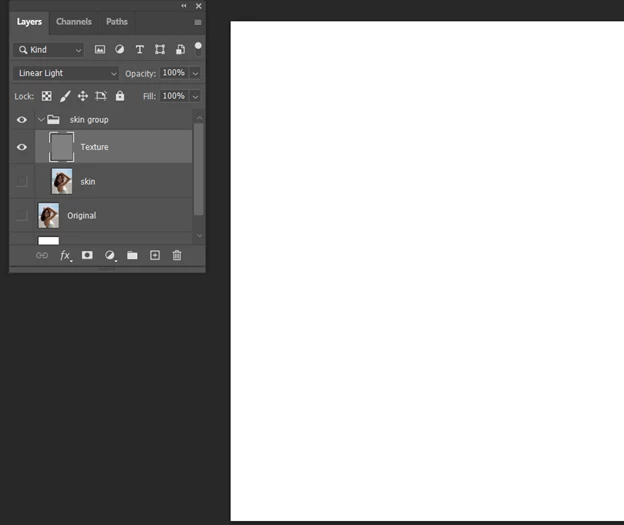
When I try the subtract method, I get the same thing:


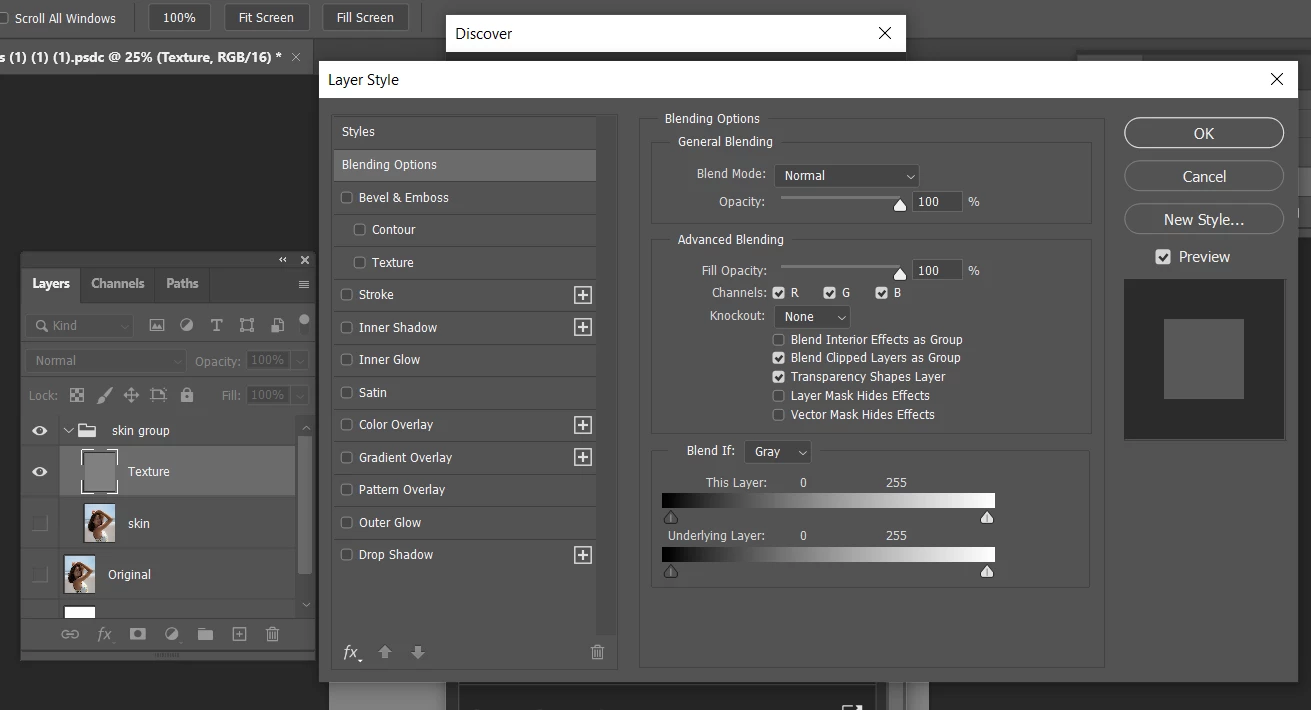
I don't know if this wil help, but here is more information about the layer.

Thank you for any help you can provide. Thank you

This topic has been closed for replies.

2 replies

Stephen Marsh
Community Expert
Community Expert
April 14, 2021

Once you learn the correct way to do this, putting the steps into an action removes human error, makes the process faster/less tedious/more efficient etc.


https://www.dropbox.com/s/7sf1xcijtzdygyh/Frequency%20Splitter%20v4%20Conditional.zip?dl=0


Participant
April 14, 2021

I'm replying to my own post b/c I just solved the problem with great help from adobe chat support. Since I have seen this problem several times, I wanted to share my error and easy correction. First, you must do the low frequency Gausian Blur layer first. After that is done, when you do the HF layer, you do Image>Apply Image, and then in the second field of the pop up Apply Layer box, be sure to have your Low Frequency layer selected as the "layer." If you select the original, or the HF layer you are working on, you will get a solid gray layer. I'm so relieved I got this to work!! Thank you Ankit!!

davescm
Community Expert
Community Expert
April 14, 2021

Glad you got it sorted, but just in case anyone else comes across this thread the steps are:

1. Make two duplicate copies of your image layer
   Name the lower copy "Low Frequency"
   Name the upper copy "High Frequency"
2. Select the lower "Low Frequency" layer
   Use Filter > Gaussian Blur (around about 6.0 should suffice)

3. Select the upper "High Frequency" layer
   Go to Image > Apply Image
   Set Layer to "Low Frequency Layer"
   Set blending mode to "Subtract"
   Set Scale to 2
   Set Offset to 128
   Ensure Invert is unchecked
   Click OK
4. Set the blending mode of the High Frequency layer to "Linear Light"


Clone out blemishes on the high frequency layer (ensuring the clone tool is set to current layer)
Lighten or darken on the Low frequency layer


* The above steps are for an 8 bit/channel image. If using a 16 bit/ channel image then change step 3 to:

3.Select the upper "High Frequency" layer
   Go to Image > Apply Image
   Set Layer to "Low Frequency Layer"
   Set blending mode to "Add"
   Set Scale to 2
   Set Offset to 0

   Check invert next to channel
   Click OK


Dave