

- Home
- Photoshop ecosystem
- Discussions
- changing brightness of a selected area
- changing brightness of a selected area
changing brightness of a selected area

Copy link to clipboard
Copied
I have a photo with a very bright, over exposed hand. I have selected it with the lasso tool. How do I adjust the exposure/brightness on just this area?


Explore related tutorials & articles
 12
Replies
12
12
Replies
12

Copy link to clipboard
Copied
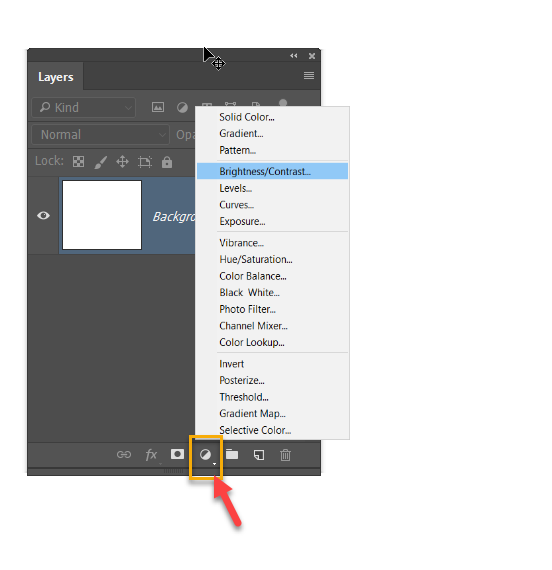
Click on the layer mask icon in the layer panel and select one of the following :
1- brightness and contrast
2- Levels
3- curves
then adjust the values
Copy link to clipboard
Copied
Mohammad, thank you for your speedy reply.
All the choices I have in the layer mask panel are, Reveal All, Hide All, Reveal Selection and Hide selection.
I have never used layers so do I need to set up another layer maybe?

Copy link to clipboard
Copied
It's in the **Layers** panel - The little Half-black-half-white circle in to middle of the Icons at the bottom.
Copy link to clipboard
Copied
Here is a screenshot for the adjustment layer button
Copy link to clipboard
Copied
Mohammad thank you so much. You are a genius 

Copy link to clipboard
Copied
I'm trying to follow this, but after I export from Photoshop I find that the entire image is lightened or darkened depending on what I was trying to do to the selected area. For instance:here's the original image I took today:

And here's the adjusted image. I only wanted to darken the rose, but the whole image has gone darker.
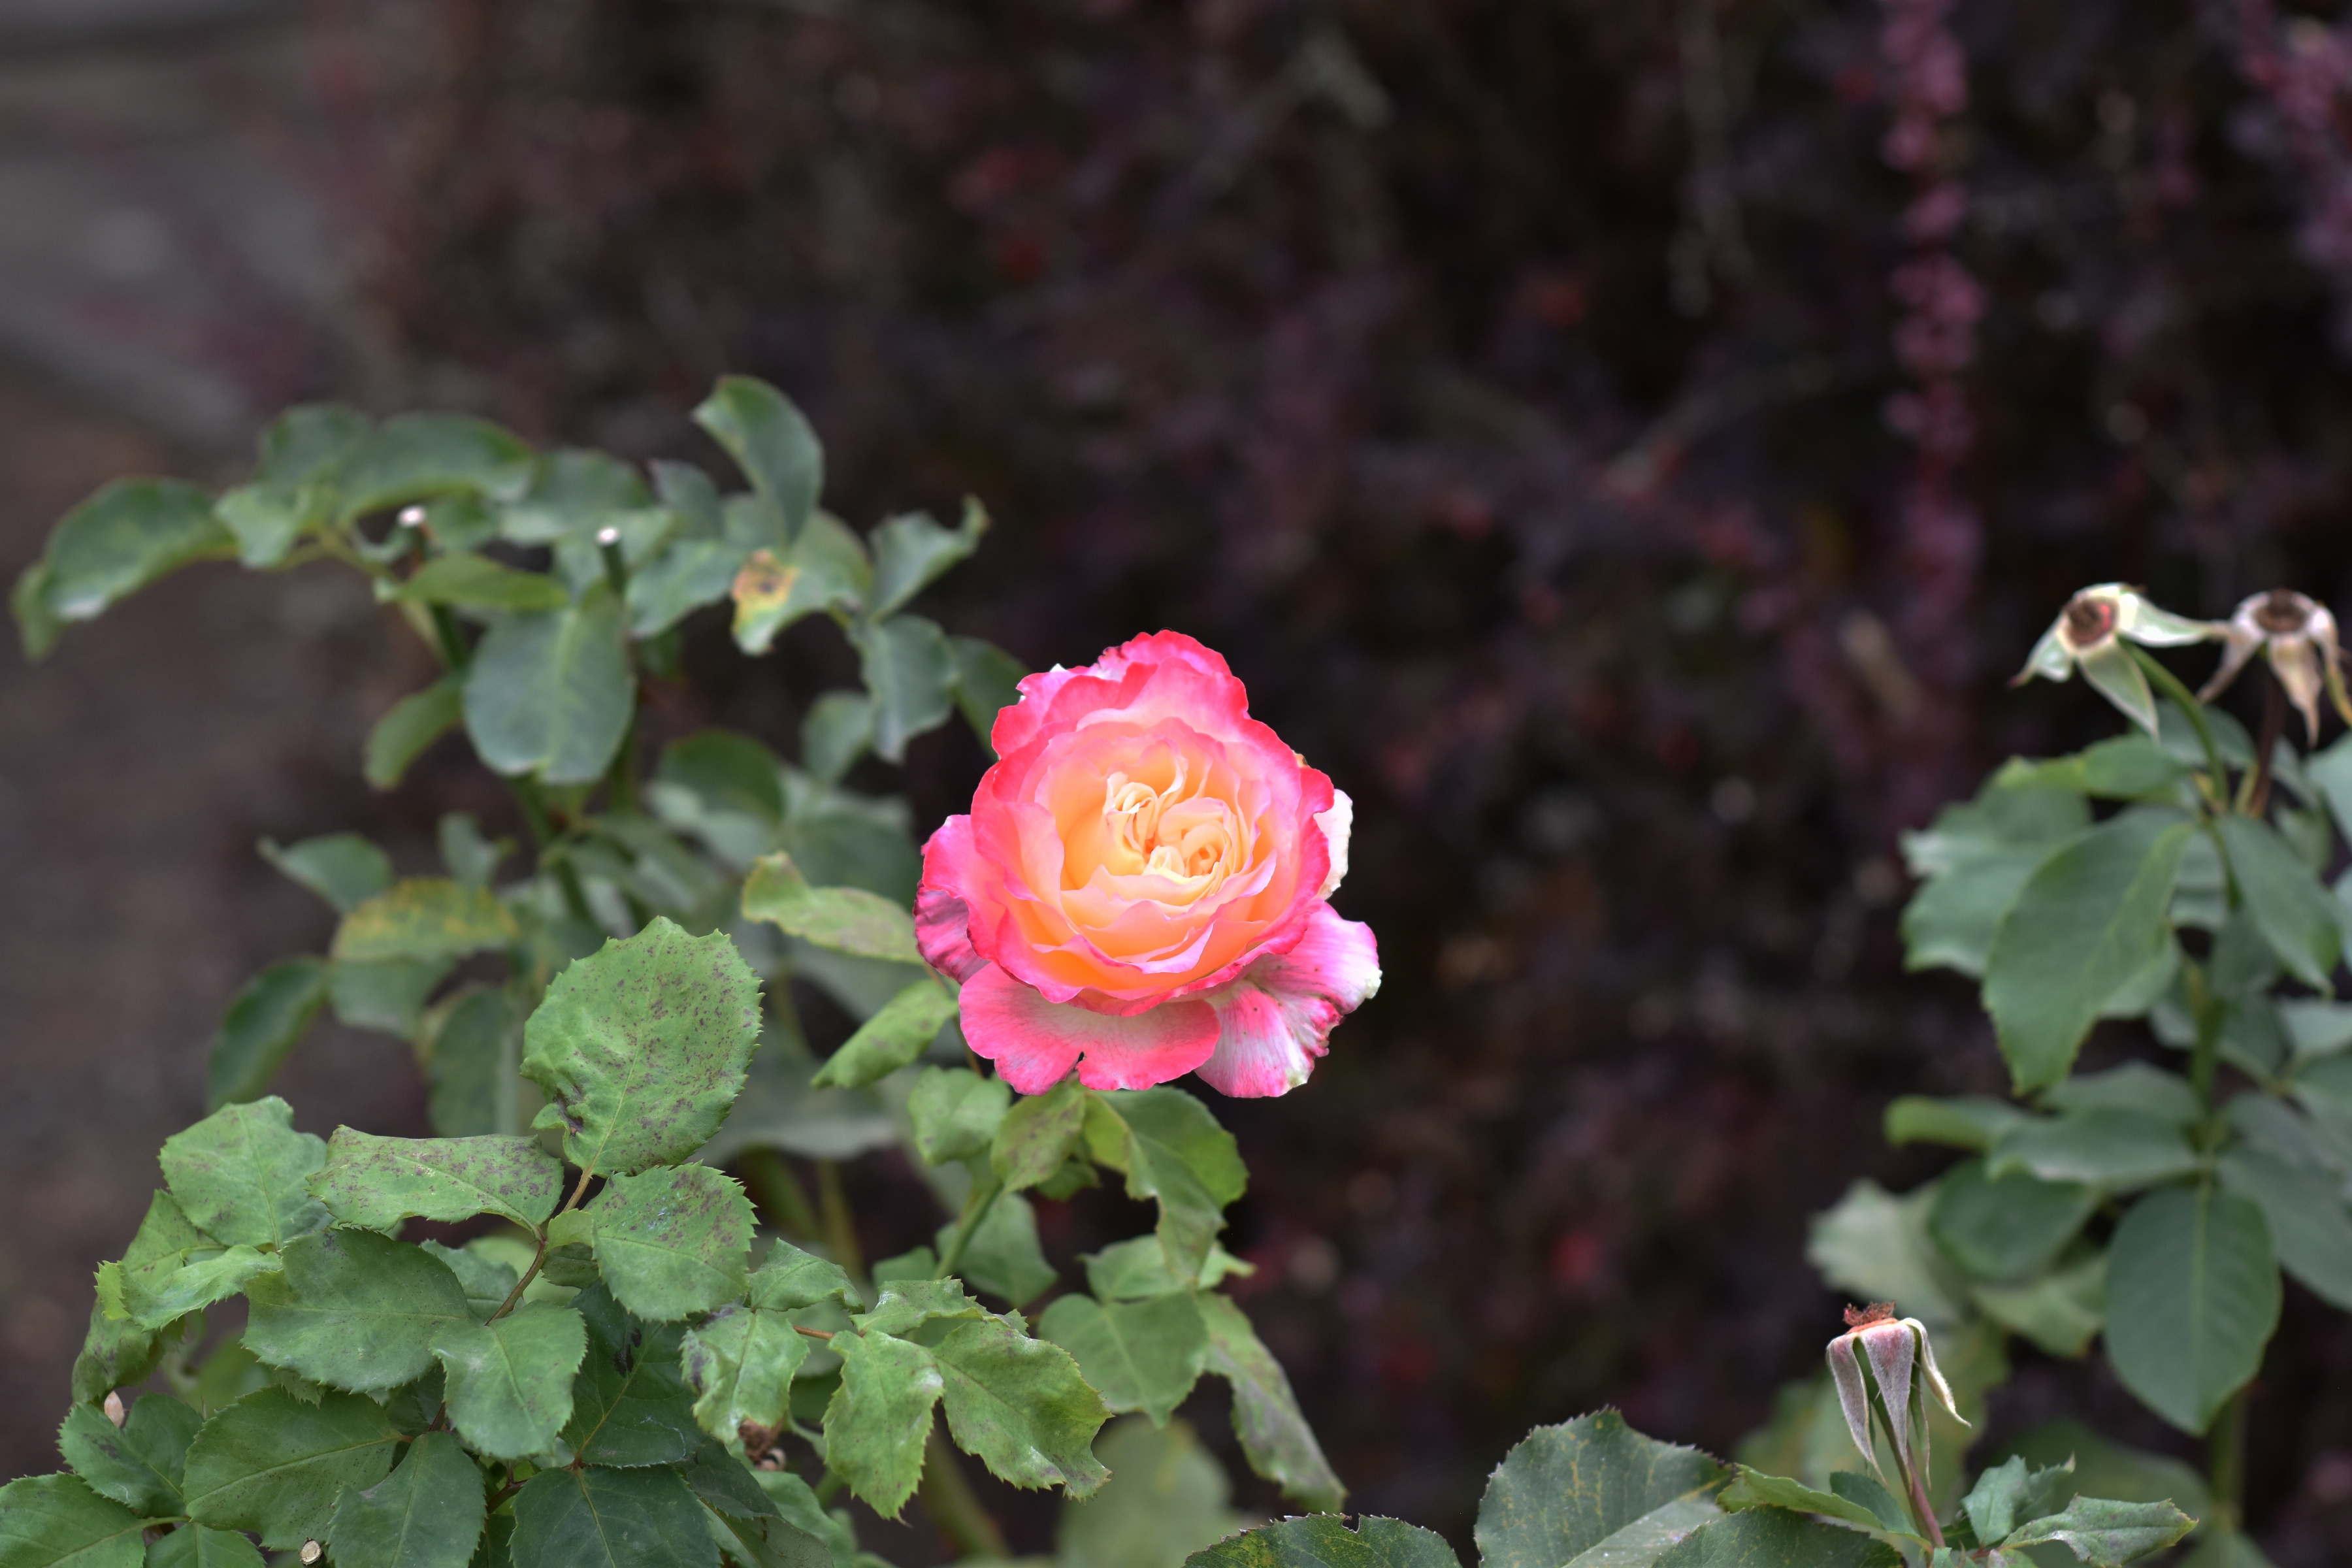
One can make the case that the entire original image was overexposed anyway, and the best approach is to simply darken the whole thing. Still, I'd like to know how to darken just the rose.
Steps taken:
(1) Loaded JPEG image into Photoshop
(2) Quick-selected the rose and made a new layer by cutting.
(3) Turned off display of each layer except the one with the rose cutout
(4) With that layer highlighted in the Layers window, I clicked on the adjustment icon and used the Darkness/Contrast tool in the context menu.
What am I forgetting/missing?
Copy link to clipboard
Copied
The adjustment layer will be applied to all the layers below,
you need to click on the make clipping mask icon in the adjustment layer ( the icon with a down arrow ).

Copy link to clipboard
Copied
wow it worked. there were two layers odwn the adjustment layer but the area i wanted to work on was on one layer so i transfered the other layer up the adjustment layer and it worked on the second one nelow. after applying i shifted the second layer back to its original position.
thankyou Muhammad HArb . jazak allah

Copy link to clipboard
Copied
mwfast wrote
I have a photo with a very bright, over exposed hand. I have selected it with the lasso tool. How do I adjust the exposure/brightness on just this area?
I have a feeling that you'll find you do not get a good result with the adjustment layer. If that is the case, copy the image and paste it to this thread, and we'll show you the best way to fix it if possible. The bottom line tends to be that a blown pixel will always be a blown pixel, and you can't detail back, but there are a few tricks you can often use.
Copy link to clipboard
Copied
Thank you. Looking forward to seeing what you can do.

Copy link to clipboard
Copied
Is the original a raw file or rendered such as a JPEG?
If the latter, copy the selection to a new layer and then try the shadow/highlight command.
Copy link to clipboard
Copied
Lately, I've found exposure adjustment particularly useful for this kind of work. It can be used on its own or combined with other adjustments as needed.

Find more inspiration, events, and resources on the new Adobe Community
Explore Now
 AdChoices