Thanks for replying, Dave. I see. I’m still new to all this, so I’ve most likely made a mistake. I figured it was a bump map or normal map due to that sense of depth the texture gives on the outfit. The author’s example texture I downloaded doesn’t list them as bump maps, just as textures under an ’added/extra detail’ folder.
Either way, I want to replicate and learn how the author made these textures so I can apply them to my model. He made four - diffuse, which I’ve done, a specular, a hardness and a roughness. These textures come under his diffuse texture as extra details. I just want to figure out how he achieved this effect.
Thanks
OK
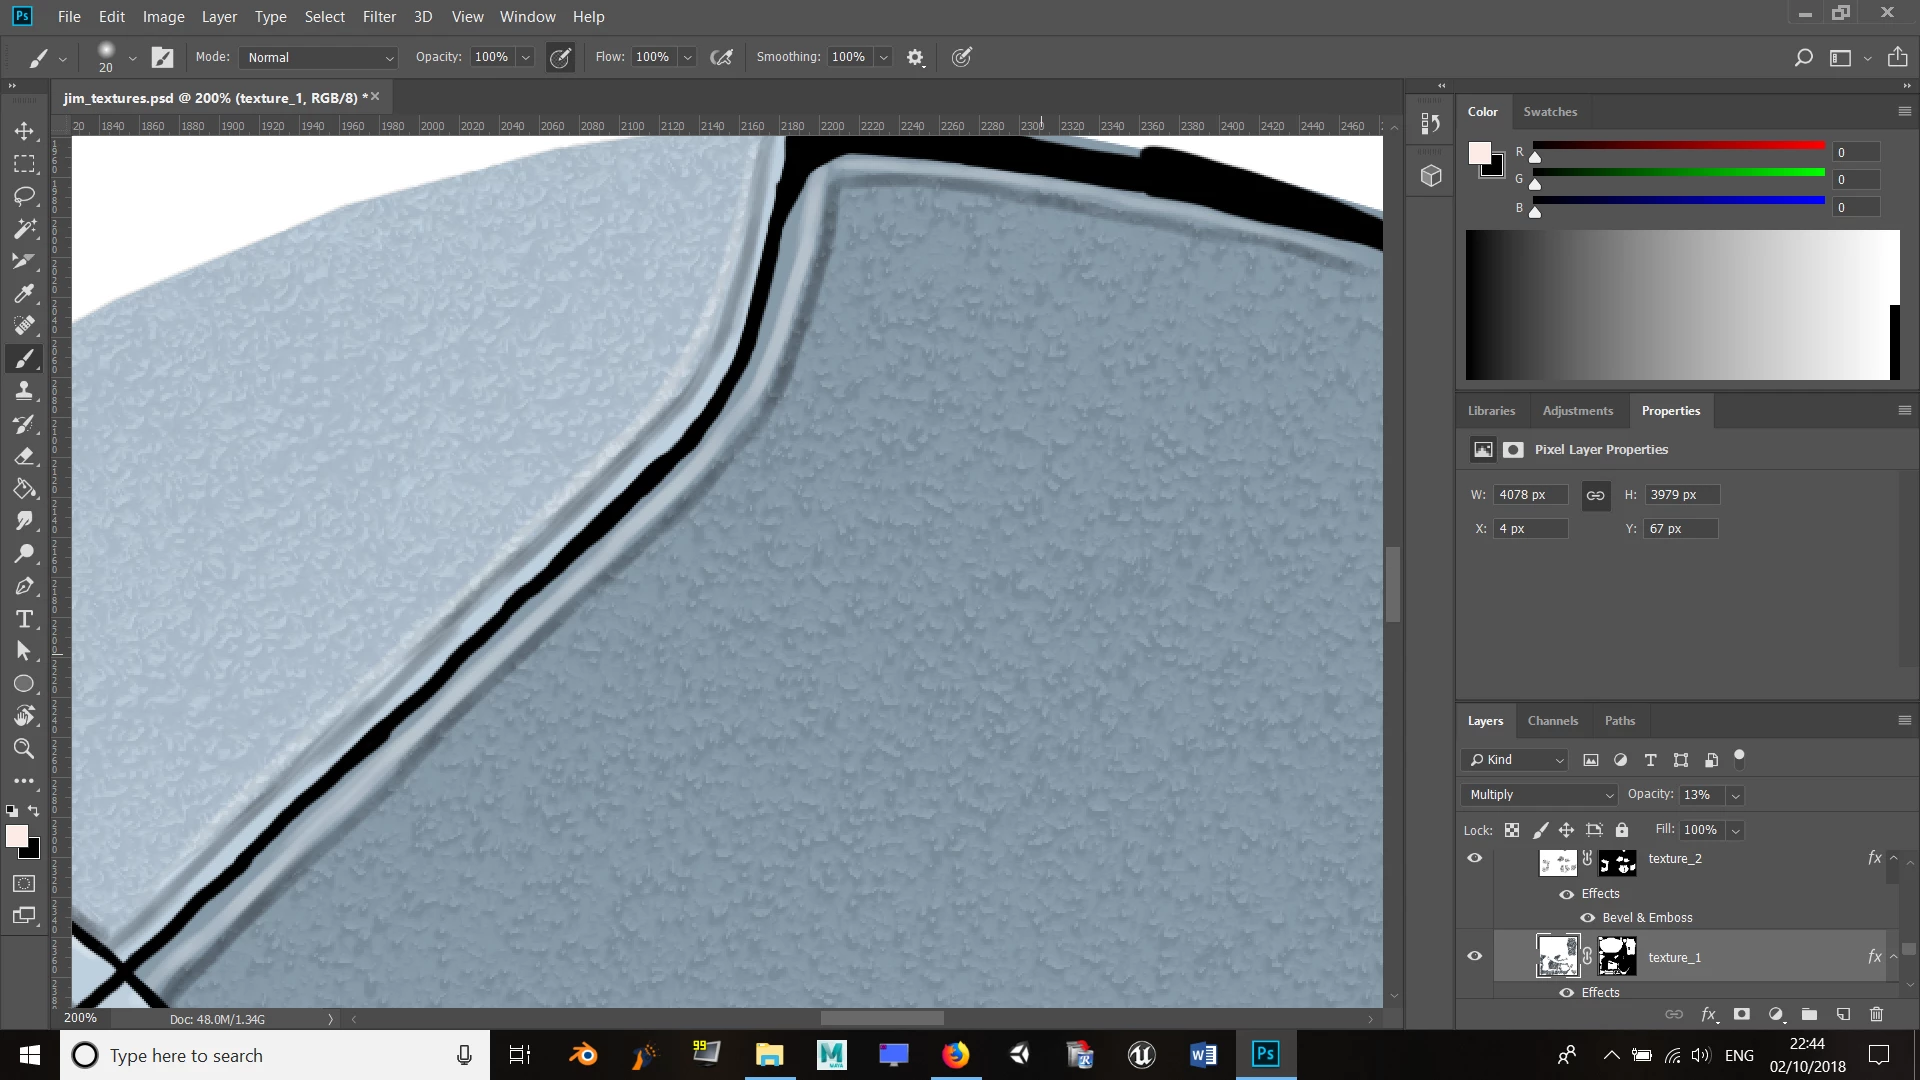
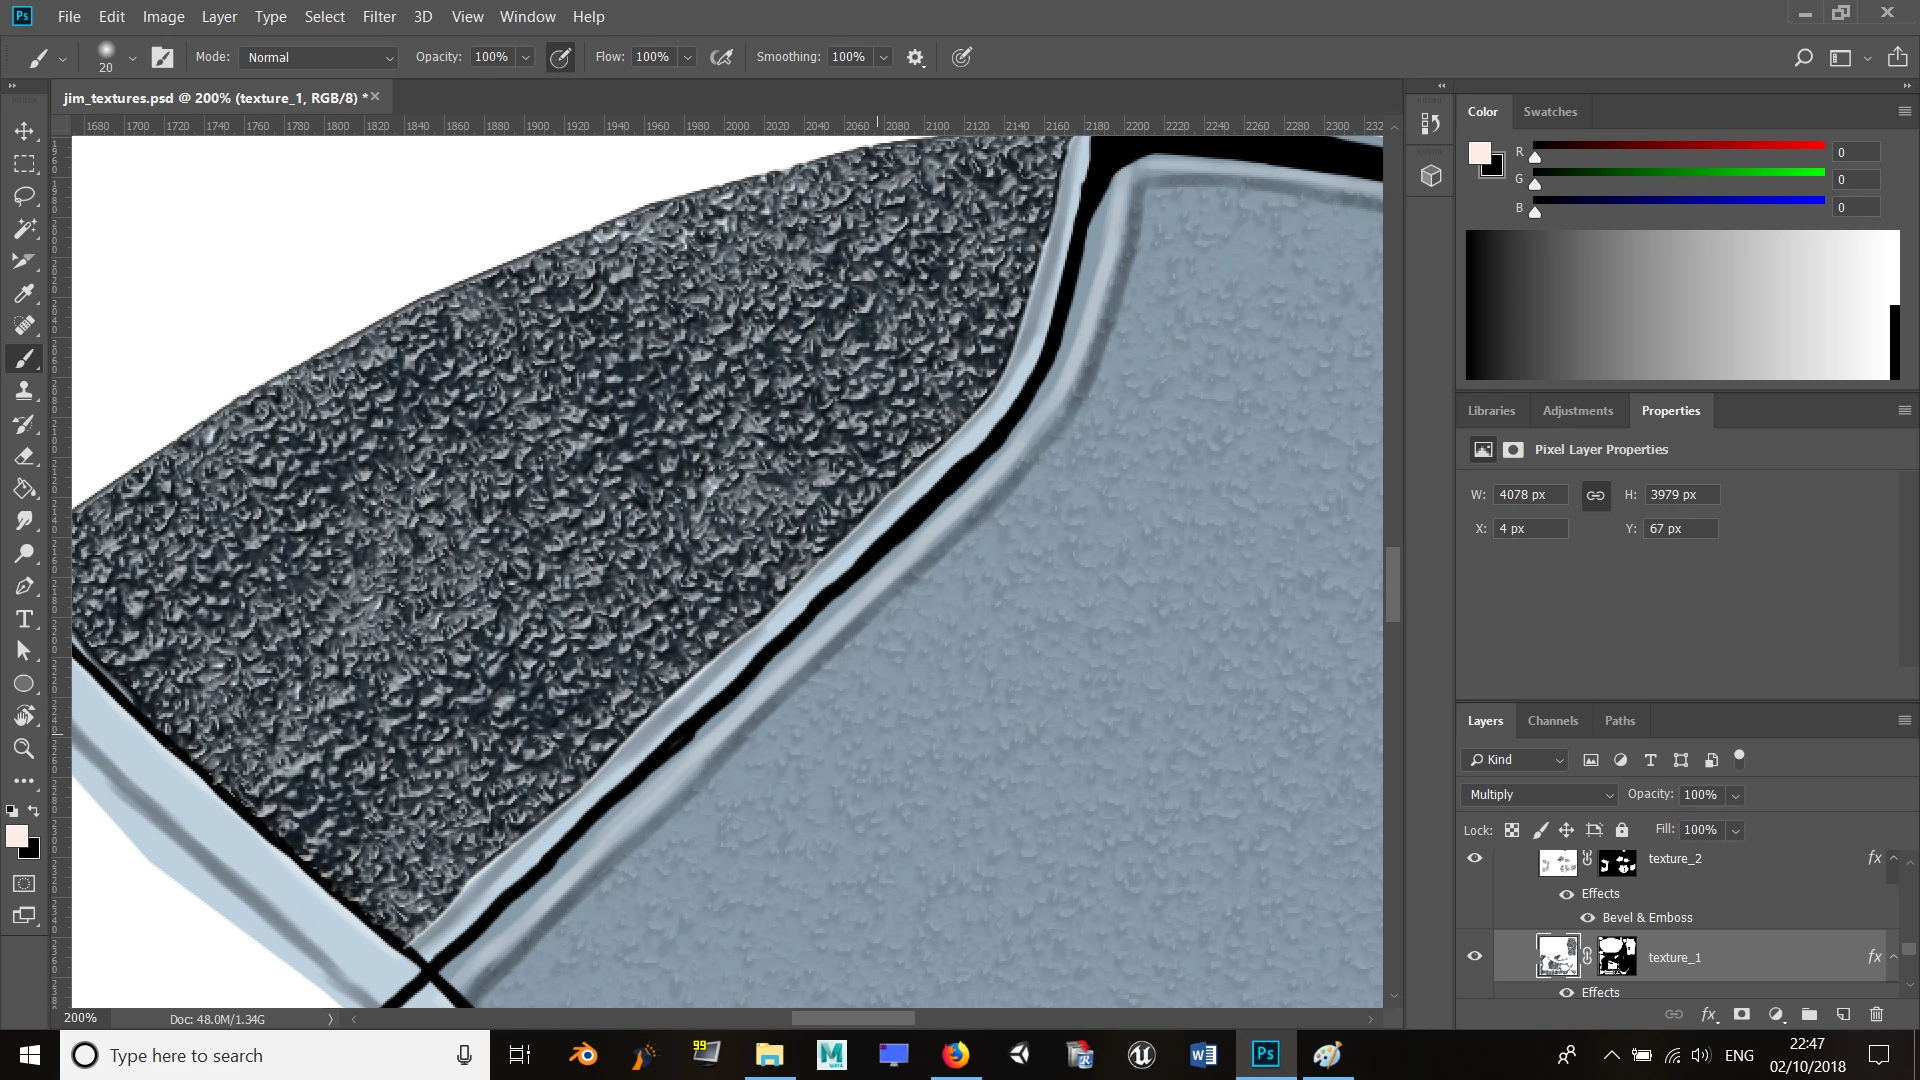
The disadvantage of applying this to the diffuse texture is that when you apply it to a 3D model, the shadow detail will not match the 3D lighting on the model.
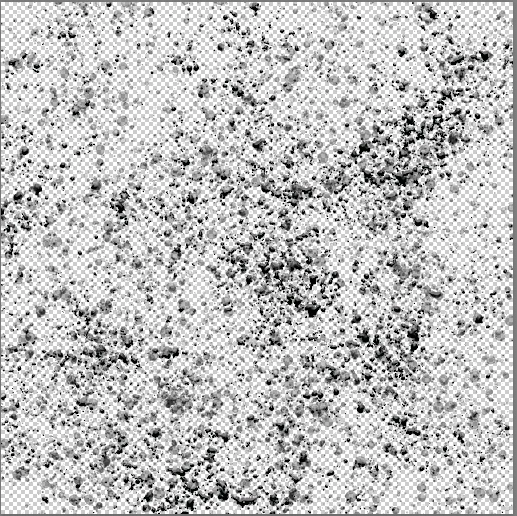
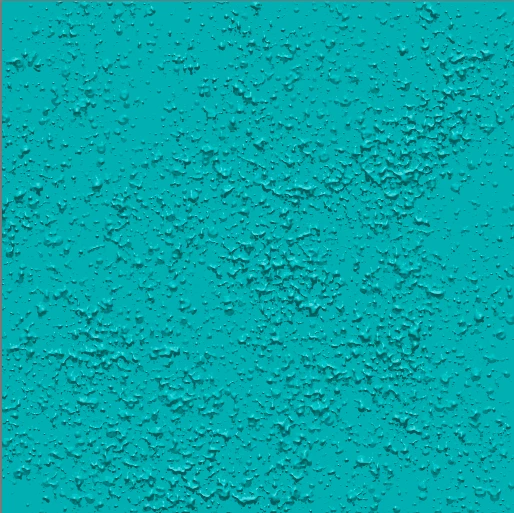
But to simulate that effect :
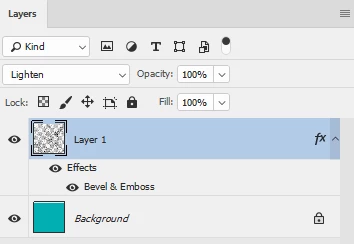
On an empty layer paint with a "splatter "brush (you can download one free in Kyles Mega pack if you are using Photoshop CC)
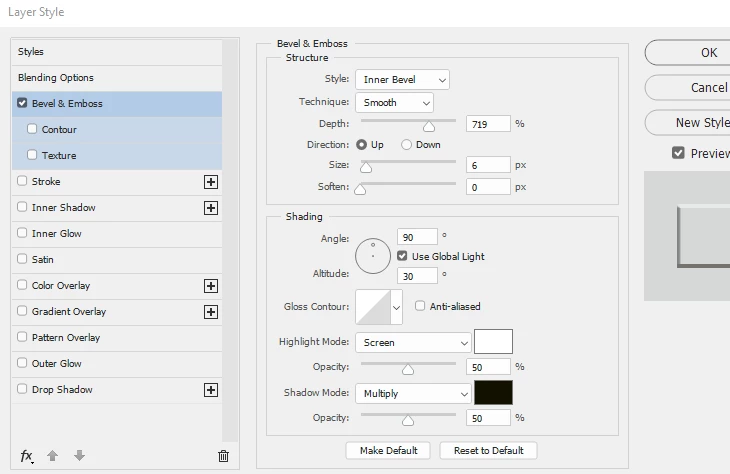
Right click the layer in the layer panel and in Blending options add a bevel and Emboss effect
Adjust the blending mode and opacity to get the effect you require (I've used "Lighten")
Dave