- Home
- Photoshop ecosystem
- Discussions
- How to blur edges outwards of an image in Photosho...
- How to blur edges outwards of an image in Photosho...
How to blur edges outwards of an image in Photoshop?
Copy link to clipboard
Copied
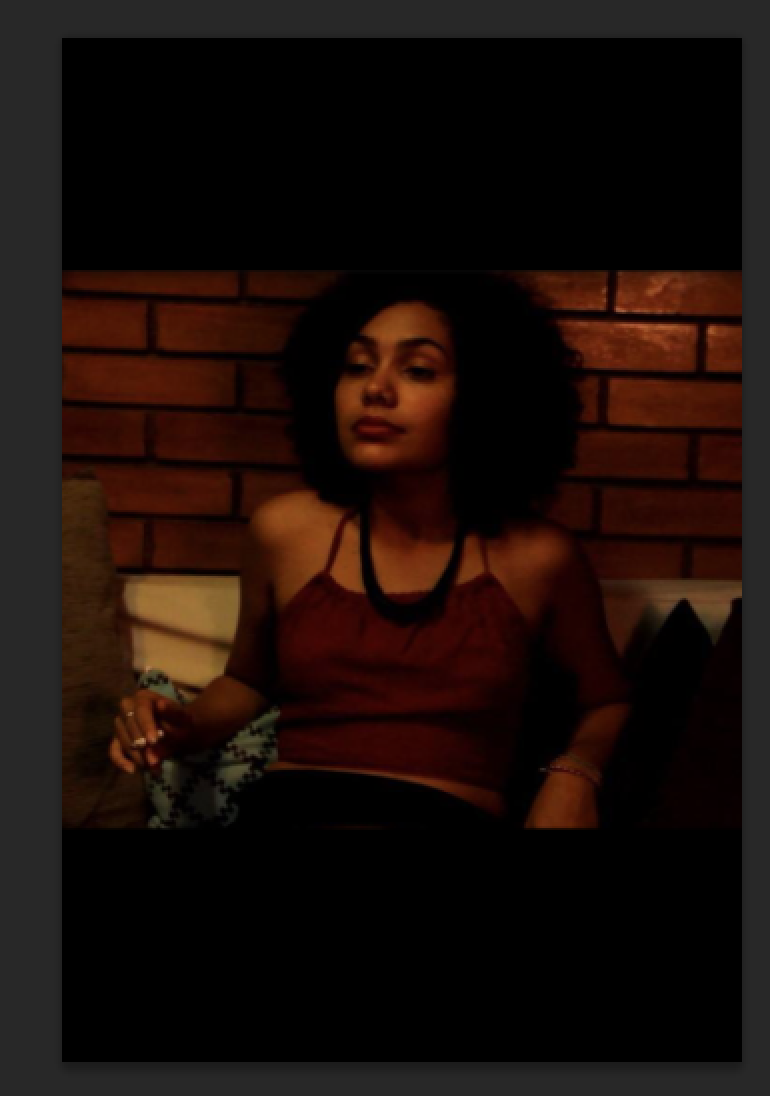
I'm currently doing a poster for a school project (a short film that we produced) and I want to blur the edges of the image outwards. It's going to have a black border, and I want the edges to not be as harsh as they are now. Is there any way to achieve this effect? I've included the photo below:

Thanks!
Explore related tutorials & articles
Copy link to clipboard
Copied
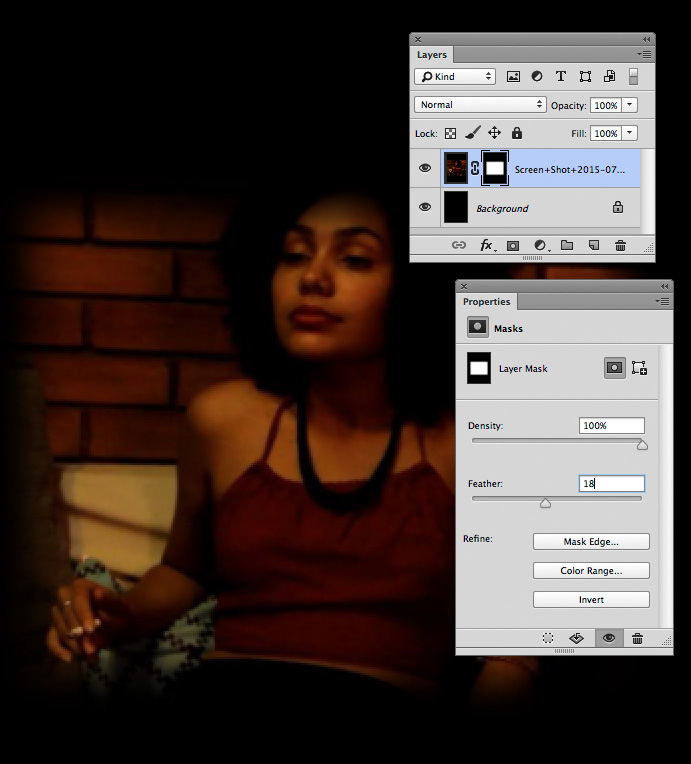
I would recommend using a Layer Mask and Feathering that.

Copy link to clipboard
Copied
If you have PS CC, you can use Iris Blur.
Copy link to clipboard
Copied

I assume you have the image on a layer above a black background layer as shown here.
Click on Layer 0, which contains your image. Then select the Elliptical Marquee tool, and in the Options bar, set Feather to 0. Select part of the image. To reposition the selection, click in its center and drag it. Note: If, after creating the selection, you want to alter its dimensions, choose Select > Transform Selection, and make the adjustment. Then either click on the Commit checkmark in the upper right of the Options bar, or use the Return key to complete the change.)
Still in Layer 0, click on the Add Layer Mask symbol at the bottom of the Layers panel. It is the second symbol from the left. This will produce a hard-edged oval containing the selected portion of the image. Choose the Properties panel, move the Feather slider to produce the degree of vignette you prefer and click OK. If the Properties panel does not currently appear, choose Window from the Menu bar and click on Properties from the drop-down menu.
Copy link to clipboard
Copied
Hello everyone!
Just want to say thank you for the help! All of your tips really clarified the problem.
Thanks again!
Copy link to clipboard
Copied
I'll add my two cents worth...
The lady's right hand is very close to frame edge, and I wouldn't want to mess that up, so I would start by filling the border with Content Aware Fill. Rather like we do when faking some extra content when preparing a canvas print we will need to fit round the stretcher. Then use a feathered layer mask as per suggestions above.
I'll add that the lens blur options are different from things like Gaussian Blur, because they don't cause selected content to bleed outside the selection.
Find more inspiration, events, and resources on the new Adobe Community
Explore Now

