• Global community
    • Language:
      • Deutsch
      • English
      • Español
      • Français
      • Português
  • 日本語コミュニティ
    Dedicated community for Japanese speakers
  • 한국 커뮤니티
    Dedicated community for Korean speakers
Exit
0

How to enlarge an image without loosing quality?

Community Beginner ,
Aug 29, 2016 Aug 29, 2016

Copy link to clipboard

Copied

Hi!

I need to resize an image, I know that resizing and resampling are two different things, so I read that for printing is recommended to resize, so I resized my image to change the quality for printing, the problem I have is that I don´t know how to make the image bigger, as it doesn´t change size on the screen so that it will fit on my template. its too small, I can only think about resampling it, but if I resample I will be changing the number of pixels and loosing quality, right? How can I enlarge the image getting the best quality possible?

Thanks

Views

54.5K

Translate

Translate

Report

Report
Community guidelines
Be kind and respectful, give credit to the original source of content, and search for duplicates before posting. Learn more
community guidelines

correct answers 1 Correct answer

LEGEND , Aug 29, 2016 Aug 29, 2016

The simple answer to that question is you cannot make an enlargement without some loss of quality, even if you were to do that with an enlarger in a darkroom with old fashion film there would be some loss, but its a question of how perceptible the loss is and film was until the invention of multi-mega pixel cameras far more forgiving than digital media. However you can still do a lot digitally

1) Go to the image size dialog and set it to re-sample using the 'preserve details' interpolation method

...

Votes

Translate

Translate
Adobe
LEGEND ,
Aug 29, 2016 Aug 29, 2016

Copy link to clipboard

Copied

The simple answer to that question is you cannot make an enlargement without some loss of quality, even if you were to do that with an enlarger in a darkroom with old fashion film there would be some loss, but its a question of how perceptible the loss is and film was until the invention of multi-mega pixel cameras far more forgiving than digital media. However you can still do a lot digitally

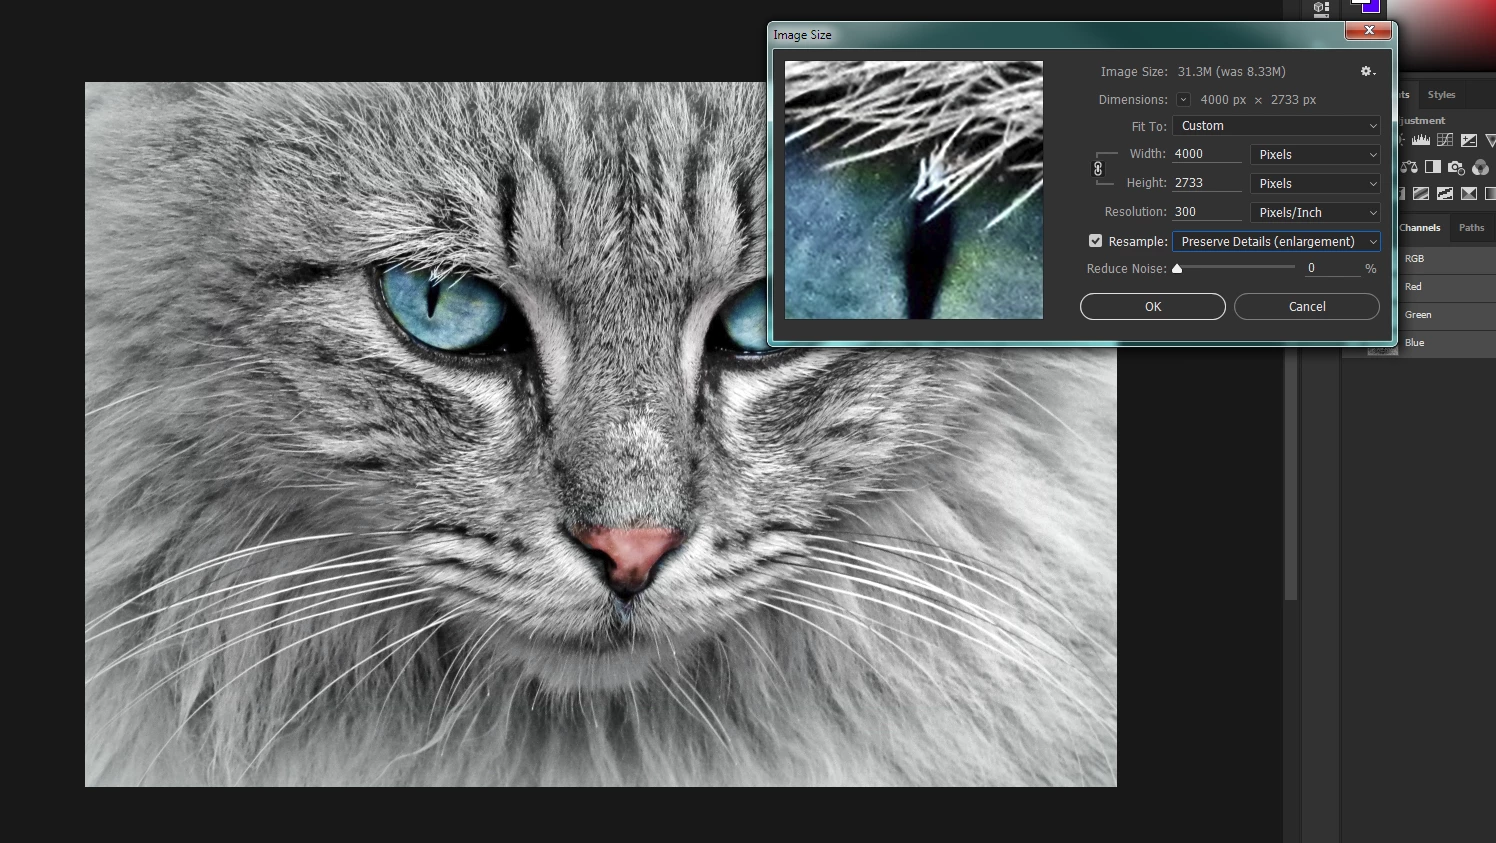
1) Go to the image size dialog and set it to re-sample using the 'preserve details' interpolation method and increase the width and the height, but don't go crazy doubling the number of pixels is easily as far as you showed go.
1.png

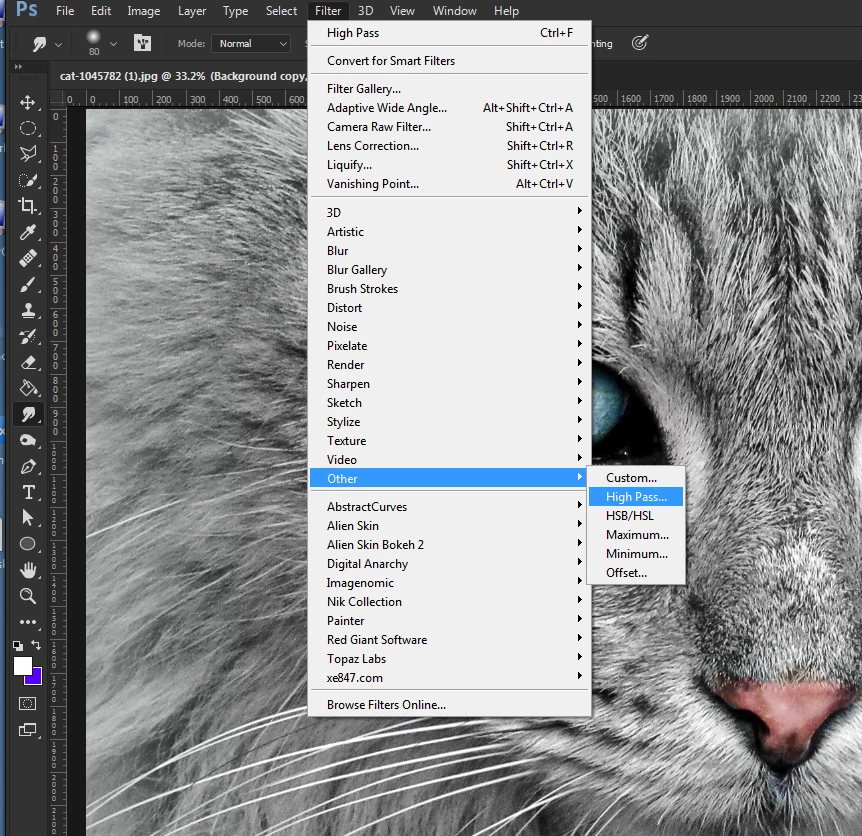
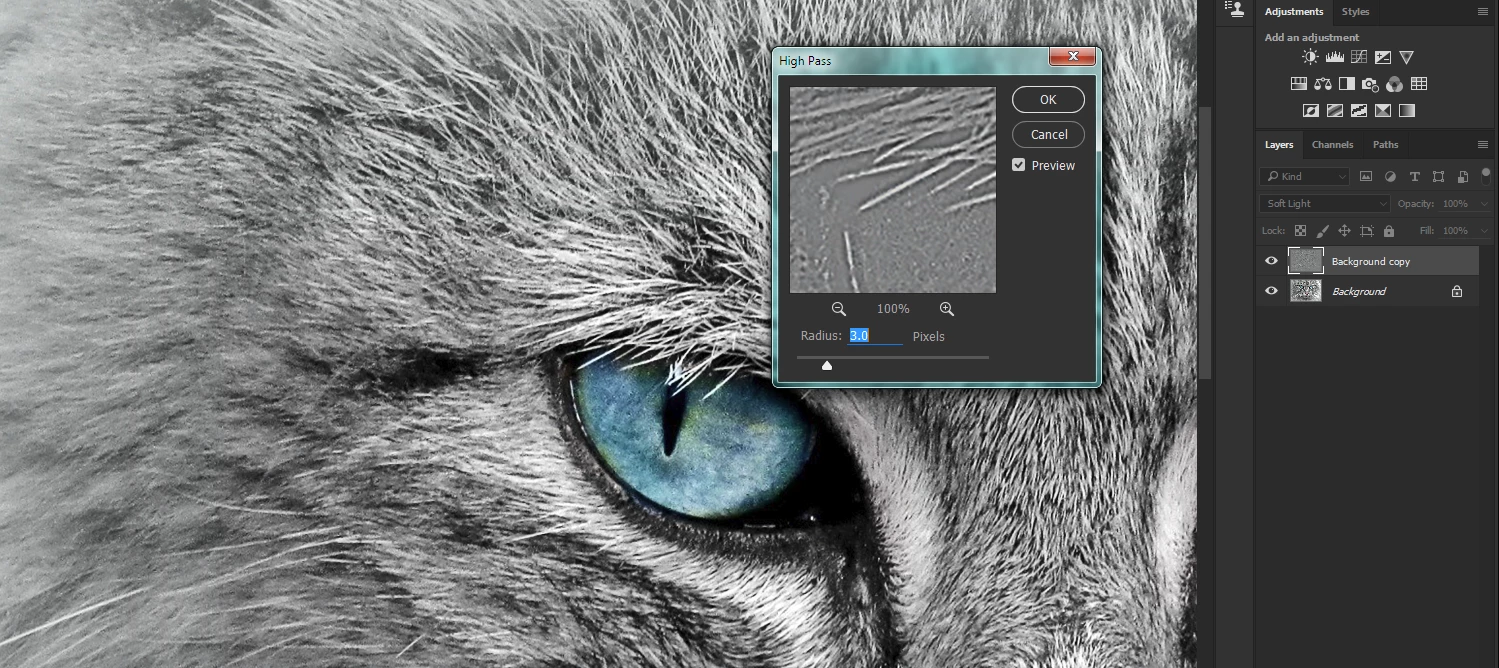
2) Photoshop will have now made calculated guesses about the colors of pixels that would be adjacent to real pixels in the image and created them, inevitably it will make mistakes which will show up as a reduction in sharpness. To compensate for that save the enlarged image as a 'Smart Object' or indeed you could have done that in step 1. Now duplicate the layer ctrl-J or cmd-J , set the blend mode to 'soft light' and apply a 'High Pass' filter
4.png

Adjust the preview to give an enhanced edge like below. This is trial and error which is why a smart object is best to use as a smart filter is available for retrys.
2.png

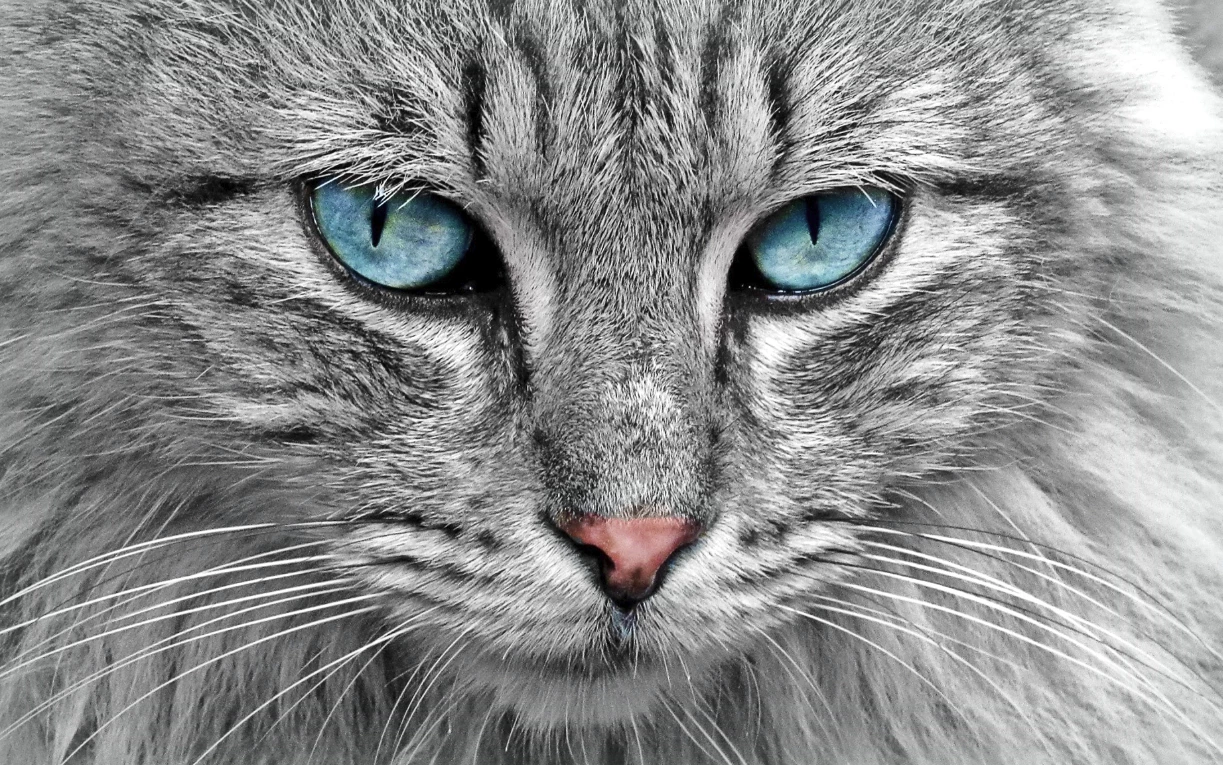
What this procedure does is sharpen the image in a very controlled way compensating for loss of focus during the enlargement.

Generally if you start with a good quality uncompressed image this will result in a nearly perfect enlargement
3.png

Better results can be obtained with third party plugins like Alien Skin Blow UP as they have more sophisticated algorithms for enlargements but this method tends to work very well

Votes

Translate

Translate

Report

Report
Community guidelines
Be kind and respectful, give credit to the original source of content, and search for duplicates before posting. Learn more
community guidelines
Community Beginner ,
Aug 30, 2016 Aug 30, 2016

Copy link to clipboard

Copied

Thanks a lot! This works!

Votes

Translate

Translate

Report

Report
Community guidelines
Be kind and respectful, give credit to the original source of content, and search for duplicates before posting. Learn more
community guidelines
Community Expert ,
Aug 30, 2016 Aug 30, 2016

Copy link to clipboard

Copied

Terri Stevens wrote:

Better results can be obtained with third party plugins like Alien Skin Blow UP as they have more sophisticated algorithms for enlargements but this method tends to work very well

Hmmm...  I wonder what Chris Cox would say about that?    We had a discussion here a while back in which Chris and Jeff Schewe talked about upresing, and Chris said Photoshop's Preserve Details was as good as any of the third party alternatives. 

Beautiful cat btw.  Is it a Main Coon?  This is our cat Ruby.  He's scared of his own shadow, but that at least keeps out of the road.  We have had two cats run over in the ten years we have lived in this house.

Votes

Translate

Translate

Report

Report
Community guidelines
Be kind and respectful, give credit to the original source of content, and search for duplicates before posting. Learn more
community guidelines
LEGEND ,
Aug 30, 2016 Aug 30, 2016

Copy link to clipboard

Copied

LATEST

It's not my cat Trevor just a stock photo I had. It has beautiful blue eyes don't you think? How do you tell the time on that sundial with the Ruby sitting on it? You'll have to get one of those new fangled watch things. I'd worry if I had a cat, at least with a dog you know where it is all the time, but cats are so much more independent. Unfortunately living in a flat and now with a baby I don't have any pets which having been brought up in the country seems very strange, but its not practical just now.

Chris might be right now about the Photoshop interpolation engine, Blowup hasn't been updated for years now, but then again Alien Skin don't seem to update anything very often period.

Votes

Translate

Translate

Report

Report
Community guidelines
Be kind and respectful, give credit to the original source of content, and search for duplicates before posting. Learn more
community guidelines