

- Home
- Photoshop ecosystem
- Discussions
- How to remove shine from this picture?
- How to remove shine from this picture?

Copy link to clipboard
Copied
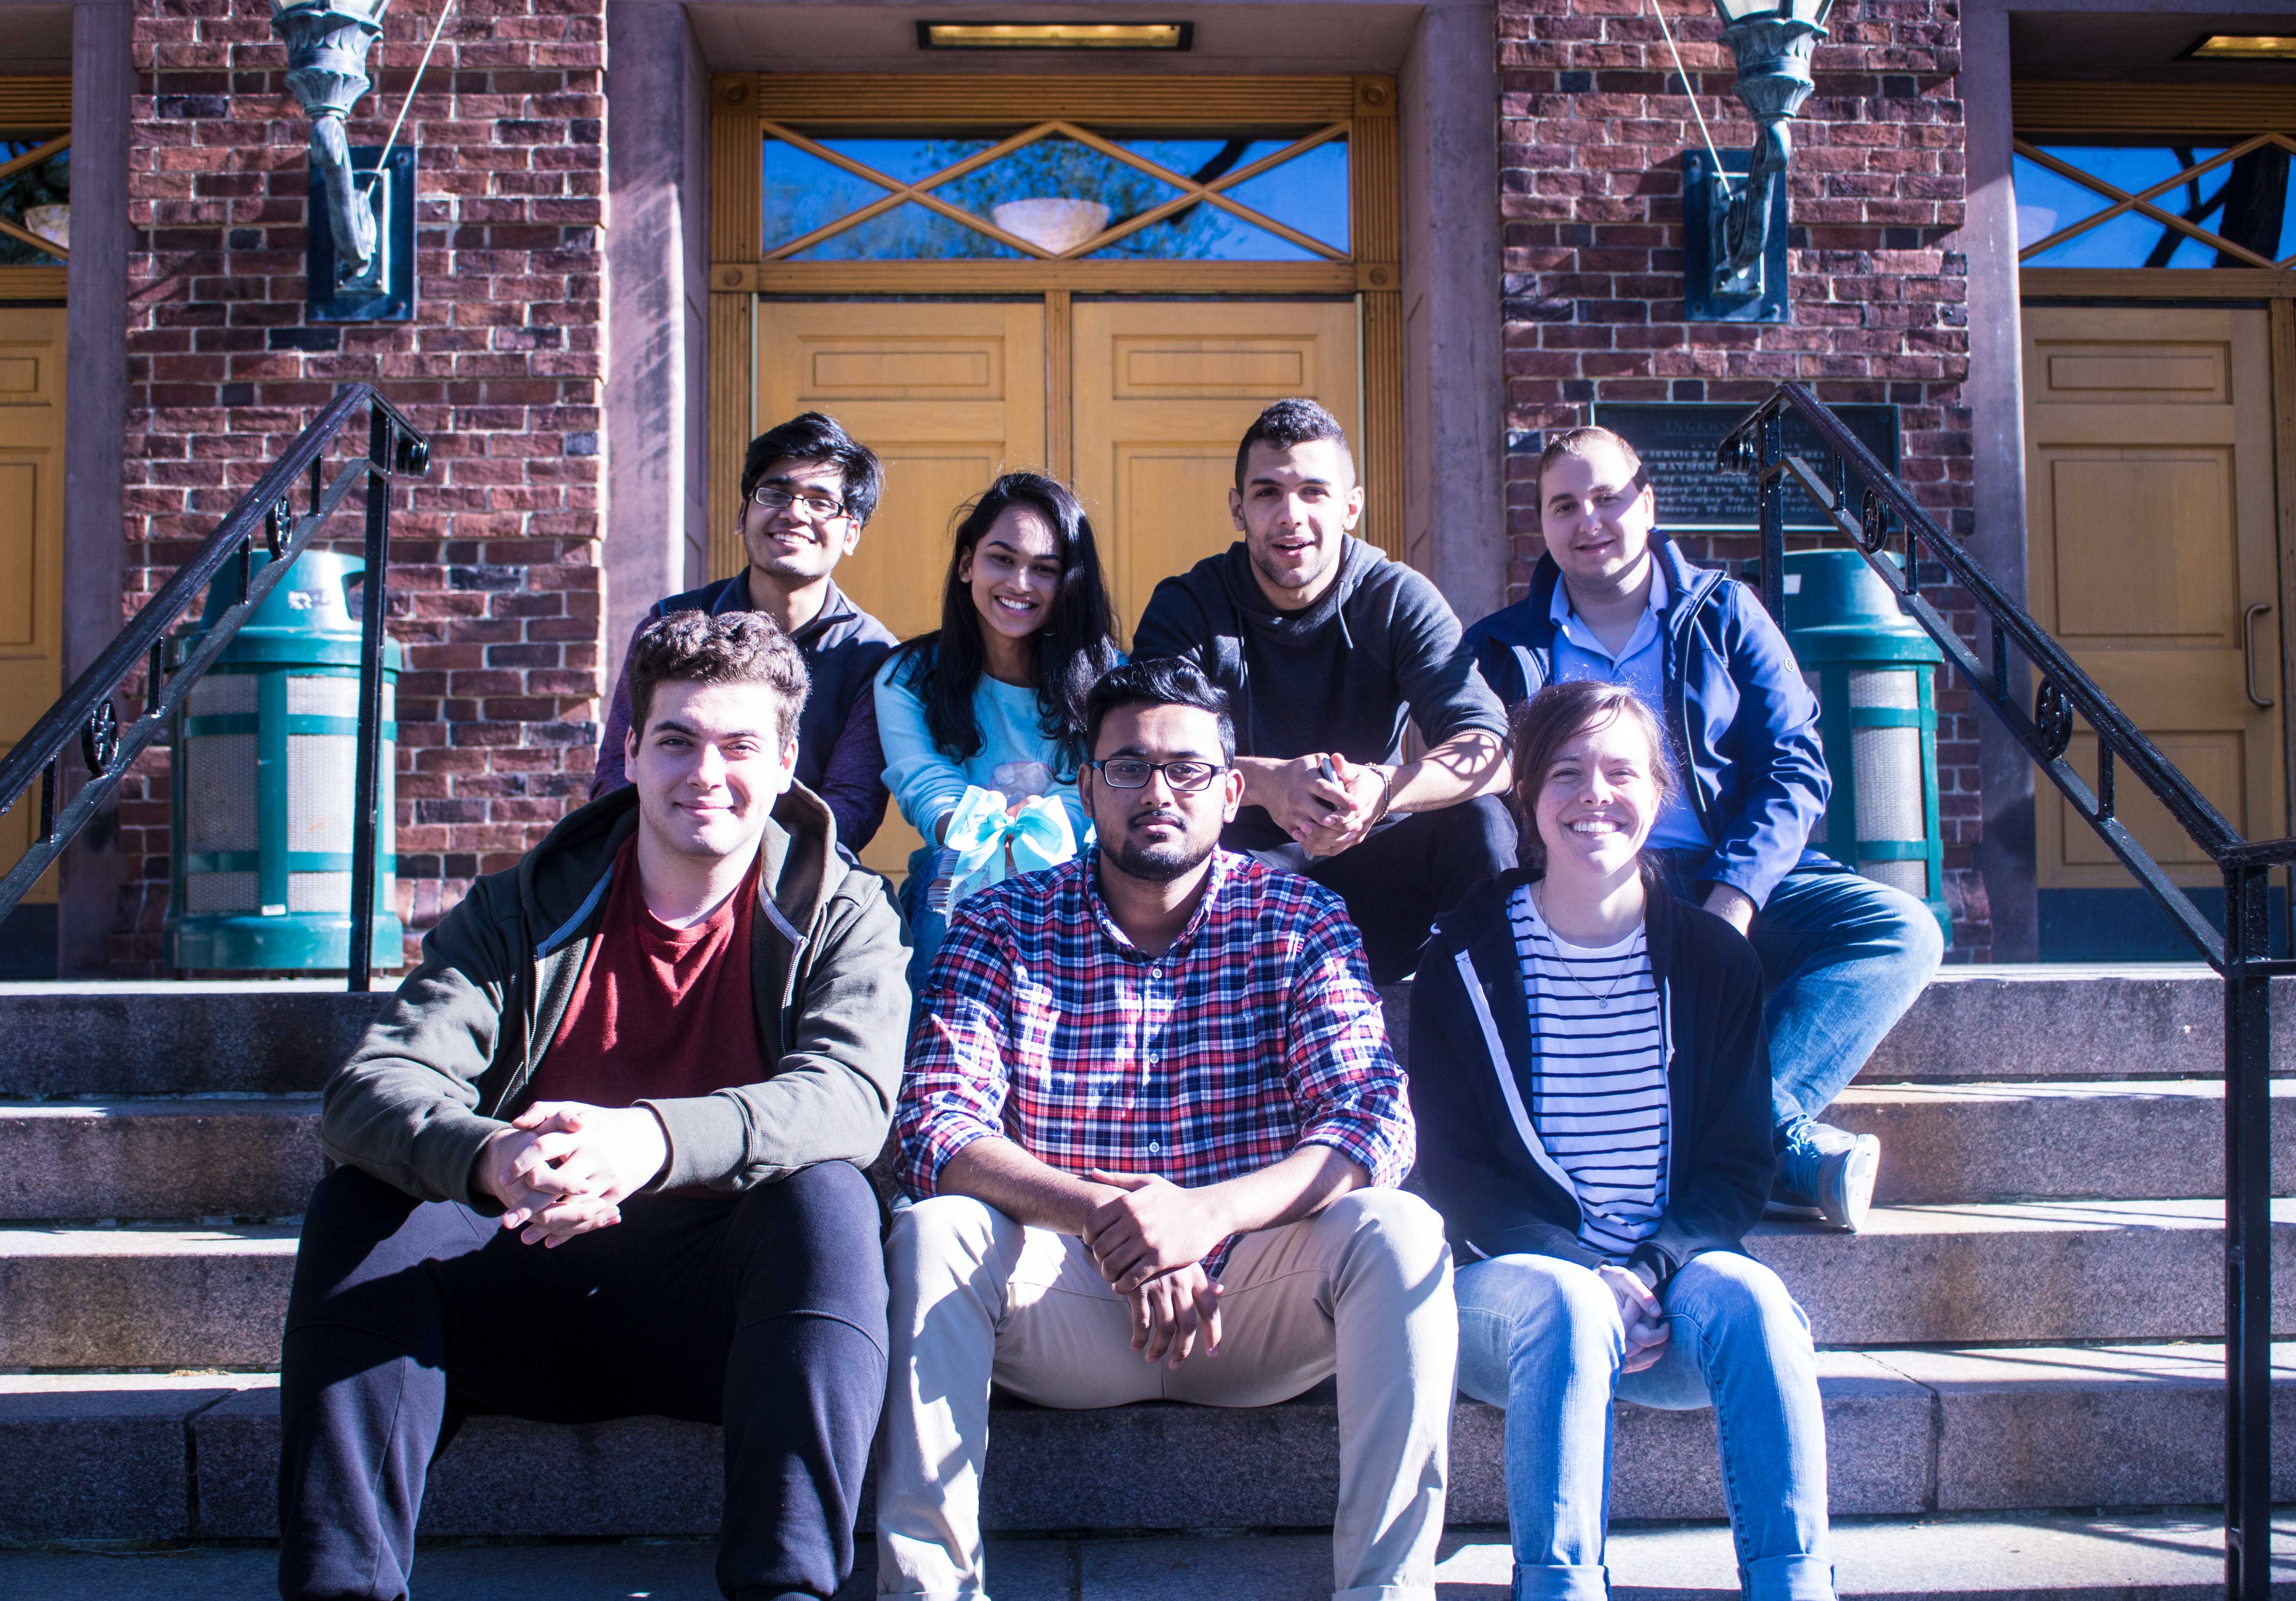
I have been trying to remove shine on the faces from this picture. I have tried content aware fill, levels, curves, masking and brushes. I tried looking online maybe I am doing something wrong?
I want to remove just the bright spots on their faces without killing the brightness of the picture. If I have to edit each face I will do it, but so far the results have been pretty destructive and not subtle. If someone could fix this and show the steps it would be a life savior. Any help is appreciated!


 1 Correct answer

Someone recently linked to this pdf, maybe it can be of use.
http://www.adobe.com/digitalimag/pdfs/highlight_recovery.pdf
Explore related tutorials & articles
 13
Replies
13
13
Replies
13
Copy link to clipboard
Copied
Good day!
Do you have the Raw images?
Because there is precious little to work with in this jpg.
An Adjustment Layer set to Blend Mode Multiply and some Blend if settings might help a little.

Regards,
Pfaffenbichler
Copy link to clipboard
Copied
Hello,
I do have the raw images, but they are too large. I could downsample and upload them if that would be helpful? I will try out our suggestions!
Thank you for your reply!
Sincerely,
Adnan Sakib
Copy link to clipboard
Copied
I do have the raw images,
Then you should try fixing the issue in Adobe Camera Raw as much as possible with global settings and then with the Adjustment Brush for example where necessary.
By opening the RAW files as Smart Objects you can combine maintained RAW editing capability with Photoshop Adjustments and some edits.

Copy link to clipboard
Copied
The original image showed evidence of a color balance problem, blown out highlights and considerable chromatic aberration. The method shown below adjusts the color balance first, then addresses the highlight problem. No attempt was made to deal with the chromatic aberrtation.
1. Add a duplicate layer
2. Use Curves and its middle eyedropper (chose the vertical gray cement column on the far right) to correct the overall blue cast.
3. Quick selection tool to select the super highlight sides of the faces that have a Lab L value of 99% and even 100%.
4. Place the selection on separate layer
5. Create a foreground flesh color patch by averaging the left side of the faces
6. Lock the transparent part of the layer, then Edit > Fill with Foreground color set to Color. Layer Blending Mode: Multiply
(Depending upon your choice of color, you may want to dupe this layer for greater control. I did.)
7. Change the Mode to Lab
8. Adjust local and total contrast via the Curves L channel of the transparent layer and then the Background Layer without affecting the color..
9. Return to RGB

Copy link to clipboard
Copied
1. Add a duplicate layer
2. Use Curves and its middle eyedropper (chose the vertical gray cement column on the far right) to correct the overall blue cast.
Using a Curves Adjustment Layer instead would seem prudent.
7. Change the Mode to Lab
8. Adjust local and total contrast via the Curves L channel of the transparent layer and then the Background Layer without affecting the color..
9. Return to RGB
I strongly discourage converting images, in particular 8bit images, repeatedly to different Colour Modes.
Copy link to clipboard
Copied
Hello,
I will try out your suggestions! How would you recommend fixing the chromatic abberation?
Thank you for your detailed response!
Sincerely,
Adnan Sakib
Copy link to clipboard
Copied
How would you recommend fixing the chromatic abberation?
Again something that would be addressed in Camera Raw (Lens Correction > Defringe).

Copy link to clipboard
Copied
You will not be able to get a flat tone or the same tone across each of their faces. Because you took the picture with a hard light hitting the one side of their face, it can not really be changed too much.
You can play with it in the Camera Raw filter, but you will not get a cohesive tone across the faces.
Usually before I do a shoot somewhere I go with an assistant to the location to do a sunlight test. See where the sun falls on a person the day before I want to do a shoot (at the same time of day that I have planned to do the shoot). If the sun is too bright then I will try to do it at a different time. Granted there are variable like cloud cover that can change the lighting.
If I am not shooting up into the sky then a a day with a few clouds is perfect as it will filter the light better. If not then I bring a reflector to bounce light on my subject's face. Granted with a group... bouncing light is probably not that easy.
I am guessing this photo was spur of the moment. Which is ok. You created a natural group picture that looks good. The overall tone of the image just needs tweaked. The hard light is ok for this shot, unless you are planning on using it for a team shot for a company website.... then I would reconsider redoing it.
But alas, you can not remove the hard light perfectly from the side of their faces.
Copy link to clipboard
Copied
You can play with it in the Camera Raw filter, but you will not get a cohesive tone across the faces.
The OP stated they have the RAW images, so using the Camera Raw Filter would involve unnecessary image degradation compared to using Camera Raw proper.
Copy link to clipboard
Copied
I was only being general.
Yes if you have RAW images they will upload directly into Camera RAW.
The point that I am making... is that you will not get a smooth tone because of the bright sun on their faces. It can not easily be fixed.
Now maybe if a person is a pro retoucher he or she can go in and paint the area and use the tools properly to fix that. But most average users can not probably make this adjustment. The sun is simply too harsh.
So just take the part of what I said about shooting when there is no harsh sunlight hitting a person's face. Another example... is I always avoid shooting models outside around noon and 1pm... simply because the sun is usually shining from above at that time which produces dark shadows under the eyes and nose of my subject. That can be corrected with a bounce sometimes.... but not always. So I always try to shoot outside during optimal conditions (which may or may not always be possible depending on what you are shooting).
Copy link to clipboard
Copied
I do know how to shoot and when to shoot as I have been working for a while, it was just a group photo that I didn't want to make an incredible fuss about it especially since people aren't available at any other part of the day. I appreciate you trying to help anyways, but your comments aren't really super relevant to the matter at hand. Thank you!
Copy link to clipboard
Copied
Someone recently linked to this pdf, maybe it can be of use.
http://www.adobe.com/digitalimag/pdfs/highlight_recovery.pdf
Copy link to clipboard
Copied
I appreciate all your help sir! Once I tone this image down a bit and am somewhat satisfied you will most likely get the correct answer! Thank you for everything!

Find more inspiration, events, and resources on the new Adobe Community
Explore Now
 AdChoices