Participant
June 19, 2017
Answered

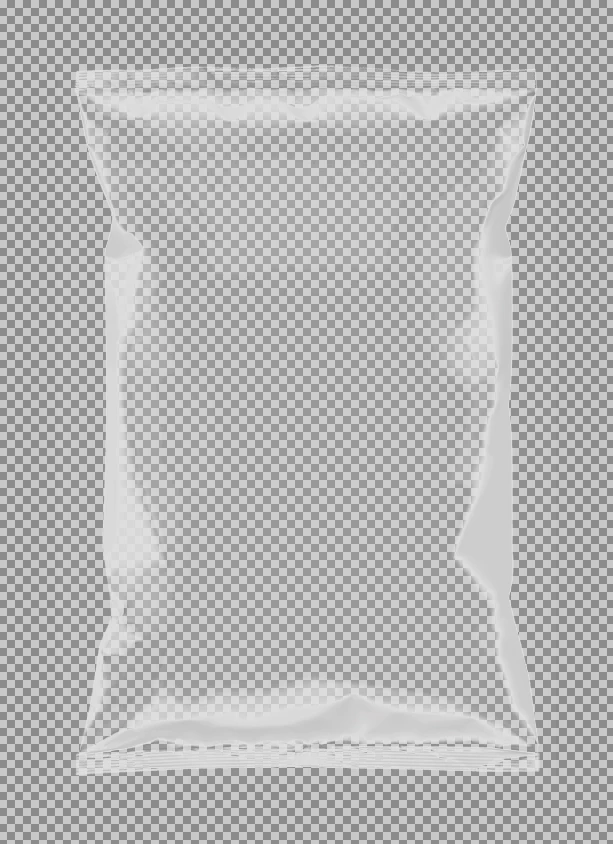
Insert image into png chip bag

  • June 19, 2017
  • 4 replies
  • 12531 views

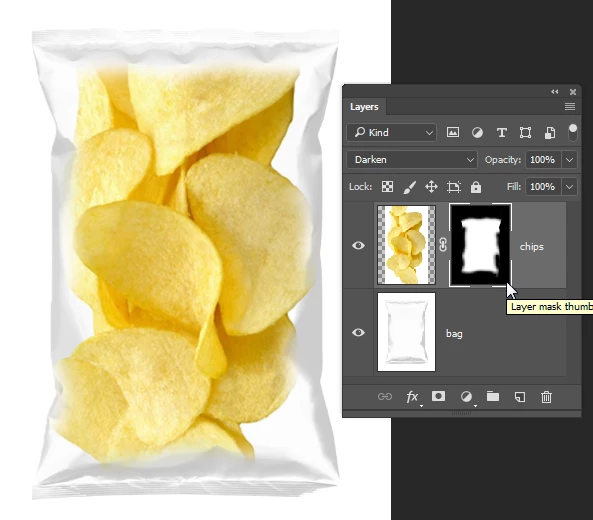
Hi I'm attempting to insert an image into a transparent chip bag but I get no result. I'm using a chip bag png file but after that I can't select it or do much with it. I wan't to be able to insert any image I create into it for future use. I thought its almost like drawing inside of the object like illustrator does but I don't think thats the correct rout. Can someone please point me in the right direction. Thank You.

    Correct answer barbara_a7746676

    The bag in your screen capture does not look transparent. If it is transparent there would normally be a checkerboard pattern like this:

    Or maybe like this:

    On the other hand, maybe it is on top of a white layer and that's why it doesn't look transparent.

    Advice would be different, depending on whether it is transparent or not.

    Since I can't see that it is transparent, I will assume that it isn't.

    Photoshop does not have a "Draw Inside" mode but you can get similar results. Below I put the bag on one layer and the chips on a layer above it.

    Next, add a Layer Mask by clicking the icon at the bottom of the Layers panel.

    Select the brush tool, and use a soft feathered brush.

    Click on the mask to make it active (it will get a thicker line around it in the Layers panel when it is active).

    Paint in the mask with black where you want to hide the chips.

    4 replies

    Participant
    August 14, 2024

    Thank you it's help me a lot ☺️ 

    Participant
    September 27, 2023

    Thanks You !!!¡!!


    barbara_a7746676
    Community Expert
    barbara_a7746676Community ExpertCorrect answer
    Community Expert
    June 20, 2017

    The bag in your screen capture does not look transparent. If it is transparent there would normally be a checkerboard pattern like this:

    Or maybe like this:

    On the other hand, maybe it is on top of a white layer and that's why it doesn't look transparent.

    Advice would be different, depending on whether it is transparent or not.

    Since I can't see that it is transparent, I will assume that it isn't.

    Photoshop does not have a "Draw Inside" mode but you can get similar results. Below I put the bag on one layer and the chips on a layer above it.

    Next, add a Layer Mask by clicking the icon at the bottom of the Layers panel.

    Select the brush tool, and use a soft feathered brush.

    Click on the mask to make it active (it will get a thicker line around it in the Layers panel when it is active).

    Paint in the mask with black where you want to hide the chips.

    barbara_a7746676
    Community Expert
    Community Expert
    June 20, 2017

    You may want to lower the layer opacity a bit to make it look more like the chips are inside the bag. I also changed the Layer Blend mode to Darken in the upper left corner of the Layers panel.

    JJMack
    Community Expert
    Community Expert
    June 19, 2017

    You Bag look like it  is opaque and white. If you actually want the image to be on the bag's surface the image would need to be distorted to the bag's shape and also need a distort Displacement map. Look for a Photoshop tutorials for Displacement Map.

    You png is mostly transparent you will no be able to select the bag in the png document. Is you save it also as a jpeg it will ne easy to select the bag in the jpeg version. That layer can also be duplicated into the png document and the bag selected.

    All you need is the Jpg you can save as version as a displacement PSD.   You can place an image in over the background bag image scale it for the bag mask it to the bag's shape. Displacement distort the image and blend in the bag's shading texture using multiply blend mode.

    JJMack
    Participant
    July 10, 2017

    JJMACK, My attempt to try this and this was my end results

    1) Clicked on channels and selected the one with most contrast which was red.

    2) Duplicated the red channel and made a new one.

    3)Added Gaussian blur of 1.0

    4)Saved document as PSD

    5)Added new layer with car image and applied disp map and I saw the edges twist.

    6)Chose every type of overlay mode and the only one that looks semi good was the color burn. I tried the multiply and it did not wrap around the bag like the color burn.

    Please help

    JJMack
    Community Expert
    Community Expert
    July 11, 2017

    adamr51692364  wrote

    JJMACK, My attempt to try this and this was my end results

    1) Clicked on channels and selected the one with most contrast which was red.

    2) Duplicated the red channel and made a new one.

    3)Added Gaussian blur of 1.0

    4)Saved document as PSD]

    5)Added new layer with car image and applied disp map and I saw the edges twist.

    6)Chose every type of overlay mode and the only one that looks semi good was the color burn. I tried the multiply and it did not wrap around the bag like the color burn.

    Please help

    If steps 1 through 4 was to save a PSD for use with distort as a displacement map. I have no idea of how good of a displacement map it would be.  All I did was to add a white background below your png and flatten.  I would have  added a temp Level adjustment layer that made the bag to have greater contrast  by darkening the gray tones and saved a psd for use as a displacement map.  I would have then deleted the level adjustment layer.  So I just had the grayscale bag background layers.  I may have darkened that a bit with a level adjustment for I would be placing in an image over it and blending in the bags shadow texture via multiply blending would help the effect. Before placing in the image I would have first have select the white background using the magic want tool in contiguous mode or used the  quick selection tool.  Then i would have invert the selection so I would have a good selections of the chip bag.  I would save the selection as an Alpha channel name "Image 1".  Then save the Document as a PSD template file.  I would then populate the template via my Interactive Populate Collage script. which would place in the image I selected over the chip bag background layer where the image would be resized by the script to cover the bag and be masked to the shaped of the bag.   The populated template would remain open in Photoshop where I would change the smart object layer blending mode to multiply and add a Smart Distort filter with the displacement map to distort the image to the bags contours more.  You can see the distortion best in the bags seal stripes.  You image did not cover all if the bag and your displacement map most likely did not have a good  darkened  grayscale need to be a good displacement map. Only by burning in the bag did you get some bag texture.

    JJMack