Losing details when cropping
Copy link to clipboard
Copied
I am having an issue with Photoshop. And I am hoping you guys would be able to give some advice. I am working on a product photography project in my Adobe Photoshop CC 2019. These product photos will be used on a website’s catalog to order and buy, thus the website has specific dimension specs: 1500 px x Heigth open x 300ppi must have 5 px border and 24 Bit depth. My original photo begins to lose its’ details and sharpness when I open in Photoshop to Crop and Resize the photo for a specific dimension. My original photo looks fine when I zoom in and out with clear details on the product. However when I resize and crop the photo in Photoshop, it begins to lose it sharpness and details and becomes very pixelated. I think I have tried everything I could find on YouTube but nothing seems to work to retain the products details and sharpness in photos. Any suggestions I would truly welcome.
https://drive.google.com/open?id=1oLd2wKAHNXUFCq-NmTWc6YDH8oR0vDau
https://drive.google.com/open?id=1FtRoh5VVSDkTaY6bkRUIcD2ZCg1g8x7c
Explore related tutorials & articles
Copy link to clipboard
Copied
Hi
Your cropped image looks sharp at 100% zoom (which in Photoshop maps 1 image pixel to 1 screen pixels). Zooming in any further is just showing the individual pixels. That is expected, the original photo shows a closer view at 100% zoom (i.e. the same 1:1 mapping) purely because it has more pixels.
Dave
Copy link to clipboard
Copied
Incidentally you might want to use a curve to lighten the white background, use Content aware fill (or a brush) to fill the gap at the top right corner and when you export the image make sure you convert to sRGB and Embed the colour Profile.
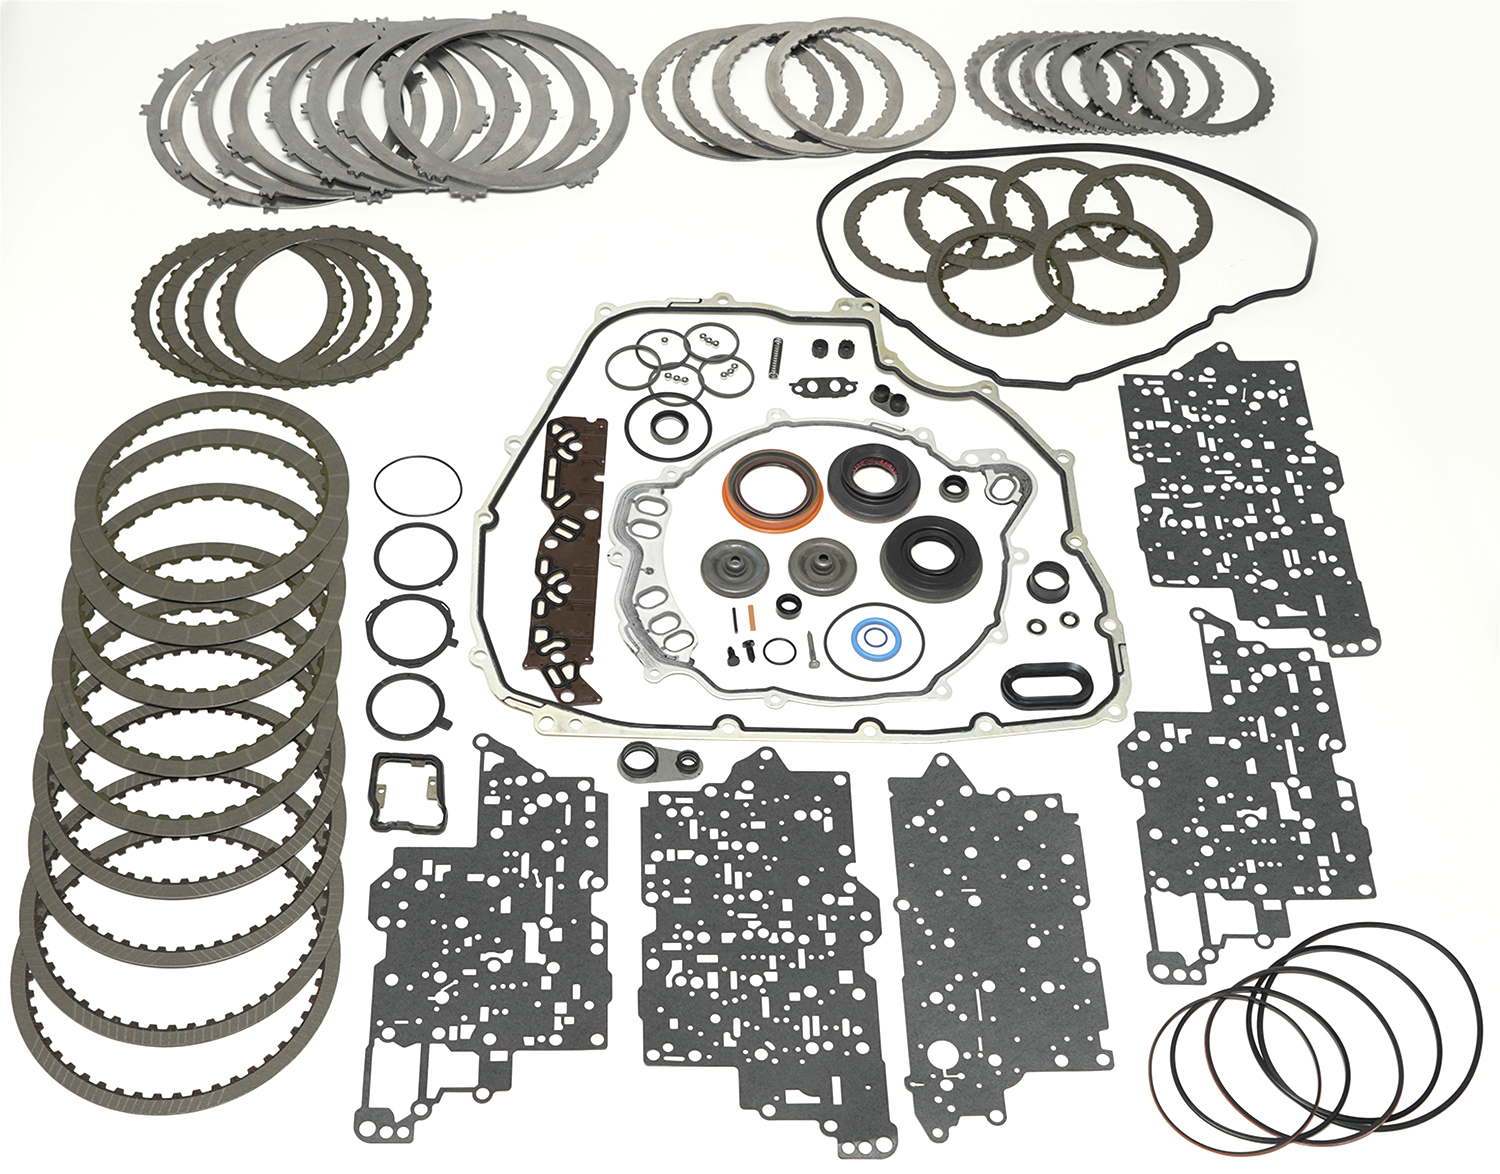
Dave
Copy link to clipboard
Copied
Thanks Dave, thats my next step. Just wanted to make sure that I was not seeing "crazy" on the screen.
Copy link to clipboard
Copied
Thanks Dave, I think that makes sense. However, then why does my single product photo not have the same issue when I resize and crop that photo? The Individual product photo looks great in both original form and when I crop to dimensions from when zoomed-in- and zoomed-out. The Smart Object layer tool was so easy and great for the individual product photo but made the image look worse for the Kit product photos.
Copy link to clipboard
Copied
Hi
Any image will show the same pixel issue if you zoom in to more that 100%. At 200% zoom 4 screen pixels are used for every image pixel. At 400% zoom, 16 screen pixels are used for every image pixel. That is going to show the pixels.
A smart object will redraw the content every time it is resized , but it always redraws at the document resolution. So zooming to more that 100% on the SO will show exactly the same pixellation.
Dave
Copy link to clipboard
Copied
I'm intrigued - what is it? I would guess some kind of gearbox overhaul kit, but I'm not sure.
Dave
Copy link to clipboard
Copied
Hi Dave, it is an Overhaul Kit but I forgot which auto. I have about 122 various Overhaul Kits photos and about 200 Mounts (with 4 different angles to clean up and prepare for an automotive distribution company's on-line catalog site.
Copy link to clipboard
Copied
Thanks - it was the old engineer in me that forced me to ask ![]()
Dave
Copy link to clipboard
Copied
If you are using Place to create the smart object layers you need to be careful. I believe the image you posted had a 350DPI setting If you resample it to 1500px wide the Print resolution will still be set to 350DPI. If you place that file into a document that has a 72DPI resolution. Place will drastically reduce the image 1500px width creating the smart object layer's content. It will be like 308Px wide. If you scale the smart object layer up to 1500px wide the image quality will be very poor. When using Place make sure all documents have the same print resolution so Place will not resize and degrade your images.
Copy link to clipboard
Copied
First I did a perspective crop because it look like you took the shot from an angle. The perspective crop may help a little to reduce the distortion. I then resized to a 1500px width. The of course will loose some detail. You reducing the number id Pixels you have for the images. You can not save all the details you have for the larger image. You have fewer pixels to store details in. Here is the quality I see after a quick perspective crop and an image resize.
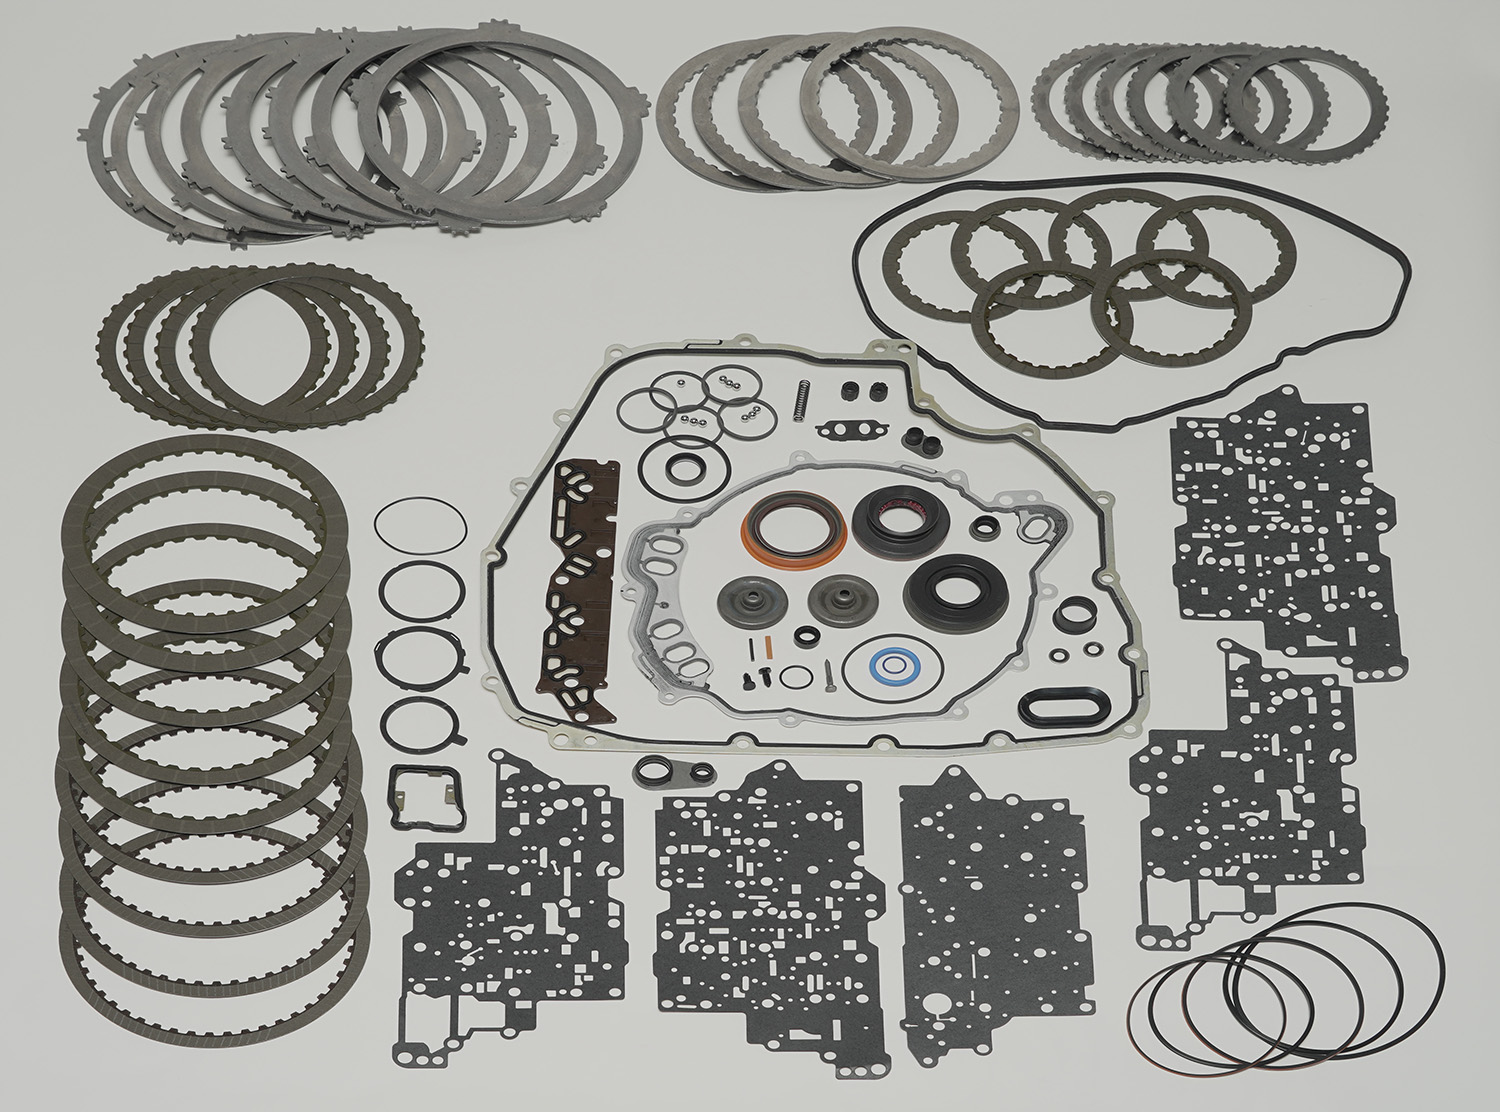
adding a level adjustment
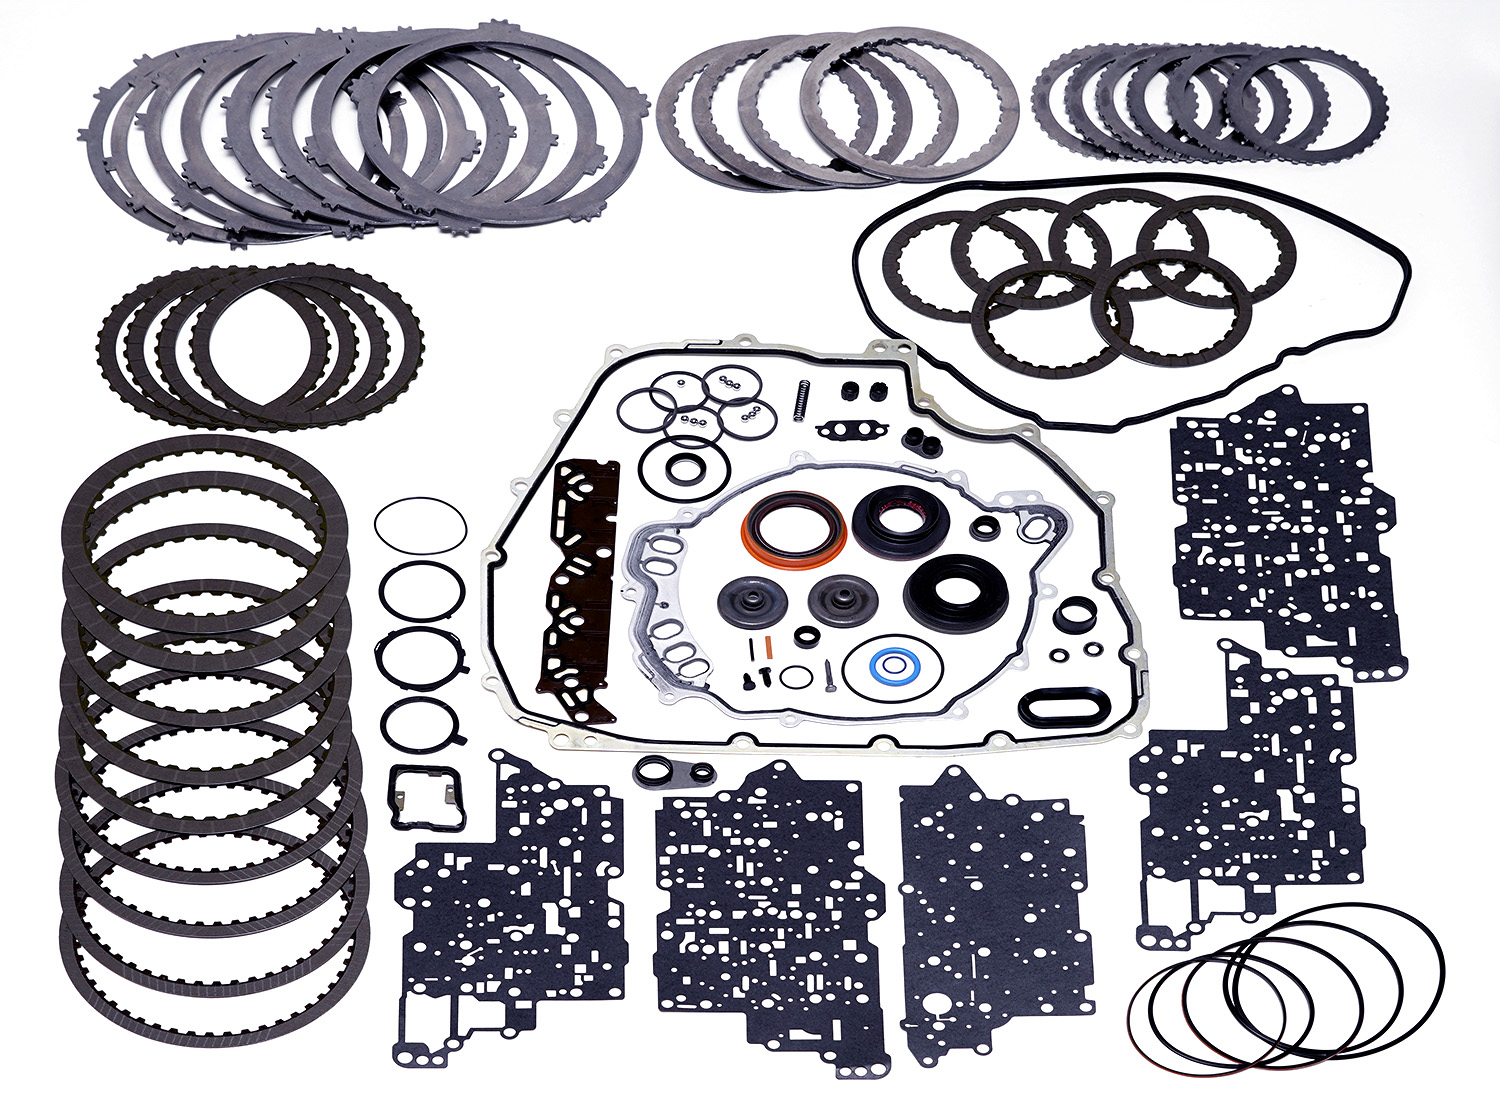
Different crop and curve
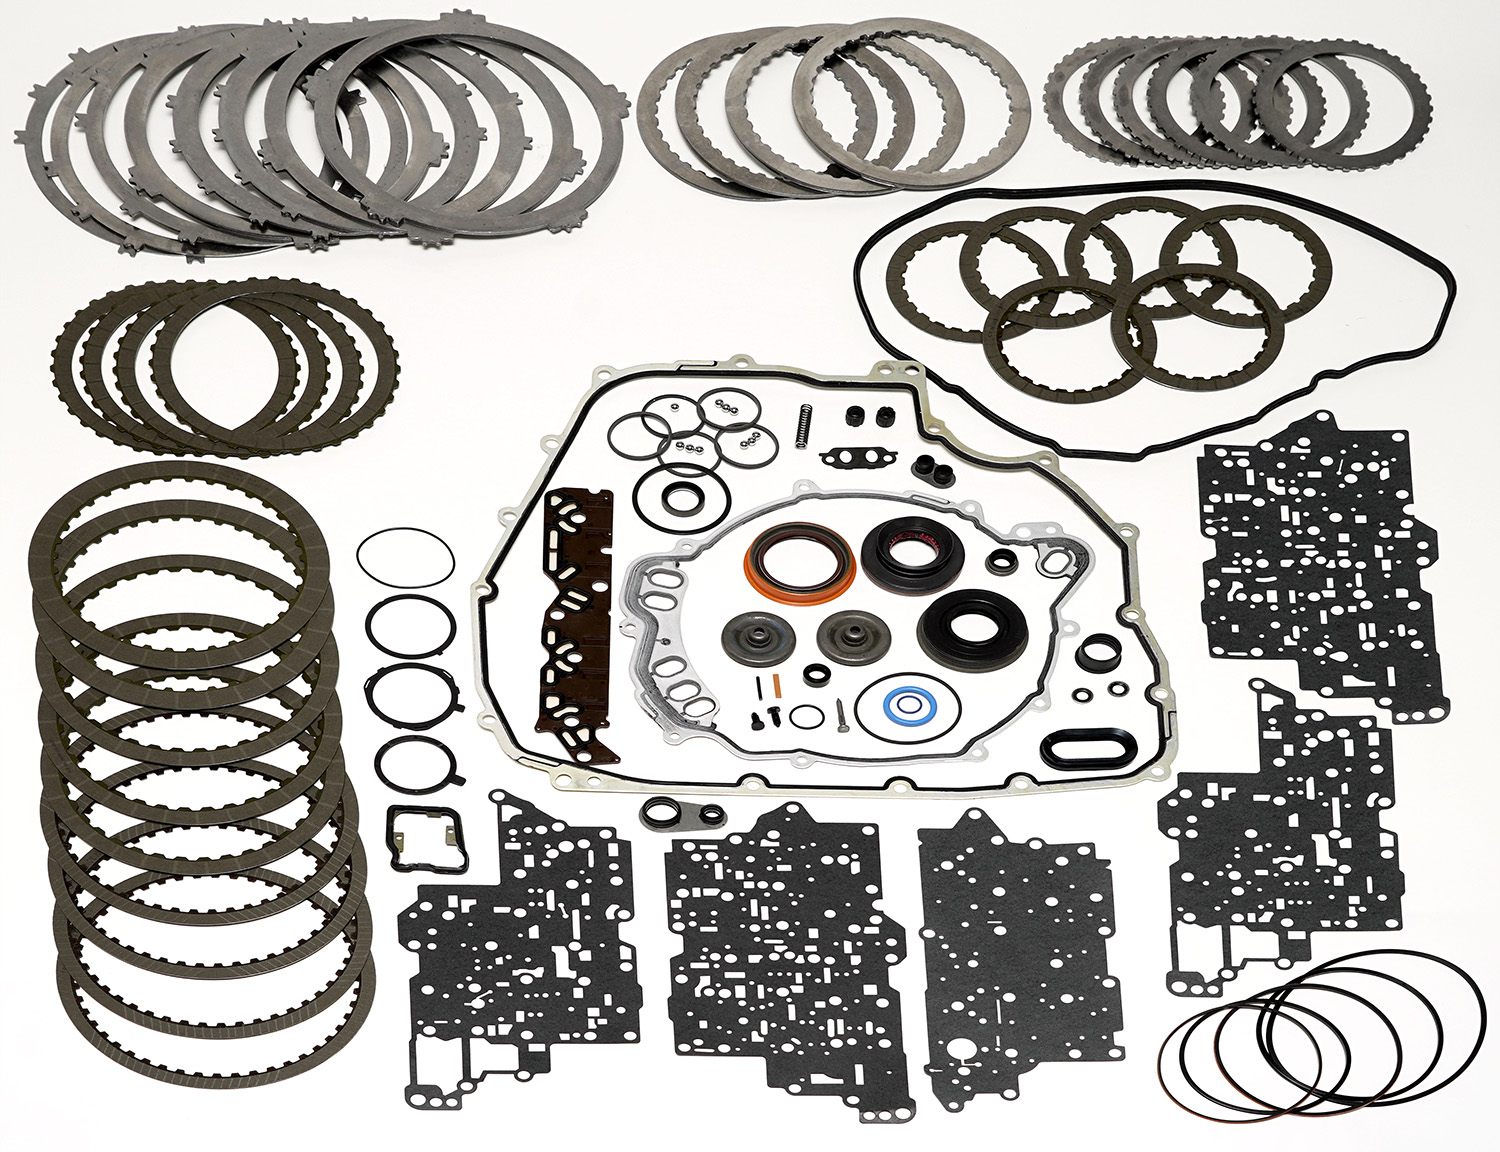
Copy link to clipboard
Copied
JJMack, you are correct. I shot these photos up in an odd angle because the table set-up was taller than me and my apple-box and at the current time I do not have tethering equipment. I plan on getting when I get another big project. Ultimately, I had to stand on a table with my tripod and camera about 2 feet away shooting downward, however, the camera was still not right on top of the products.
Copy link to clipboard
Copied
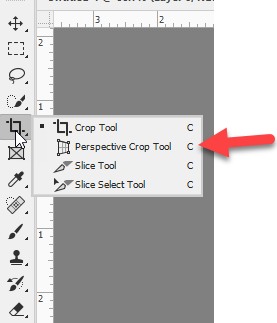
Hi Hi Jack, I am going to sound like an idiot.... but where is the perspective drop tool in Photoshop? I am rather to new to Photoshop. I am a videographer who has been dabbling in to business photography and product photography but now I am getting more request for the photography side. Thus I am trying to be a quick study. Thank you for any help and your knowledge.
Copy link to clipboard
Copied
"Crop" and not "drop" typo issues.
Copy link to clipboard
Copied
Hi
In Photoshop several tools can share the same toolbar slot. To use Perspective Crop, hold the mouse down on the crop tool and you will see a menu appear with the Perspective crop tool in the same slot. Without releasing the mouse move it over perspective crop and release.
Dave
Copy link to clipboard
Copied
Thanks.
Find more inspiration, events, and resources on the new Adobe Community
Explore Now