Participant
October 14, 2018
Answered

match color and brightness

  • October 14, 2018
  • 5 replies
  • 810 views

Hi,

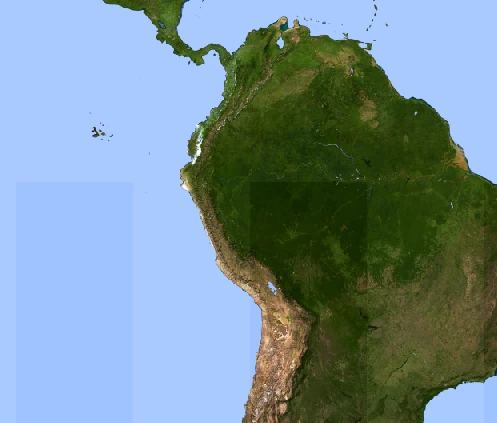
I have an image created with a third party product. Due to some reasons that I still have to figure out there are noticeable seams in the image, big squares that have a slight difference in brightness in respect to other areas.

I'd like these areas to match the rest of the image, which tool should I use?

Thanks

    This topic has been closed for replies.
    Correct answer Semaphoric

    Select the areas in question, and add a Levels adjustment layer. The layer mask will isolate those areas. Drag the center slider in the Properties panel so that the tones match.

    It would help to zoom in and make some guides along the edges of the areas, to aid in dragging out the selection marquee, to avoid having a border around the adjustment. Since the areas have hard demarcations, you would not want to use any feathering.

    5 replies

    Participant
    October 14, 2018

    The levels adjustment layer did the job! thanks a lot for all your replies.

    By the way the content aware fill dramatically changed the content of the image.

    JJMack
    Community Expert
    Community Expert
    October 14, 2018

    Yes Content aware will do that to large areas. That is why I only use it normally in small areas and border areas on stitched images.

    JJMack
    Inspiring
    October 14, 2018

    The Blue is a snap ( you could easily use the Clone tool to repaint the selected area ).  For the land mass, take a look at your individual Channels and use the one that has the most contrast for the area selection.  I would use the Eyedropper tool to get a reading from the lighter areas and then use Curves to get close.  The key is your selection.  Any pixel deviation can be manipulated after the adjustment is made ( i.e., Smudge, Clone, Paintbrush, etc. ).

    Semaphoric
    Community Expert
    SemaphoricCommunity ExpertCorrect answer
    Community Expert
    October 14, 2018

    Select the areas in question, and add a Levels adjustment layer. The layer mask will isolate those areas. Drag the center slider in the Properties panel so that the tones match.

    It would help to zoom in and make some guides along the edges of the areas, to aid in dragging out the selection marquee, to avoid having a border around the adjustment. Since the areas have hard demarcations, you would not want to use any feathering.

    JJMack
    Community Expert
    Community Expert
    October 14, 2018

    I find it quite hard to make the perfect selection to do a perfect job with levels though it does do a great job I usually get some small edge selection border problems. However they are easy to select and then use content aware fill solves these small problems. If its an odd shape selection convertint the seletion to a path after the level adjustment you can stroke the paths with the healing bursh.

    JJMack
    Semaphoric
    Community Expert
    Community Expert
    October 14, 2018

    For straight, hard-edged areas like these, it would probably be better to make a vector mask. Then you could use the Direct Selection tool and nudge the sides precisely with the arrow keys.

    JJMack
    Community Expert
    Community Expert
    October 14, 2018

    If you still have the document in layers you could try auto blend layers to see what it can do.

    JJMack
    Muqqarib Hassan
    Inspiring
    October 14, 2018

    Hi, Make a selection on that rectangle by using a rectangular marquee tool and then right click in the selection and choose fill option and then choose content aware option and hitt okay.