- Home
- Photoshop ecosystem
- Discussions
- Merging 3 circles so they don't overlap
- Merging 3 circles so they don't overlap
Merging 3 circles so they don't overlap
Copy link to clipboard
Copied
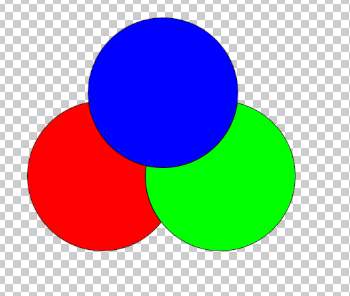
Hi, i'm trying to put 3 circles together so they don't overlap and are totally equidistant from one another. I have played with this for ages and i can only get it through merge layers but then they are all one colour. I've attached some images of my attempt and what i'm trying to achieve.
[ attachments inserted as inline images by moderator ]
Explore related tutorials & articles
Copy link to clipboard
Copied
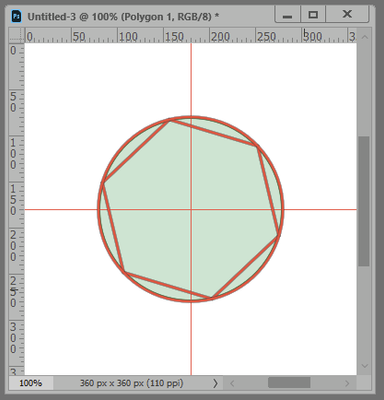
Lay out a set of vertical and horizontal guides. With the Polygon Shape tool, Sides set to six and Radius set to some convenient amount, drag out a hexagon from the intersection of the guides.Set the Ellipse Shape tool so the Width and Height are both twice the Radius of the Polygon, From Center is checked, and Path Operations is set to Combine Shapes. Click on the intersection of the guides to draw a circle. You get a hexagon inscribed in a circle:
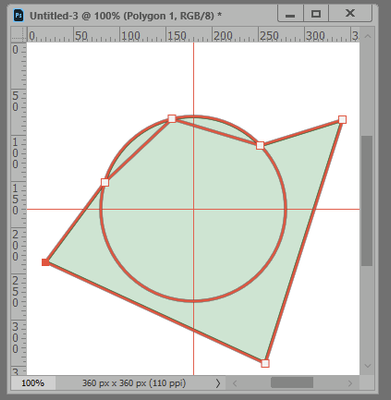
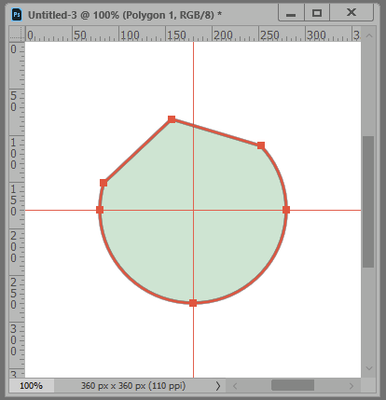
Choose a vertex of the hexagon, and, with the Direct Selection tool, drag the three vertices farthest away so their adjacent paths are completely outside the circle:
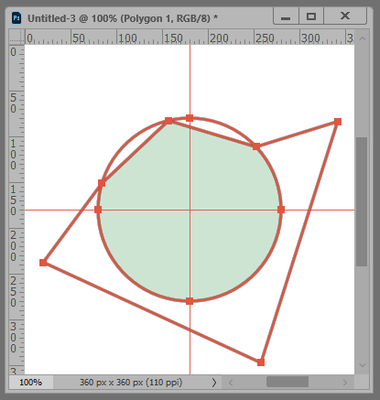
Alt+Click on the Paths panel thumbnail to select all the points, and change the Path Operations to Intersect Shape Areas:
Then change the Path Operations to Merge Shape Components:
Make two duplicates of this layer, changing the fill color on each. Rotate one copy by 120° and the other by -120°. Use the Path Selection tool to drag the Shapes so that the vertex snaps to the guide intersection, Highlight the three Shape layers, and choose Link Layers from the Layers panel menu, so they can be moved and resized in tandem.
Find more inspiration, events, and resources on the new Adobe Community
Explore Now