

- Home
- Photoshop ecosystem
- Discussions
- Puppet Warp alters layer mask not in a good way
- Puppet Warp alters layer mask not in a good way

Copy link to clipboard
Copied
Version: PS CC 2015.5
Book project from Adobe Photoshop CC 2015 release Classroom in a Book
My students are running into a problem and I am too. This is the first time I've experienced this issue and I've no clue what is going wrong.
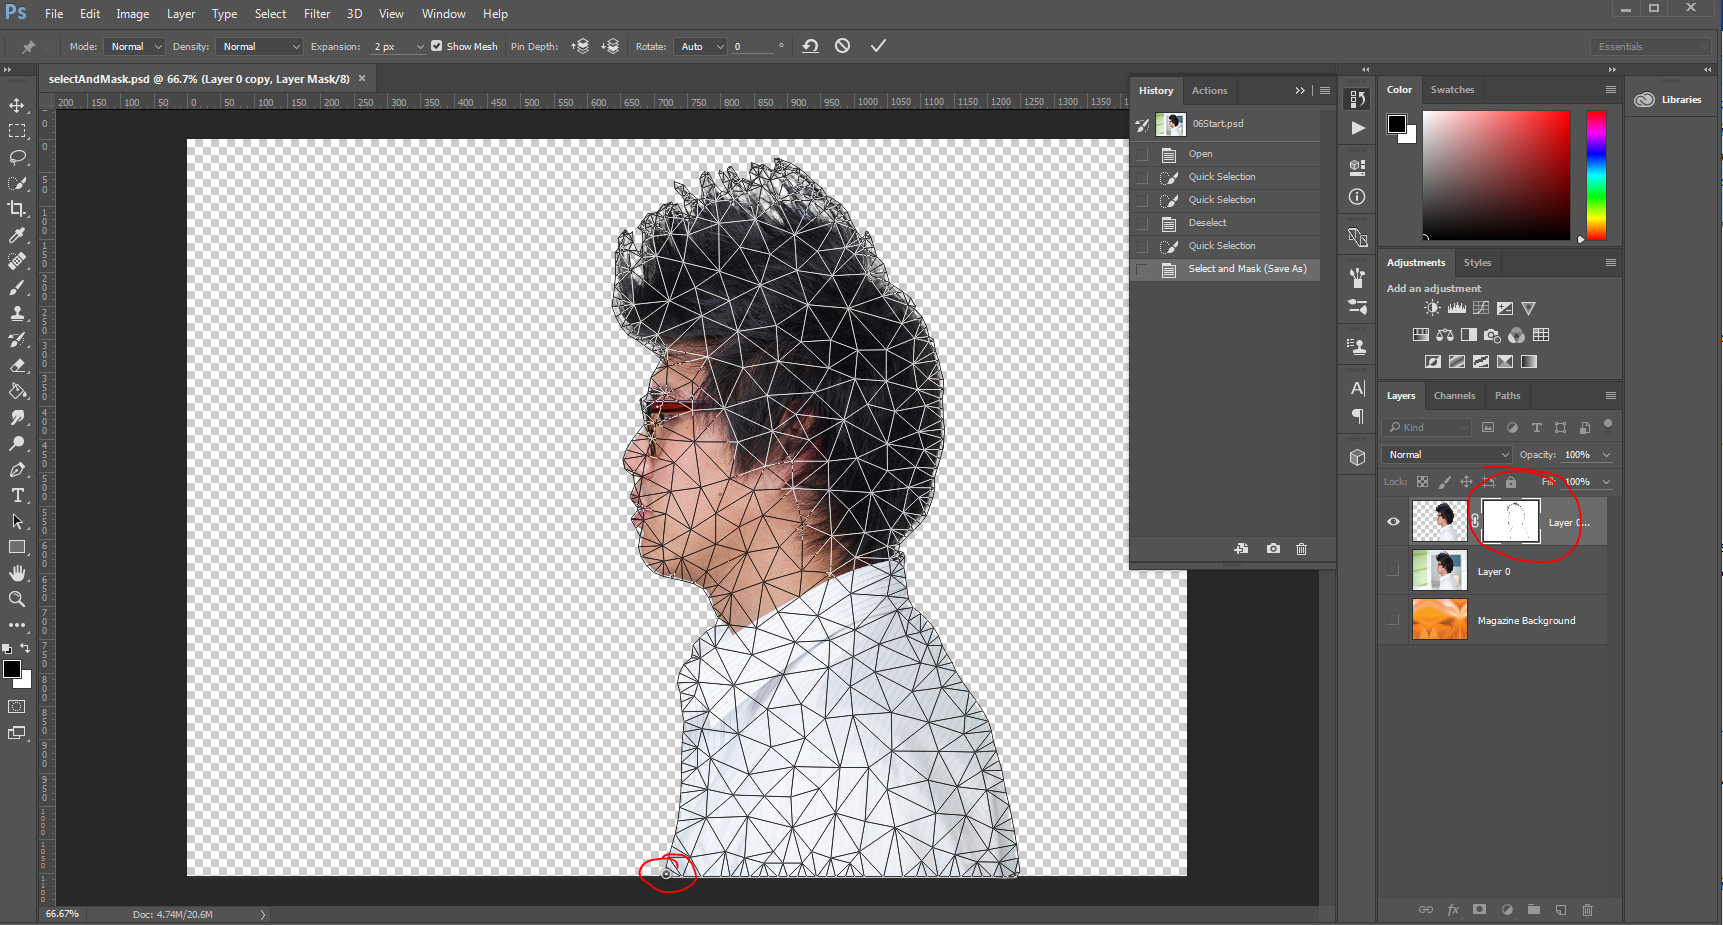
For one of the chapter projects, you select, refine and create the layer mask of a model. I rewrote instructions to use the new Select & Mask tool which works wonderfully. However, when we get to the step to apply puppet warp, the minute a single pin is added, the layer mask is altered and all that is left is an outline of my original selection. Screenshots attached for before and after puppet warp. Anyone have any solutions?


 1 Correct answer

I have not tried it, but when things like that weird on you, make the layer with its mask into a Smart Object, and then apply Puppet Warp.
Explore related tutorials & articles
 9
Replies
9
9
Replies
9

Copy link to clipboard
Copied
I can say that it still works perfectly on my Mac (same Photoshop version, same lesson file), so it may be a problem with Windows. Have you recently updated/upgraded your Windows installation?
Adobe Community Expert / Adobe Certified Instructor
Copy link to clipboard
Copied
I have not tried it, but when things like that weird on you, make the layer with its mask into a Smart Object, and then apply Puppet Warp.

Copy link to clipboard
Copied
Even though we teach this lesson and teach our students of the Non-destructive techniques, yet I'm afraid the issue you, your students and many of mine too have experienced as well forced me to apply the mask to the layer hence deleting background and losing the mask permanently, or as Trevor.Dennis mentioned above, you may convert the layer into Smart Object. By the way, this issue shows on Mac too.
however Smart Object may be a bit advanced for your students at this lesson they are in to understand well.
Copy link to clipboard
Copied
Interesting... mine lets me keep the mask during and after the application of the warp, even without turning it into a smart object (see below image after puppet warp was applied).
I like the idea of Smart Object to resolve lynn_k's issue, but on my Mac, it's not necessary as you suggest, Zaid...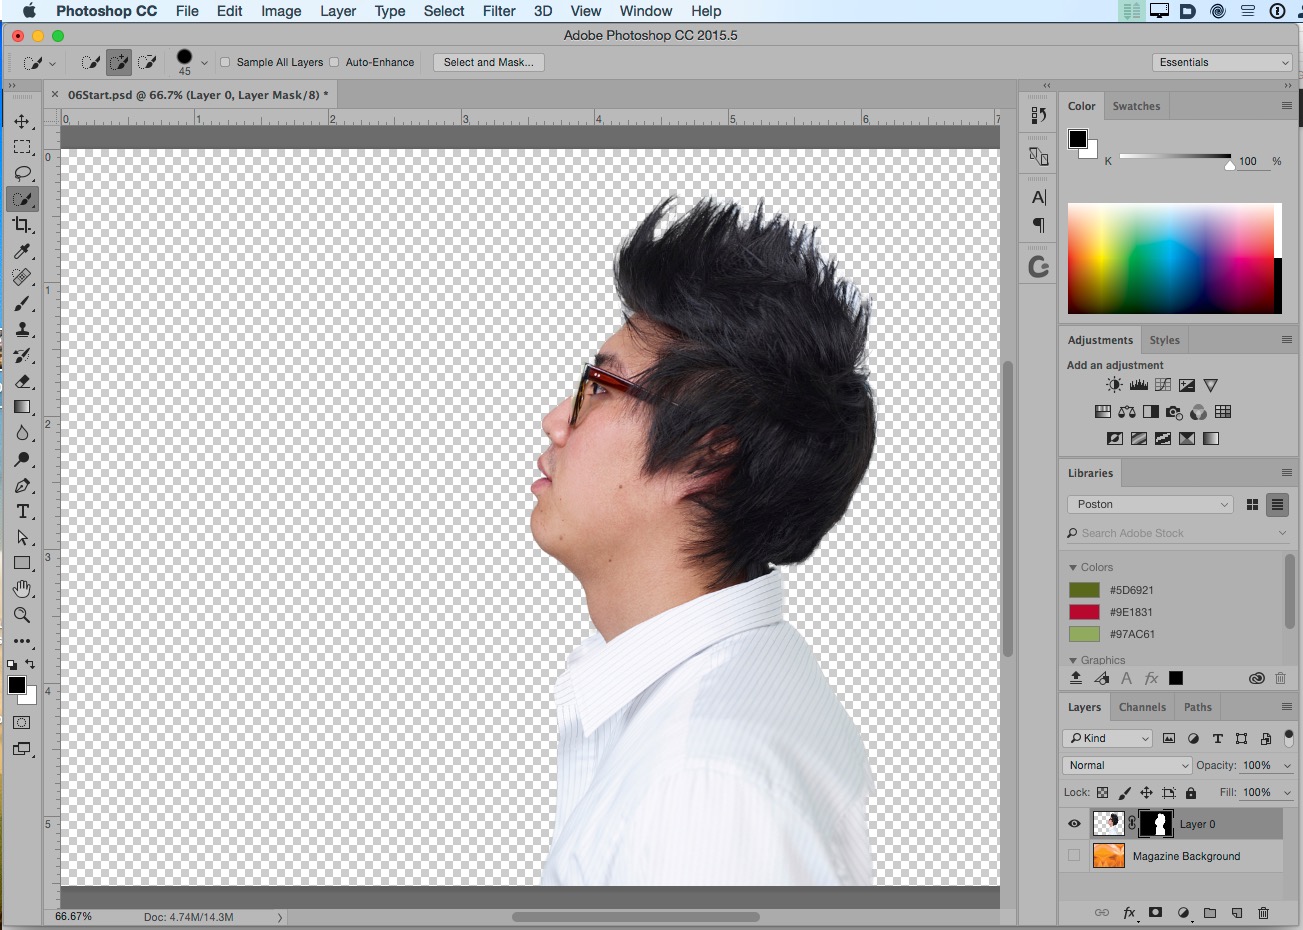
Adobe Community Expert / Adobe Certified Instructor
Copy link to clipboard
Copied
I've had a wee play with this now, and was unable to duplicate the effect in your screen shots.
I tried with:
Layer active
Layer Mask active
Layer Mask unlinked
The above with an active selection.
They had exactly the effect you'd expect. I'd think about Resetting All Tools, which might, but probably doesn't affect Puppet Warp, and then that last resort or resetting Preferences, which is far more likely to affect Puppet Warp.
We would very much appreciate any feedback if you manage to fix it and what worked.
Copy link to clipboard
Copied
Thanks everyone for your helpful suggestions! I did find a workaround last night. Instead of outputting to a new layer with layer mask I chose layer mask only. I duplicated the layer w/mask and then used puppet warp on the duplicate layer. It worked but I think it was just luck.
I like the idea of trying the reset all tools and prefs and the smart object. I'll try that today, see if it's consistent and send more feedback.
Copy link to clipboard
Copied
Well, I have to say I haven't had the best of luck. I did reset all tools and reset the preferences, and I still had the same issue with the puppet warp altering the layer mask. I did take Trevor.Dennis's approach and made the layer a smart object. Once that layer is a smart object the puppet warp worked fine on the smart object layer. Still same issues if trying it on the psb (I was trying everything). However, I was hoping to keep some of the original textbook tutorial which had the puppet warp applied to the model and it's layer mask. With it as a smart object, the mask doesn't get warped which is used for a shadow layer.
To gain a better understanding of where we're going with this tutorial, here's the rest of the instructions...
- start puppet warp, pin the shoulders down and then with the active pin at the nape of the neck, tilt the head back 135 degrees and commit. This warps both the layer and layer mask
- select the masked area (CTRL-click)
- save selection as channel
- create a new layer, name it shadow, and with it active, choose Select > Refine Edge (which is now Select > Select & Mask > Refine Edge and change the slider to 36%
- Edit > Fill (black, 100%) > OK
- reduce shadow layer to 30%, rotate it a bit and drag it to the left of the model.
So the only solutions I've found is to go back into the mask and repaint the black sections after doing the warp. it's not pretty but it's a quick fix. Still looking for alternative solutions.
Copy link to clipboard
Copied
I have what may be a silly question, but it's worth asking. Are you ensuring that the link between the image and mask are turned on, on the layer? I'm referring to the chain between the mask and image icons.
Ive made that error on occasion, so its worth checking.
Adobe Community Expert / Adobe Certified Instructor

Copy link to clipboard
Copied
It looks like you have the mask itself selected (and not the layer) when you apply the Puppet Warp? (See the corner outlines in your screen capture.) What happens if you select the layer itself before invoking the Puppet Warp?

Find more inspiration, events, and resources on the new Adobe Community
Explore Now
 AdChoices