Exit
  • Global community
    • Language:
      • Deutsch
      • English
      • Español
      • Français
      • Português
  • 日本語コミュニティ
  • 한국 커뮤니티
0

Recommended workflow to apply jersey design to a texture image (to be used in Unity)

New Here ,
Oct 06, 2019 Oct 06, 2019

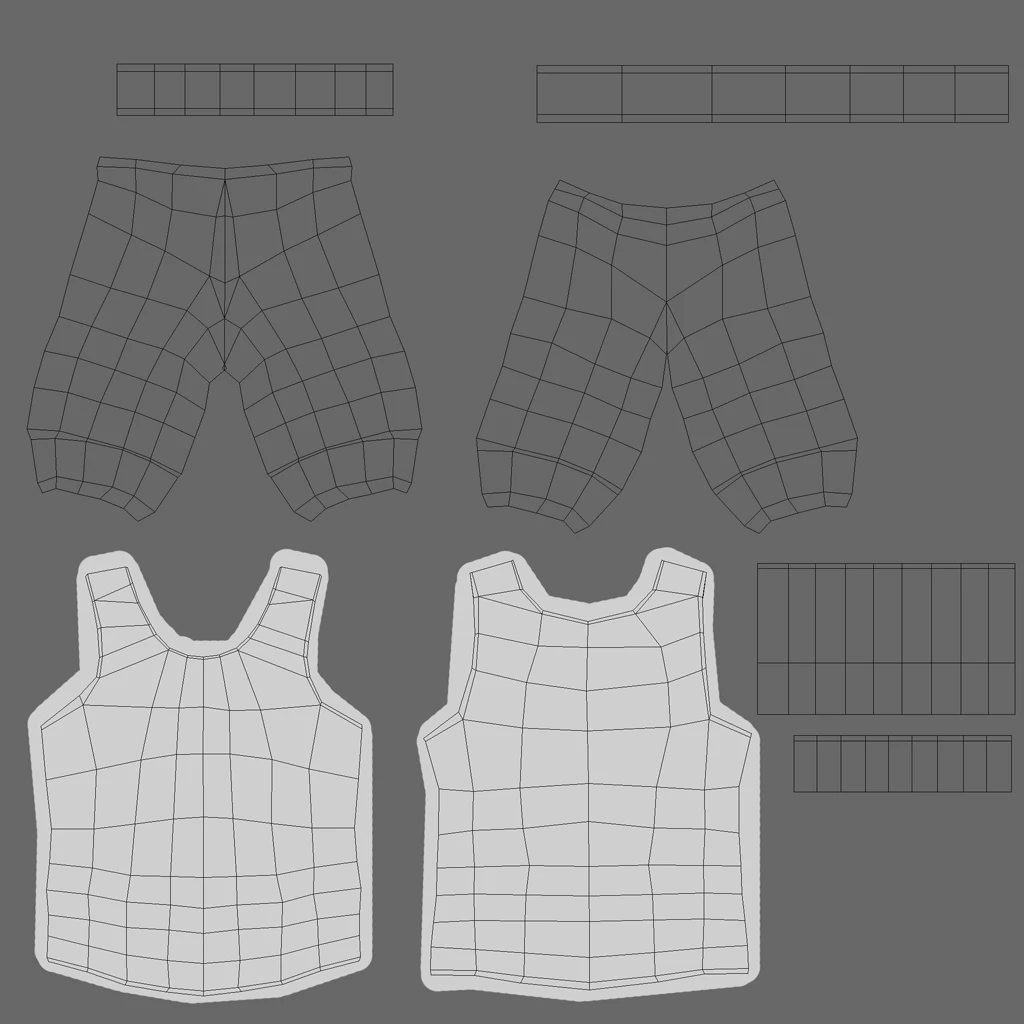
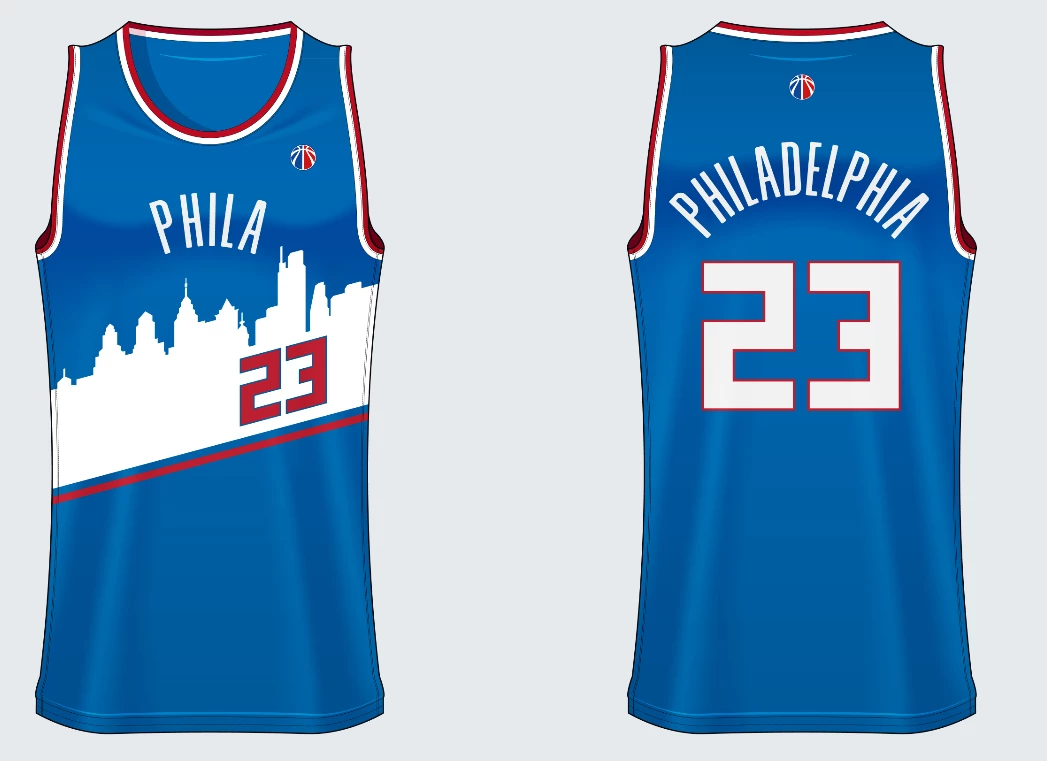
Hey experts!  I'm looking for guidance on a repeatable workflow to easily transform/warp/distort standard images into a custom shape texture that I need to use in Unity.  In this example, I have a jersey texture that I use in Unity, which is not in the most easily-edited layout. I would like to take designs like jersey2 and transform them to fit inside the jersey in the first image.  I've been playing with smart objects + puppet warp, but the results seem wonky.  Any recommendations in how to create a repeatable workflow to easily add new designs to the jersey1 texture image? Thanks for the guidance!!

jersey1 (that I want to apply jersey2 designs to easily)jersey1 (that I want to apply jersey2 designs to easily)jersey 2 (design example)jersey 2 (design example)

612
Translate
Report
Community guidelines
Be kind and respectful, give credit to the original source of content, and search for duplicates before posting. Learn more
community guidelines
Adobe
LEGEND ,
Oct 06, 2019 Oct 06, 2019

Well, actually you would start by fixing the UV coordinates in a 3D program and making them contiguous... No offense, but they are all wrong and basically useless. Once they are fixed, it's as easy as filling in a solid color and copy & pasting the elements where they need to go.


Mylenium

Translate
Report
Community guidelines
Be kind and respectful, give credit to the original source of content, and search for duplicates before posting. Learn more
community guidelines
New Here ,
Oct 07, 2019 Oct 07, 2019
LATEST
No offense taken at all! 🙂 I had a designer create this model for me on Fiverr and I'm attempting to have him remap this correctly. When I first asked about fixing it, I was told that it was not easy. I am not a 3d modeler so I was not sure how to respond. I have shared your answers in hopes to get this cleaned up. If any of you are interested in making a few $$ to help me fix and remap this on my 3d character, I'm happy to discuss it, as well! I really appreciate the info!
Translate
Report
Community guidelines
Be kind and respectful, give credit to the original source of content, and search for duplicates before posting. Learn more
community guidelines
Community Expert ,
Oct 07, 2019 Oct 07, 2019

Hi

Garments are fairly easy to texture as they are made from flat materials with seams which is what the UV unwrapping process achieves. So get the UVs unwrapped without stretching and with the seams in the same place as a real garment and the rest is easy.

That said I would not be applying those images as a surface texture. They have shadows and folds on them, whereas you want a flat material so the 3D modelling and rendering process can take care of folds and shadows. So, I would build the material as new, adding the logos etc in layers. 

If you do this a lot you may want to look at Adobe's Substance Painter which works similarly to Photoshop in layers but has channels for each of the material maps e.g. Base Color, Metallic, Roughness, Height, Normal etc.

Dave

Translate
Report
Community guidelines
Be kind and respectful, give credit to the original source of content, and search for duplicates before posting. Learn more
community guidelines