

Using actions to hide/show smart object layers

Copy link to clipboard
Copied
Hey all. I have a workflow question for you all. I really need some help! Please x x
I have about 80 carpet samples saved as high res tifs. Each sample needs to cropped and resized to about 12 variants for use online.
E.g. 260px x 260px
600 x 900
260 x 260 but with a drop shadow
800 x 800 but more 'zoomed in'.
400 x 800 but with a mask applied
500 x 500 with a watermark etc etc
It took my previous colleague literally WEEKS of doing them by hand. However I've found a smarter way is to use smart objects and 'artboards'. This allows me to use the same smart object and place it all the different artboards at once, set the right crope, masks, etc. It works amazingly well.
I just need to go into the single smart object, switch which layer is 'visible', save it, then switch back to my 'master template' file and I'll see that they're all done. I just then hit file > export > artboards.
However, it gets very tedious when I have 80 different swatches to change out and then save, one at a time. Especially given that it takes a little while for the smart object to save.
....
So my plan is to continue to pop all the swatches/layers into my single one smart object, could I then make an action. Which would....
1) Open smart object
2) hide current layer
3) unhide 'next' layer
4) save smart object
5) save 'main' PSD artboards
6) rinse and repeat.
...
Each time it runs, I obviously don't want it to keep saving over itself, ideally... it would save the filename as the name of the currently selected smart object layer. But this is probably asking too much!.
I don't know enough about actions to know if this is possible, and I know literally NOTHING about scripting! So I'm completely stuck!
Could anyone provide any help or words of wisdom? Thanks x


Explore related tutorials & articles
 6
Replies
6
6
Replies
6
Copy link to clipboard
Copied
To avoid opening Samrt Object each time, use Layer Comps to swich layers visibility inside of them.

Copy link to clipboard
Copied
You have about 80 carpet samples saved as high res tifs. Each sample needs to cropped and resized to about 12 variants for use online.
What are the sizes and Aspect Ratio of the carpet sample designs? What are the sizes of these carpet simple design? Are the designs a seamless pattern or a repeating design pattern withe different aspect ratios or do all carpet designs have the same aspect ratio?. If you crop a design to some other aspect ratio you loose part of the design. Seamless patterns will no longer tile seamlessly and cropped pattern will no longer tile like the design should.
You need E.g.
260px x 260px. That a small 1:1 aspect ratio image.
600px x 900px. That a web size portrait image with a 2:3 aspect ratio
260px x 260px. but with a drop shadow. Your small 1:1 aspect ratio. Layer styles not part the design. Photoshop renders pixels for the effect.
800px x 800px but more 'zoomed in'. Your 1:1 aspect ratio image scaled to 800px by 800px. Zooming is resize the image it scales the image.
400px x 800px but with a mask applied. That a portrait withs a 1:2 sapect ratio. How does the mask, mask the design?
500px x 500px with a watermark yor 1:1 aspect ratio image sizled to 500px by 500px . How is your watermakt applied and scaled?
etc etc
The big question is how do handle the miss matches between the carpet samples and the images you need aspect ration. It is easy to scale images however, when yoy crop you loose design content. you seel the nee 3 Aspect Ration omages. 1:1, 2:3 and 1:2 that is a poroblem.
Copy link to clipboard
Copied
Hi, I don't seem to be able to post my response below. I'll try again shortly.
Copy link to clipboard
Copied
I've reduced the amount of text I've written, maybe this post will come through ok!
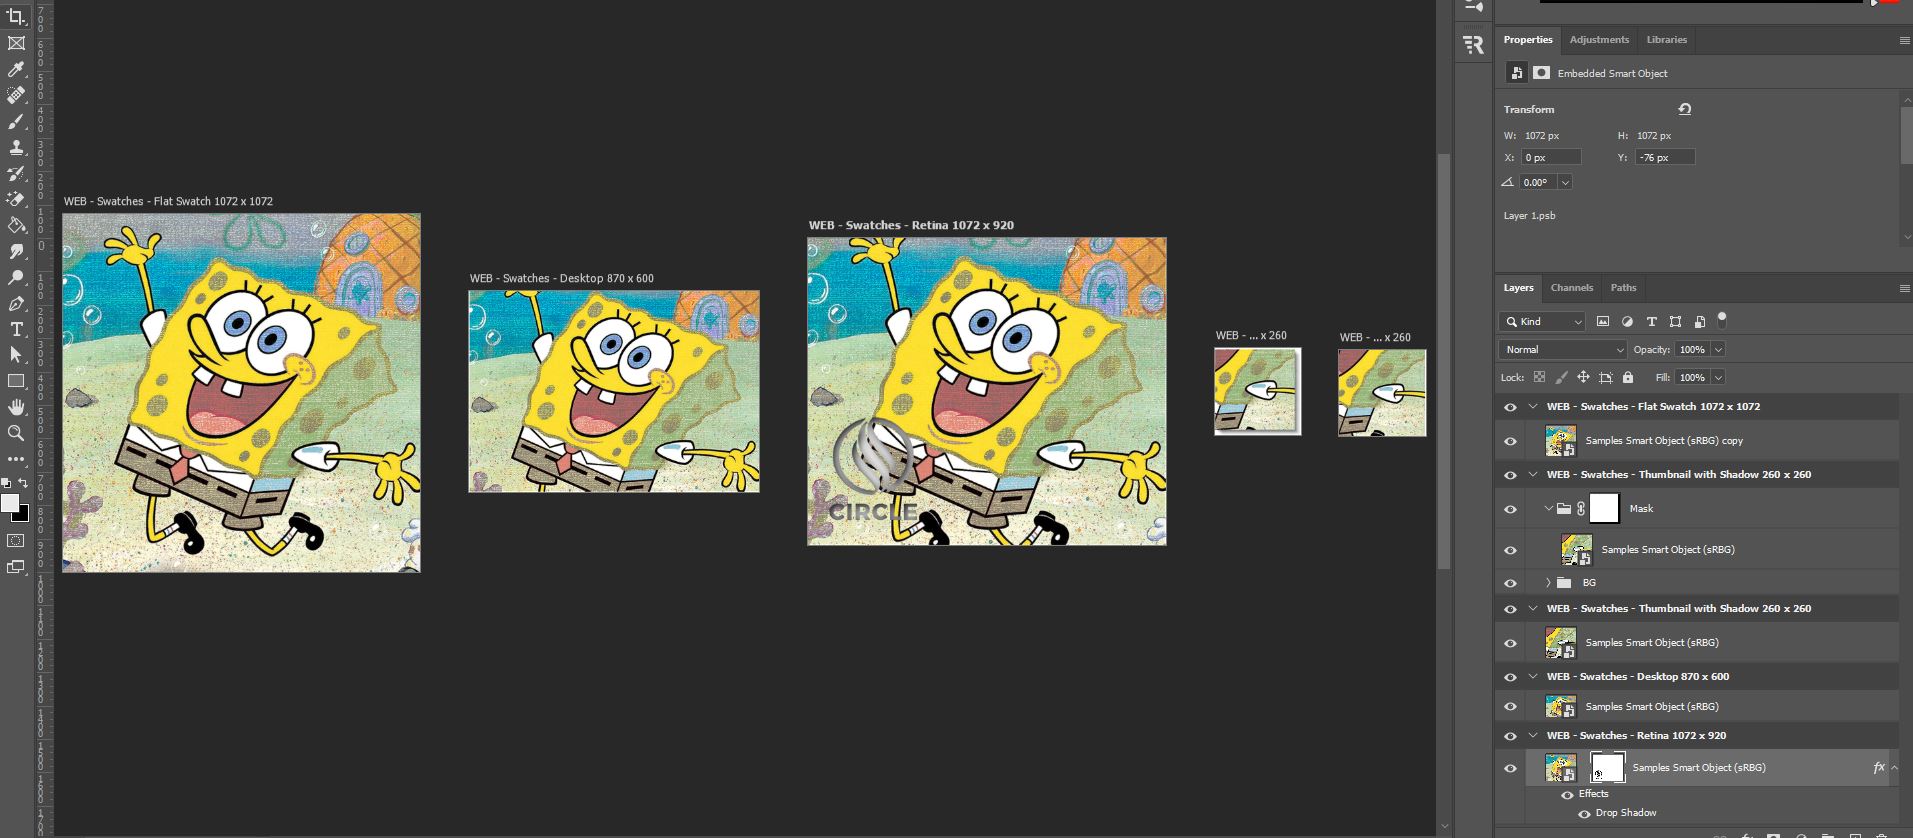
I've attached an over-exaggerated example of what some of my samples currently look like. As you can seem the scaling, shadows, masks etc are all applied at the correctly required scale. Nothing is knocked out of proportions etc.
All samples were supplied to me at the same scale, and from manually doing it, I can see that I'm comfortable with how they're appearing on screen. - Cropping the tops/bottoms/edges is all completely fine 🙂
Copy link to clipboard
Copied


I see 5 different crops. No scaling. The 5 images have different content. One of the crops had a logo watermark size for the crop and it has been overlaid onto the crop sample. The forth crop layer had a white layer added under it that is slightly larger than the crop so a drop shadow layer style effect add to the small crop has canvas the catch the drop shadow effect that is outside the coped image's layer bounds. The first images is not crop then 2 centered aspect ratio crops image 2 and 3. The next 2 crops are small different sized 1:1 aspect ratio crops that are not centered image 4 and 5. Crop 2, 4 and 5 may have also been scaled down slightly its hard to tell by eye.

Copy link to clipboard
Copied
Yep. Pretty much. These are the ones I've made. I'm comfortable with how they work.
Currently my process is
> Double click to open the single 'smart object', (which currently has 50 or so layers in it) to open the smart object
> In the smart object, I use the show/hide layer buttons to displaying a different layer....
> I then save the smart object
> I then switch back to my 'template' document
> I then hit File > Export > Artboards to files
> I then save the artboards all in the same place together, for the filename, I call it the same as the 'layer name' used.
> I then start from 'step 1' again in a loop....
This is the bit I'm hoping to be able to automate.

 AdChoices