 Adobe Community
- Home
- Photoshop ecosystem
- Discussions
- Re: Warm colours in portret-photography
- Re: Warm colours in portret-photography
Warm colours in portret-photography

Copy link to clipboard
Copied
Hello,
i am looking for a workflow (post-processing), how-to or help to achieve the warm colours which I often see .
For example these pictures :https://www.google.nl/search?q=lisetmor+families&rlz=1C5CHFA_enNL693NL693&tbm=isch&tbo=u&source=univ...
are they using layers or something?
I hope anyone can help me to achieve this in my pictures,
best regards,
Henk


Explore related tutorials & articles
 20
Replies
20
20
Replies
20
Copy link to clipboard
Copied
There are a lot of techniques and tricks to achieve such a look and feel.
Look here: "Soft" Style Dreamy Child Portrait Edit in Photoshop | PiXimperfect - YouTube . Does that help?
Copy link to clipboard
Copied
I am going to take a look !

Copy link to clipboard
Copied
Can you post an image (or a Flores versions of it) that you wish to edit thusly?
Copy link to clipboard
Copied
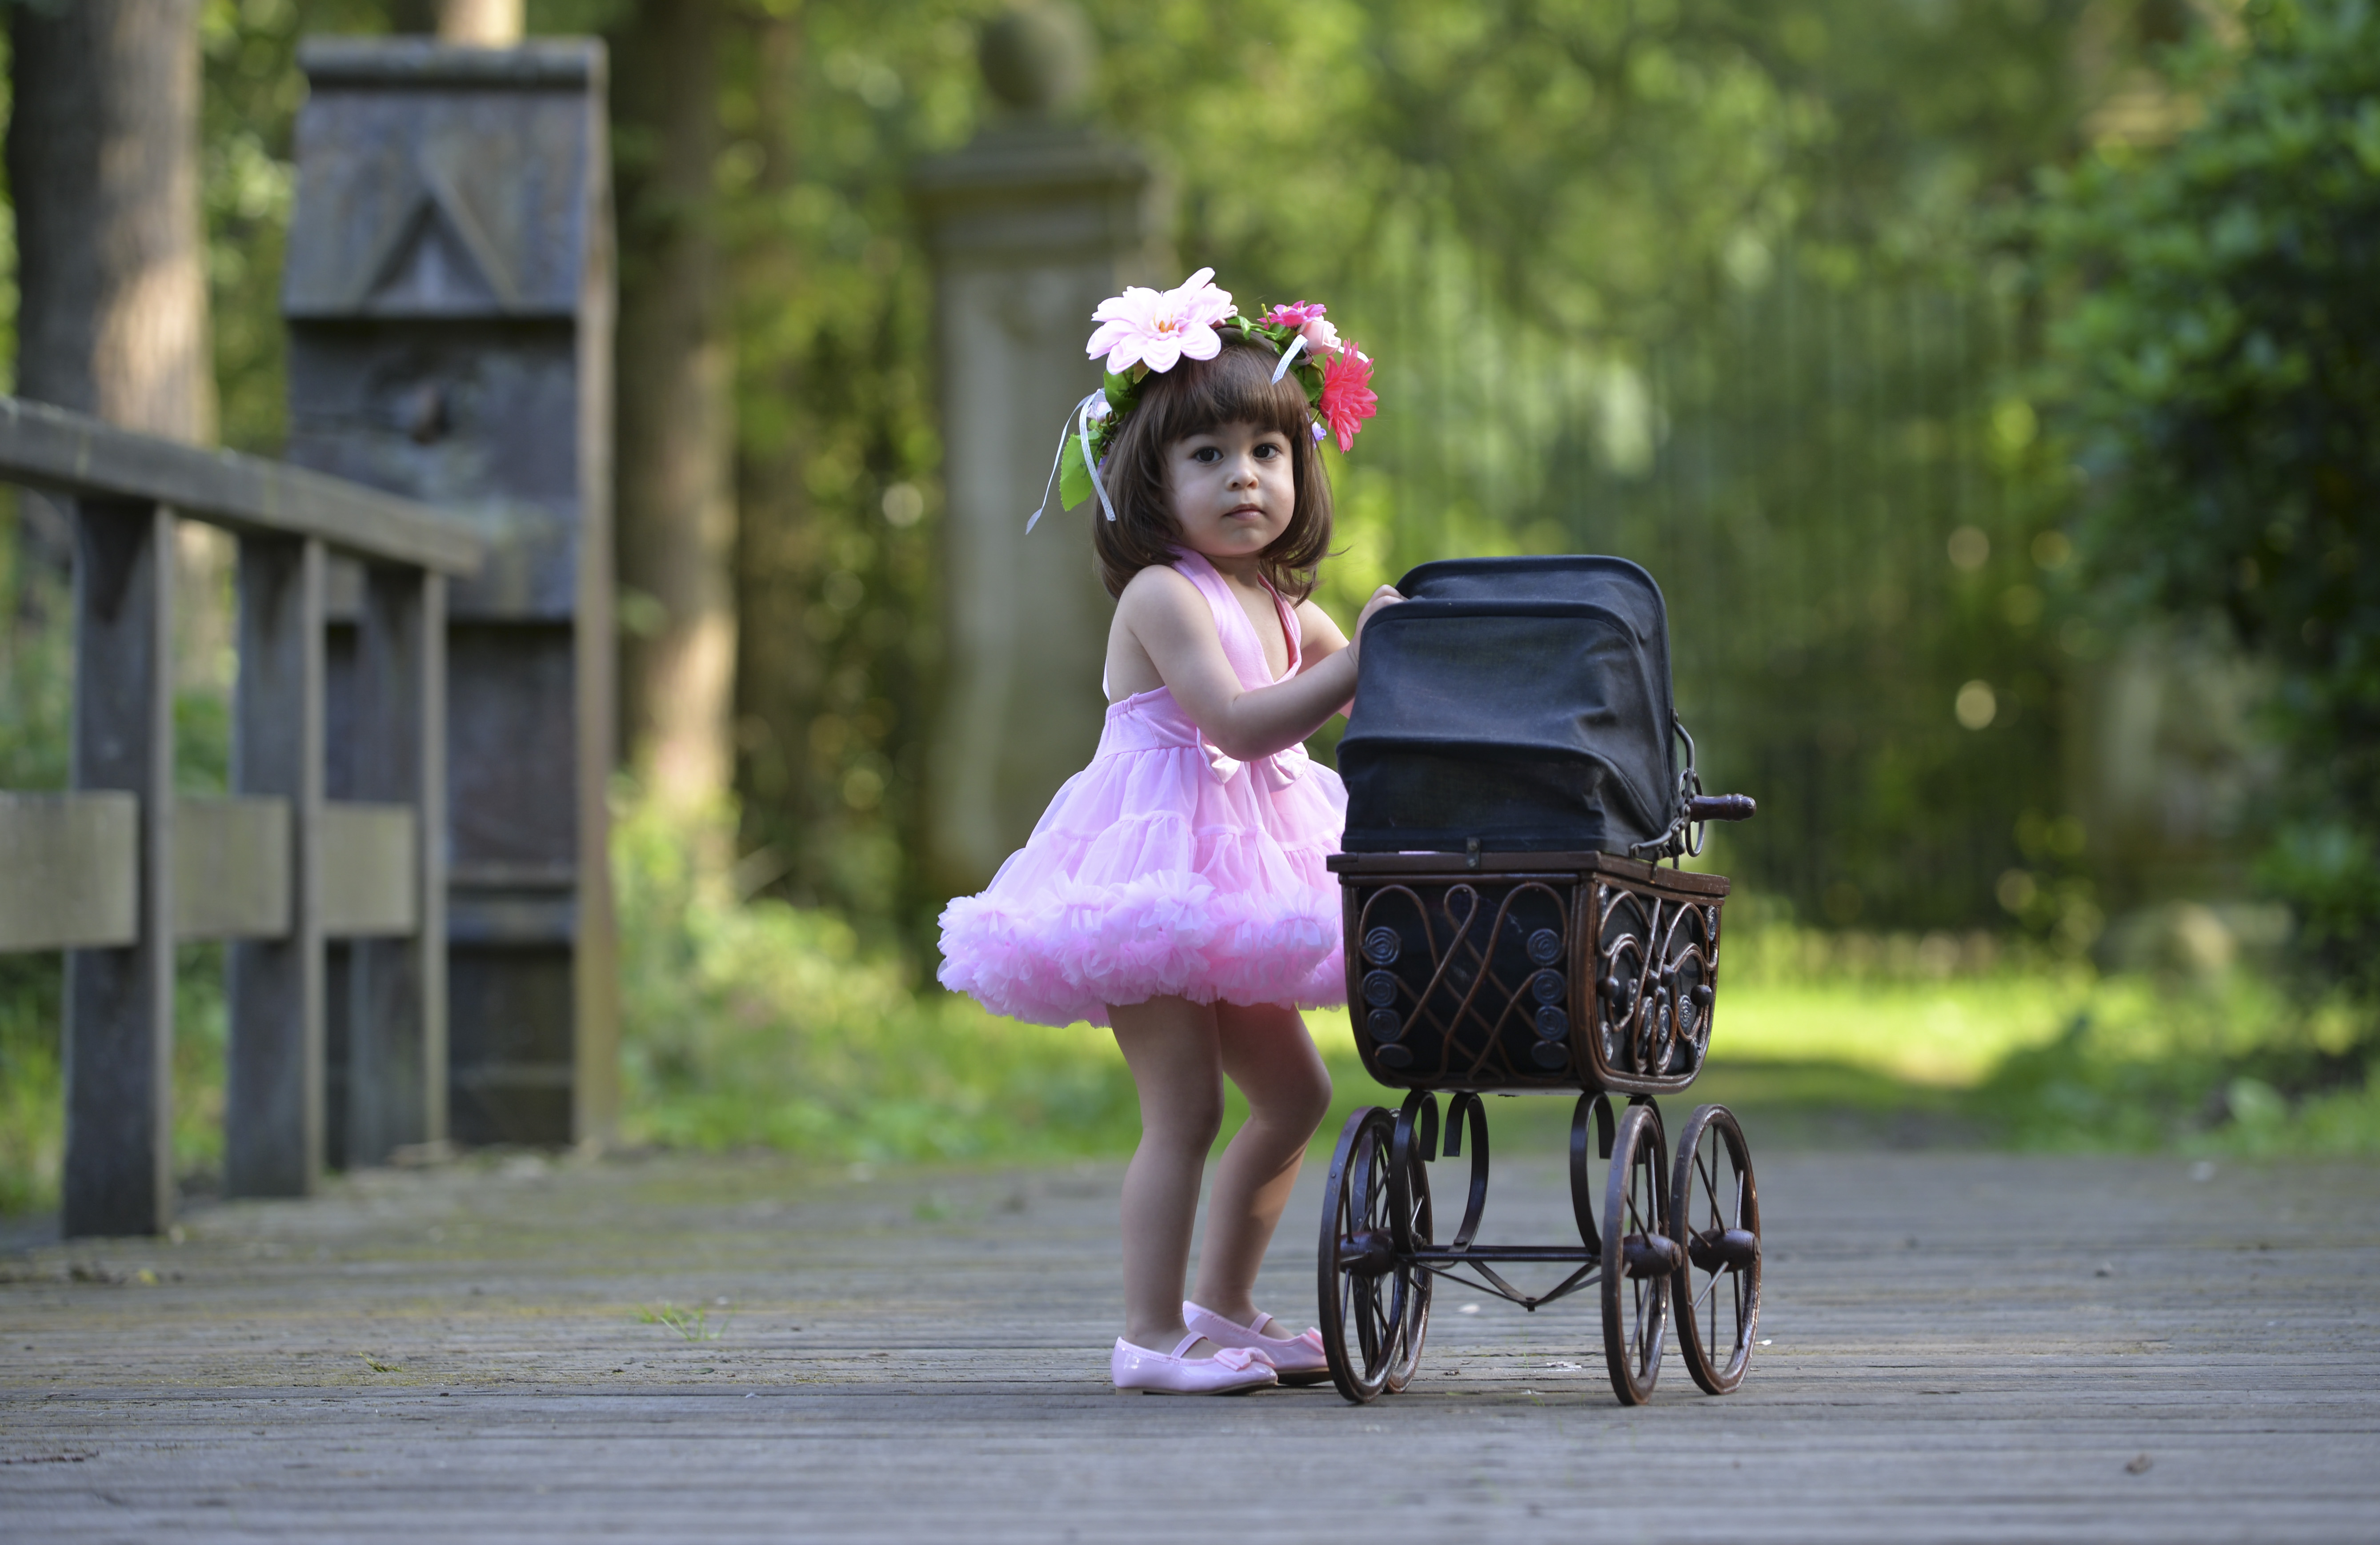
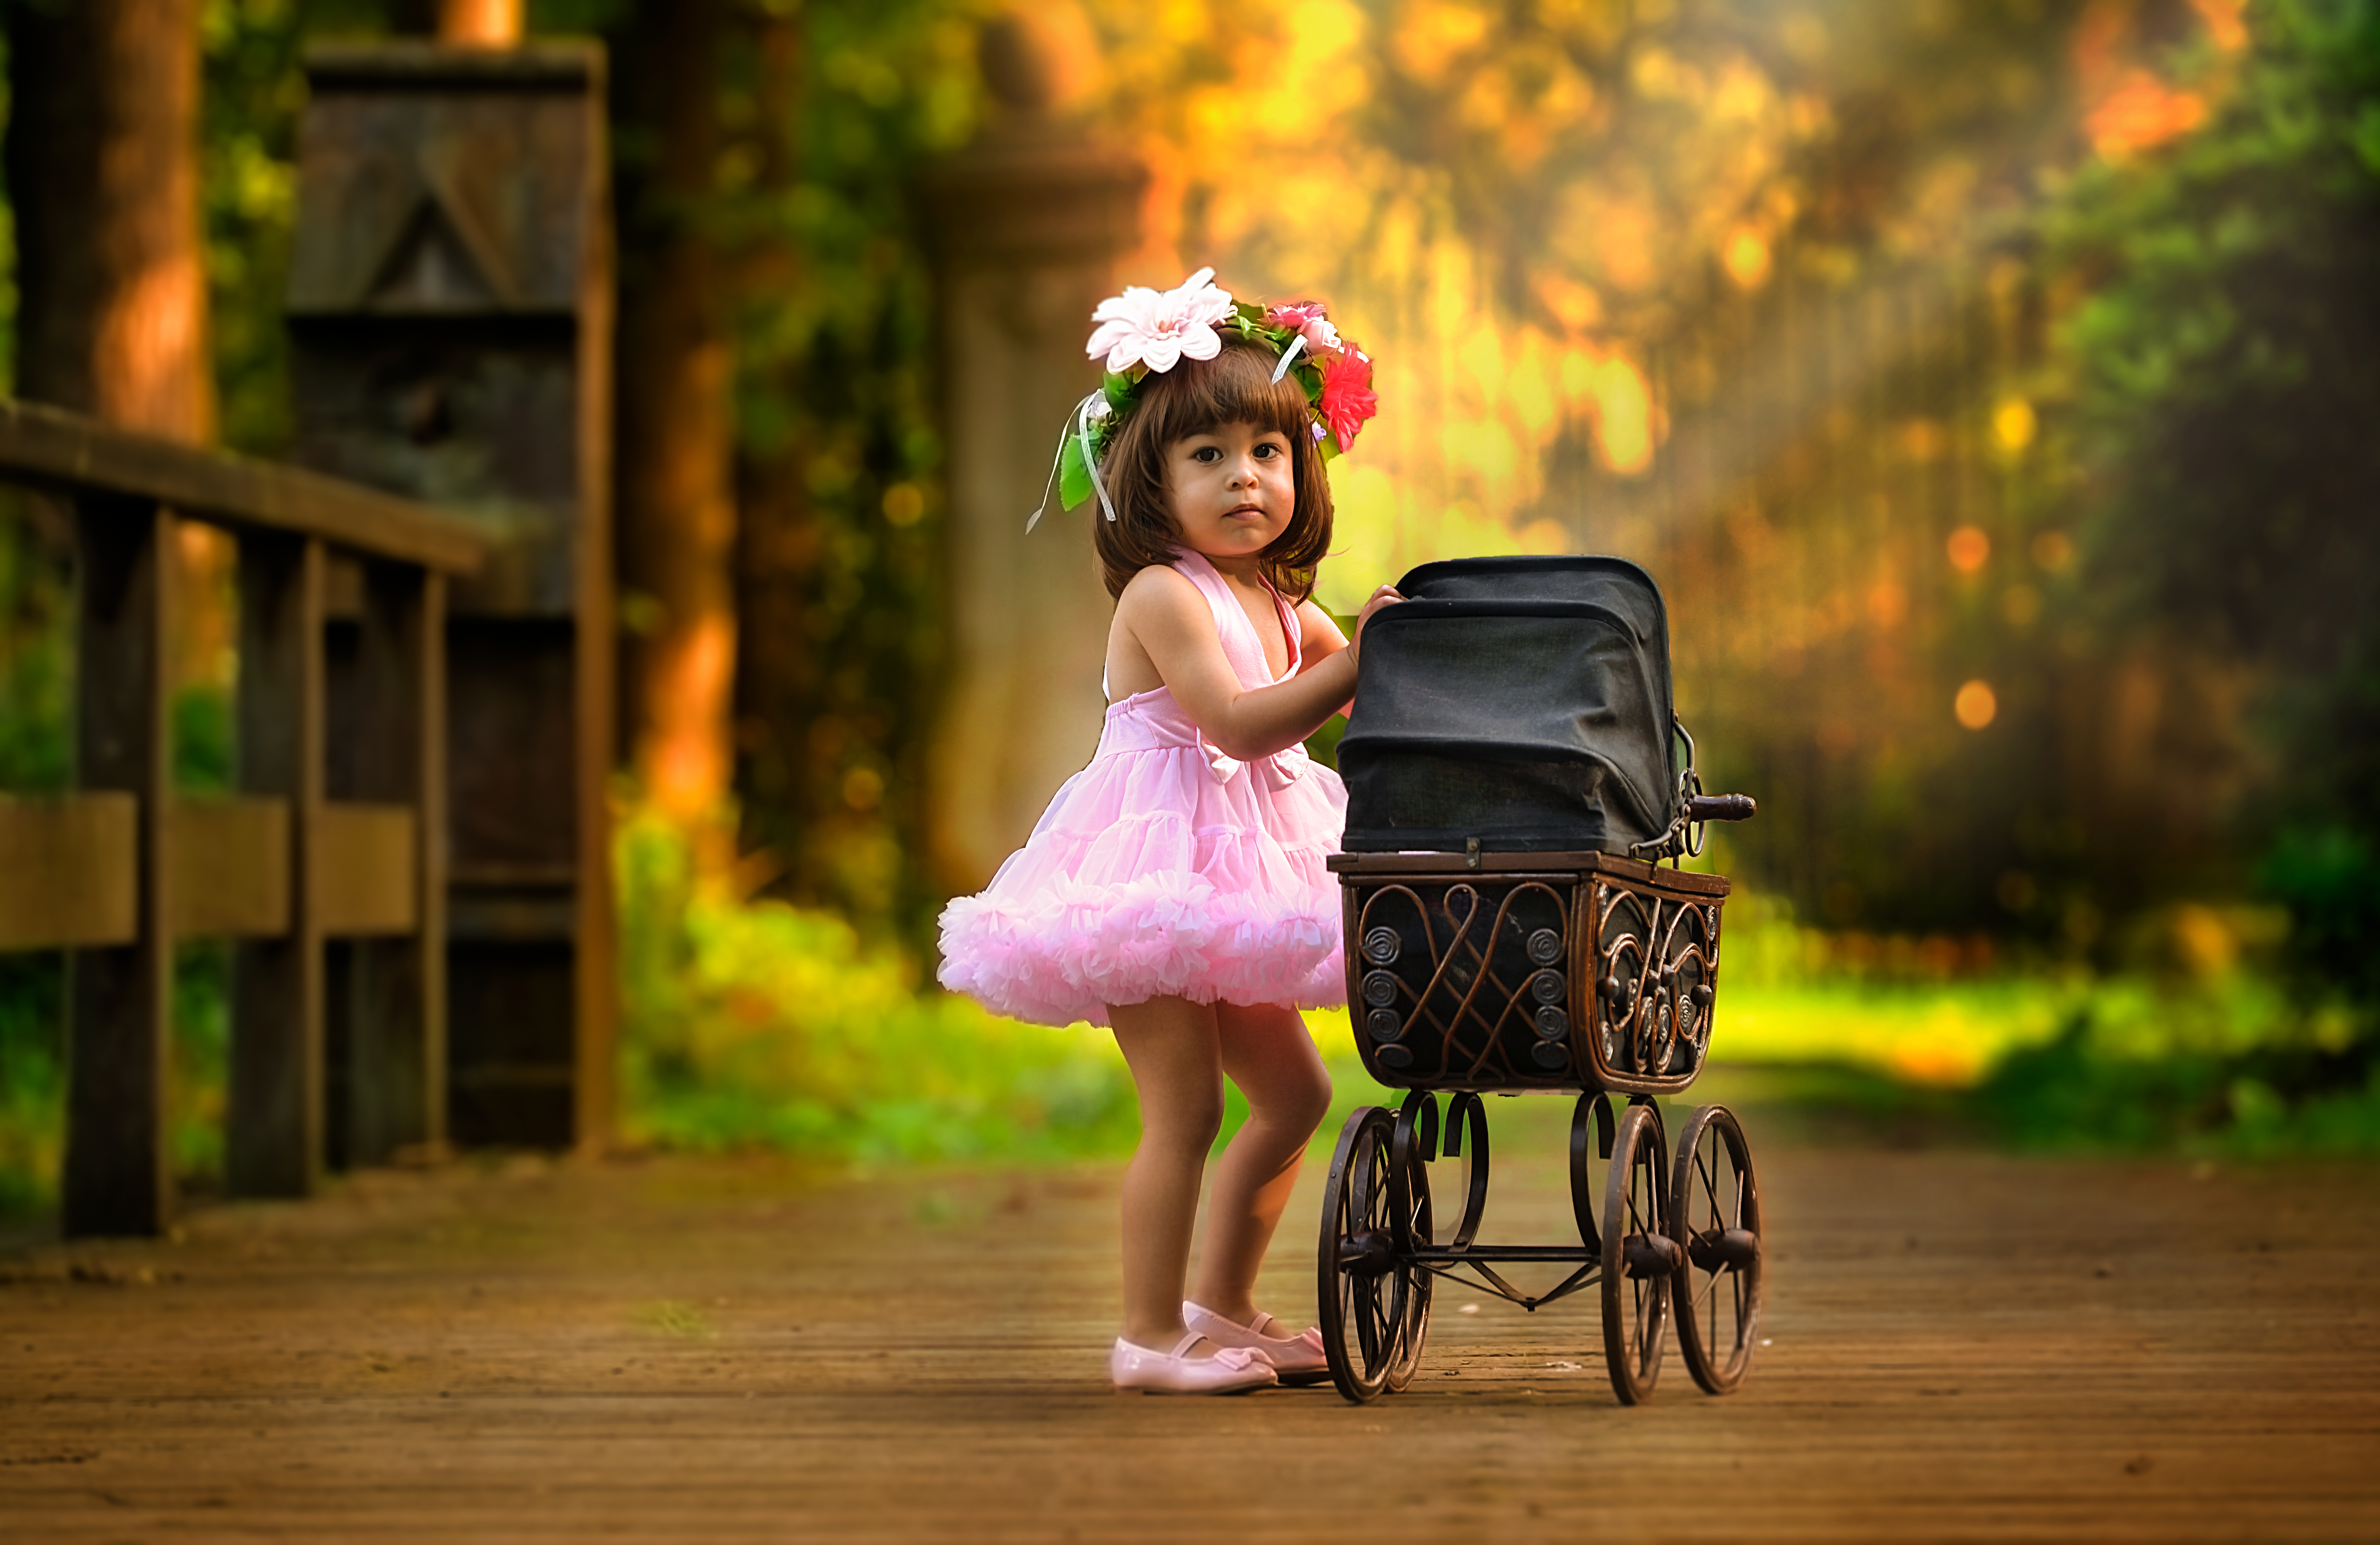
This one would be nice to see it in warm colours 🙂

Copy link to clipboard
Copied
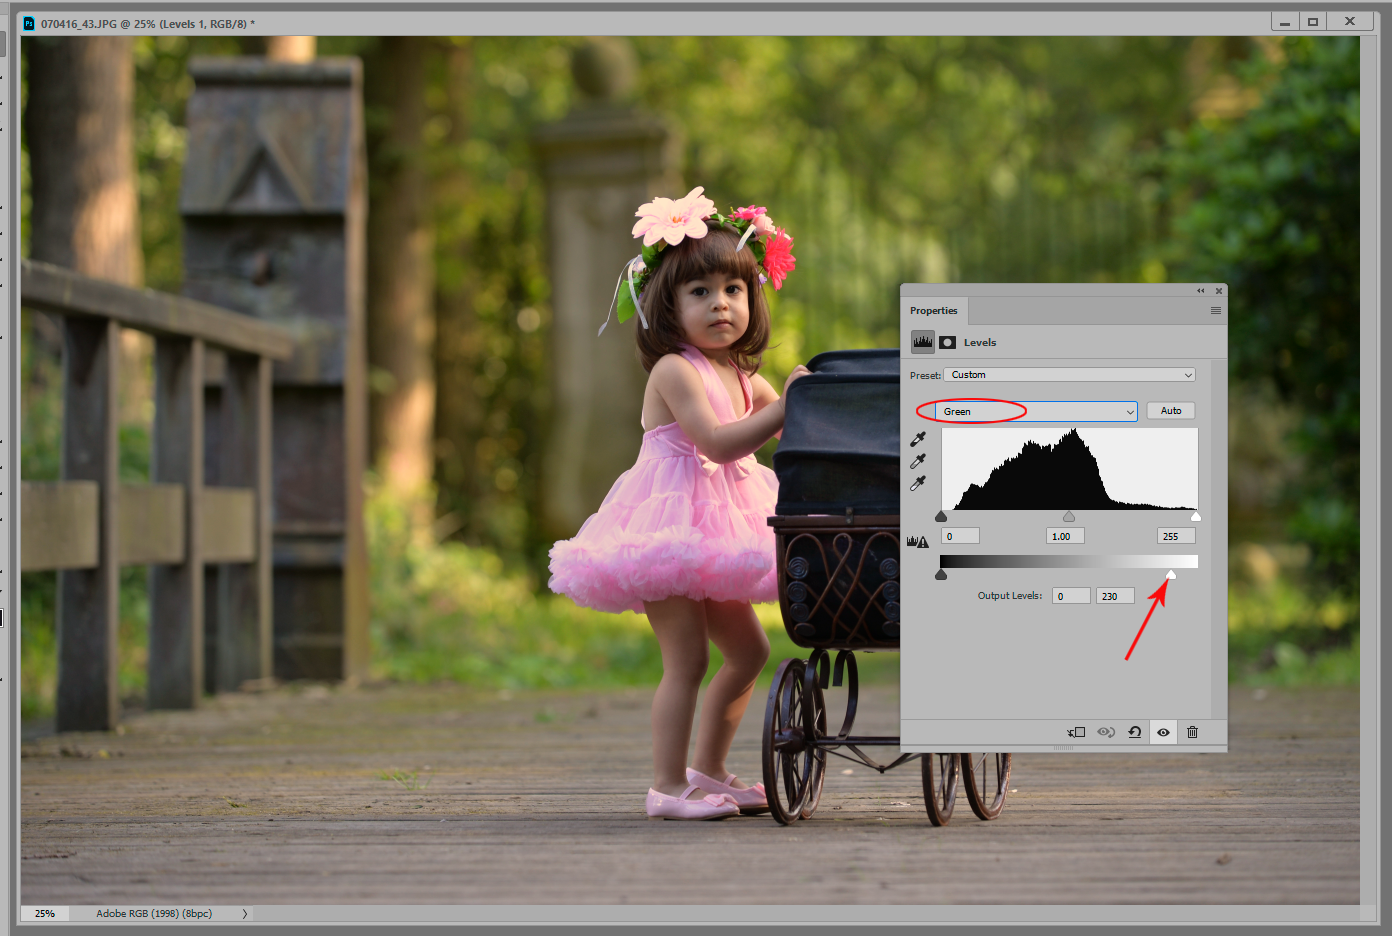
For starters, a Levels layer, and drop the output highlight sliders in the green and blue channels to taste:

Copy link to clipboard
Copied
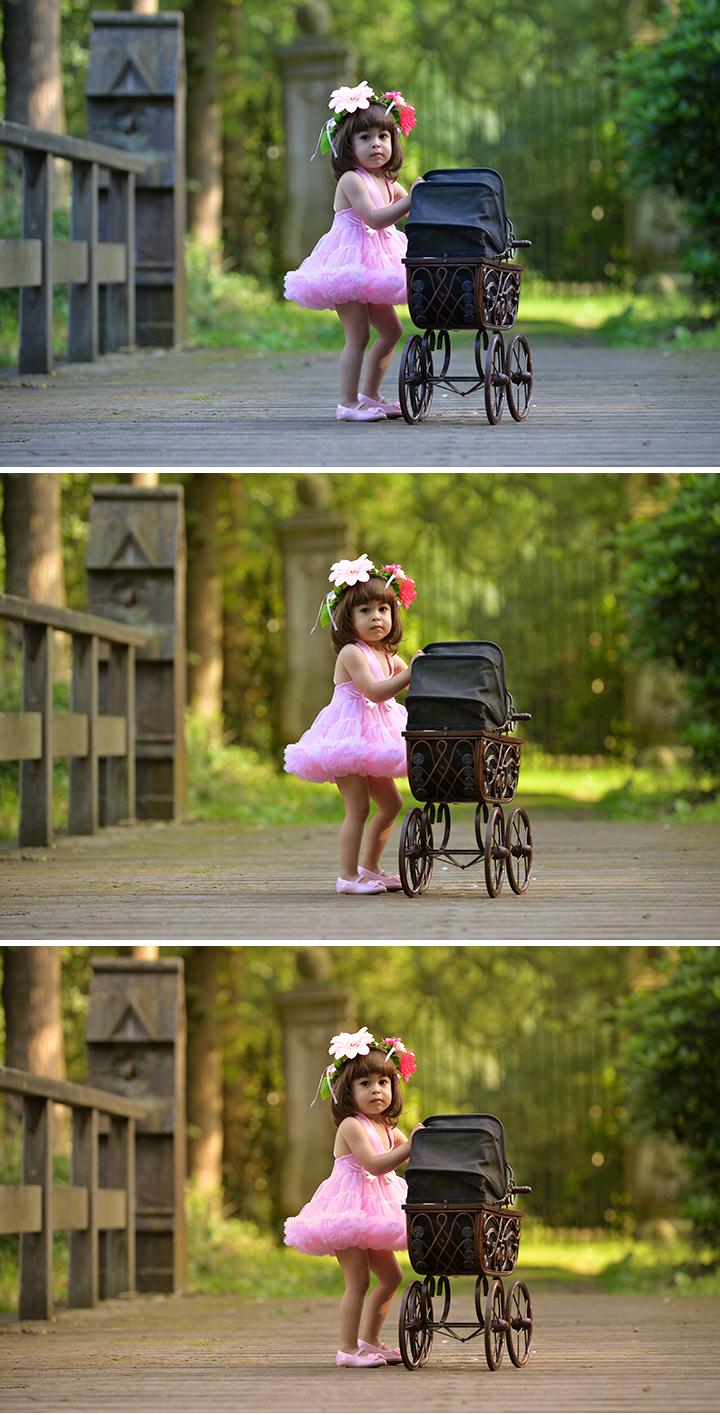
Fig 1. Starting image
Fig 2. To neutralize the overall cooling effect of sky light as evidenced by the blue cast in the black carriage hood opposite her arm: Image > Adjustments > Curves. Choose the middle eyedropper and click in that blue area.
Fig 3. To add a slight honey color: Image > Adjustments > Photo Filter.. Warming Filter. Use slider to meet personal preference. Be careful to not overdo.

Copy link to clipboard
Copied
Hi
Nice picture! You can do a lot with curves layers and associated masks.
Any layers below - other than normal blending mode and 100% opacity are shown as such in brackets
Dave
Copy link to clipboard
Copied
Nice try Dave. You did the complete job... 🙂
Copy link to clipboard
Copied
So great ! Really what I am looking for! I hope I can make it and that I will make the good translations to Dutch 🙂
Copy link to clipboard
Copied
Shadow depth of field assisted by selected blur, burned in image edges, a Photoshop warming filter adjusted with its slider and a tonal range & composition that lends itself to these effects -- those are a few of the elements displayed in this Google collection. As c.pfaffenbichler advises, post the image so that we can be more helpful.

Copy link to clipboard
Copied
To learn editing skills like the ones which are in Your google search link, better search for tutorials in Youtube or register in online teaching websites such as linda.com
Copy link to clipboard
Copied
From the first image
Go info Camera Raw and adjust the highlight balance by adding yellow and a bit of red
Then copy that layer and hold down th option key and add a layer mask making that mask black.
Set that layer to multiply.
Add another layer and set that to Color Dodge.
Click on the background layer and choose Select/Subject and invert that selection
Click on the multiply layer nad brush in the areas you want to darken. Click on the color dodge layer and brush in the highlights in the background.
Done and here's the result
Copy link to clipboard
Copied
Hello Bob ,
thanks for your answer !!
I still have some questions:
Do you mean the highlight balance in CR on the 4th page and than the left , middle or right options to play with the colours?
But than you are in PS , so I have to open PS en make a black mask with the optionbutton. ?
Rest is following later 🙂
thanks again !
Henk
Copy link to clipboard
Copied
Here's the way to make white balance changes in Adobe Camera Raw (ACR) for your image Henk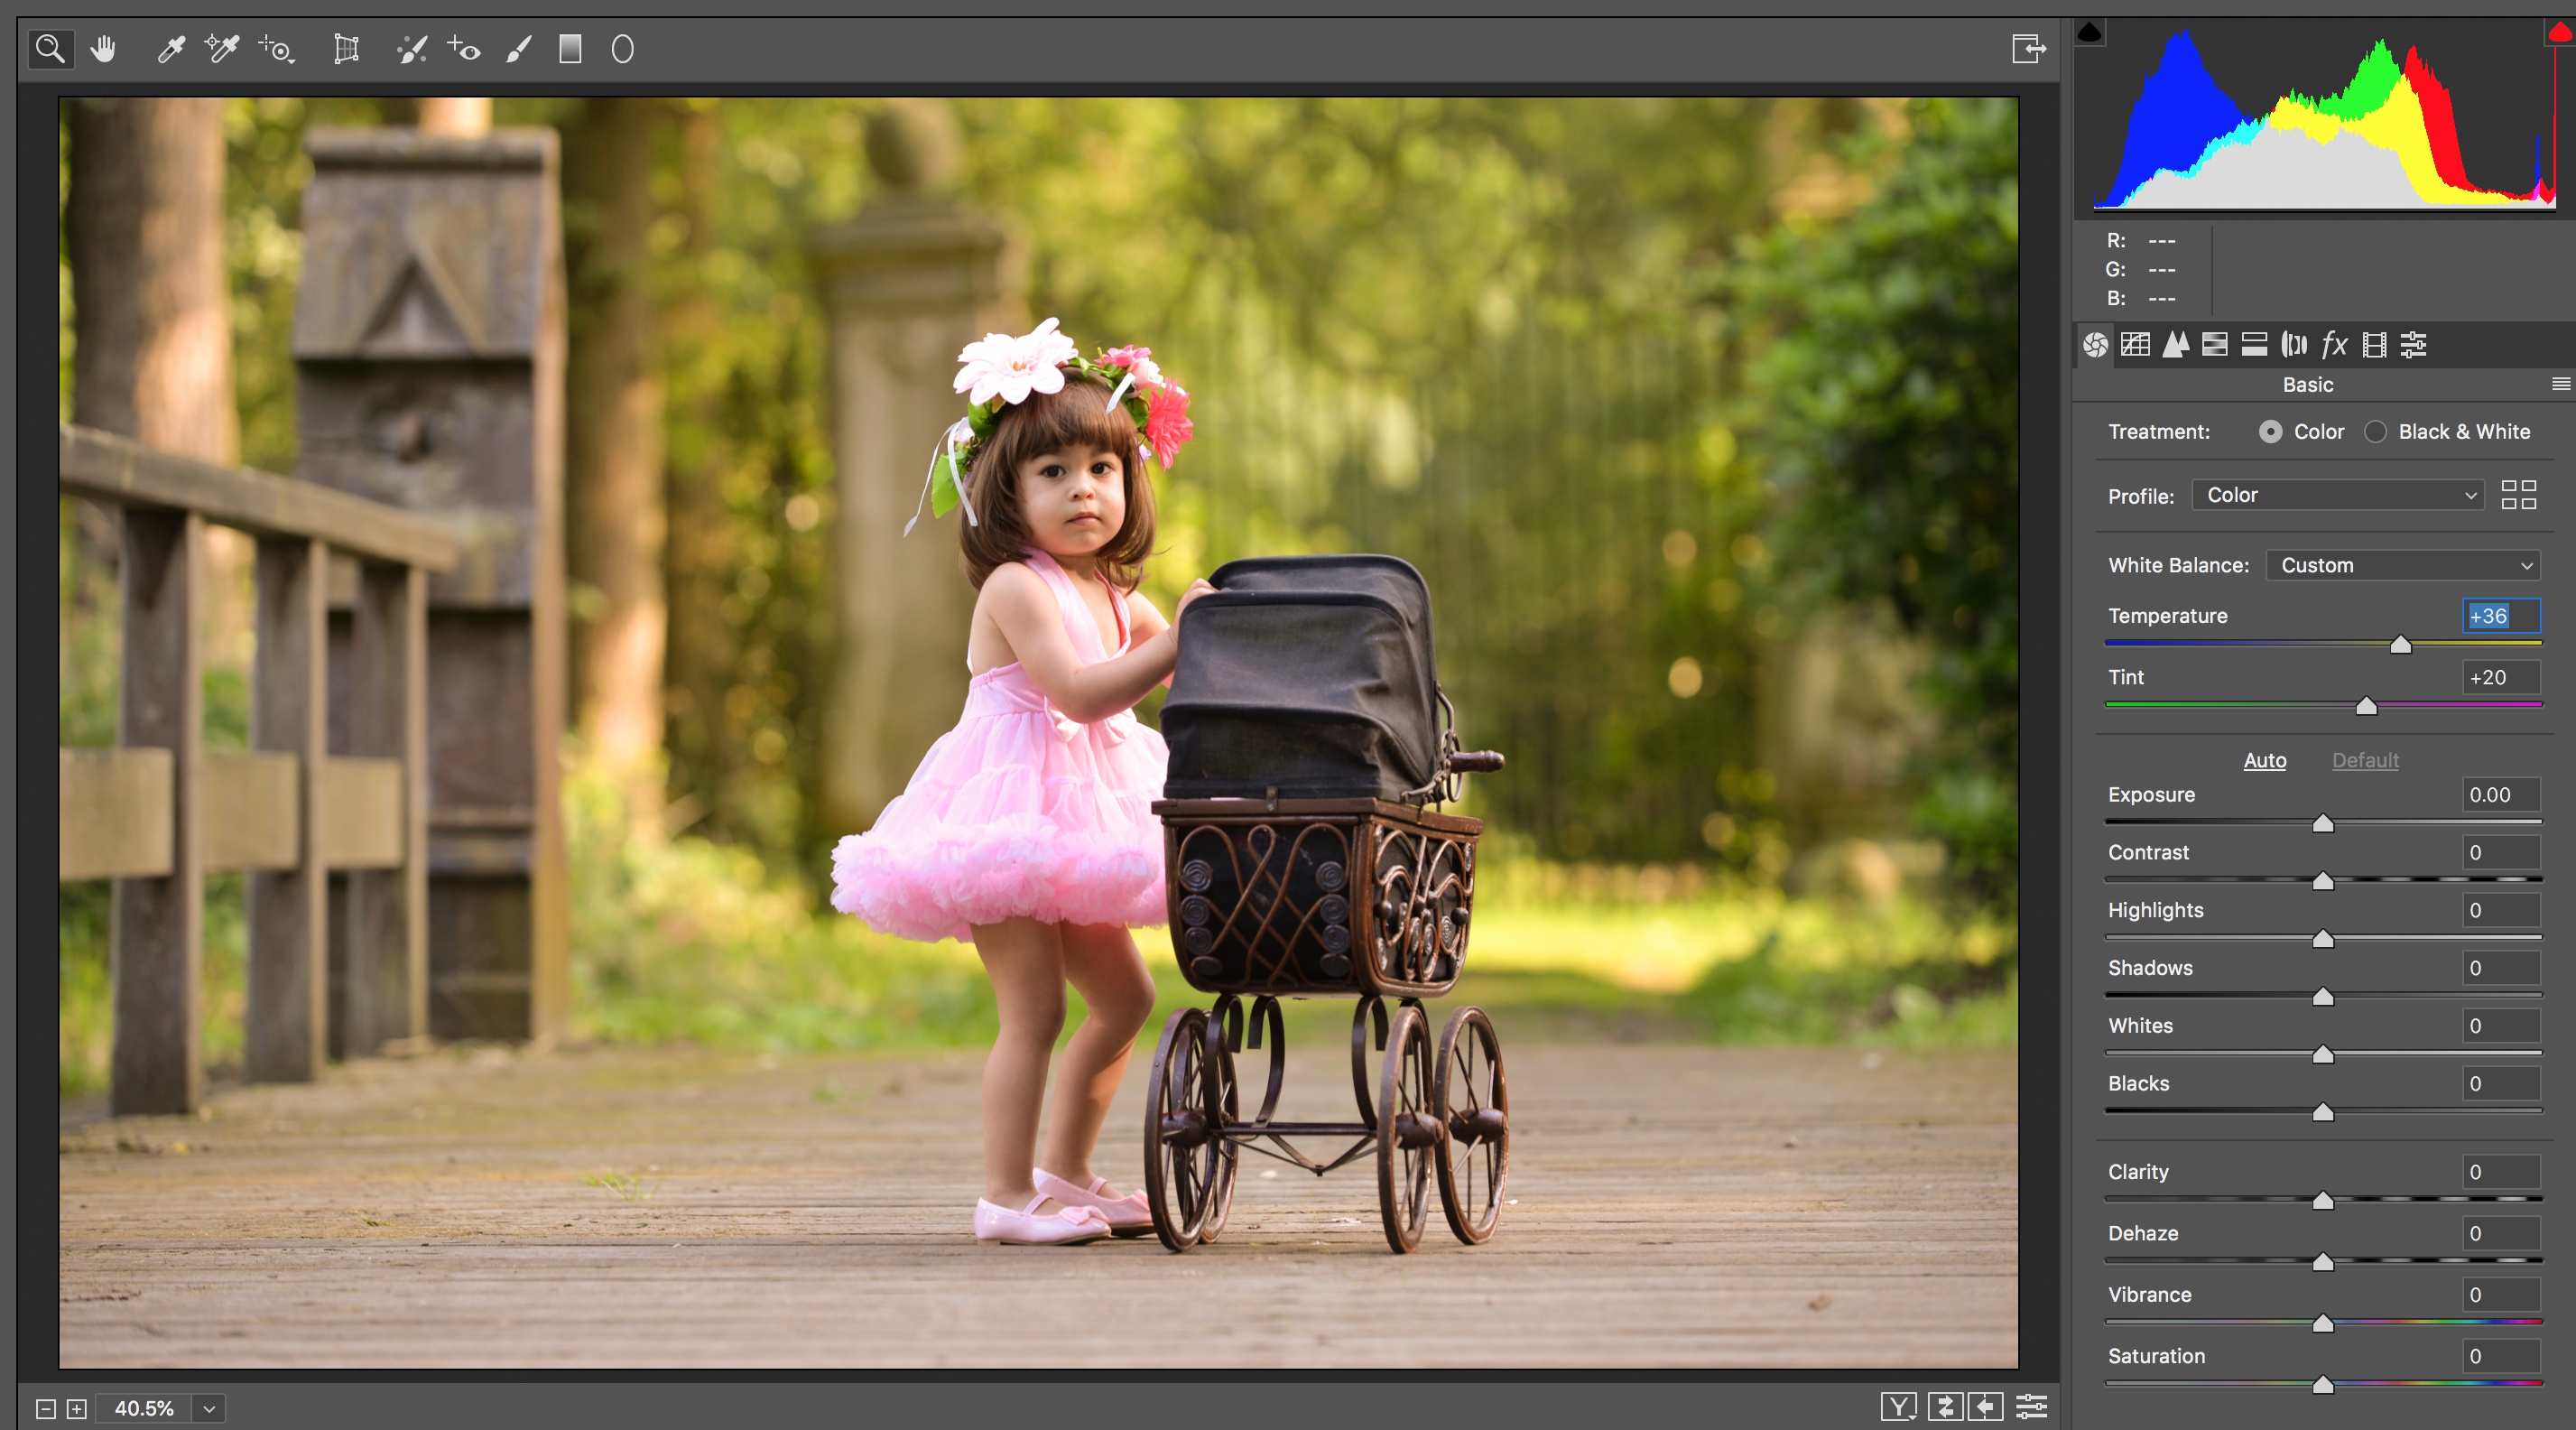
Copy link to clipboard
Copied
Ok , first step is setting the WB with the buttons temperature and tint. , that's clear !
But now I want to now how I can colour the background best without the girl ?
Making a layer in PS and cut her out ? A white layer or black?
and than.... 🙂 ?
Copy link to clipboard
Copied
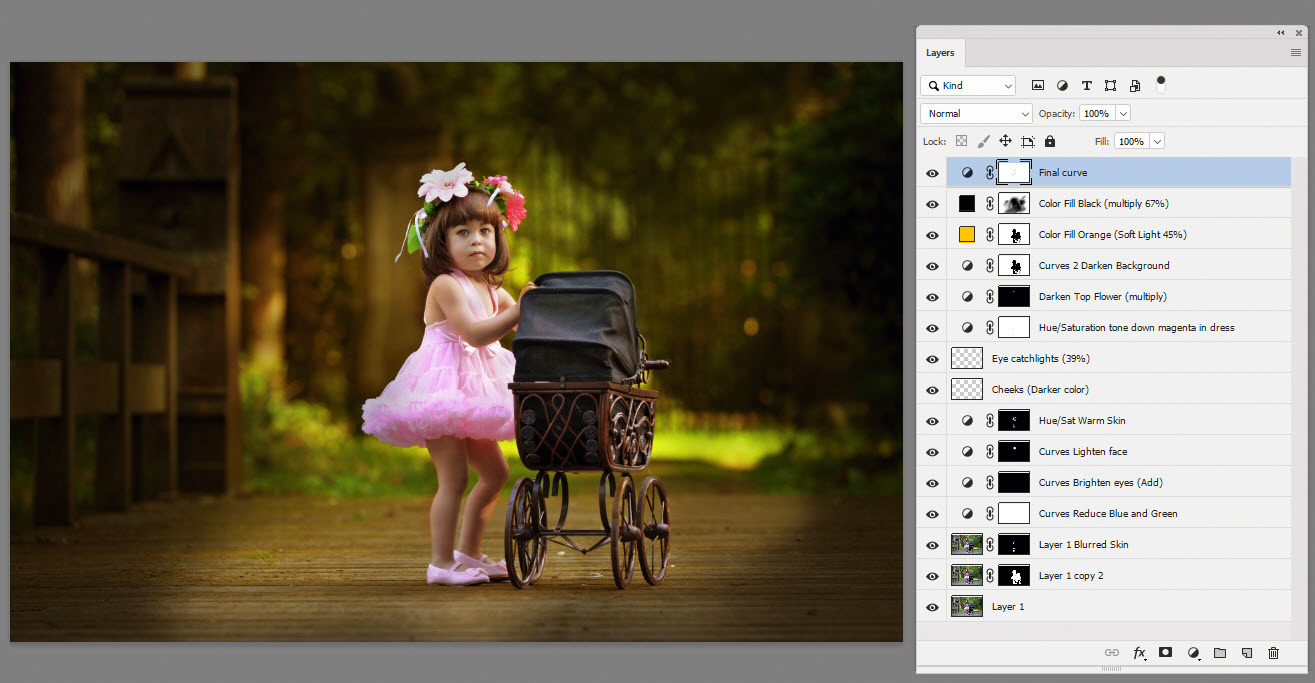
Hi Henk,
Here's a screen grab of all the layers. Since I recreated this again I took some artistic license to change one part of my process.
So there is a screen layer that adds some extra sunshine to the top left corner
The path forward from where you are at is to copy that new warmer colored layer and name it Multiply Layer.
Then select /subject.
That does a fair job to get the main character. Clean that mask up as needed to fit around the details.
add a layer mask and invert that so the background is white and the subject is masked out. Set this layer to Multiply mode
Copy that Multiply layer and set that new Layer to Color Dodge mode.
Paint on the masks for both of these layers using black in multiply mode to add highlights and shadows where you wish in your image.
Then I chose this time to add another empty layer and set it to screen mode. I selected a skin color and painted it over the areas I wished to add sunlight. You can certainly paint sunbeams or whatever you wish.

Adjust the blend percentages of each layer to your own taste.
I believe I had the Color Dodge and the Multiply layers set to 100% and the Screen layer set to about 50%, but those will be different depending on how much painting you do and what brush density is used.
Hopefully that clears things up!
Copy link to clipboard
Copied
Thanks again Bob !! I am translating the text , print it and gonna try !! Super!!

Copy link to clipboard
Copied
I think you have got a lot of advice! Bob did some great work (cheers bob)!
Here is another video tutorial that might be helpful.
How To Make Colors POP In Photoshop - YouTube
There are so many ways to create an effect in Photoshop. YouTube will be your best friend! The great thing is even the pros learn something new each day as everyone know a different trick to accomplish a task! Have fun exploring and working on the photo! Excited to see if you are able to accomplish the task you want! Share when you are finished!
Copy link to clipboard
Copied
Thanks for the usefull link ! I saw that that also helps a lot !
Only my problem is that I can't remember long what I did , so I have to look each time...:-(
That's the reason that I am looking for a easy and simpel way to make it look warm.
But i am gonna try !
Thanks for your reaction!
And indeed, youtube is a real treasure 🙂
regards,
Henk
Copy link to clipboard
Copied
henki18786763 wrote
Only my problem is that I can't remember long what I did , so I have to look each time...:-(
What you need is training. Doing the manipulations several times in a row. With that you will even be able to find your own way to achieve the result. And remember: there are may ways to get a similar result. This isn't rock science.

 AdChoices