

- Home
- Premiere Pro (Beta)
- Discussions
- Re: Now in Beta: Timeline tone mapping
- Re: Now in Beta: Timeline tone mapping
[Released] Timeline tone mapping

Copy link to clipboard
Copied
This feature is now shipping in v23.2 of Premiere Pro. More information is available here.
------------
In this latest public beta, Premiere Pro introduces automated tone mapping for HDR (High Dynamic Range) video to SDR (Standard Dynamic Range) video workflows.
Tone mapping works with iPhone HLG, Sony S-Log, Canon Log, and Panasonic V-Log media, as well as media that is in HLG and PQ color spaces.
TWO STEPS TO TONEMAPPING
Tone mapping is done in Two-Steps. First, you set the clip’s color space to the wide gamut color space it was recorded in (like Sony S-Log) in the Interpret Footage dialogue.

Then you must drag that clip to a Rec. 709 timeline. Tone mapping will automatically be applied, but you can confirm that “Automatically Tone Map Media” is checked in the Sequence Settings:

SOME CLIPS INTERPRET AUTOMATICALLY, SOME REQUIRE YOUR INPUT
iPhone HLG clips are automatically detected and interpreted on import and you don’t have to do anything, just drag and drop them on to a Rec. 709 timeline.
For Sony XAVC S-Log media, you can enable Automatic Detection and interpretation with “Log Color Management” in File > Preferences > General and checking “Log Color Management”:

All other log media must be enabled manually by overriding the color space in the Interpret Footage Dialogue.
COLOR MANAGEMENT GOING FORWARD
Tone mapping currently works with iPhone HLG, HLG, PQ, Sony S-Log, Canon Log and Panasonic V-Log formats.
Currently, Automatic Detection is supported only on iPhone HLG, HLG, PQ and Sony XAVC S-Log media. Other HDR and log formats will be supported in future beta releases.
Tone mapping HDR source media to SDR timelines is one part of a larger color management system in development for Premiere Pro that is being introduced and validated through the beta program.
This workflow offers a LUT-free way to transform your media from HDR to SDR. This is a first step, and more functionality and control will be added.
You can, of course, continue to work with log footage and LUT-based color workflows. This new method is another, alternative color workflow model that exists alongside it.
We want to know what you think. Please join the conversation below.


 72
Replies
72
72
Replies
72

Copy link to clipboard
Copied
This will be helpful.
Thank you

Copy link to clipboard
Copied
Color space conversion is a very necessary and important process when working with a material. And here it is very important that the color space is interpreted correctly without using LUT. This is extremely important, I stress, extremely important. Colorists have been waiting for this for a long time. Otherwise, we will get a cropped dynamic range without the possibility of recovery during subsequent work with color. A practical example: you have intreated the material into the color space using LUT and passed it to the colorist for improvement, who in turn will not be able to manipulate the flexibility of the material, since LUT transform the color space and thereby trim the dynamic range.
Therefore, it is necessary to take this into account.

Copy link to clipboard
Copied
As I understand it, the tonemapping mentione by Eric above is not LUT based. I would expect to be corrected if I am wrong about that.
Of course, depending on the nature of the LUT involved, there can be a wide range of possible outcomes. I've been workign at creating LUTs in LutCalc that both:
1) apply a conversion & curve to dynamic range that lifts blacks to around 3 (on an 8-bit scale), and rolls white down to about 97, so no clipping occurs and
2) converts HLG to sRGB/Rec.709 color space primaries/volume.
In testing so far, I've been able to take several clips from BRAW through Sony log and apply this in the Interpret Footage Input LUT slot ... and get a good image inside Premiere. No clipping of dynamic range or colors.
As they come in with slightly lifted shadows and no total white, I need to then apply an "Exposure" adjustment to set the middle of the tonal area properly so that then I can expand Contrast to get the width and general shape to the curve I want for the image. And probably drop shadows just a titch.
I've been rather suprised how well this works. But then, I know a lot of the color space and dynamic range conversions used in Resolve are LUT based also. So it's back to ... it depends on 1) how well the LUT is designed and 2) using the appropriate LUT for the media involved.
Neil
Copy link to clipboard
Copied
I don't agree with your point of view. If you apply LUT at the interpretation stage through the Modify panel, the dynamic range will be cut off in the material. It will not be possible to return it later. LUT is a destructible workflow, as one color space is transformed into another. LUT's should only be applied for the stylistic look at the end of the color correction chain.
Copy link to clipboard
Copied
Can a LUT be destructive as you noted? Of course. Yet ... when properly designed, they aren't.
For example, LUTs are used in Resolve all the time for color space/dynamic range conversions. Both in general in program preference settings and heavily by colorists in their power node structures. So ... it depends.
In this app, at this time, we need to do the conversions in the Interpret Footage dialog. Similar to Input settings in Resolve. Except the Input settings are kinda mushed together in Premiere, so it's taking some testing and care to get the right things done ... where. Steps have to be combined that are separate items in Resolve. And yes, I'd prefer the more-option process!
But given what Premiere is at this time, I've been working with conversion LUTs. Creating them in LutCalc as Adobe chief color scientist Lars Borg has suggested ... and from testing with BRAW and Sony footage so far, the results do not clip anything nor distort color hues.
Would I then take the clip with that LUT applied and try to stretch it back out on an HLG timeline? Of course not.
The simple answer is you can ONLY set a clip to one color space in a project, unless you duplicate the clip in the Project panel, creating a separate metadata instance of it. You could have one set for Rec.709, another for HLG.
But setting an Input LUT to convert say S-log3-cine to Rec.709, applied with the Override-To Rec.709 option ... if properly done, will not clip nor crush, and should fairly accurately transfer the color from wide-gamut to Rec.709. And you can work that clip properly in a Rec.709 workflow.
If you then wish to change to an HLG workflow, simply remove or change the Input LUT and Override-To options, and work with an HLG timeline.
I do agree you have to be very careful what LUT you use in that Input LUT slot though. And ... test with your media.
Neil
Copy link to clipboard
Copied
This is a complex and fascinating process to study.
Input LUT slot usage
From what I've learned, the Interpret Footage Input LUT slot is well used if you wish to apply your own control to the transform of any wide-gamut media to Rec.709. Adobe chief color scientist Lars Borg suggests using LUT Calc to create transform LUTs for either/both dynamic and color space/range changes. From my testing so far, that seems to work.
And so for say some log or RAW media that you have, if you create a basic transformation LUT you can apply that in the Input LUT slot, and use the Override-To option to set the color range of the result to Rec.709.
Doing it this way, you could skip their tonemapping and apply whatever normalization you prefer. Or of course, you can use their tonemapping, which at times can be quite useful.
Override-To Option functionality
That Override-To option actually doesn't apply anything to the media. What it does is tell Premiere essentially which NCLC tags to use to mathematically "see" the image data when it uses it on a sequence within that project. Totally a metadata operation.
So if you have an HLG or PQ clip, and use the Input LUT slot to transform that to fit within the Rec.709 sequence, you must also tell Premiere to use the "stock" NCLC tags for Rec.709 when working with that clip. By setting this Override-To option to Rec.709.
Copy link to clipboard
Copied
The Interpret Footage dialogue allows users to either apply an input LUT of their own choosing to a piece of footage OR have a color space applied to the clip (as Neil explains above). Footage tagged as wide gamut can then have a tonemapping algorithim applied to it in the timeline, and the image can be displayed in a pleasing way without any clipping or loss of image information.
What's new in this beta is support for interpreting additional "flavors" of camera log color spaces (Panasonic, Canon) which join Sony S-log and other HDR formats.
That's the first half of the color management/ tonemapping pipeline.
The second half is, of course, the tonemapper. And in this public beta we have a very unique, tri-algorithmic method -- meaning it's a 3-in-1 tool that responds to the type of footage placed in the timeline. So iPhone HLG interpreted clips use one kind of tonemapper, log interpreted another, and then a third for other HLG sources.
The goal of this strategy is simply that there is no one-size-fits-all tonemapper, and we want to make sure that we are giving users a really great baseline that 1) does not clip any information and 2) displays a pleasing tonemapped rendition of the wide gamut source.
From this baseline, Premiere users will be well poised to drop a variety of log and HDR clips on to a timeline and make color adjustments to the tonemapped rec 709 image using Lumetri.
And, once again, this is the first phase of color management and tonemapping of wide gamut video to rec 709. As we get your feedback, we will improve our tonemapping algorithims and offer more controls. So, if you have the time, please take a look and let us know what you think of 1) the workflow and 2) the quality of the tonemapping.
Copy link to clipboard
Copied
1. "...so iPhone HLG interpreted clips use one kind of tonemapper, log interpreted another, and then a third for other HLG sources".
As I understand it, if we use clips received from various sources in our project, the new tonemapper function will automatically display the correct color space on the timeline. If that's the case, then that's great. But, as you have noticed, then you need to consider the introduction of all types of sources as soon as possible so that the process works fully and correctly.
2. Footage tagged as wide gamut can then have a tonemapping algorithim applied to it in the timeline, and the image can be displayed in a pleasing way without any clipping or loss of image information.
That's what I'm talking about. Tonemapper is the best solution for translating material into the correct color space for displaying it on a timeline without affecting the dynamic and tonal range of data, unlike the previous method of interpretation through LUT. This is the science of color and color space, and this is how the new tonemapper function will work. The Lut itself cuts off the source at the very first stage, which serves as a limitation when working with it in the future.
Is that right?
Copy link to clipboard
Copied
It can be, right, but depends on the design of the LUT.
For instance many LUTs are used in Resolve for changing gamut and/or range that do not clip or crush, because of careful consideration in design within the LUT. I've been able to build a couple similar in LUTCalc.
They start by lifting the bottom a bit, and have a long slow roll-off of upper tones. I've been able to feed them both under & overexposed RAW and HLG clips, converted to Rec.709 without a crush or clip.
I'm finding Eric's last comments in this post quite useful to understand where they're going with this. It seem to be a rather unique method that may well work, but is going to take some explanation for users. As there are implications of the options not necessarily obvious but majorly "there".
Between the Input LUT option and the tonemapping, combined with Override_To to 'tag' the file for timeline use, we users are going to have multiple options. It's kinda ... squishy, in a way, as you can do this or do that or even this, all workable, but all with slightly to very different implications for then working in the sequence.
Such as ... you will perhaps have more 'iron-clad' control of the image on appearance on the Rec.709 sequence if you've rolled your own conversion via the Inuput LUT slot. Making your on-sequence work more predicatable at times.
This would be for a more advanced user, probably working specific media workflows on a regular basis, needing precise repeateable results.
Using the tonemapping may mean less work done on the sequence in color for the average corporate explainer or YouTuber who just needs something nice & sorta pretty.
But for someone going for very specific looks, might be a bit too unpredictable. Having a follow-on preset ready to go ... might not be as rock-predictable and usable.
It is nice to finally ... over a year since the underlying system was dumped on us ... getting a good idea of where we're actually going.
Neil
Copy link to clipboard
Copied
I would like to hear thoughts from @eric escobar.
I want to understand will it be identical to what is in DaVinci called "the science of color management DaVinci Wide Gammut", which automatically determines the color space of the source?
Copy link to clipboard
Copied
Most excellent question ... and I'll be looking for Eric's response.
But my guess is the answer will be ... sorta but not really ...
As the setup they are creating can be 'pushed' several different ways by users. So, with one directional push from a user, maybe ... something very similar in result to an Auto color managed in Resolve with certain media/workflows may appear.
However, they don't use a wide-gamut timeline process except with HLG/PQ timelines. So for Rec.709 work, they have to tag & transform prior to the the media going on the timeline. Then the monitor & exports are tied to the timeline color space/volume.
In Resolve, we have wide-gamut as the expected timeline space with output transforms for the specific monitor and/or export selected. So the math is a bit different, not only where it's applied but what must be applied.
In Premiere, from everything I've seen from Francis, Lars, or Eric, all color/tonal corrections will be applied on the timeline, but only after the conversion to Rec.709 that created that timeline 'space'.
In Resolve, with typically a wide-gamut timeline still, the math for color corrections are applied while the media is still in a wide-gamut space. You see the results in your Rec.709 space monitor, but the math is actually applied to the wide-gamut data.
I personally lobbied the color team to create a P3 limited D65 Rec.2020 'space' for all timeline panels. This is the widest, deepest color volume space currently practical. This would be something many colorists do, and would understand and highly approve of. And it would have several advantages:
- There are easy and accurate ways to transform all media to that space/volume. This would have both 'standard' defaults the app applies and user choices for transforming into that space.
- There are easy and accurate ways to transform from that space to both monitors and exports.
- The math for ALL tonal/color corrections done to all clips no matter their individual origin will be highly similar and predictable. Making color work vastly easier.
- The scopes would be completely reliable.
But ... though I was told this was "an interesting suggestion ..." and even had a number of questions come back on it, this does not seem to be the model they chose to run with. Ah well ...
Neil
Copy link to clipboard
Copied
So why not approach this issue with more global things that will work perfectly. Now if they introduce one thing without taking into account the other, there will be questions and unpredictable results again. Now again, guesswork and misunderstanding among most users will cause even more trouble with color spaces when introducing Tonemapper, which, as you said, can give unpredictable results on the timeline. And what if you work simultaneously with different sources, as happens in most projects. I'm sure it won't be obvious. Moreover, @eric escobar pointed out that not all profiles are available in support yet.
And what happens, this function will be "neutered" again?
My vision is this:
1) for beginners in color correction, it is necessary to enable the Tonemapper tool to automatically determine the color space of the source placed on the timeline, after which the user will be able to get the color correctly and proceed with further color manipulation. But, in the event that there is support for all camera profiles (including Fuji) from which the source can be obtained. Then it has the right to exist;
2) for professional colorists, it is necessary to remove the interpretation of the source before placing them on the timeline. After placing the source on the timeline, using the Lumetri panel to develop the material, and then perform primary (secondary if necessary) color correction before the material development stage (that is, we place the steps with color correction before the material development) It is very important. The next step is to perform toning to create a stylistic look. I explain why this is so: if we apply the interpretation of the material before manipulating the color correction, then we will lose tracking the correct work with the source in the color correction chain and limit the source taken in the profile (Arri LOG, RED, BRAW, HLG, SLOG, etc.) in the dynamic and tonal range to the value of REC 709. As we know the color space is smaller than the above. Accordingly, we will get a compressed color space and thereby limit ourselves in manipulating color when creating a stylistic look. For professional colorists, this is an ideal development of the situation.
Copy link to clipboard
Copied
They are using a working timeline color space model. The timeline, monitoring, and export all aligned. With three options, Rec.709, HLG, and PQ.
So they need to bring the file into the timeline color space as the first step of the process. And the way they are doing this, there are actually quite a few things the user can do for color transforms. But you have to know what and how to create or acquire the tool outside of Premiere to do this, if you want to personally control that transform.
So their idea is you can use their tonemapping (just released) or you can apply your own via that Interpret Footage Input LUT slot. Either way, you then tell Premiere essentially what color space 'tags' you want it to see, which dictates the math used for the file on the timeline.
As I've noted elsewhere, I've been trying the suggestion to use LUT Calc to create a full conversion as is done with a number of LUTs and/or color transform options in Resolve. And I've used that to bring S-log3 and BRAW files into Rec.709, and it actually worked rather well. No clipping, no crushing, and the colors were within Rec.709 boundaries and actually as good as I could get in Resolve.
But ... it's definitely a painful process for us users, and not all the controls are clear as to exactly what they do. Which is part of the pain. What the hay does this ... do? Specifically ... ? All they have tended to give is a few use-case examples.
But what about a different use or need? If you don't know the exact function, how are you to guess? That's ... not good. I'm trying to get all this sorted.
I've been through a good and lengthy discussion about this with one of the more techy colorists I know ... one of the people first certified for DolbyVision btw ... and he's been pushing this Premiere color handling around a lot from his needs with his Resolve conforms.
His thoughts ... first, ok, they're not doing this the way he'd have chosen but it's Adobe, right?
Second ... once he puzzled out how to work the Input LUT against the Override-To, yea, he can make anything actually work. As he's told me, if you know how to get or make them, you can apply conversions to do about anything. And do it quite usably.
But then, he knows his conversion LUTs and has a ton, some of which are manufacturer LUTs, mostly, ones he's created. He likes to use his own, as he's always tested/pushed them to their limits. Knows exactly what that tool does.
And not many Premiere users have a thousandth the knowledge on that he does. So ... for most users, probably ... the tonemapping as they bring it in will be the start. They are working to do this such that there's no data crunching, that the file makes the transfer/conform as intact as possible going from wide gamut to narrower.
And it's going to take some testing and some just getting used to it. As my bud says, it does work actually, if ... odd. And currently kinda opaque to most users, with limited options that we can see.
I ...again ... argured for a common working space for all timelines no matter the display/export space. In specific again, P3 limited Rec.2020/D65, the largest currently practical space. With transforms for monitor & export depending on your need.
Ah well. This can work, it's just ... going to take some messing with.
Neil
Copy link to clipboard
Copied
Ask the colorists who work with the DaVinci product and provide them with my entry above. What will be the answer? which way would be correct from the point of view of the chain of building and working with the native color space before cutting it in REC 709.
Copy link to clipboard
Copied
Baffy ...
Um, I communicate with pro colorists daily. The one I referenced above was the first 'boutique' shop to be DV-certified on the East Coast, I think only the second shop certified back east. He's taught the post production world at NAB for years, MAX, and all across Europe and China ... besides being a noted expert as a working colorist.
Direct quote: "It actually works as it should just weird in how its presented." Amen. (He also says it's just not fully fleshed out yet and the UI for it is terrible ... yup, agreed on both counts ... )
I have covered the point of your post in detail. Would this Adobe method be the colorist's ideal choice? No.
Can it work ok? Yes.
Is it my first choice either? Hades no.
Will I still be pushing for moving to a wide-gamut timeline basis, with transforms then for display & export? Sure.
For some additional information ...
Most of the colorists I know don't actually work with each clip being in it's own "native" space on the timeline to begin with. They tend to transform all clips from any original source to one of several common wide color spaces. Some just do DWG ... Davinci wide gamut. Many choose an Arri form, some do P3 limited Rec.2020/D65. And of course, some just do ACES basis.
And with any of those options, all clips are transformed by Resolve from their 'native' state to the timeline/working color space. Some do this in the various CM options in Resolve, some do it by nodes in their "power grades" ... where typically the first node applies a transform. And different tools can be used for the task. Including both mathematical transforms and a ton of LUTs built for this purpose in node working.
It makes a lot of sense to transform to the widest gamut shared by the project, as then all color/tonal corrections math applied to any one clip is exactly the same as that applied to any other. All tools function identically with every clip on the timeline.
Then of course, a transform has to be applied to whatever monitor space you're working in while working. And of course, the export process color space best be set to how you monitored it.
In the Resolve method you work from the wider stuff of the 'native' clip (though you can't see it in the monitor with the monitor set for Rec.709) to get the correction by scopes & eye. As long as Resolve can work with the clip, you're fine.
In the Adobe method, you need be a bit more careful in getting the clip to the timeline most certainly. And this is one place I think their documentation and explanations really fall flat. Nearly useless for this part of the process.
Neil
Copy link to clipboard
Copied
I want to get one more question.
Ask the colorist if it is of paramount importance when we place the clip on the timeline, and then we develop the clip through the Lumetri panel. Not via the Modify panel. Next, we do balancing, fine correction, and then create an appearance and, if desired, style it. Here you need to pay attention to what I want to get according to the chronology of events. As far as I know, all primary color correction should stand before the source is displayed in the desired color space. And the appearance and styling is done after interpretation. In DaVinci, this is done with a bang, not with a wide gamut, but when setting up DaVinci YRGB. Because when setting up DaVinci Wide Gammut (similar, as I understood, to the introduction of Tonemapper in Premiere), the color profiles of cameras are picked up automatically and thus the chronology of working with color is violated. In the DaVinci YRGB operation mode, we will be able to track the chain of our work and, in case of correction, correct or add the necessary settings in the primary color correction before converting to REC 709. This is important because we are playing with a wide range of sources and we have more manipulations to correct.
It's important for me to find out from a colorist.
Copy link to clipboard
Copied
Not sure what you're talking about with the first comment. Lumetri can not do color space/volumetric changes to the image. Period.
So the transform to working color space must come prior to Lumetri.
In Resolve, do you skip the Input/Media Pool color management options? Which are of course analagous to the Interpret Footage location. Exactly. So using the Resolve CM prefs to set a color space is working in the same order as Premiere's new process. Just without some of the options you have in Resolve.
Although in Resolve, you can separate the working space from the display space. (Which again, I would prefer.)
As to on a timeline, yes, one can wait in Resolve and apply transforms on the timeline. In fact, where one or more transforms are applied, whether before or after the corrections are applied, can be setup pretty much any way you want. You can even transform a clip to X in one node, do some corrections, transform to Y in another node, do some corrections.
I'm part of discussions where folks talk about using several working-space transforms in successive nodes in Resolve because they like the way X tool works in Y color space, but prefer to use Z tool in Q color space. It can become pretty complex. But if all are performed correctly for that media, it works.
And in Resolve the choice of display transform is separate from the timeline.
In Premiere, it isn't. Again, in Premiere, the display of the image on the timeline is tied to the working color space of the timeline.
Is that a limitation? Yes. Is it crippling? No.
As in Resolve, many colorists working a 'pure' Rec.709 project have always opted to set their CM through the whole shebang to Rec.709. Input color space, working timeline space, monitor, all tied to Rec.709. Front to back Rec.709.
And yes, that can work and has for thousands of shows and films.
Now, Premiere has the options of Rec.709, PQ, and HLG. For most editors ... that is about as complex as it needs to be. Is it the Ultimate? No. But as long as the transforms are handled correctly, it can work without data loss. It has in Resolve since forever.
And again ... yes, I would prefer both a wide-gamut 'set' timeline, and more user options.
Neil
Copy link to clipboard
Copied
It would be surprisingly cool if Adobe developers would make support for a wide gamut on the timeline. Thus, working with a variety of source formats (LOG, HLG, BRAW, Arri, Red), you did not have to worry about interpreting the material into the right space, since the Wide Gammut mode would support all the color profiles of cameras. And on the Export page, you set the setting for the REC 709 color space for proper delivery. This would allow the colorists at Premirere to work with a wide range of colors throughout the project, rather than in the REC 709 space.
It was necessary to do so, if I correctly understand the process of the new Mappertone tool.
Copy link to clipboard
Copied
For quite a few years, most colorists in Resolve brought everything into Rec.709, then worked the entire project in Rec.709. That process can work and be quite acceptable.
You and I would both prefer a wide-gamut working space, clearly. In any Ideal World, of course. I think perhaps what the devs in Premiere were thinking of was how much complexity can the average editor be expected to deal with daily?
This system ... with the tonemapping now a part of the 'shipping' version ... does give a fair amount of control to the user, more than we've had.
A choice to use their tonemapping for many log/raw codecs, which will do a pretty decent job of normalizing media to the timeline. Probably a good choice for the majority of jobs.
Or ... create specific conversion processes for your specific media, and apply that in the Interpret Footage dialog.
Or ... simply override-to Rec.709, and leave in log to do your normalization in Lumetri.
Neil
Copy link to clipboard
Copied
I didn't want to get a little something from you.
Copy link to clipboard
Copied
I'm sorry, what does this mean?
Copy link to clipboard
Copied
I can't understand Neil. I ask one thing, and he gives me a whole poem and there is no concrete answer to my question.
Copy link to clipboard
Copied
I am deeply appreciative of Neil's experience, insight and generosity that he voluntarily dedicates to this forum, and the Premiere Pro community at large.
Color is complicated and wide-ranging. Premiere Pro color was built around a Rec 709 - Rec 709 pipeline, the workflow that dominated the industry for decades. We are working diligently, and carefully, to integrate wide gamut formats, workflows and delivery into Premiere Pro, while taking great care not to break or complicate users existing workflows. I appreciate the feedback and patience as we solve the problems that inevitably arise from this scale of a task.
Copy link to clipboard
Copied
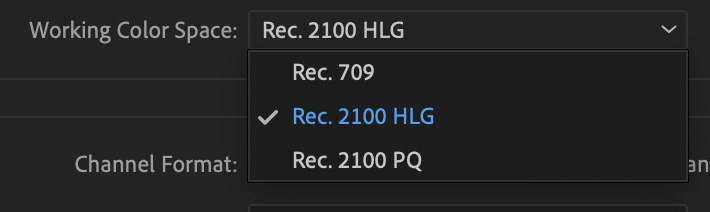
In the current release and beta versions of Premiere Pro, users can work with wide gamut clips on a wide gamut timeline by setting the Working Color Space of the sequence to either Rec 2100 HLG or Rec 2100 PQ. Users can use Lumetri to make basic color adjustments to clips and the whole project can then export in HDR. It is not necessary to work in Rec 709 for HDR delivery.
Are you looking to take an HDR project in Premiere Pro and make an SDR "trim pass" on it, so that you can deliver both an HDR and SDR version?

Find more inspiration, events, and resources on the new Adobe Community
Explore Now
 AdChoices