• Global community
    • Language:
      • Deutsch
      • English
      • Español
      • Français
      • Português
  • 日本語コミュニティ
    Dedicated community for Japanese speakers
  • 한국 커뮤니티
    Dedicated community for Korean speakers
Exit
0

How to make a shell overlay effect on the wallpaper?

New Here ,
Feb 20, 2025 Feb 20, 2025

Copy link to clipboard

Copied

Hi everyone, I'm just a novice texture artist and recently I wanted to try to make a simple enough wallpaper texture, but when I got to the moment when I needed to put these shells on top of each other like in the photo, I couldn't do it. I've been digging into Time Sampler for a long time, but I haven't found any settings that could do this. I also searched on the Internet but also did not find it. Could you help to make this effect?


image1.pngexpand image

graph.pngexpand imagegraph2.pngexpand image


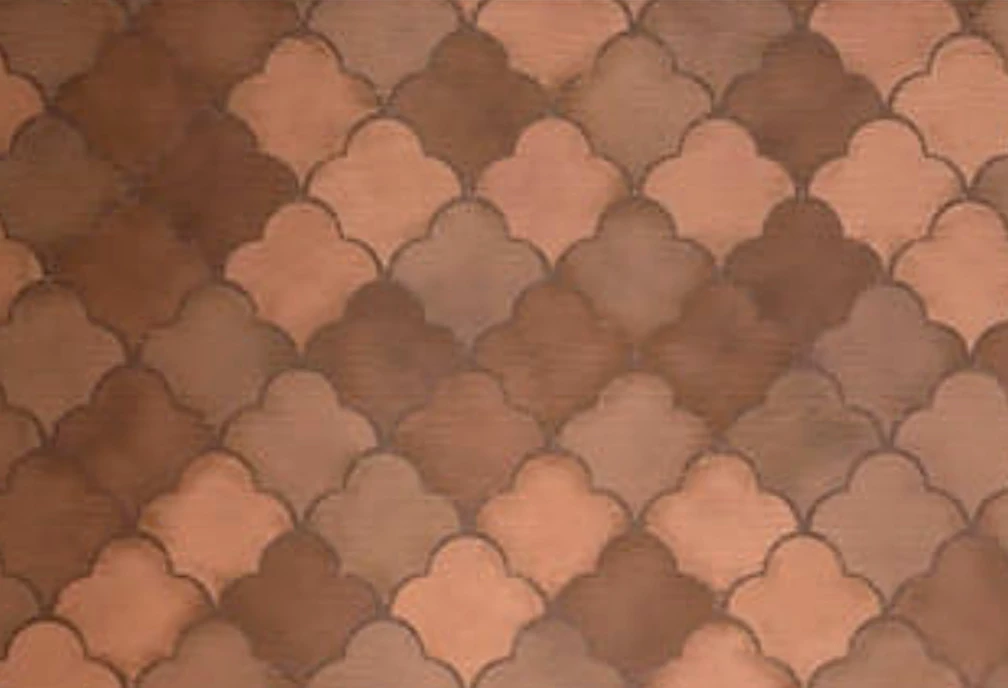
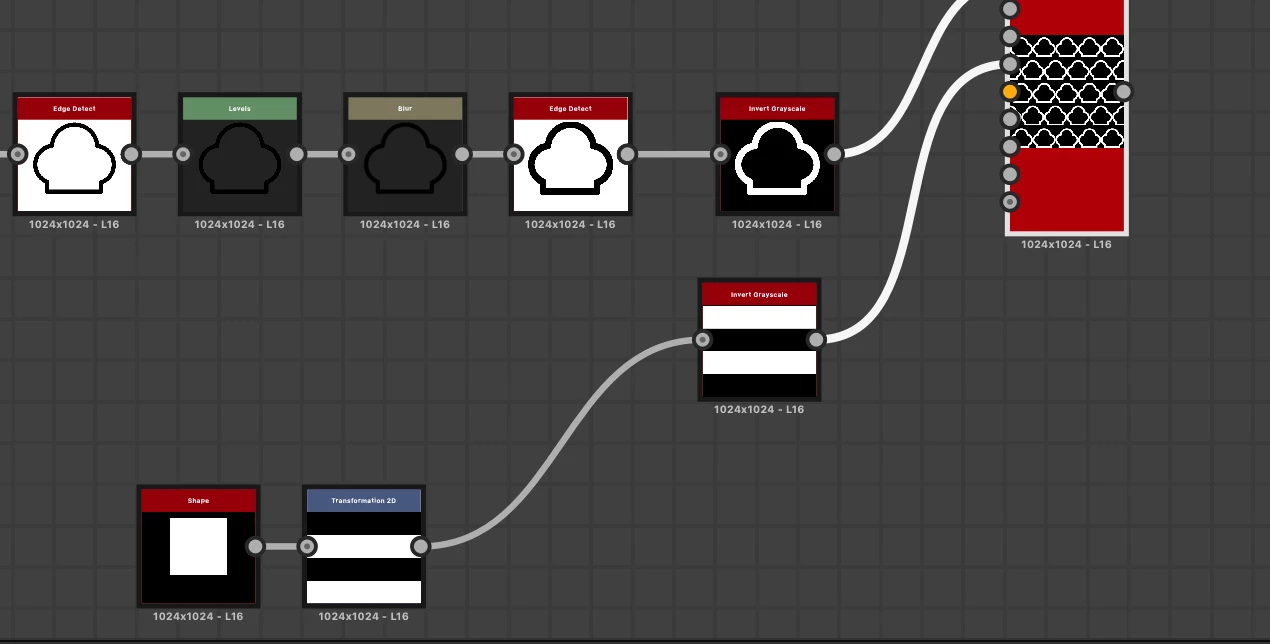
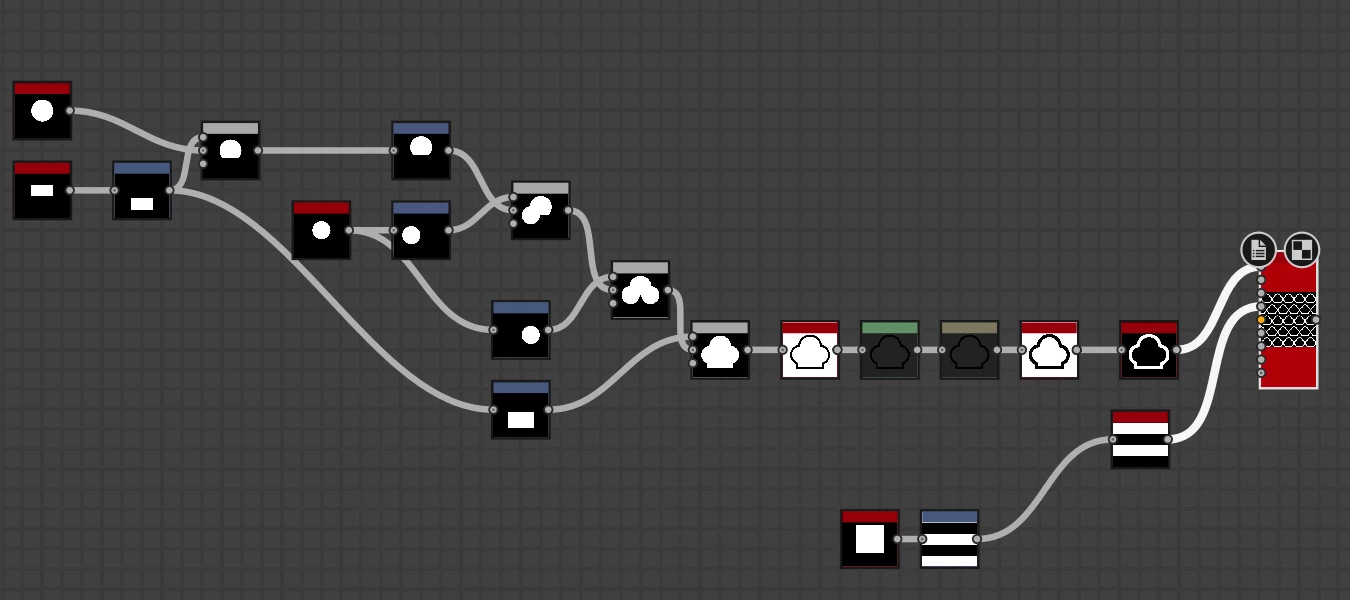
I also tried to select individual rows of shells to move them, but nothing worked for me.

Thank you in advance!

Iris
TOPICS
General , How to , Substance Graph

Views

111

Translate

Translate

Report

Report
Community guidelines
Be kind and respectful, give credit to the original source of content, and search for duplicates before posting. Learn more
community guidelines
Adobe Employee ,
Feb 20, 2025 Feb 20, 2025

Copy link to clipboard

Copied

Hello!


The Tile Sampler node will indeed let you do that. What we aim to do is create a grid in the Tile Sampler that lets us have double the tiles vertically than horizontally, then increase the vertical size of the tile to have the overlap we want, then color the tiles so that the next row is in front.


To achieve this, I have used these parameter values:

  • Y amount should be double the X amount
  • Size Y should be double Size X
  • Scale should be higher than 1
  • Offset = 0.5
  • Global offset Y = 0.5 (to ensure proper alignment for vertical tiling)
  • Color parameterization mode: Row index (to color tiles according to their row)
  • Color parameterization multiplier = 1.0


Finally, we change the Tiling Mode to Horizontal Tiling only to prevent the last row of tiles from covering the first row. Full tiling is restored downstream in the Edge Detect node.


This is the result, with a couple of additional tricks for you to learn.


shellTilesGraph.pngexpand image


I have attached the SBS file for this graph. I hope this is helpful!


Best regards.

Luca Giarrizzo | Quality Engineer, 3D & Immersive | Adobe

Votes

Translate

Translate

Report

Report
Community guidelines
Be kind and respectful, give credit to the original source of content, and search for duplicates before posting. Learn more
community guidelines
New Here ,
Feb 21, 2025 Feb 21, 2025

Copy link to clipboard

Copied

Thank you very much!

Iris

Votes

Translate

Translate

Report

Report
Community guidelines
Be kind and respectful, give credit to the original source of content, and search for duplicates before posting. Learn more
community guidelines
New Here ,
Feb 22, 2025 Feb 22, 2025

Copy link to clipboard

Copied

Sorry, I couldn't open the file because I have Substance Designer version 13.1.1.

Iris

Votes

Translate

Translate

Report

Report
Community guidelines
Be kind and respectful, give credit to the original source of content, and search for duplicates before posting. Learn more
community guidelines
New Here ,
Feb 22, 2025 Feb 22, 2025

Copy link to clipboard

Copied

LATEST

How could I open your graph on my version, or would you attach the graph on the version I can open it on?

Iris

Votes

Translate

Translate

Report

Report
Community guidelines
Be kind and respectful, give credit to the original source of content, and search for duplicates before posting. Learn more
community guidelines