Copy link to clipboard
Copied
I've made a material in Designer that I planned to use on a mesh in Painter. The texture looks great in Designer, and I've followed a tutorial from Adobe on exporting it as an SBAR to import into Painter for use. Unfortunately, when in Painter, the texture looks all wrong.
I've checked with some experts in other forums. The issue doesn't seem to be with Designer, but with Painter. Tried switching normals from DirectX to Open GL. The issue still persists. The issue keeps leading back to something with the ambient occlusion map of the texture, but we don't know what or how to fix it. Not sure if this is a user error thing or a bug. Other materials work fine. Any ideas?
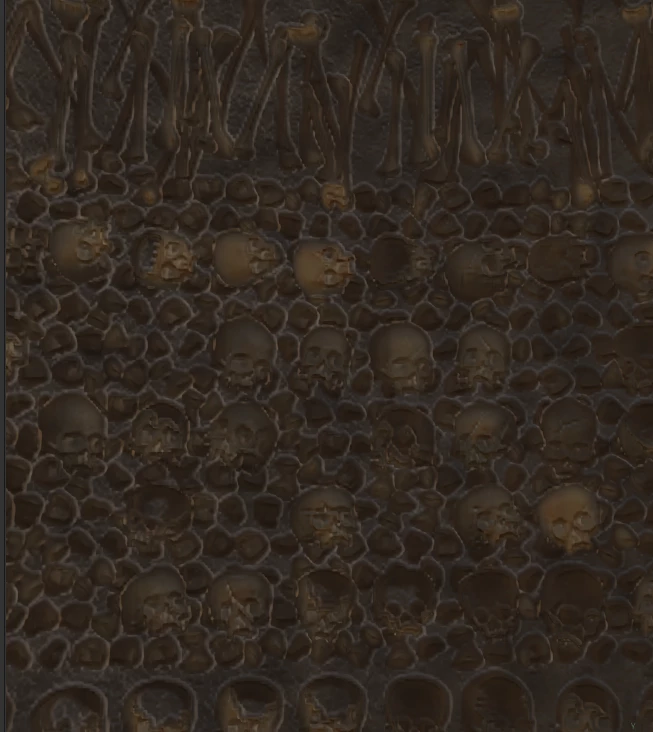
Below is how the material looks in Painter.
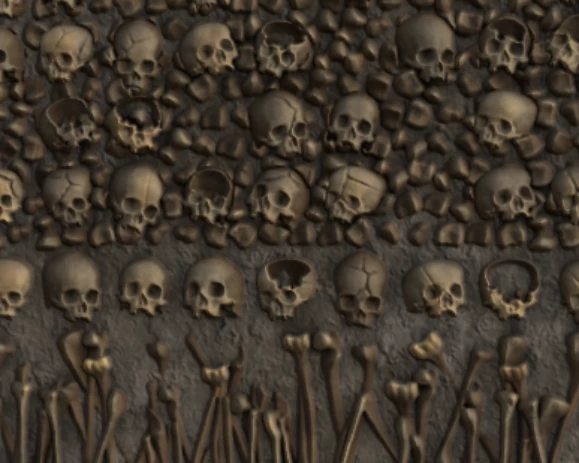
Above is how the material looks in Designer.
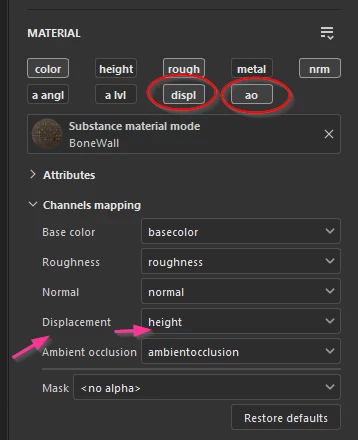
Here is the solution to the issue! Special thanks to Technical Artist, Lousie Melin for her kind help to solve this. For anyone else with this issue, here's the directions and screenshot she gave that resolved the problem:
"Painter does this weird thing were it converts the height to normal on the fly, and so your exported height and normal map are added to one another- which sometimes gives weird results. I would recommend in that case to manually remap the height map to Painter's displacement
...Copy link to clipboard
Copied
There seems to be a conflicting difference in lighting direction when looking at just the normal map and height map. I've tried flipping different color axis' in the normal map levels to see if I can get them to match up. So far that hasn't worked, but might be onto something. Normal map is on the left, and height is on the right in the screenshot.
Copy link to clipboard
Copied
Looking at both more closely, the height definitely is the weird one.
Copy link to clipboard
Copied
Here is the solution to the issue! Special thanks to Technical Artist, Lousie Melin for her kind help to solve this. For anyone else with this issue, here's the directions and screenshot she gave that resolved the problem:
"Painter does this weird thing were it converts the height to normal on the fly, and so your exported height and normal map are added to one another- which sometimes gives weird results. I would recommend in that case to manually remap the height map to Painter's displacement channel (to add the displacement channel in Painter go to your texture sets settings, click on the little "+", and add the displacement map. While you're at it you can also add the Ambient Occlusion map, which is missing by default.) Once you've done that you can go back to your layer, disable the height channel and enable the displacement and AO, then in the material properties go to "channel mapping" and map the height map to the displacement channel, and you should be good to go! Another usual suspect when facing discrepancies between Designer and Painter is your UVs and texel density, in Designer things look nice and crisp because the textures takes up the whole UV space, but I assume this was not your case."
Copy link to clipboard
Copied
Something to add that may be helpful for others - if you rotate the material, say 90 degrees, and it goes back to looking inverted, this is where you can add a levels effect to the material and I inverted only the green and red channels of the normal map with that and it fixed it up.
Find more inspiration, events, and resources on the new Adobe Community
Explore Now