Gusztav77
Known Participant
February 12, 2023
Question

Import faceless meshes to use as paint guides?

  • February 12, 2023
  • 3 replies
  • 955 views

I'm about to paint the meshes of someone else, let's call him Bob. Some of the meshes has to be painted with specific patterns on them, just think of a sign with a solid background color and a slanted stripe over it. Bob is so kind that he created his meshes in a way that the patterns are part of the meshes, for example, the stripe is indicated by cutting the face twice, as on the following image:

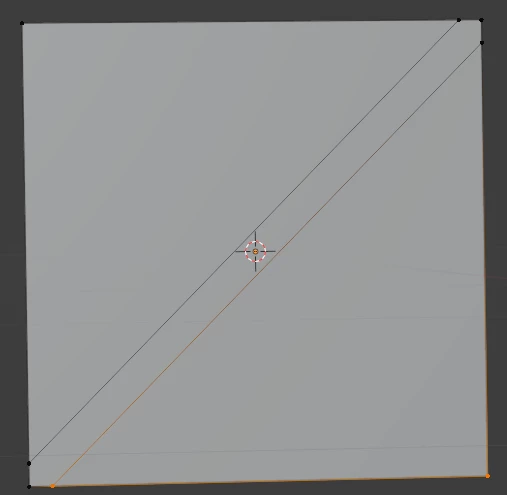
Let me call the slanted edges and the correspondig vertices guides as the sole purpose of them is to help me know where to paint with a different material.


Bob is even nicer and is willing to apply vertex colors to faces so that I only need to find the proper material and apply a color picker on the mask. However the edge remains kind of cogged.


Now I would like to ask him to extract the guides from the mesh to a separate mesh, as shown on the following image, collapsing the guide edges on the original mesh:

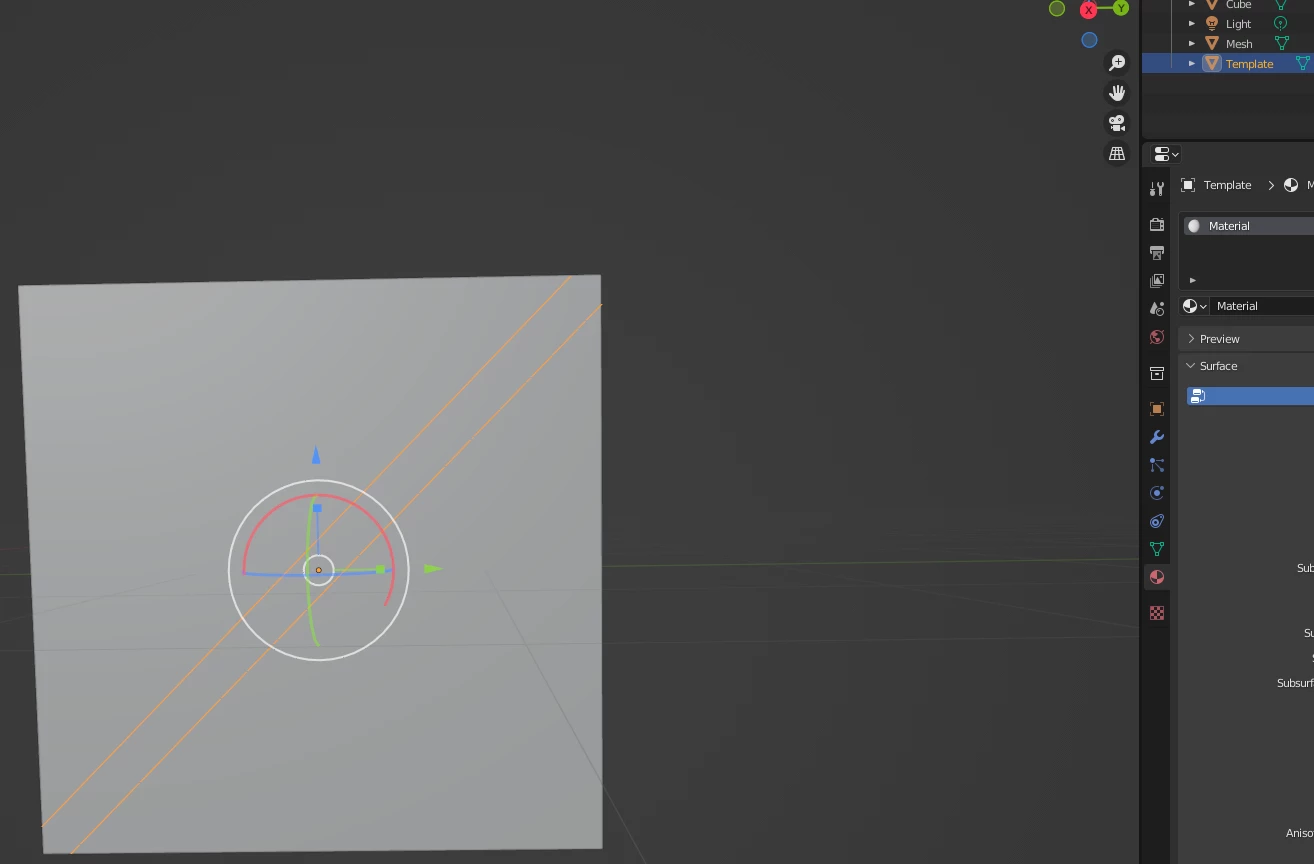
(Note the slanted selected stuff was separated from the cube with its position and scale left intact.)


If I could have the same view in Substance Painter, by showing the wireframe, I could use the guide to position my stencils and paint over the original mesh. This gives a much better result against the cogged one, just see for yourself:

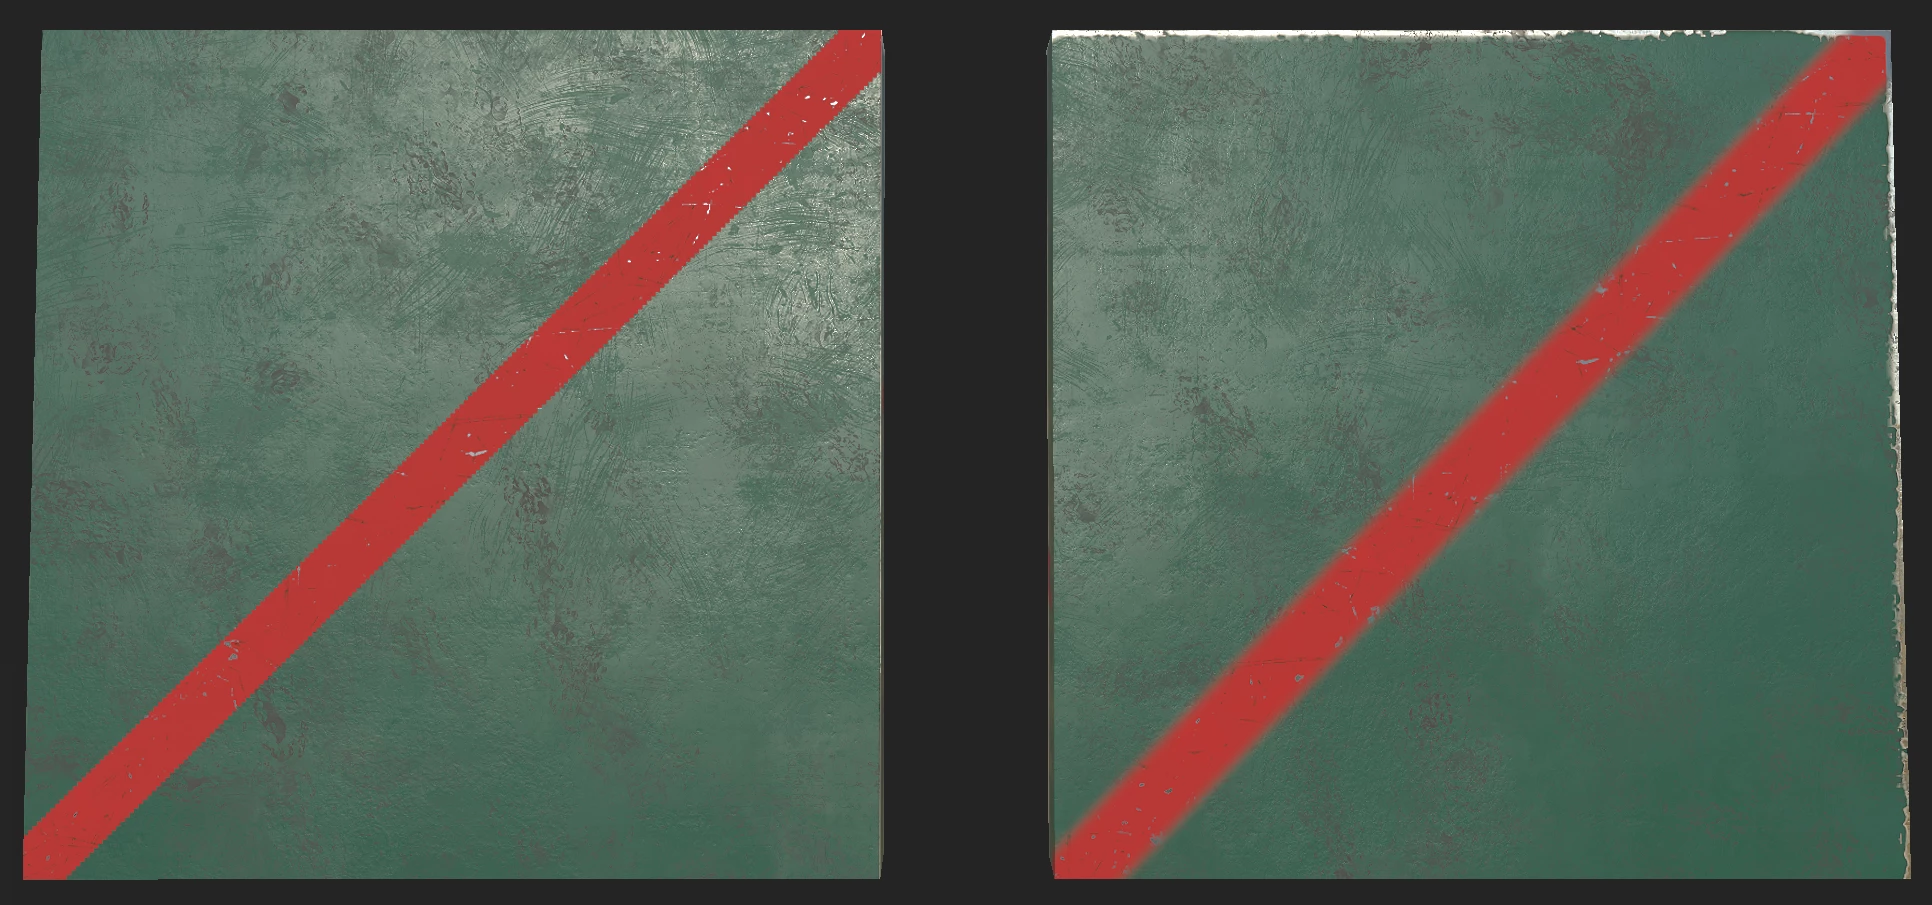
(Left side is the subdivided face with vertex colors assigned and color selection mask in Painter applied, right side is the un-subdivided face with stencil paint.)


So far so good, but I miss something. I can't seem to be able to import the guides (separated to its own mesh) as the don't have faces, just two non-adjoining edges.


Currently I'm using a workaround by creating faces in the guides. Yet it's not just too much work, but then  the guide blocks the view, and I either need to apply 100% transparent materials to them, or assign them to a different, actually unused material and hide meshes of that material after I used the guide to position my stencil. This is kind of awkward and I'd be happy to learn a quicker method.


Is there a way to import or display meshes without faces in Painter?

This topic has been closed for replies.

3 replies

Gusztav77
Gusztav77Author
Known Participant
February 13, 2023

I'm trying to further elaborate the issue, as I'm not sure I managed to express or phrase it properly. I've created another version of stuff in Blender:

  1. The left mesh is a cube with its front face cut
  2. The middle stuff is a plain cube mesh and another mesh of only two non-adjoining edges to serve as a guide for painting
  3.  The right side is another version of the middle, I've connected the edges and added a face, moved to the plane of the cube's front face.


Let's go to Painter:


Switching to the alpha-blending PBR shader, I can make the guide mostly transparent so I have something to align my stencil to. I can also turn off showing the meshes with the transparent material:

And voila!

This is my workaround which is a bit awkward, overcomplicated and inefficient. What I'd like to know if there's a way to have a similar experience with the middle box, when the guiding mesh doesn't have faces, only edges, and so I don't have to play with creating faces and transparent materials.


(Anyway, don't ask me for the slanted edge on the right cube, I have no clue what is that. Blender clearly doesn't have an edge on that face, and the guide should completely be hidden. Yet it's something I could live with.)


Cyril Dellenbach
Community Manager
Community Manager
February 13, 2023

Hi again @Gusztav77,


The cogged border is due to the UVs. The face you want to custom is probably tilted on your UV set, and because there is no such thing like a tilted pixel, the borders start to pixelate when selecting the face with the polygon fill tool.


I would suggest taking off the UV face from the rest of the UV island and to rotate it to keep it straight.


With that being said, why not just using the brush tool while holding the shift key to draw straight lines ? Or you can create an alpha according to your need. It seems to me there is many other ways to achieve your goal without creating these sorts of guidelines on your mesh.


Have a nice day,

Cyril Dellenbach (Micro) | QA Support Artist | Adobe
Cyril Dellenbach
Community Manager
Community Manager
February 15, 2023

Thanks again. I like the idea of taking off that UV face, yet I'm not sure it's going to be easy for more complex structures. And this leads to your second question, the meshes need to receive somewhat complex paint (like borders, circles, various other shapes -- like road signs like yield, stop or sharp-turn are all good examples. This is why the author has already created the blueprint as structure by cutting the faces of the meshes. I'm afraid I won't be able to take all off without eating a lot of UV space, which is heavily limited, and I also cannot straighten UV faces of curved stripes, for example. So, to put it short, those guidelines are already there, in the mesh, and moving stuff out as you mentioned is not really an option for the limited UV space/texture size he designed.


Holding SHIFT and drawing straight lines (when I need to make something straight 🙂 ) is okay, but without some guides, I would not be able to paint them precisely.


Let me know if I did not happen to properly answer the question.


Thank you @Gusztav77 for the clarification, I get it a little bit better now.


Working with the UV isn't possible for specific shapes and the brush tool is obviously not the solution.


Unfortunately, complex guidelines on the mesh isn't really common and I am afraid Substance 3D Painter doesn't have a ready-made solution for this. Also, to answer your question, Substance Painter won't support a polygon without a face. 


With that being said, I think we can try some sort of workaround solution. First of all, when you paint the vertex of the mesh to obtain an ID map, the definition of the painting depends entirely on your polycount


But, if for a reason or another, the mask is cogged, you can still smooth it with some tricks.

First, add a Blur to the mask (Increase the intensity until the cogged border fades out). Then add a Level and adjust the range to sharpen the mask.


That workaround isn't perfect and you could lose some small details or smooth unwanted parts.


But I hope this will be helpful and tell me if this doesn't work for you. I am confident we can find together something that is suitable for your workflow.


Best regards,


Cyril Dellenbach (Micro) | QA Support Artist | Adobe
Cyril Dellenbach
Community Manager
Community Manager
February 13, 2023

Hello @Gusztav77,


As @davescm recommended, I would suggest you to use the Polygon fill to mask your face.


With that being said, I also might be missing something.


Best regards,

Cyril Dellenbach (Micro) | QA Support Artist | Adobe
Gusztav77
Gusztav77Author
Known Participant
February 13, 2023

Hi @Cyril Dellenbach and also @davescm,


Thanks for your responses. Well, the problem is exactly that the mesh having no faces is not shown in Painter. This is what I can see:


The left side is the cube with the cut face. The right side is the plain cube. There should be a mesh of two edges roughly on the face (or a bit ahead of it), which is not shown.


I can use poly fill on the left mesh, but that is what leaves the cogged border, what I would like to avoid.


I even tried exporting empties from Blender, but with no further success.


davescm
Community Expert
Community Expert
February 13, 2023

Hi

I might be missing something, can you not just turn on Mesh Wireframe in Display settings?


Also, by using Polygon Fill you can brush using the faces as a mask


Dave

Gusztav77
Gusztav77Author
Known Participant
February 13, 2023

Hi @davescm , thanks for the response. See mine below Cyril's response.