Exit
  • Global community
    • Language:
      • Deutsch
      • English
      • Español
      • Français
      • Português
  • 日本語コミュニティ
  • 한국 커뮤니티
0

Normal map in Substance Painter generates wrong from Blender model

Community Beginner ,
Nov 08, 2024 Nov 08, 2024

Hey there,


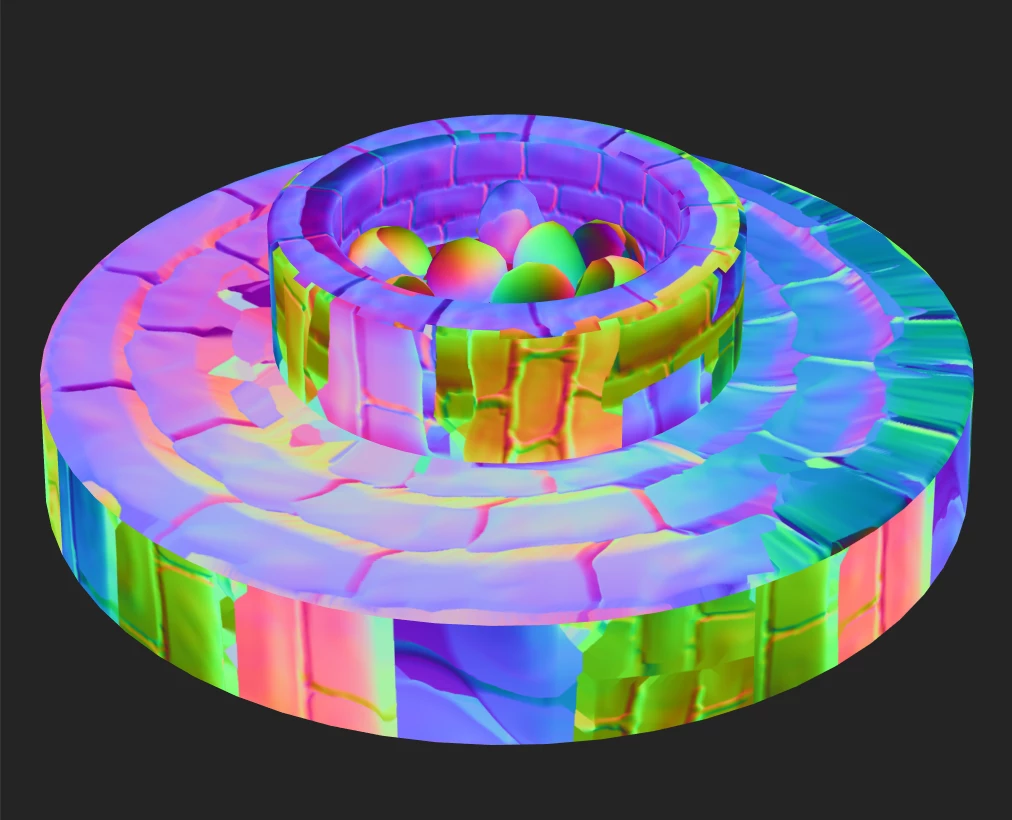
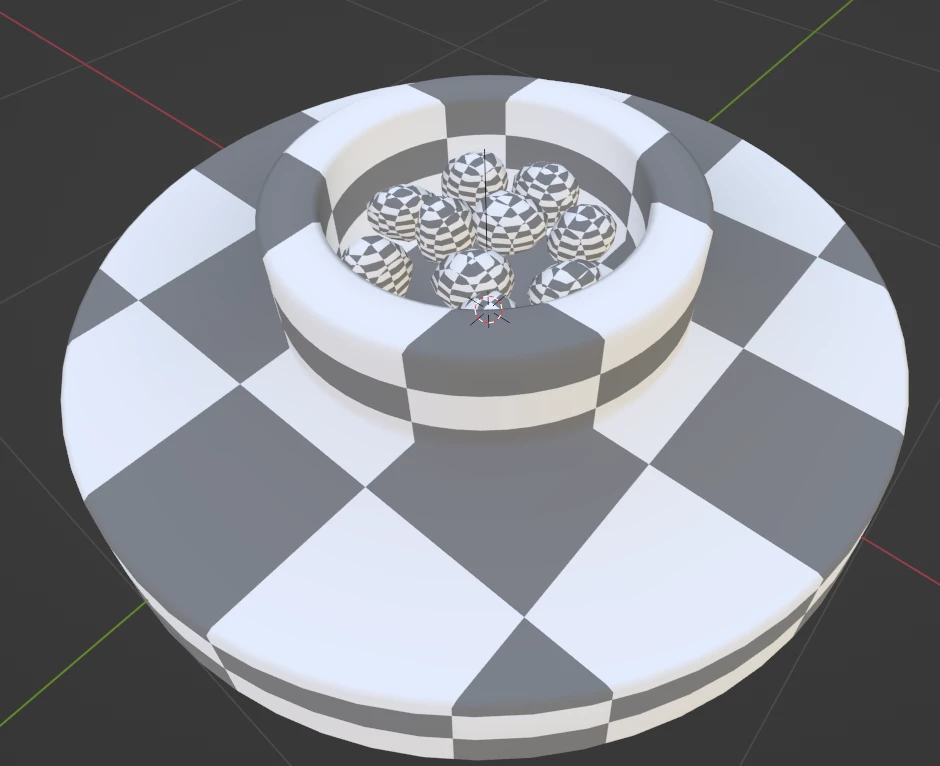
My goal is to have my low poly model have detail baked from my high poly model. This is what my baked normal map looks like and I have no idea what's happening:

1.png
 

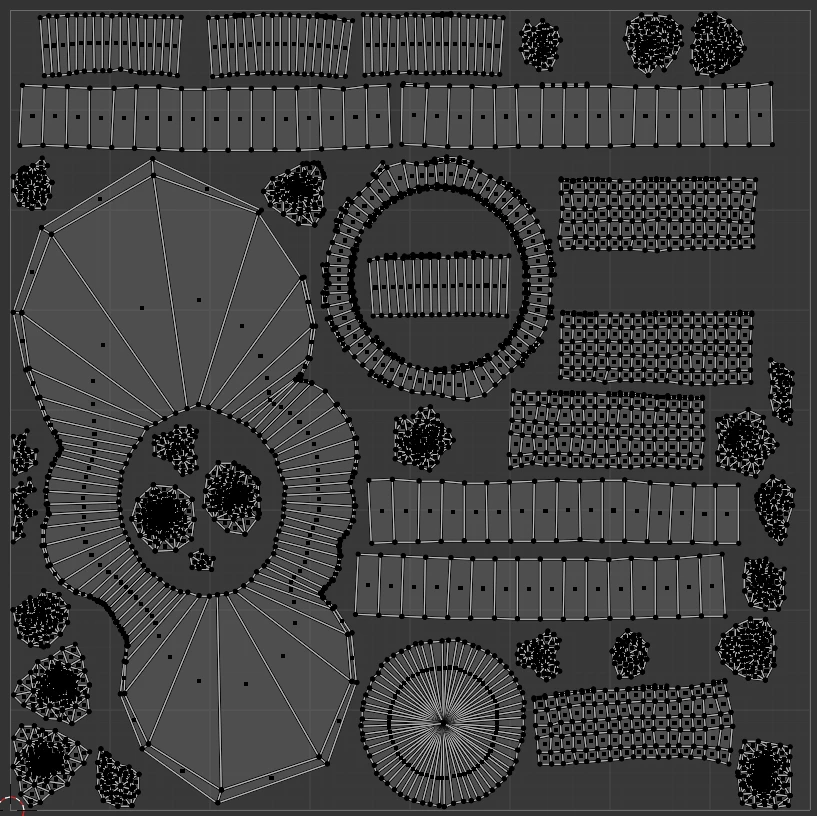
This is the uv map and preview of the high poly (1,170,176 polys):

2.png

3.png

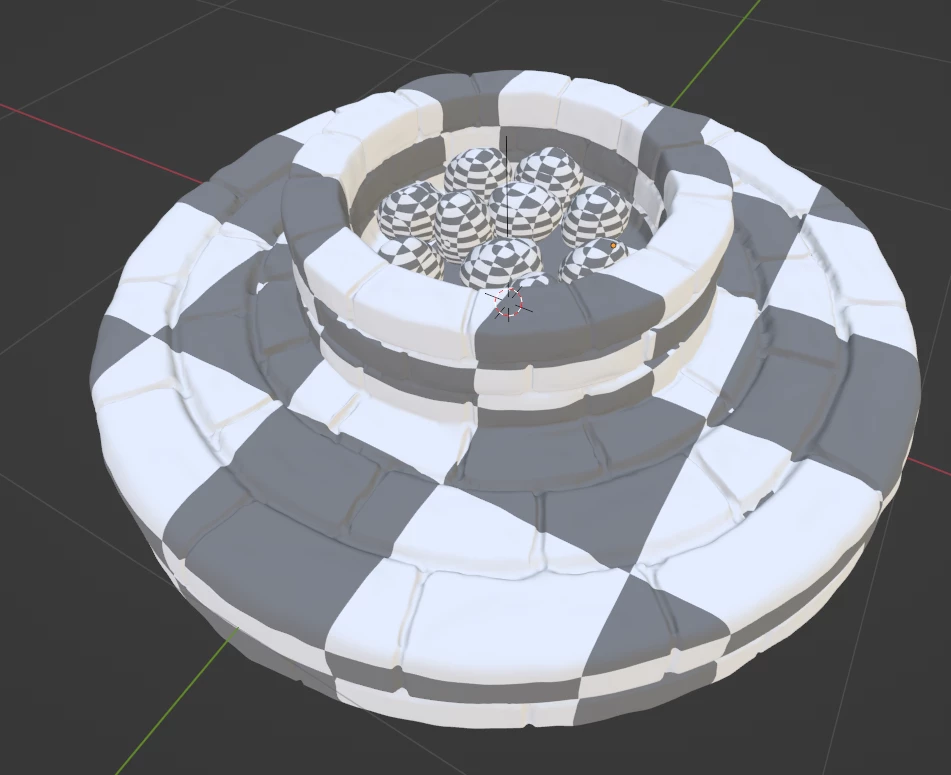
And my low poly (2,032 polys):

4.png

8ec2aae0-f88e-4442-a396-0518a46234d3.png

Perhaps there's too great a difference in polys between the low and high? But I don't think that should matter...

In Blender, I first modeled the low poly, added seams and unwrapped it. Then I duplicated the model and sculpted it and unwrapped it and call that my high poly. I duplicated the low model to create each cage and pressed Alt + S to scale along the normals to cover both low and high models.

  • Both low and high models are located at the same exact location in Blender when they're exported. They are both aligned in each other.
  • Both models have a rotation and scale of 0.
  • I have triangulated my mesh and that made no difference.
  • I have applied Shade Smooth to every face that has a sharp angle as well as add seams to every edge in those areas to avoid artifacts.
  • All normals are facing the correct way.
  • I manually oriented all the uv islands to face the way they do in world space (if there's an add-on that could automate this, I would love it!).

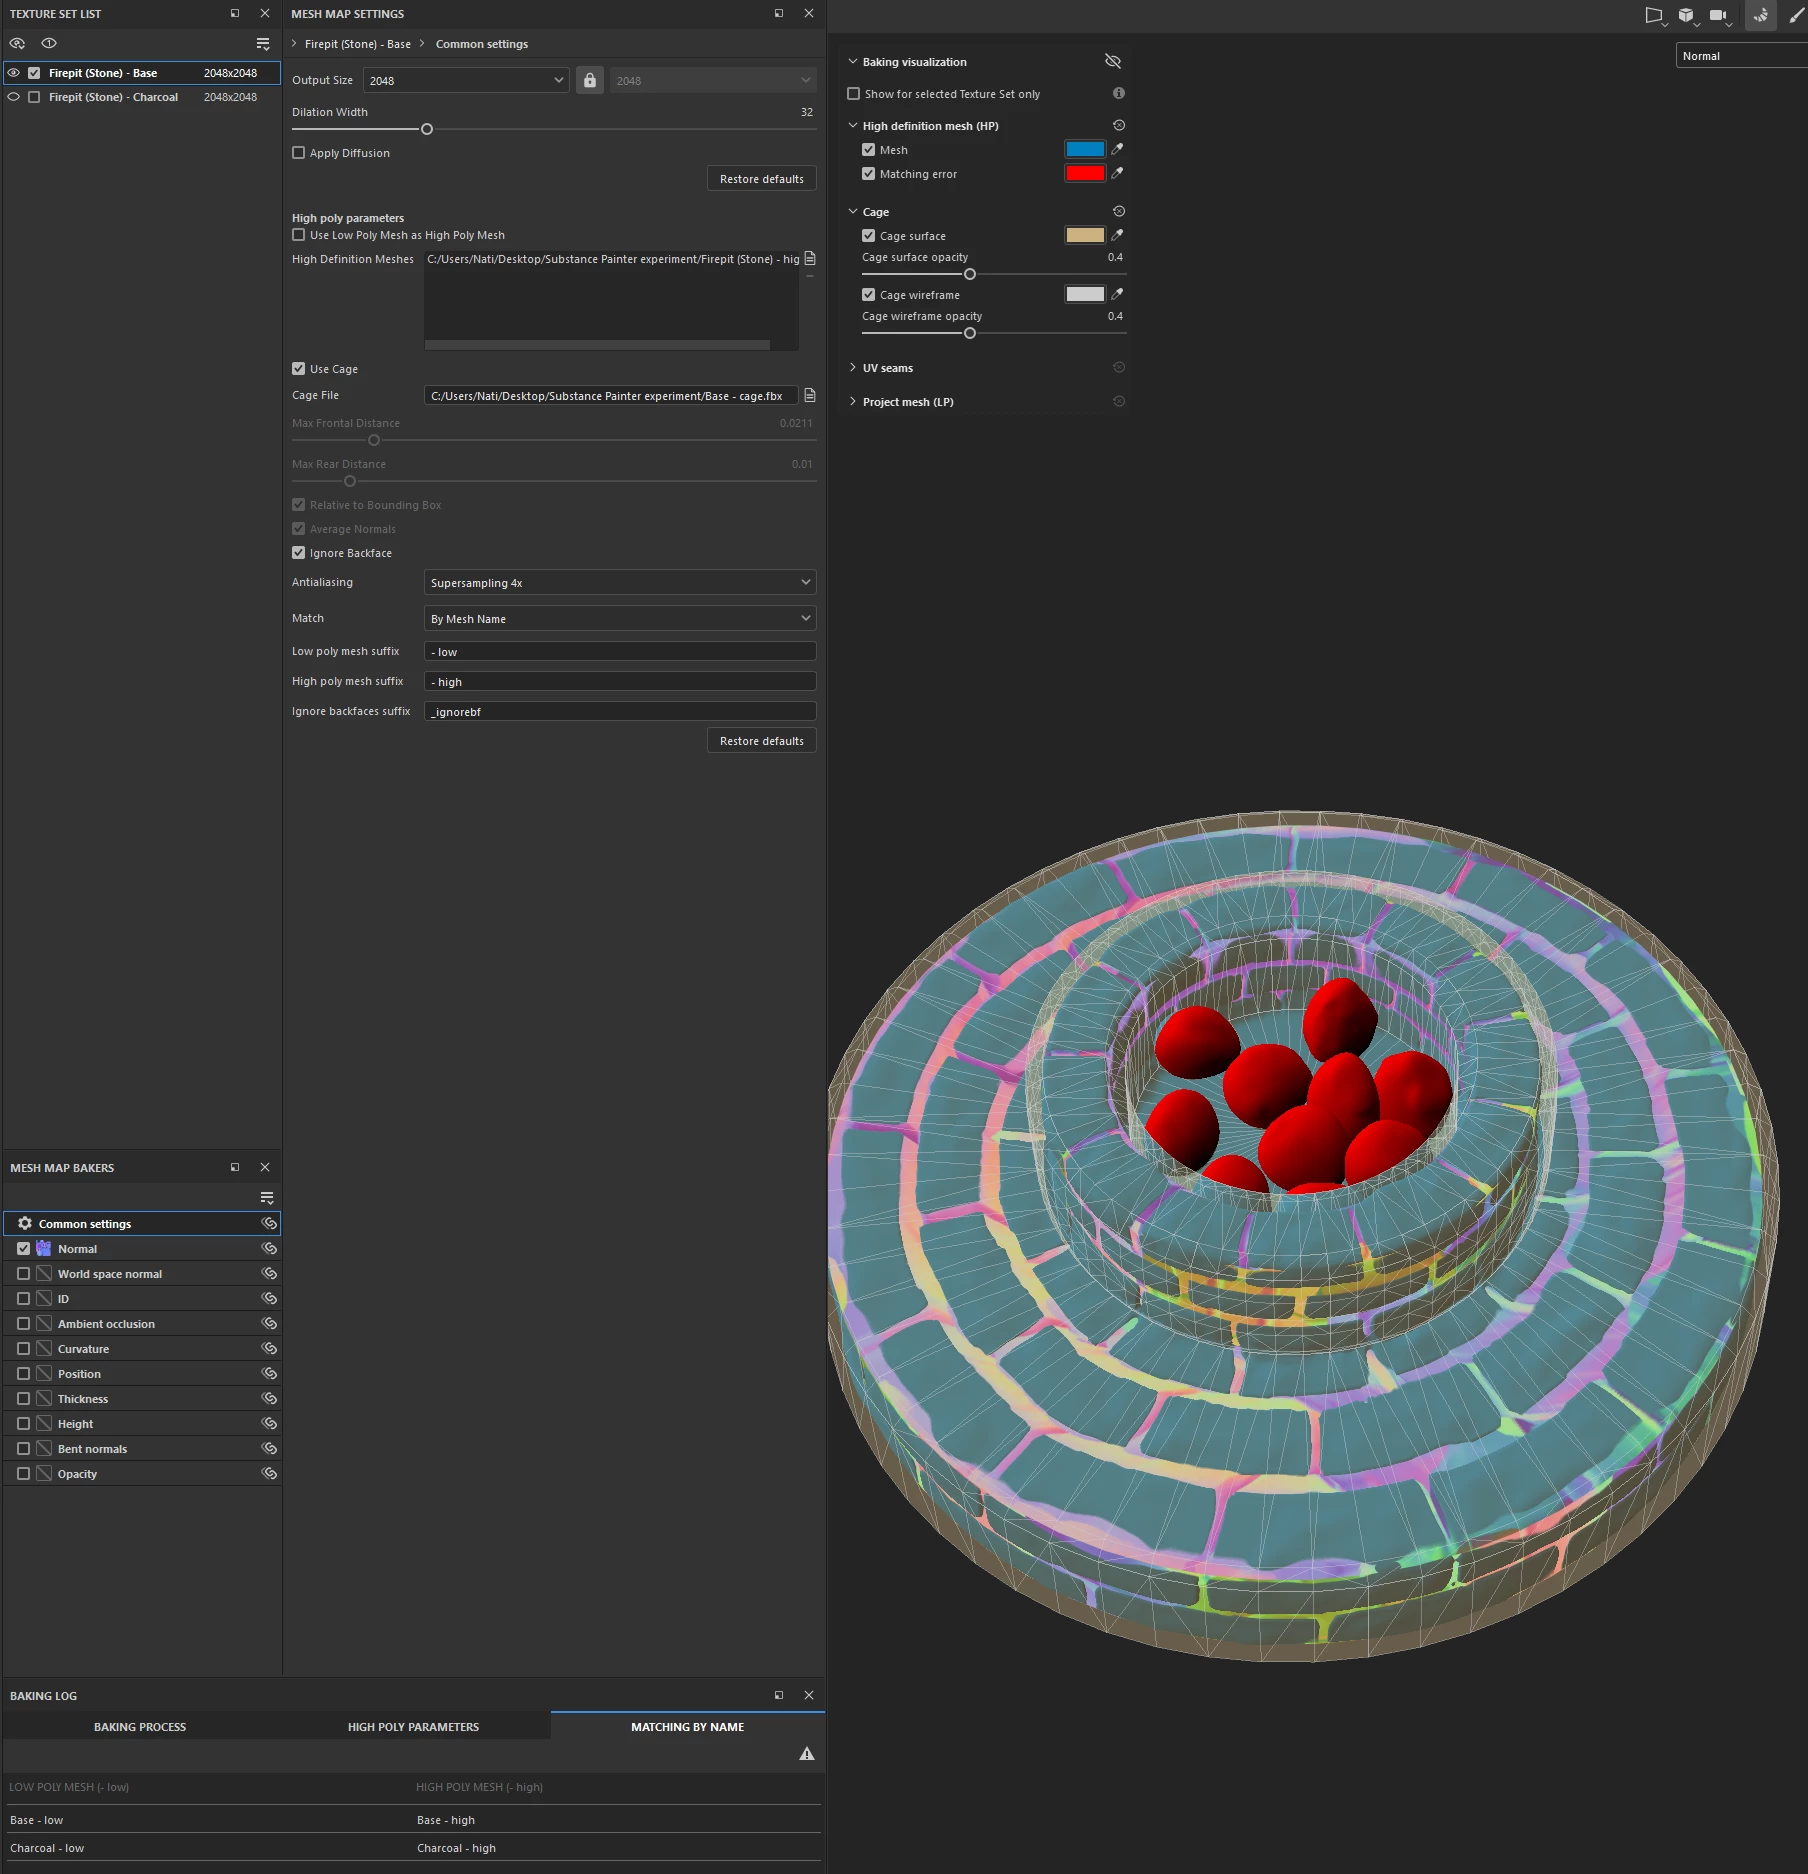
In Substance Painter, I bake the model in two separate parts because each has its own material, Firepit (Stone) - Base and Firepit (Stone) - Charcoal. I have tried baking with and without a cages. I have two cages: Base - cage and Charcoal - cage. I ensure either way I bake (with or without a cage), the model is completely covered so there's no red on the part I'm baking. Below I'm just baking the Base part of the model:

6.png


I have tried everything I could find online for over 10 hours. Thank you for your help in advance.

TOPICS
Baking , UV Tiles
1.5K
Translate
Report
Community guidelines
Be kind and respectful, give credit to the original source of content, and search for duplicates before posting. Learn more
community guidelines

correct answers 1 Correct answer

Community Beginner , Nov 09, 2024 Nov 09, 2024

So I got help from another forum and I'm posting the solution here:


I was using a cage for this more simple model which was causing an issue. If one does use a cage, the cage needs to have the exact UVs as the low poly model and in Blender, it needs to be scaled along the normals with Atl + S.


The high poly model only needs UVs if you're going to texture the high poly model. In this case, since I'm only to texturing the low poly model, only the low poly model needs to be unwrapped.

The Data Trans

...
Translate
Community Beginner ,
Nov 08, 2024 Nov 08, 2024

I will also note: When I made any changes I made to the high poly's uvs, I used the Data Transfer modifier in Blender so the uvs match between the low and high models.

Translate
Report
Community guidelines
Be kind and respectful, give credit to the original source of content, and search for duplicates before posting. Learn more
community guidelines
Community Beginner ,
Nov 09, 2024 Nov 09, 2024
LATEST

So I got help from another forum and I'm posting the solution here:


I was using a cage for this more simple model which was causing an issue. If one does use a cage, the cage needs to have the exact UVs as the low poly model and in Blender, it needs to be scaled along the normals with Atl + S.


The high poly model only needs UVs if you're going to texture the high poly model. In this case, since I'm only to texturing the low poly model, only the low poly model needs to be unwrapped.

The Data Transfer modifier in Blender was not doing what I thought it was doing. If you ever want to copy UVs from one model to another, select the model you want to copy a new UV layout to, then Ctrl click the model you want to copy the UVs from. Ctrl + L for the Link/Transfer Data menu and select Copy UV Maps. This actually works.

I had two materials uncessarily. One material for one mesh and one for the second mesh AND they shared the same UV map. Have just one material for the combined UV layout.


Interesting observation: Without using a cage, I noticed in Substance Painter when I press Ctrl + Shift + R to reimport the mesh after I exported a new version of the fbx in the same directory, the normal map gets all messed up like the first image of my normal map. When I create a new project and start with adding the low poly model, then it works fine. Super weird.

Translate
Report
Community guidelines
Be kind and respectful, give credit to the original source of content, and search for duplicates before posting. Learn more
community guidelines