Inspiring
January 30, 2022
Answered

Adjusting specific white area in part of image

  • January 30, 2022
  • 2 replies
  • 442 views

Hi all,

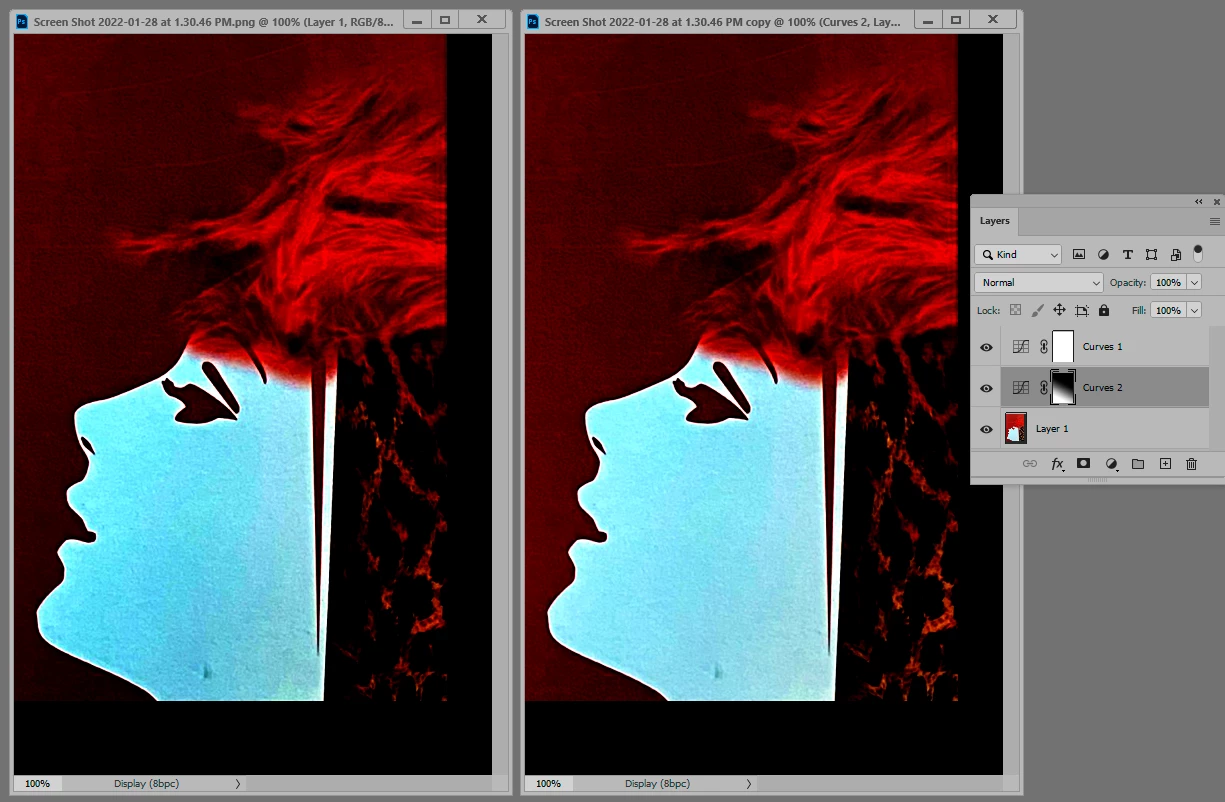
Please see the image below.


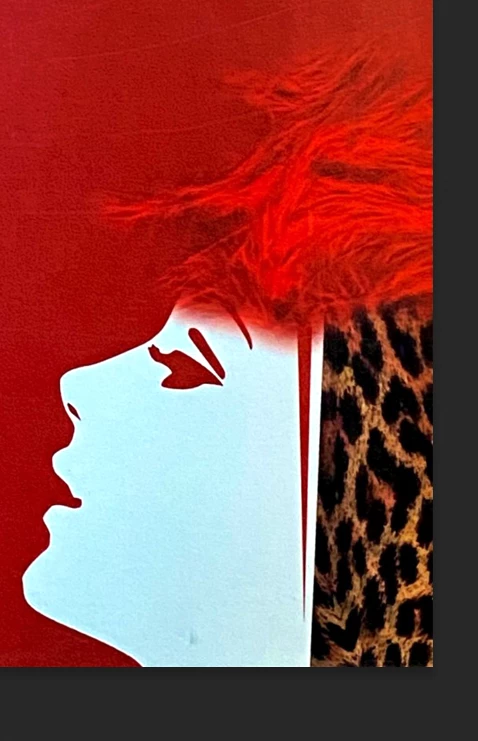
My goal is to adjust the white in the face of the girl so that it is a pure white #ffffff. At first, I thought I could adjust the exposure of the entire image, which I knew would make it a lighter shade of red, but what I didn't know would happen is that the details of the girl's hair would become lost and her hair would turn into more of a mess of light red. 

As you can see, there are areas in the white face that are sort of blueish. The face is also rather complicated because part of it is obscured by the hair, which I want to leave as is, and the eyes and red line behind the face need to stay the same color red as the rest of the background.


Is there a particular way to edit the white in the face while leaving the rest of the image untouched? I tried to use the magnetic lasso to single out the face but that creates complications that, if I could avoid, would be great.


Any help is very much appreciated. 

This topic has been closed for replies.
Correct answer D Fosse

I normally say "don't select; make a global adjustment" - but in this case I'll make an exception.


A useful trick is to put a temporary steep curves layer on top to exaggerate all problems. Here you can see that the lighting isn't quite even, there's a significant falloff towards the bottom. A gradient adjustment fixes that:


Select > Color Range easily selects the cyan area. Use Select and Mask to soften slightly. Here I just pushed the output black slider in Levels to push it up against white:


The only thing here that required a little manual brushing was the "hairline" which needs to be softened a bit.

2 replies

D Fosse
Community Expert
Community Expert
January 30, 2022

Still - if this is a photo and whites turn out cyan, I'd adjust the white point, which would most likely fix the whole problem in one go.


But watch your lighting. Even lighting is essential.

D Fosse
Community Expert
D FosseCommunity ExpertCorrect answer
Community Expert
January 30, 2022

I normally say "don't select; make a global adjustment" - but in this case I'll make an exception.


A useful trick is to put a temporary steep curves layer on top to exaggerate all problems. Here you can see that the lighting isn't quite even, there's a significant falloff towards the bottom. A gradient adjustment fixes that:


Select > Color Range easily selects the cyan area. Use Select and Mask to soften slightly. Here I just pushed the output black slider in Levels to push it up against white:


The only thing here that required a little manual brushing was the "hairline" which needs to be softened a bit.

kirbydooAuthor
Inspiring
February 7, 2022

I'm sorry, but I'm confused as to what you did when you created the curves layers. Did you make a plain white background and then place it over the original image of the face? How did you know where to set the curves? I see that you did exactly what I wish to do.

Legend
February 7, 2022

With a Curves or Levels adjustment layer, you can increase the contrast to show problems in the image.

Try adding a Levels layer and sliding the black adjustment way to the right, then slide the white adjustment way to the left. The effect is obvious.

This is also a way to do what you wanted, make the cyan face turn white. Select just that area and slide the white adjustment way to the left. That sets the white point much further over (darker tones turn white.)