


New in Beta: Contour Paint effect
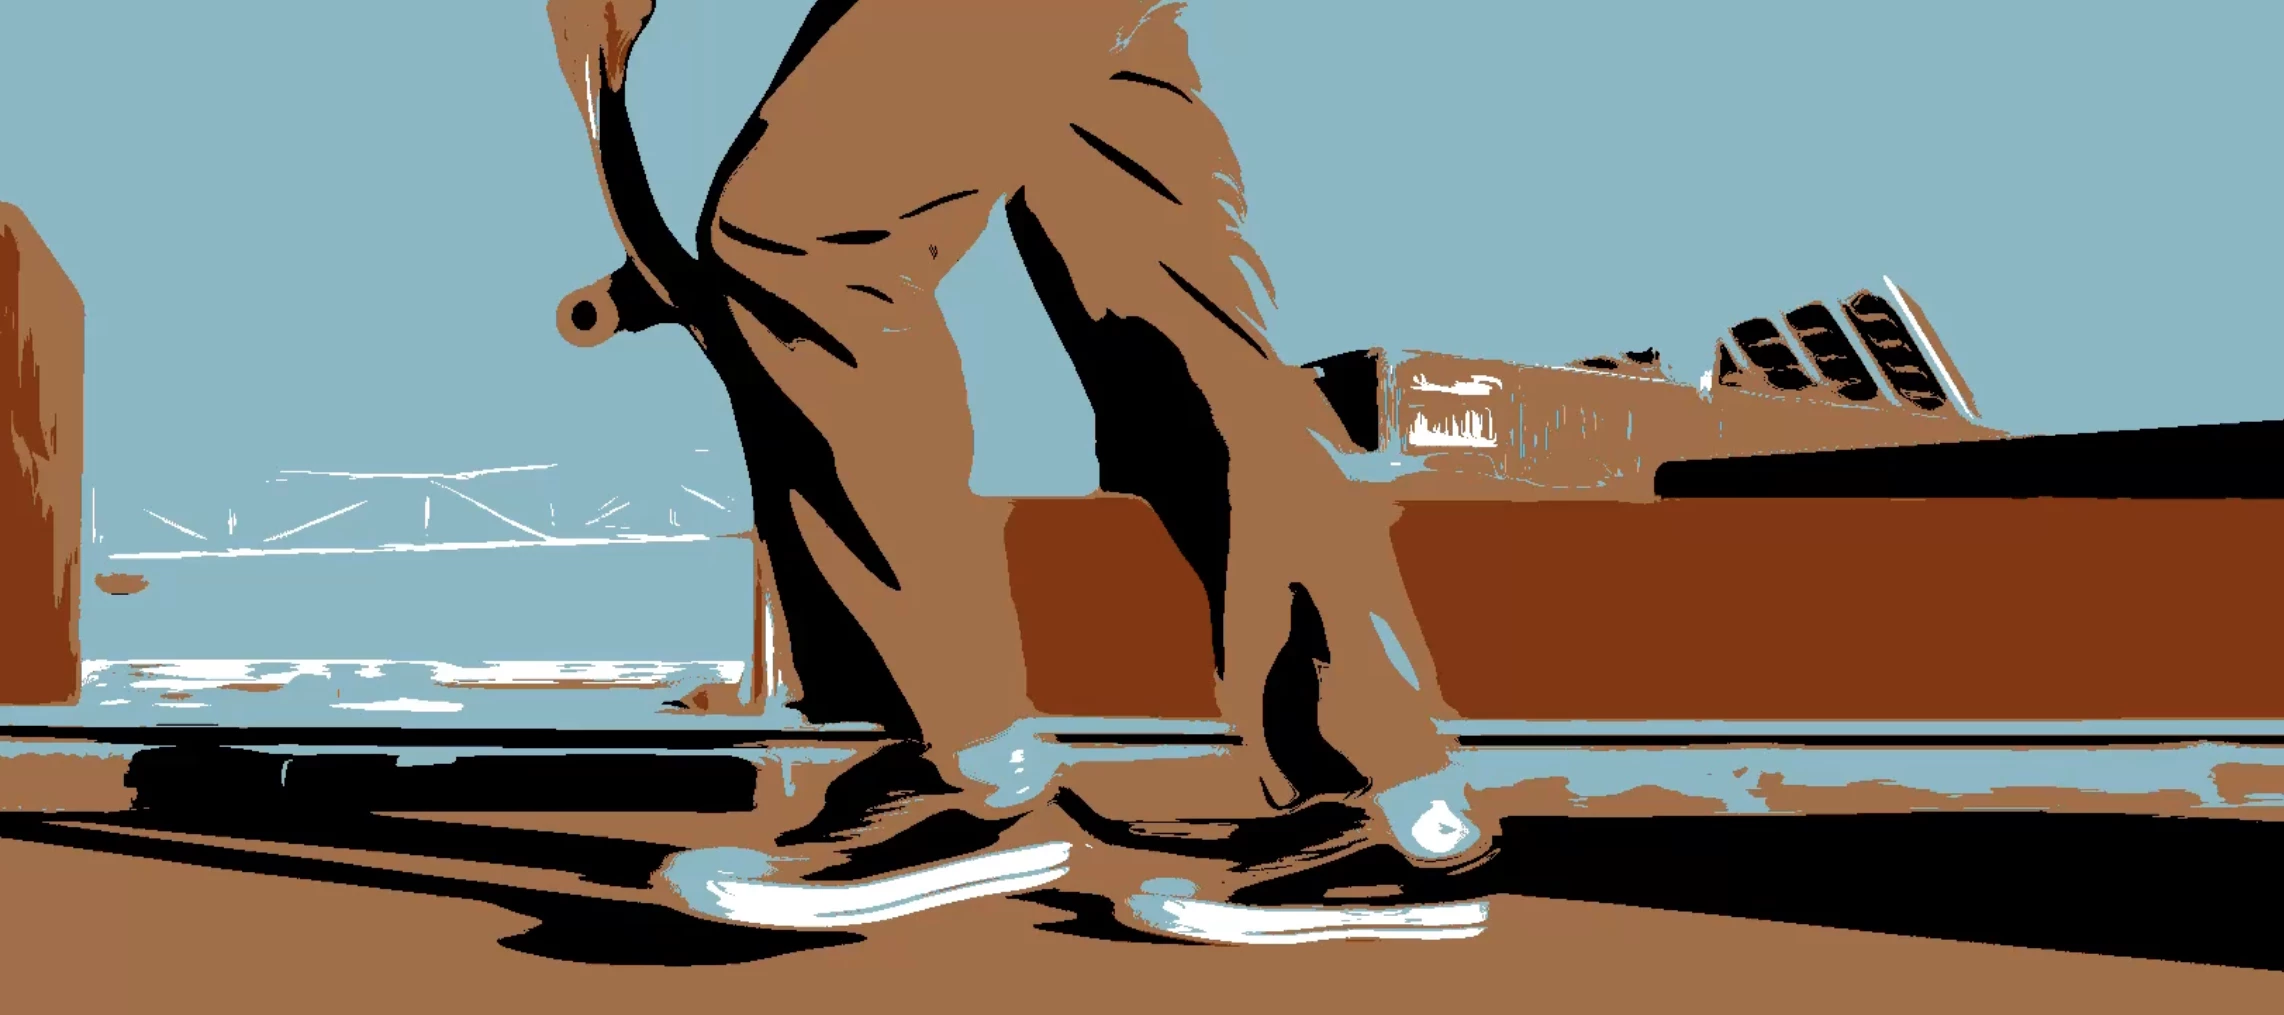
In After Effects Beta 27.0 Build 6 and later, we're happy to announce Contour Paint, a new visual effect that allows you to change your images and videos in creative ways!
At it's core, Contour Paint analyzes your frames and finds the visible flows along the edges of the shapes (the contours) within it, and then simplifies and smears your images along these contour edges like finger-painting, as well as optionally posterizing the smeared shapes by drawing solid color fills using a reduced palette. You can get illustrative, or print-like effects or very abstracted imagery. We really think you're going to have some fun with it!
Understanding How Contour Paint Works
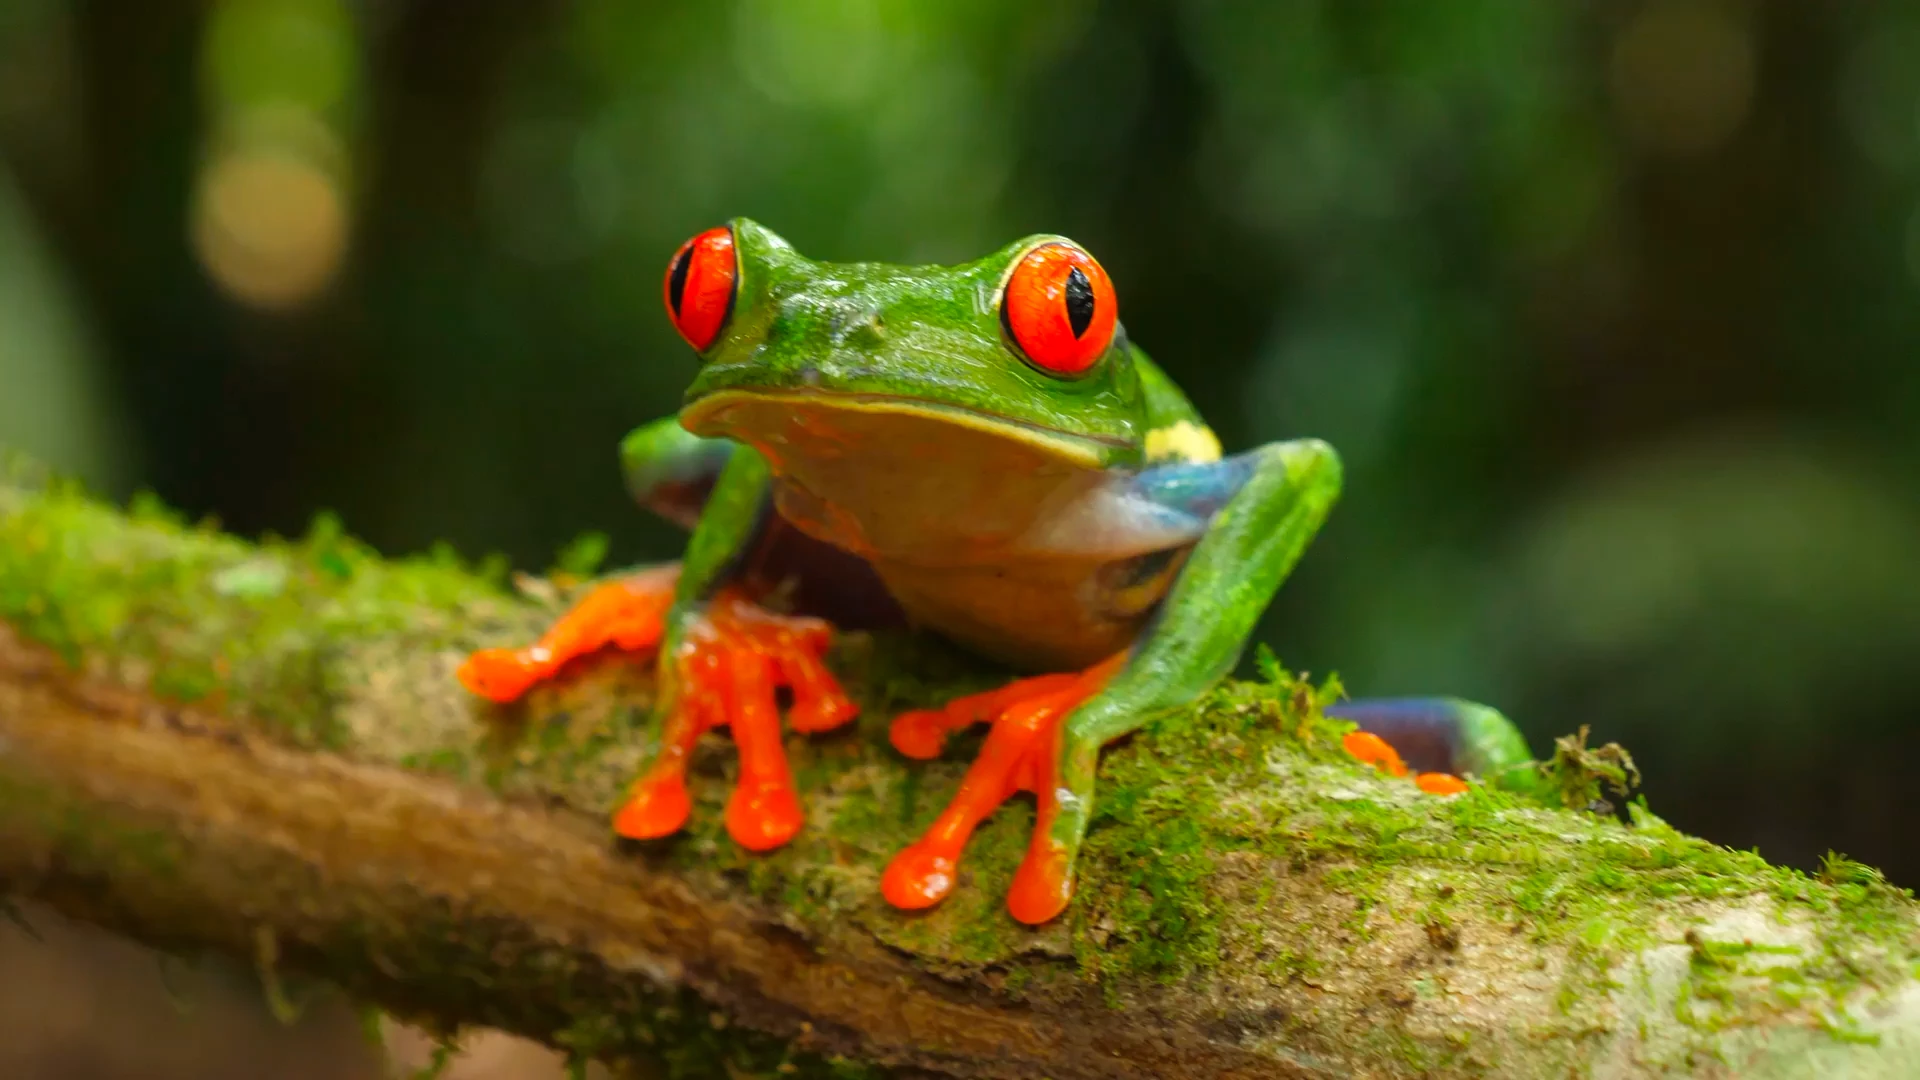
Here’s some source footage we’ll be using. A skateboarder and a frog.
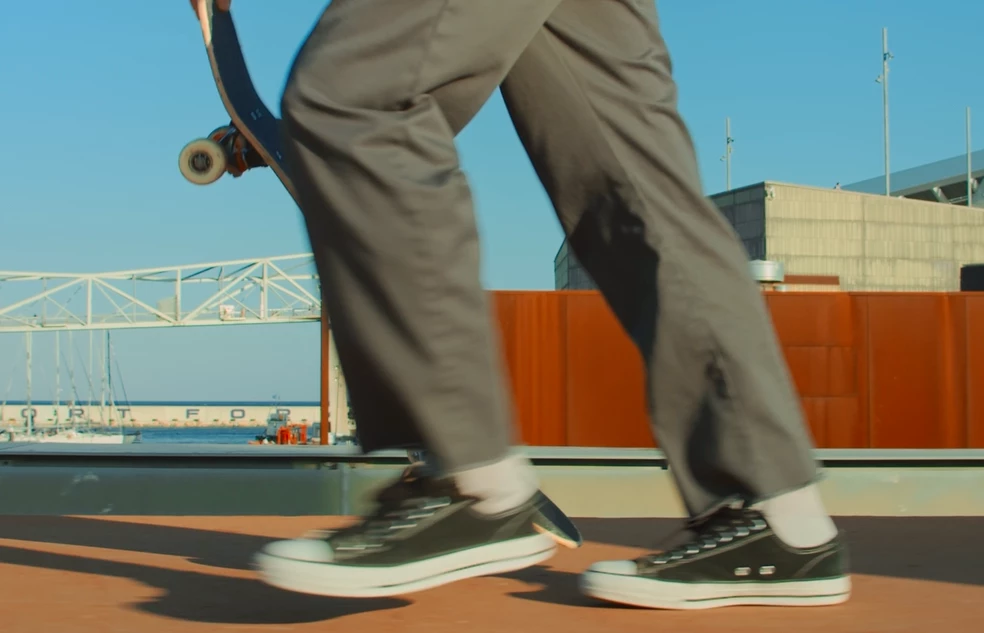
Contour Paint processes the frame via several different stages, illustrated here on the skateboarder footage
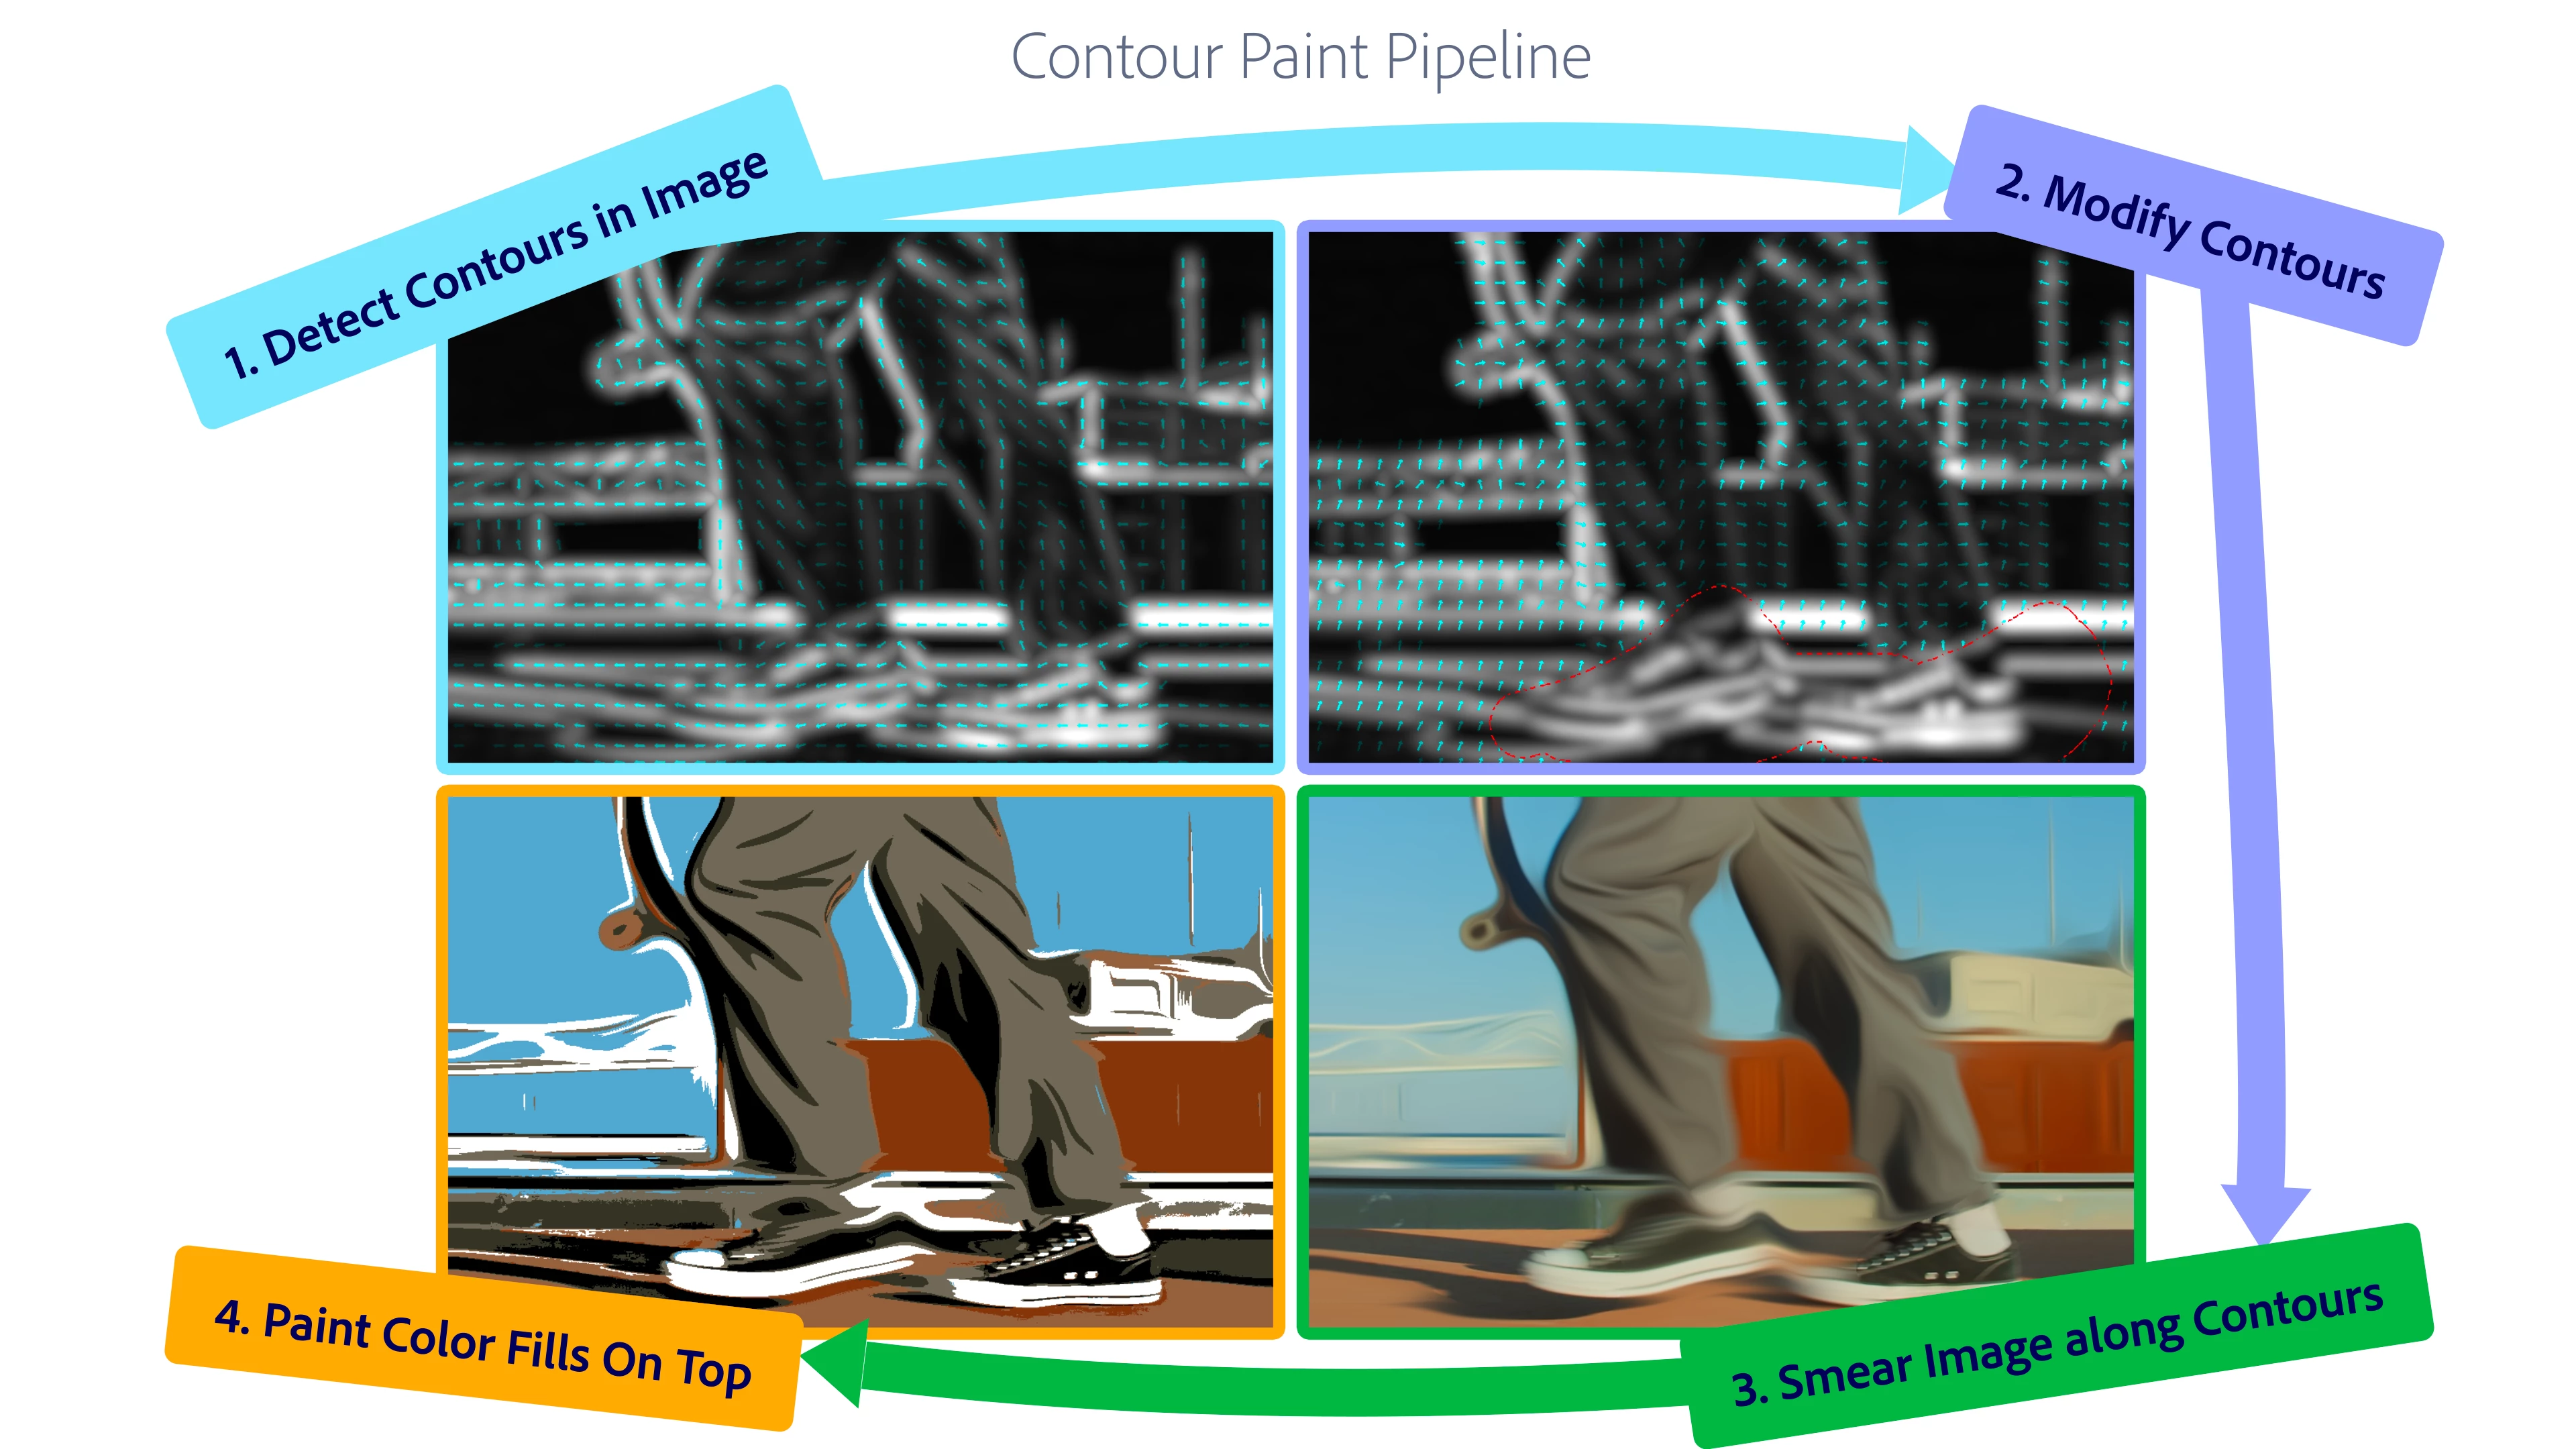
To dig further in, let’s go through the controls in Contour Paint
Contour Paint View Modes
Possibly the most important control in helping you understand Contour Paint is the first one, the View dropdown, which allows you to switch between the Final Result effect output or the internal Edge Map as Contour Paint sees it.
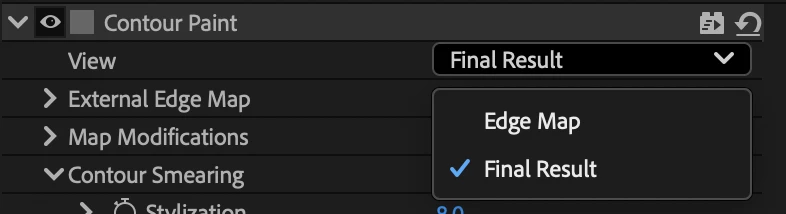
Similar to how the Keylight effect will allow you to see intermediate stages in the effect’s process, being able to see how Contour Paint is understanding your footage will be a huge help towards exploring different results.
The Edge Map view displays the edges that Contour Paint sees (you may find this looks similar to Find Edges effect) as well as the direction and magnitude of the contour flows, as indicated by the direction and opacity of the cyan arrows. Here's a crop of the Edge Map for our frog. See how you can see the arrows traveling along the edges? This is the basis for a lot of the decisions you and the effect will be making using Contour Paint.
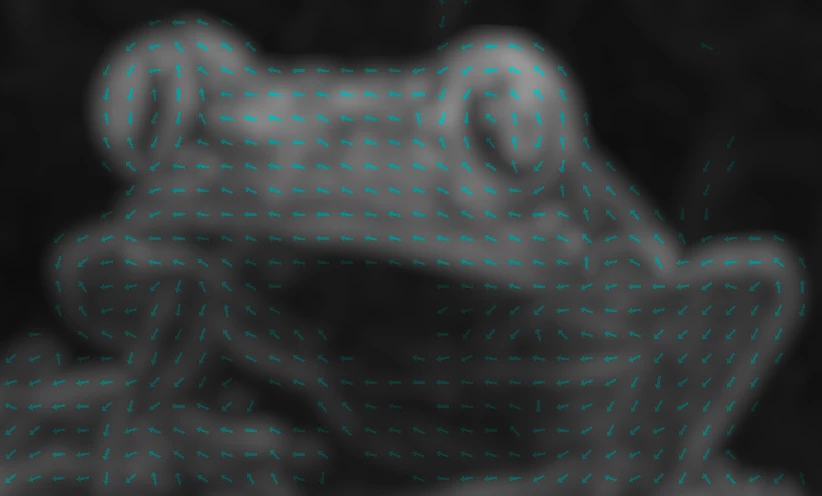
(By the way, the External Edge Map controls allow you to use another layer's edges as the map for your smearing, and the Map Modifications section allows you to change the map before it smears your image and those changes are also visible in the Edge Map, but let's leave those aside for now).
Now that you know how Contour Paint sees your image, lets talk about what you can do with it
Contour Smearing
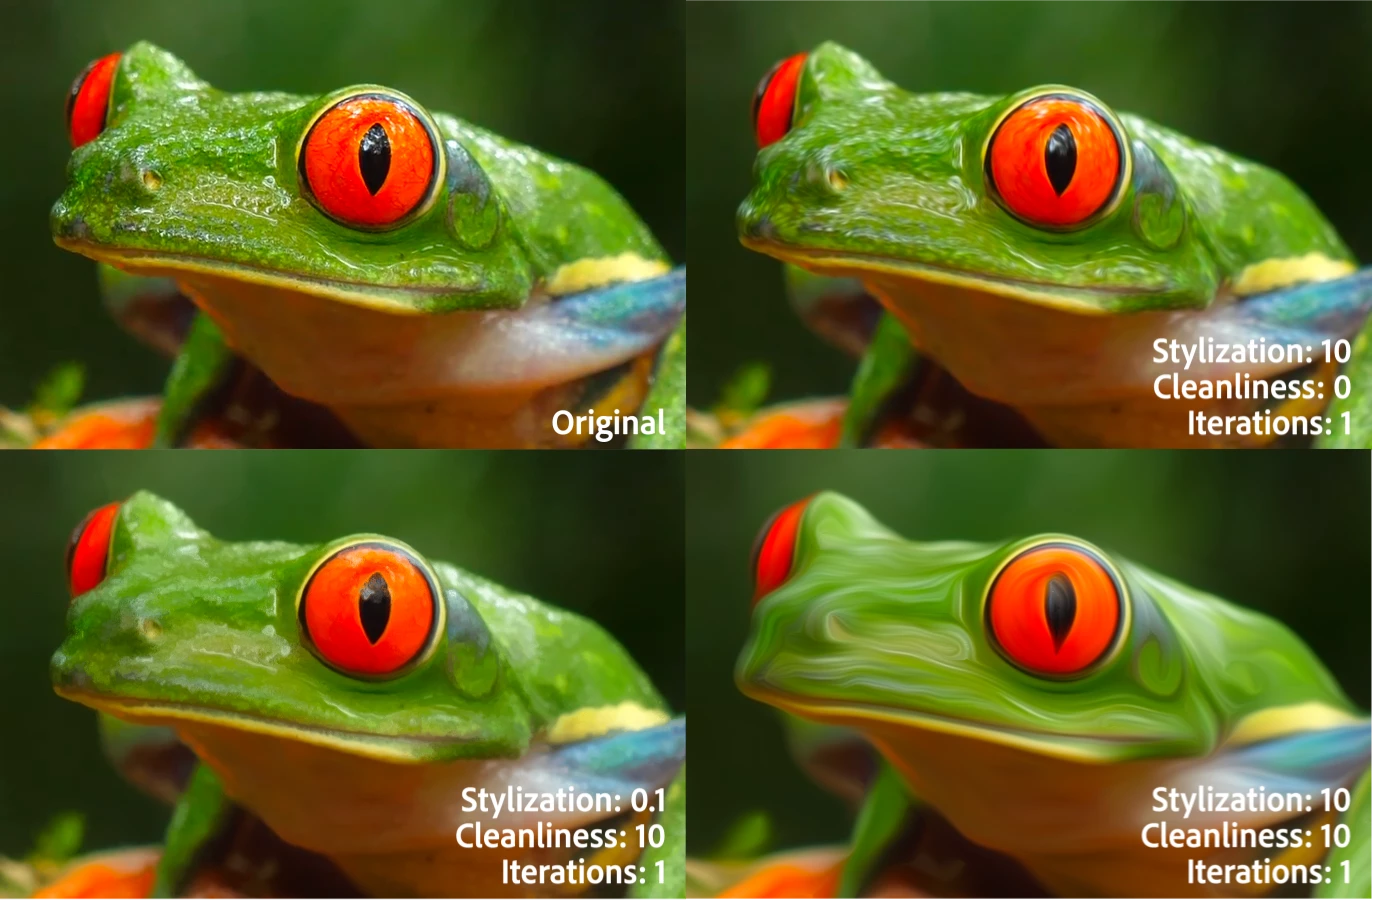
The Contour Smearing section is where you can control how much Contour Paint pushes your your frame's pixels along the contours.
- Stylization is how exaggerated the smears are and how much they focus on larger contours instead of smaller details (try changing this while viewing the Edge Map).
- Cleanliness is how much detail the smearing removes.
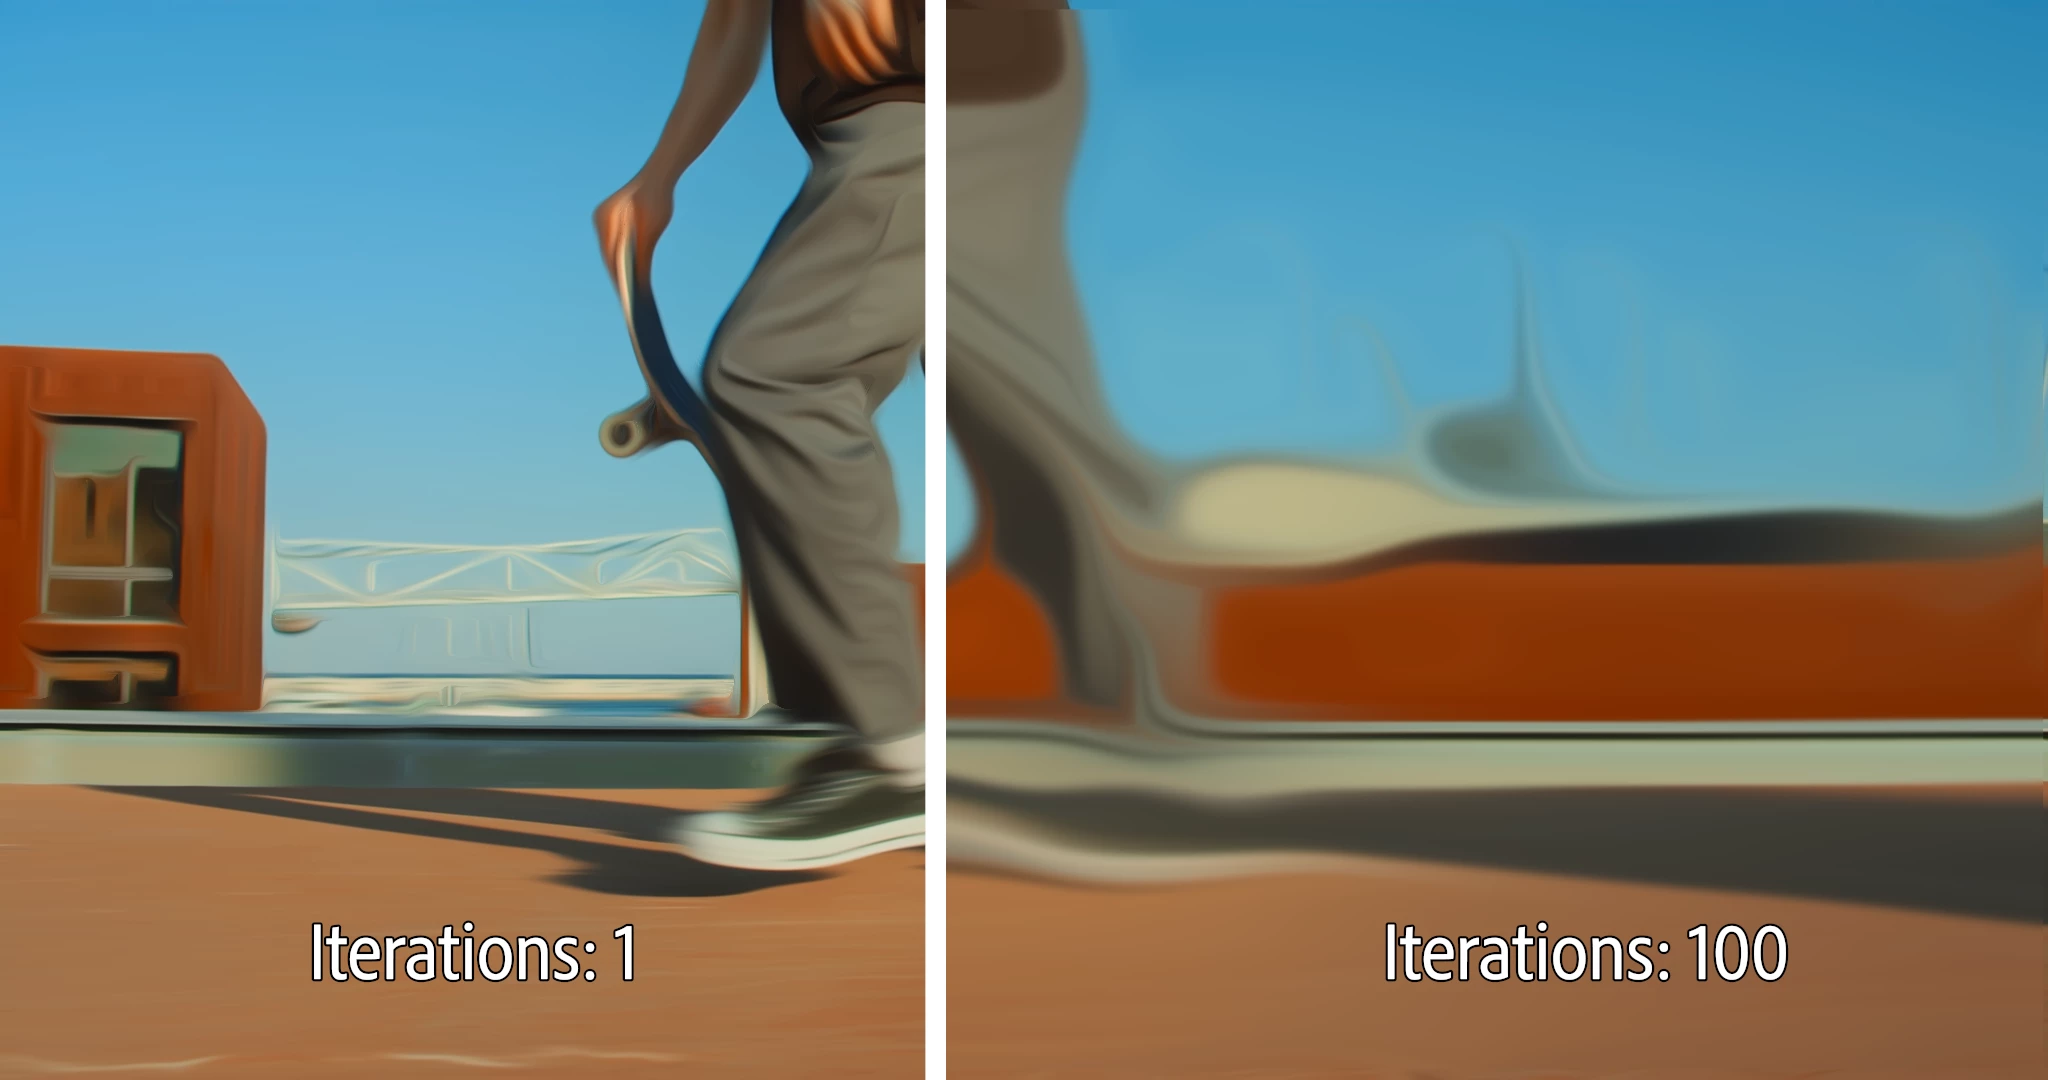
- Smear Iterations is how many consecutive times the smearing algorithm is applied overtop of itself. This value can go up to 100, but expect render times to increase accordingly since it is applying the effect multiple times.
Important: Increasing Iterations is very similar to just stacking multiple copies of Contour Paint on the same layer, and as we just said, render times do increase. However, this allows for astonishingly abstracted visuals so we recommend you experiment.
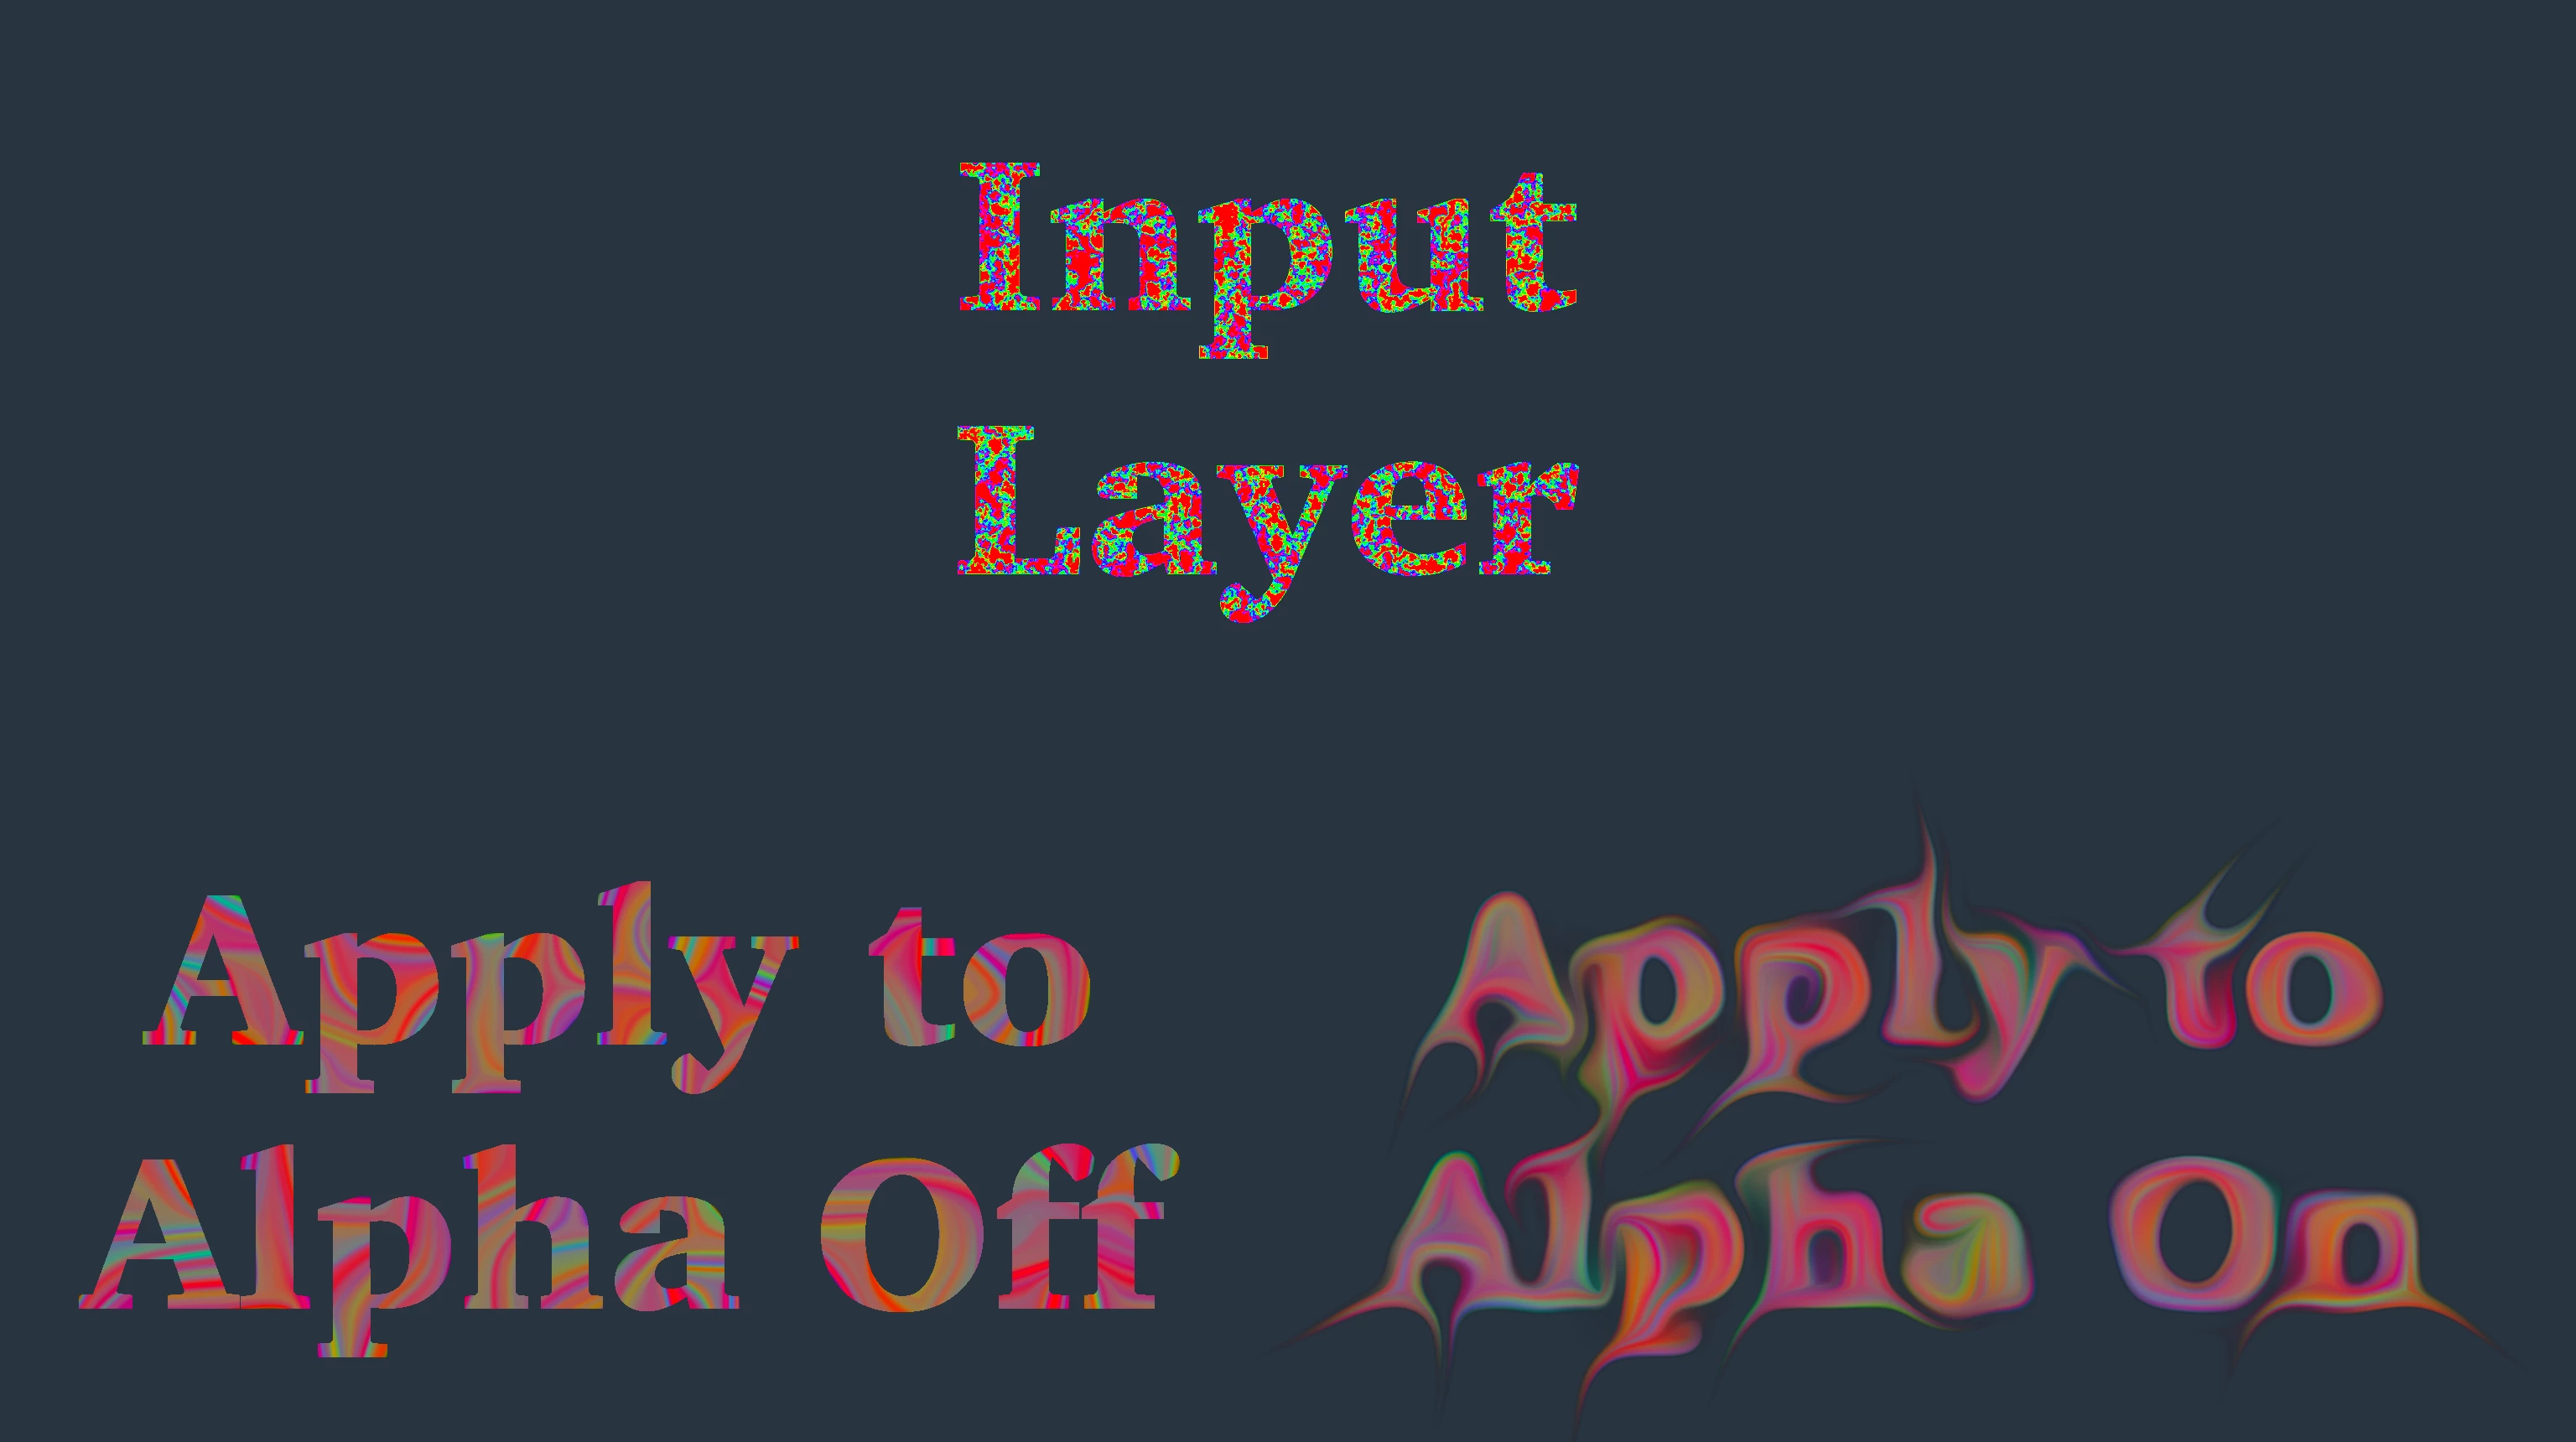
Apply to Alpha smears the pixels in the alpha channel as well as the RGB channels. This can be useful if you have a text or shape layer that doesn't fill the screen, or if you have use Object Matte on an object in your frame that you want to stylize.
Now that we know how to smear our image lets look at how to do further stylization with Color Reduction.
Color Reduction
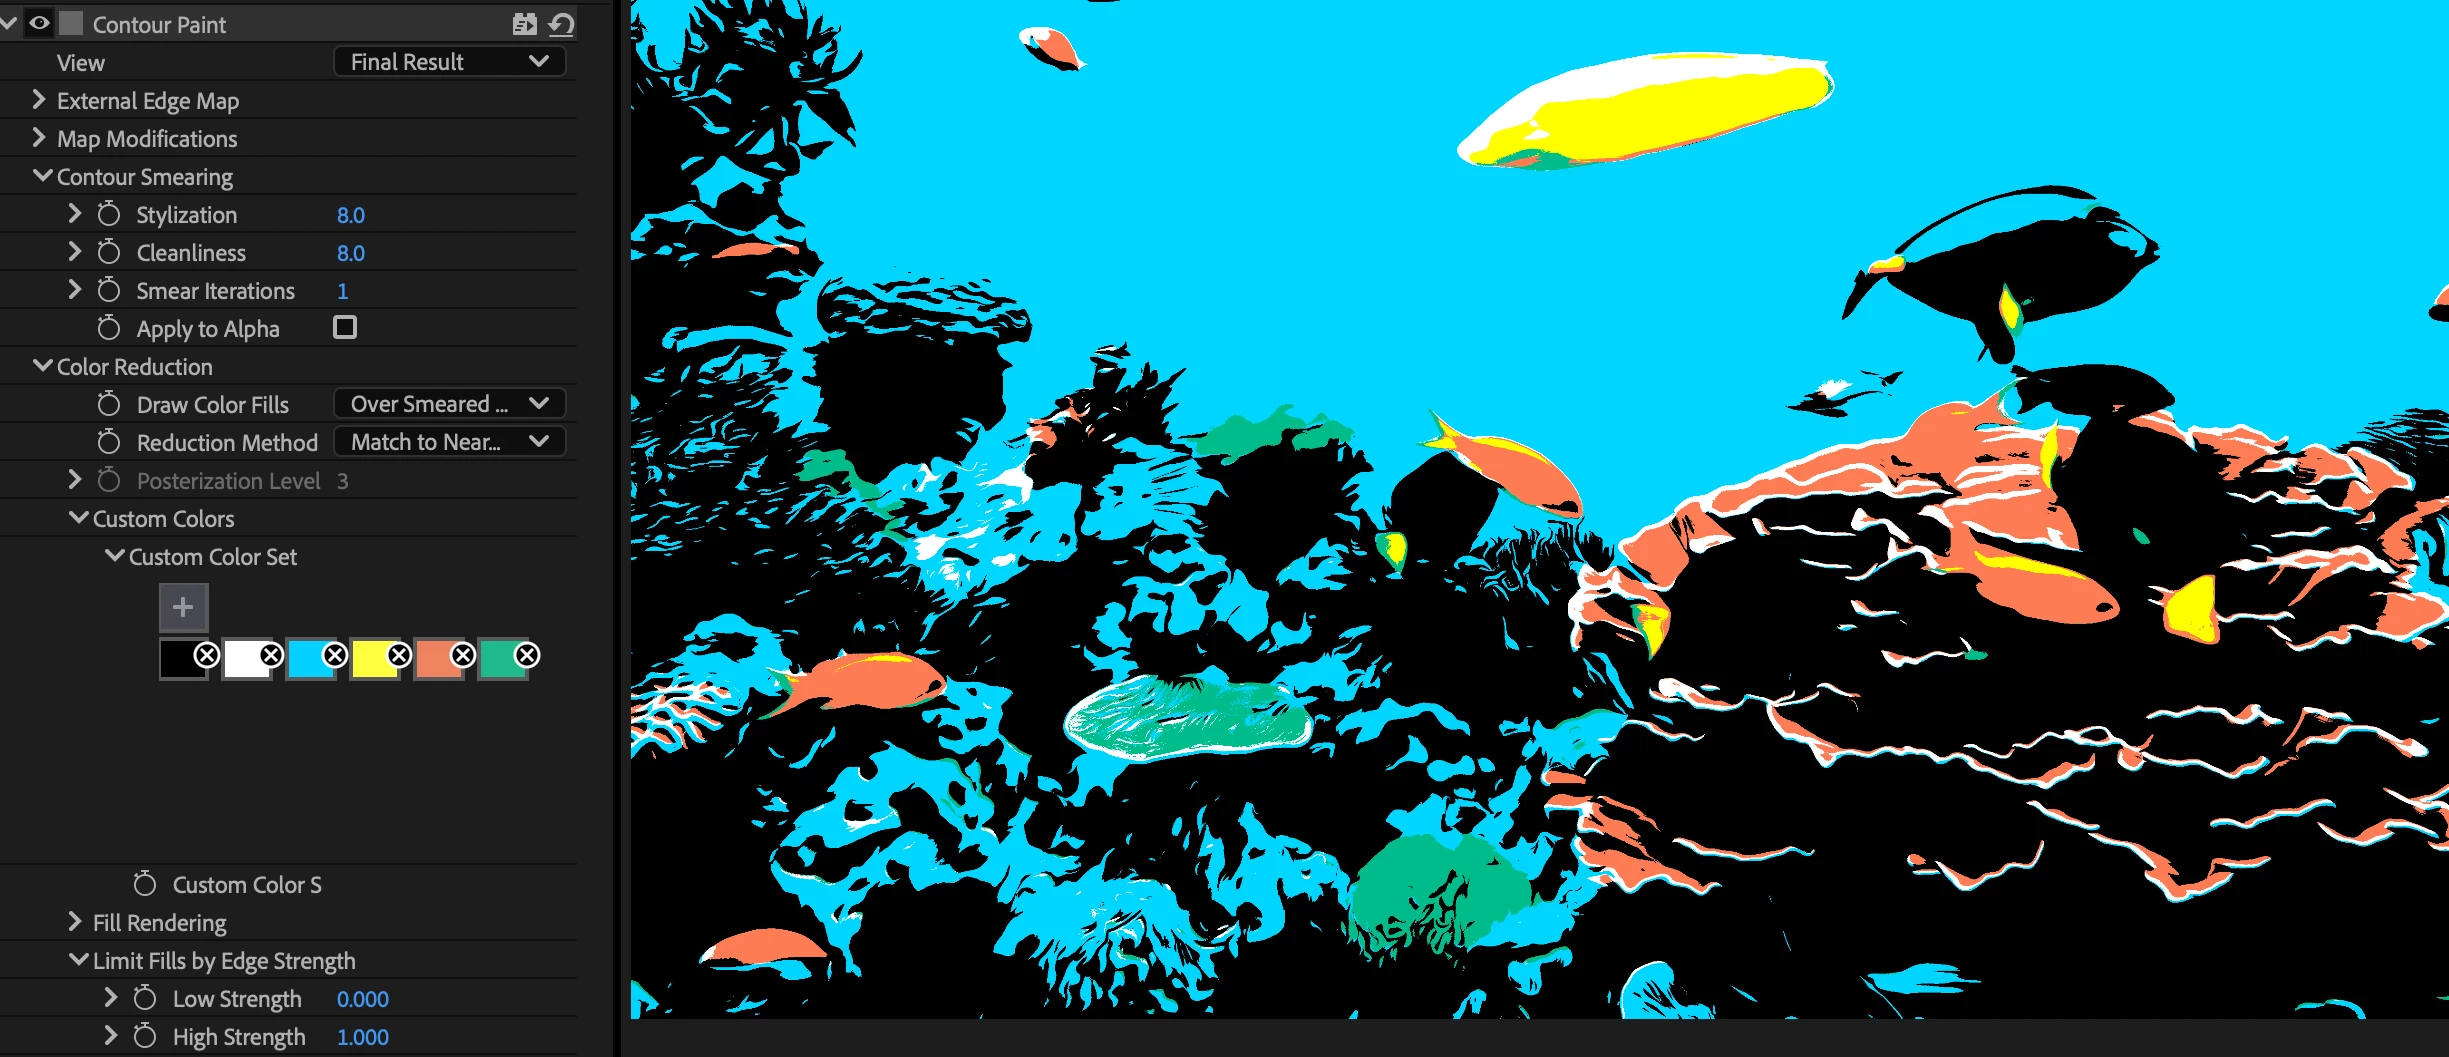
Color Reduction adds another layer (literally) of simplification and stylization. Color Reduction draws fills along the contour flows found in your image and colors those fills using a reduced palette. Think of it like someone tracing the shapes in your smeared image and filling each traced shape with a flat color chosen from a limited set.
This can create very smooth, vector-looking imagery from your videos and images.
Draw Color Fills controls if and how the reduced color shapes are drawn and composited over the smeared image.
- By default it's None and you'll just see the original smeared image.
- Over Smeared Image layers the fills on top.
- Only renders only the fills and hides the smeared image.
(There's a setting later on called Limit Fills which can create transparency in parts of the fills, this allows you to control what shows through.)
Reduction Method controls how Contour Paint decides which limited colors to use. There are two Posterization algorithms (K-Means, Median) which reduce the colors to the amount you specify in the Posterization Level control The color reduction is done using a frame average sampling technique. Because this is an averaging of colors, you may find these posterization methods to be highly-stylized and they may change on each frame if the colors in the frame change enough.
If you want more control, Reduction Method : Match to Nearest Custom Color is your friend and may be the secret star of Contour Paint and we’ll go into more detail now.
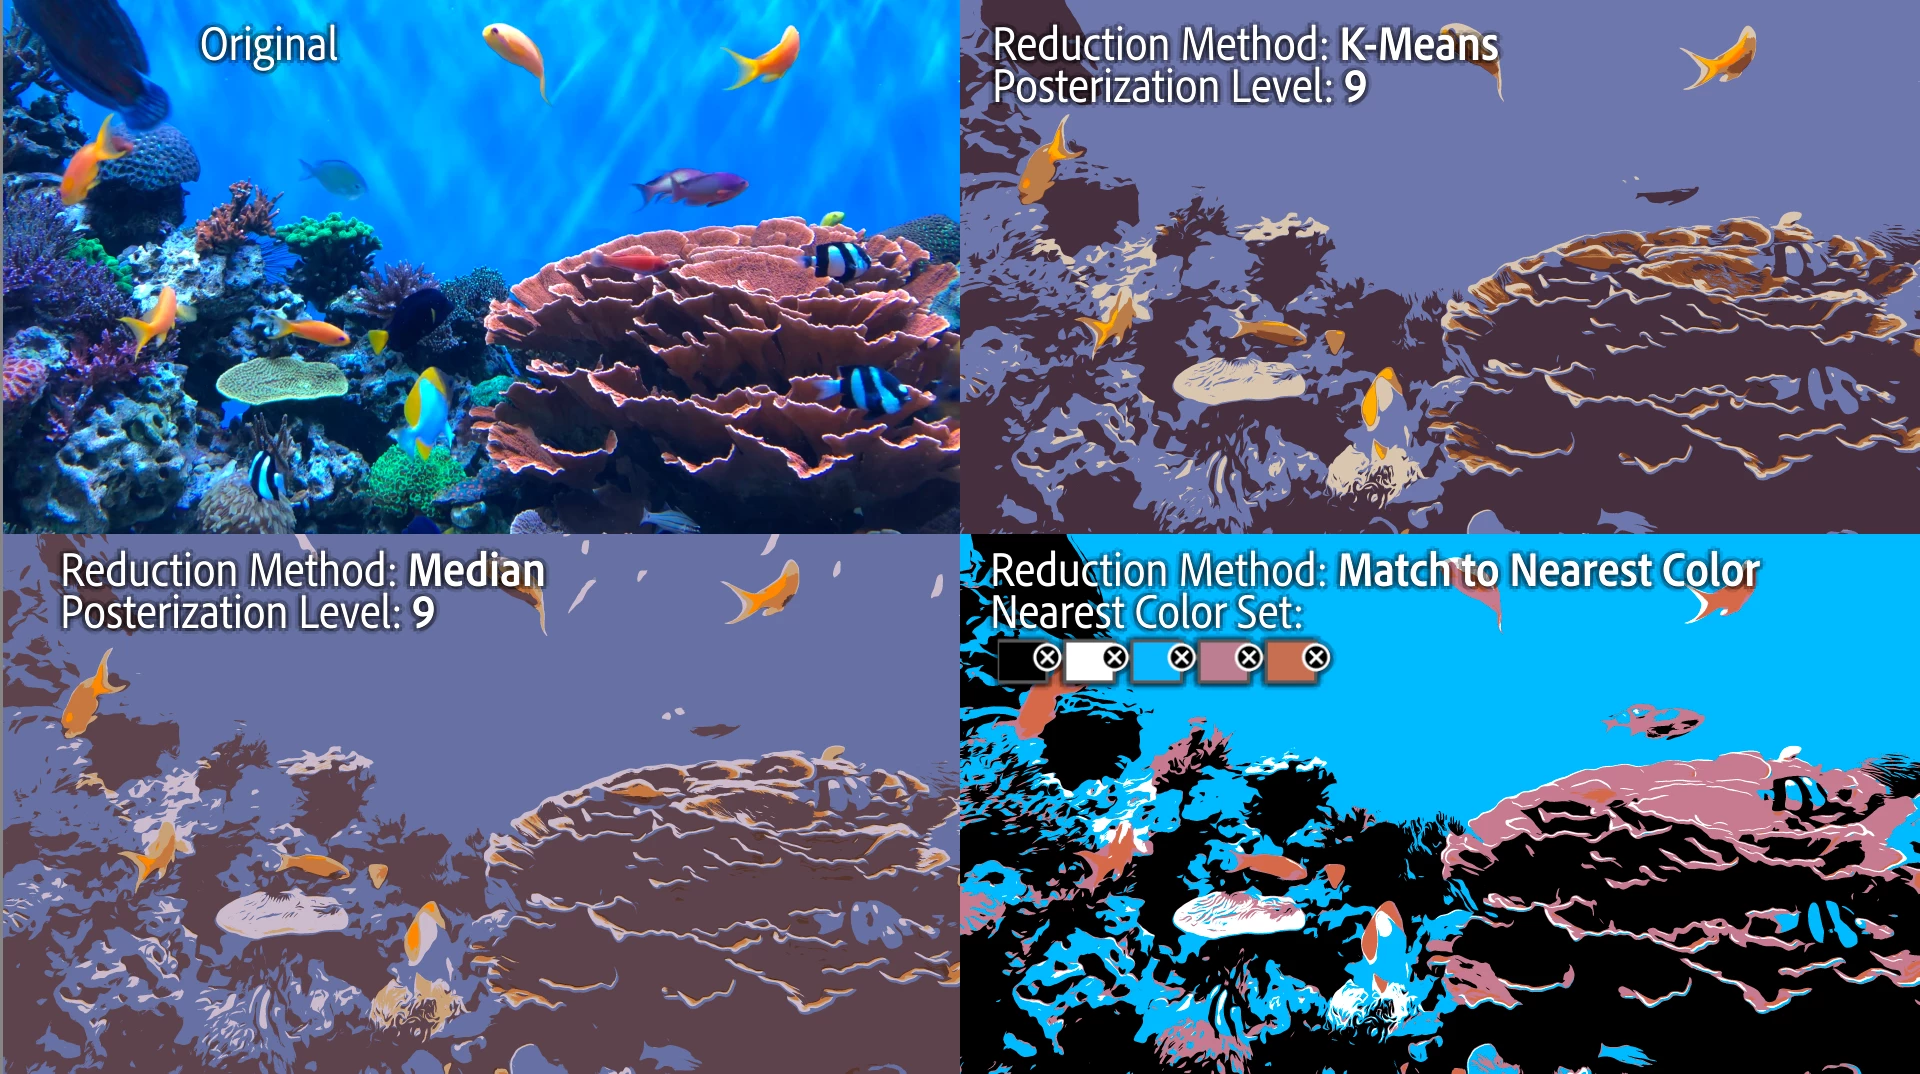
Match to Nearest Custom Color
It's important to understand what Match to Nearest Custom Color does and how it works: it uses a method that tries to match the way humans see color to find the closest color in the Custom Color set. Think of it as a smart posterization to a palette you define.
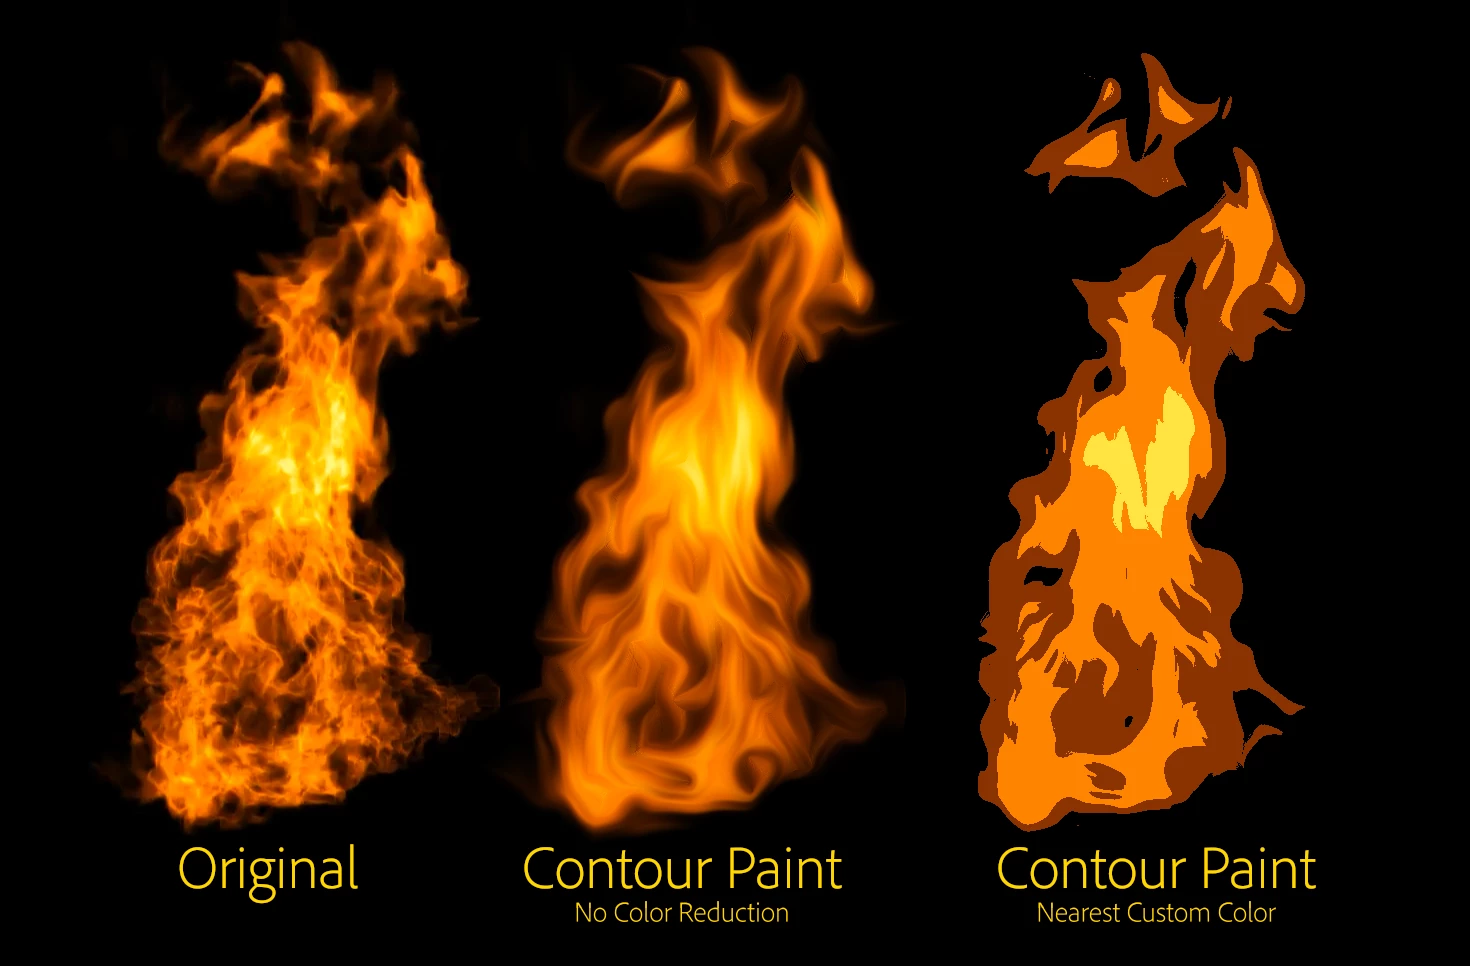
The remapping works based only on whatever the closest color is and there's no guarantee that all colors in the Custom Color Set will be used. If you add Contour Paint with a Custom Color Set that includes a hot pink color on a video of a green jungle with a blue sky, that hot pink will not be the nearest color for any of the pixels and no fills will be drawn with that color. But if a flamingo flies through the frame, that pink will start to appear.
Adding Swatches to the Custom Color Set
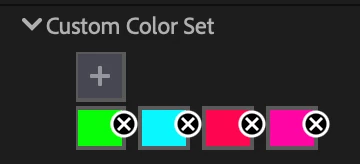
You can use the + button above the Custom Color Set swatches to add any color you want but we strongly recommend using the eyedropper in the color picker dialog to sample colors from the original image (you may want to temporarily turn off the Contour Paint effect while sampling) to guarantee an exact match. This will gain you the most control over which colors in the image are visible.
You can keyframe the Custom Color Set using the Custom Color Set property below the swatches. Enable the stopwatch on that that property and simply add or remove colors in the set of swatches to have them interpolate in and out of the palette.
Limit Fills by Edge Strength
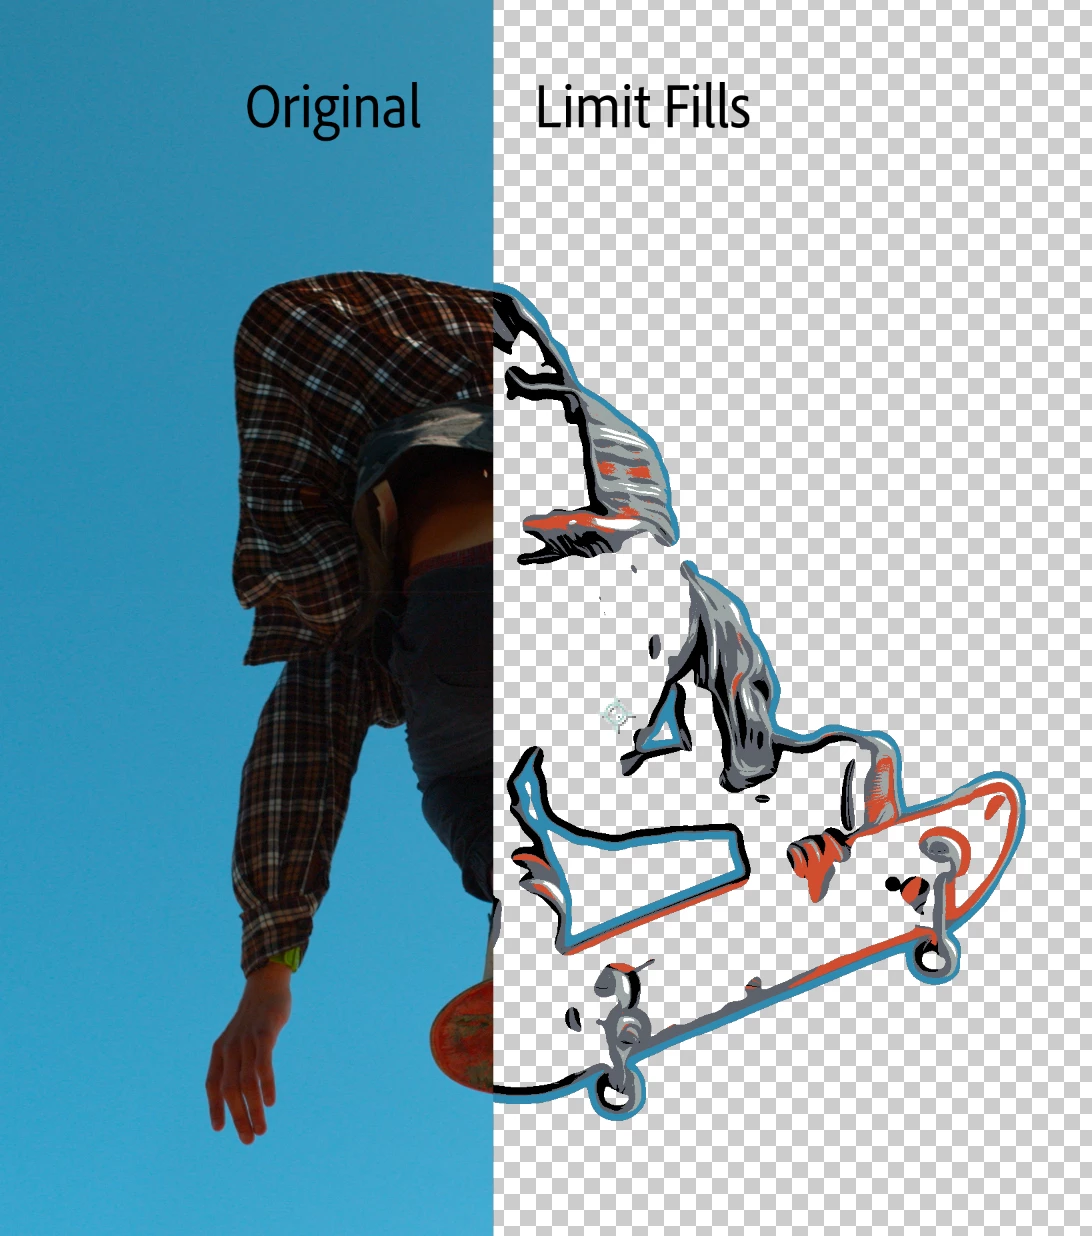
Limit Fills by Edge Strength allows you to control where the fills are drawn.
Low detail areas of your footage have edges with a low Edge Strength. You can use these controls to limit which edges draw fills around them.
External Edge Map
Now that we know how to use the downstream options, we can go back to the first controls in the effect, referencing and modifying the Edge Map.
In addition to using the Edge Map derived from your image or video, you can point Contour Paint to an External Edge Map — another layer to use to drive the smearing.
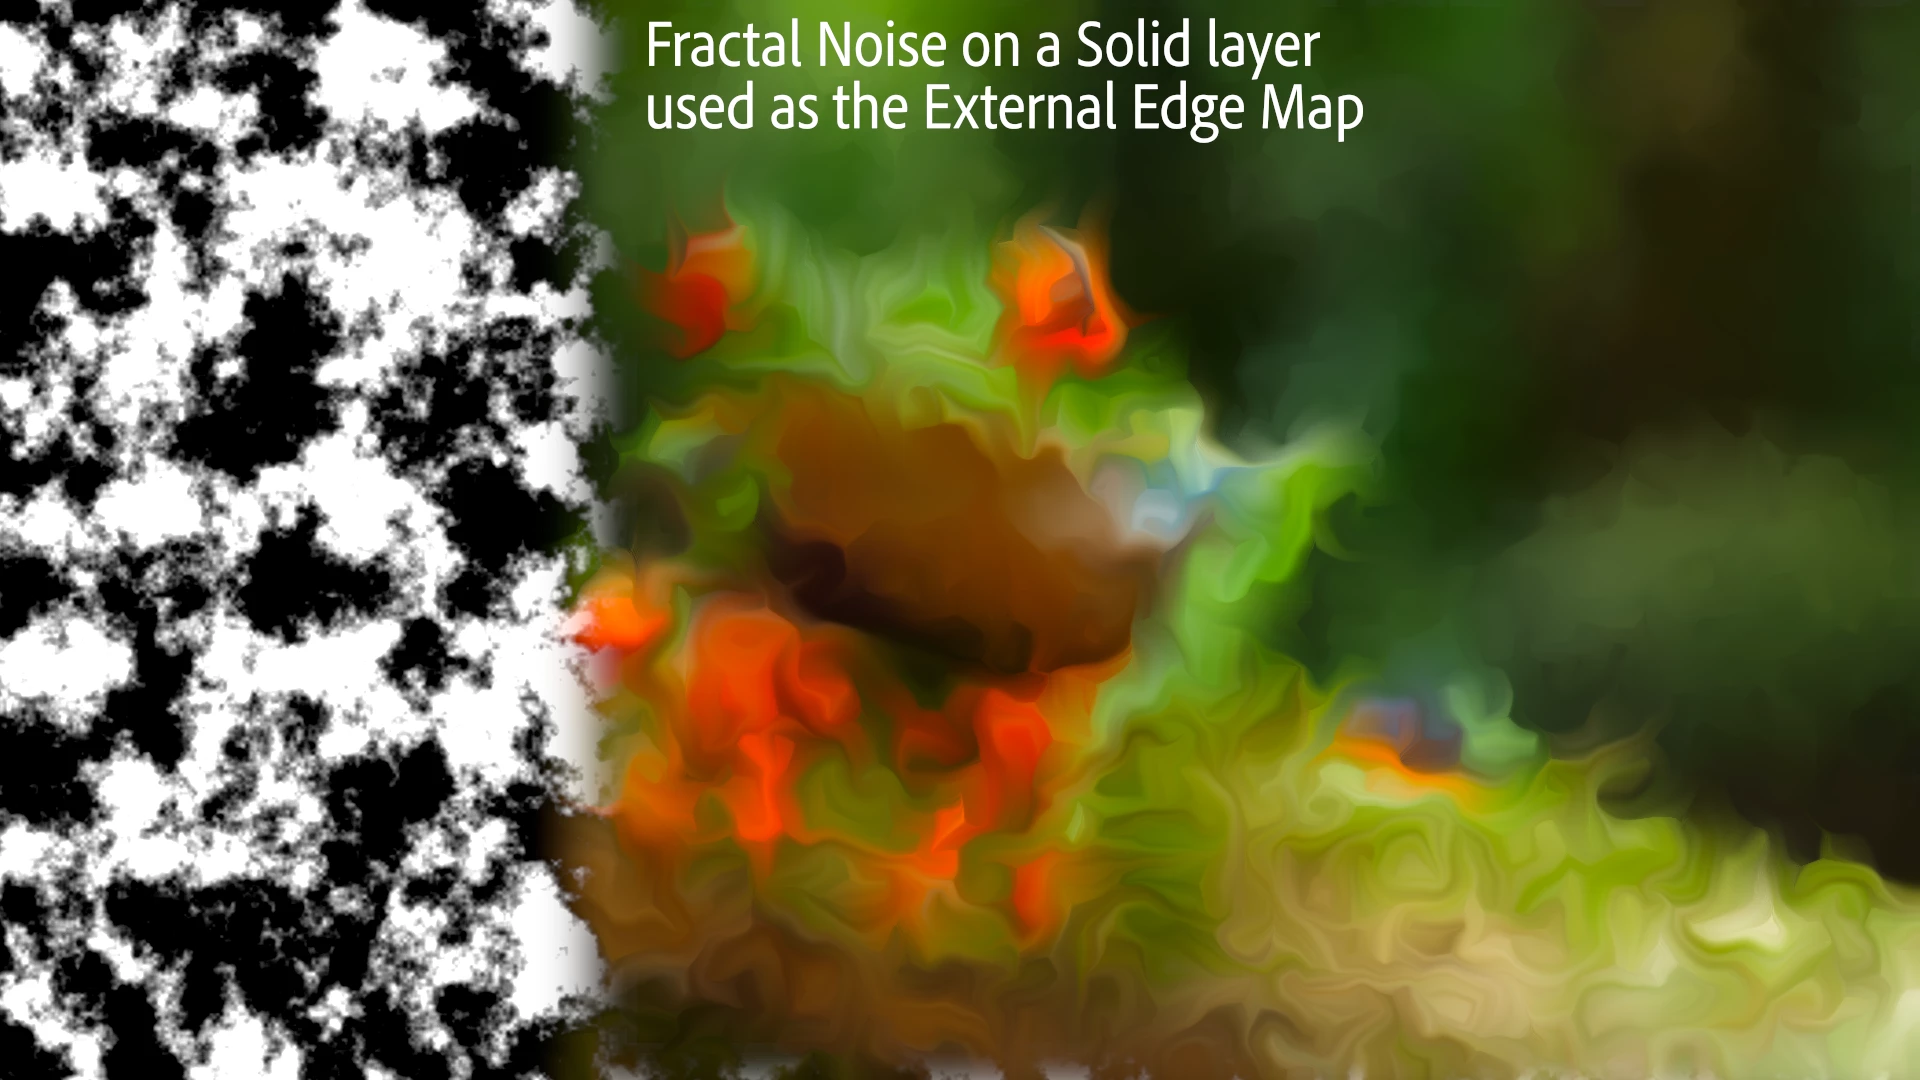
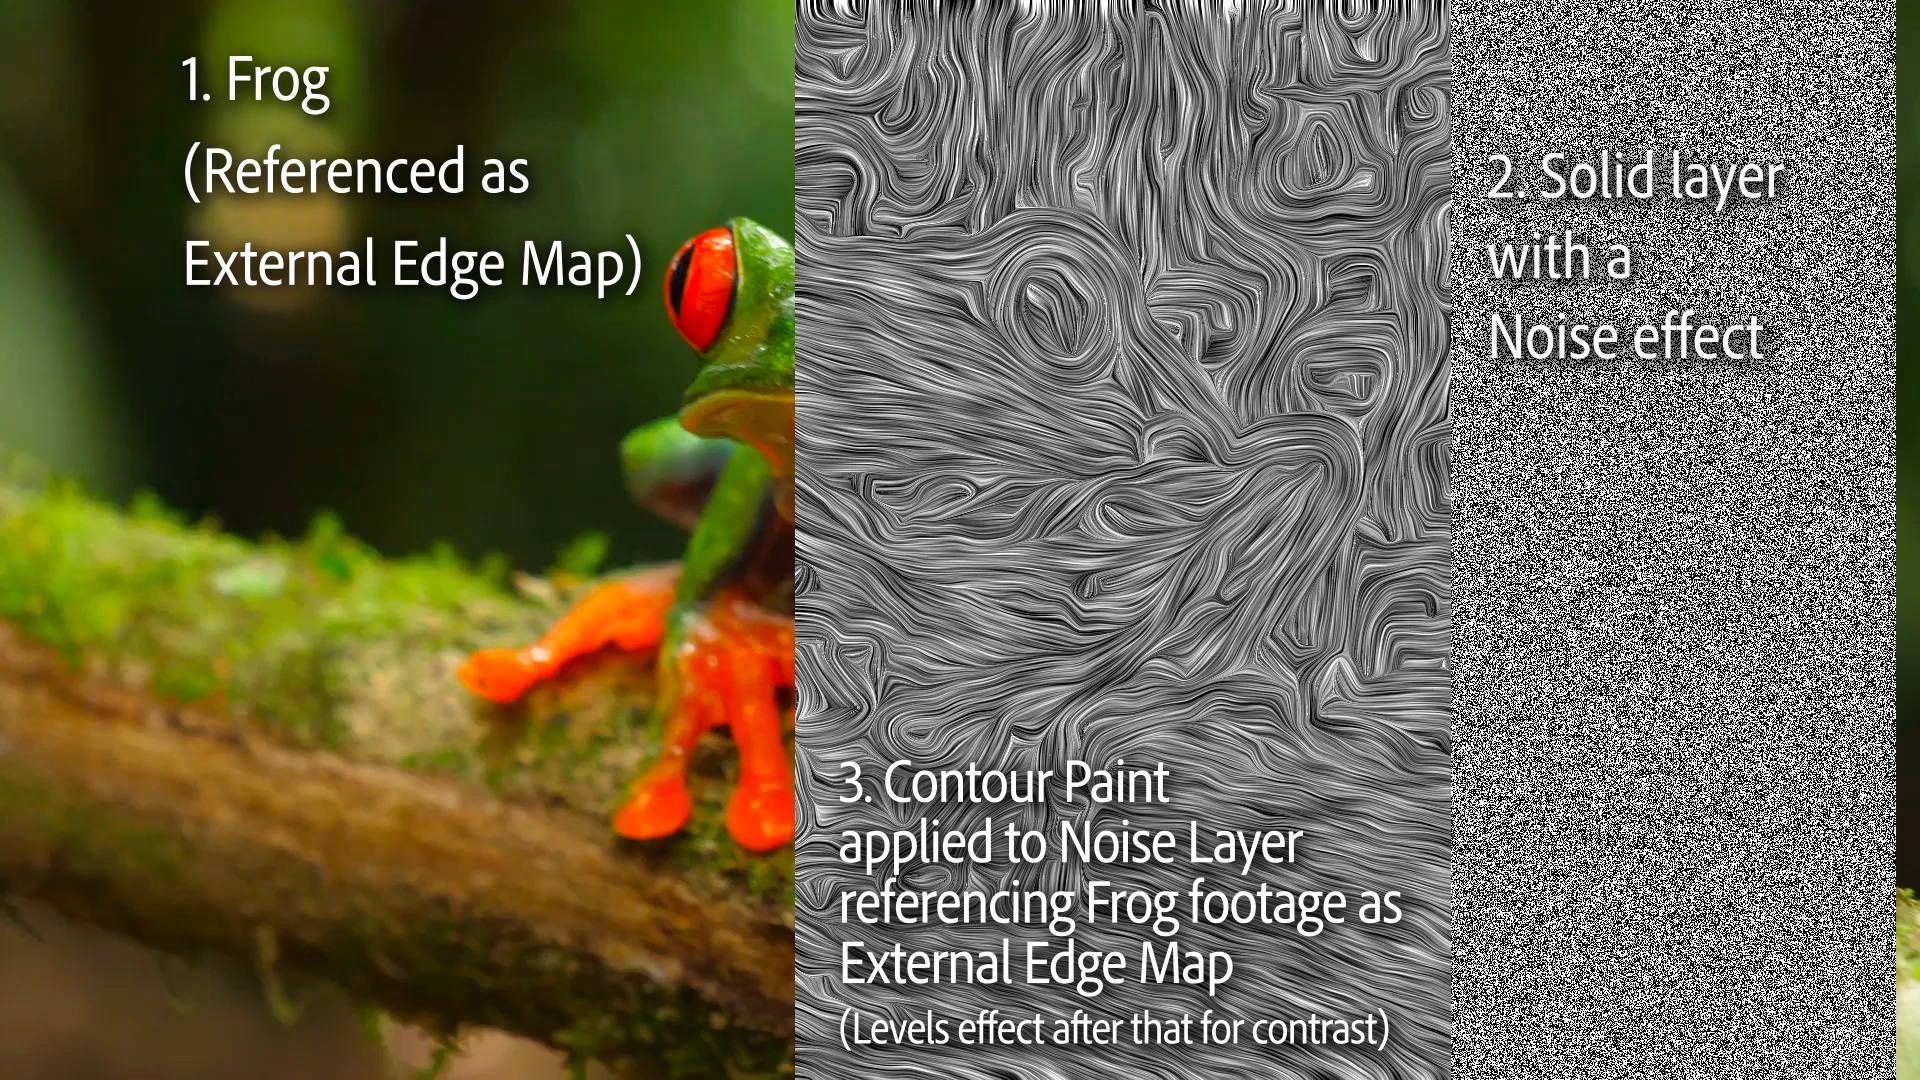
This can lead to interesting inversions of typical workflow. For example, taking a visual Noise effect (Fractal Noise, etc) and then using Contour Paint to smear that noise across the contours taken from an image can lead to a very interesting contoured line art effect.
Map Modifications
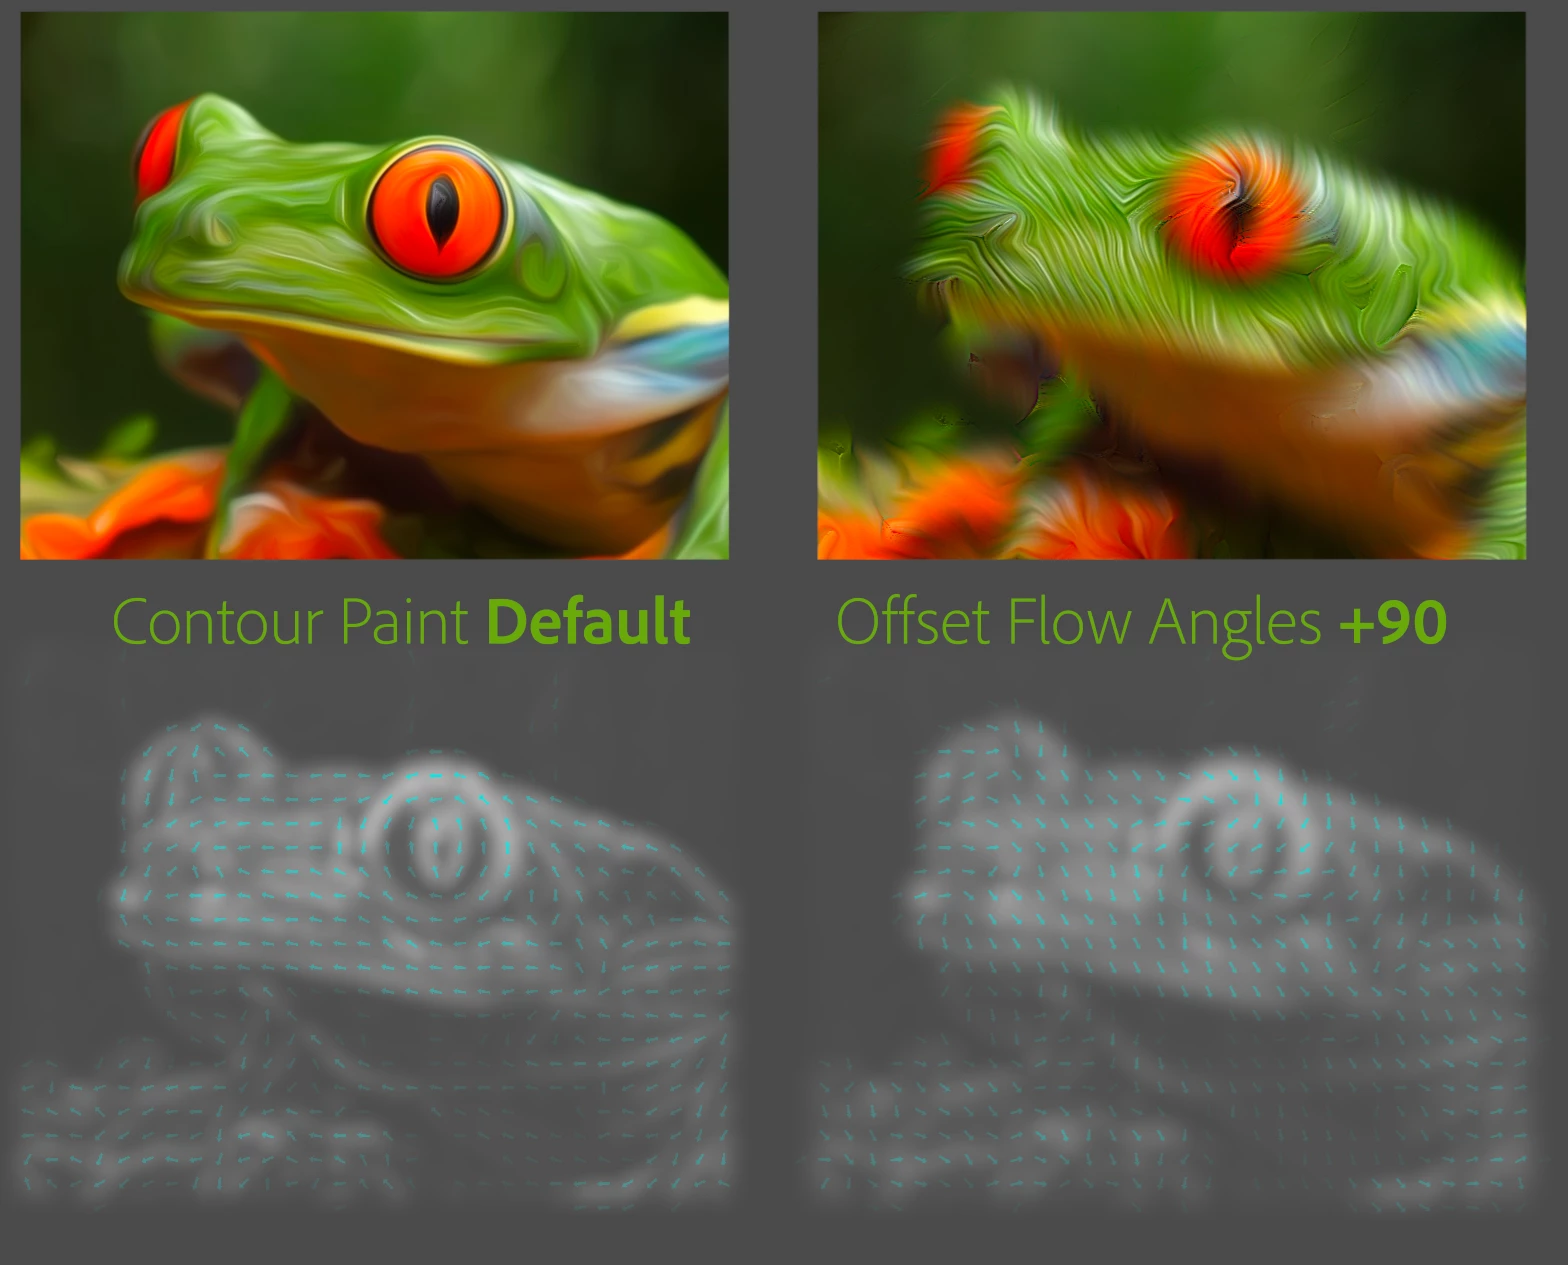
Offset Flow Angles allows a global adjustment of every flow angle in your edge map.
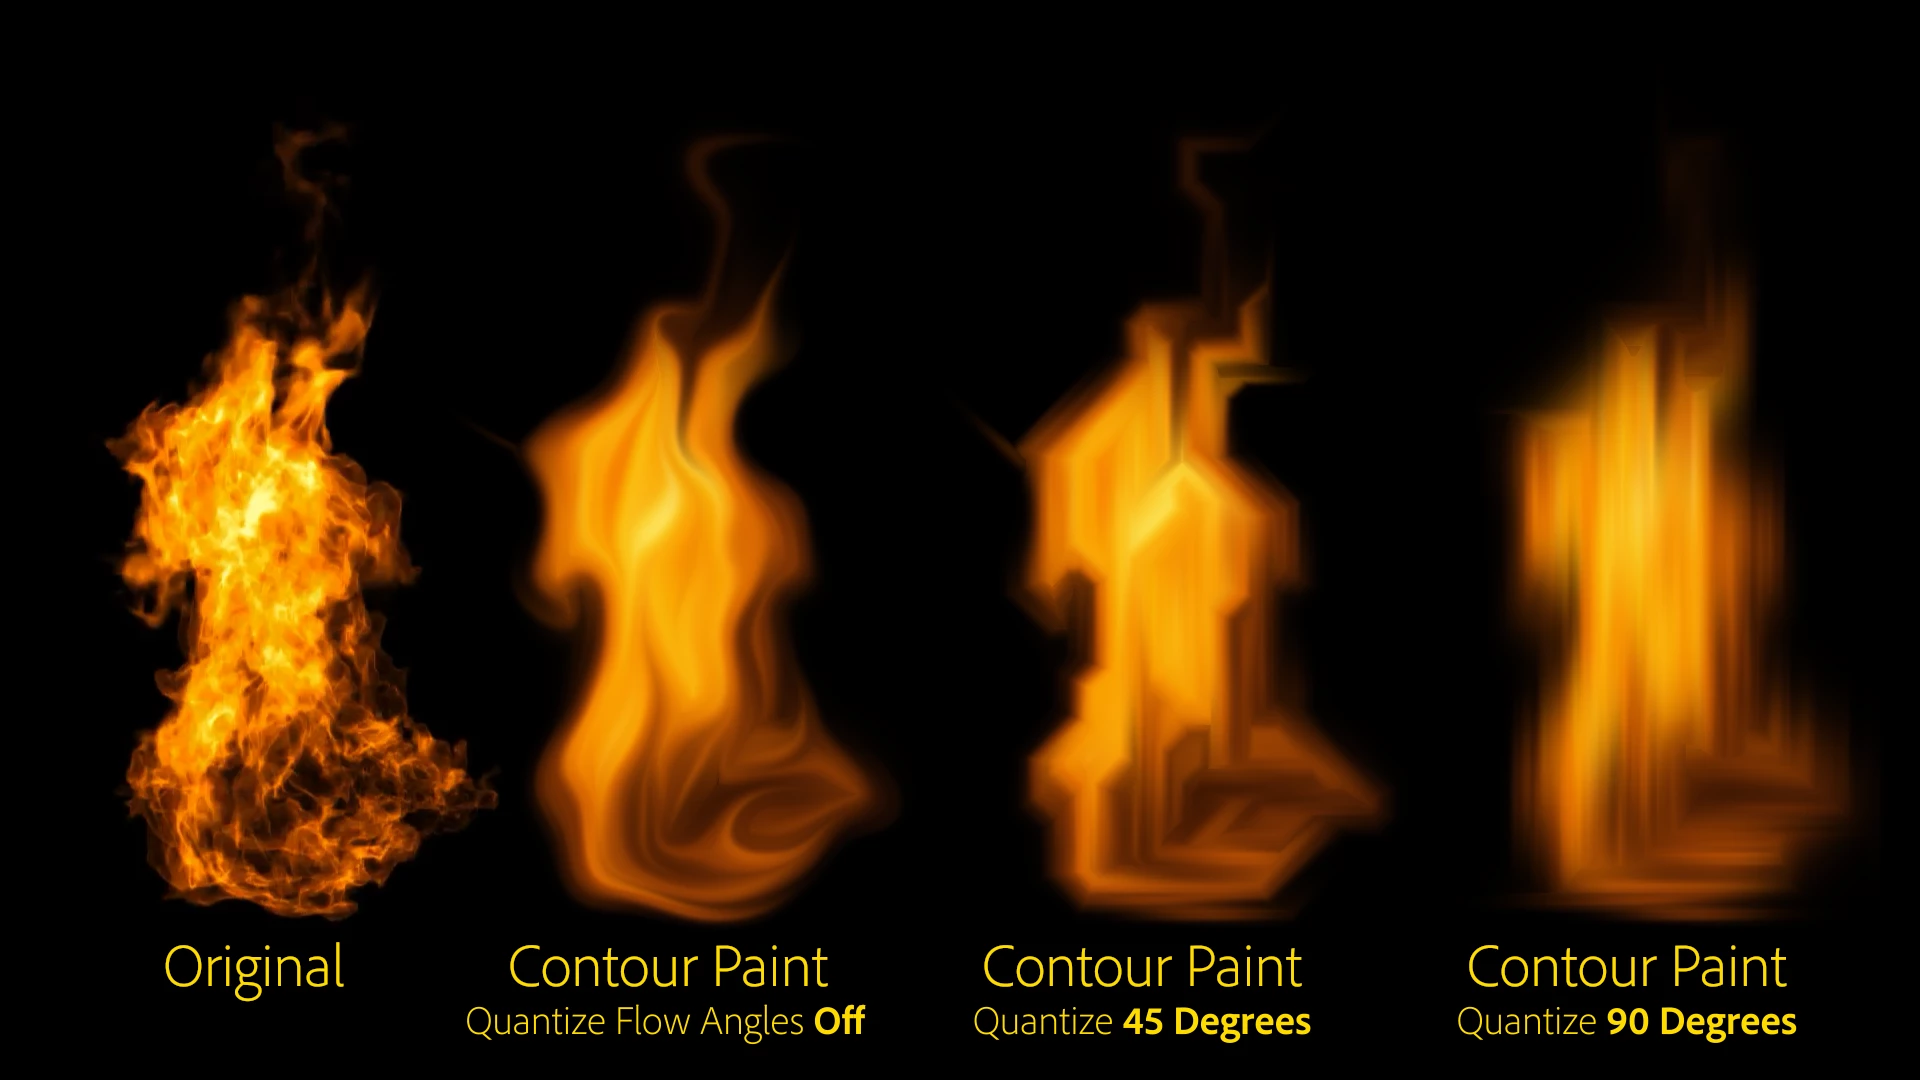
Quantize Flow Angles snaps the flow angles to specific values. This effect is more obvious at higher Iterations. This can be used for extremely stylized effects, particularly if you're trying to make imagery look "computerized."
Freehand Flow Adjustments
If you want to make manual adjustments to the edge flow map — like if it just isn’t doing what you want in one particular area — there's a suite of tools that allow you to paint changes on the flow map.
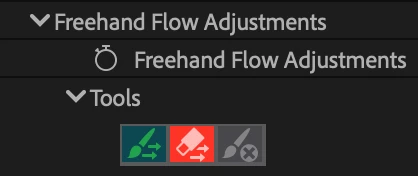
Just paint in the Comp Viewer and watch the angles adjust to your paint strokes. If your View is set to Edge Map you'll see a tinted outline of the strokes and colorizing of the arrows they're affecting.
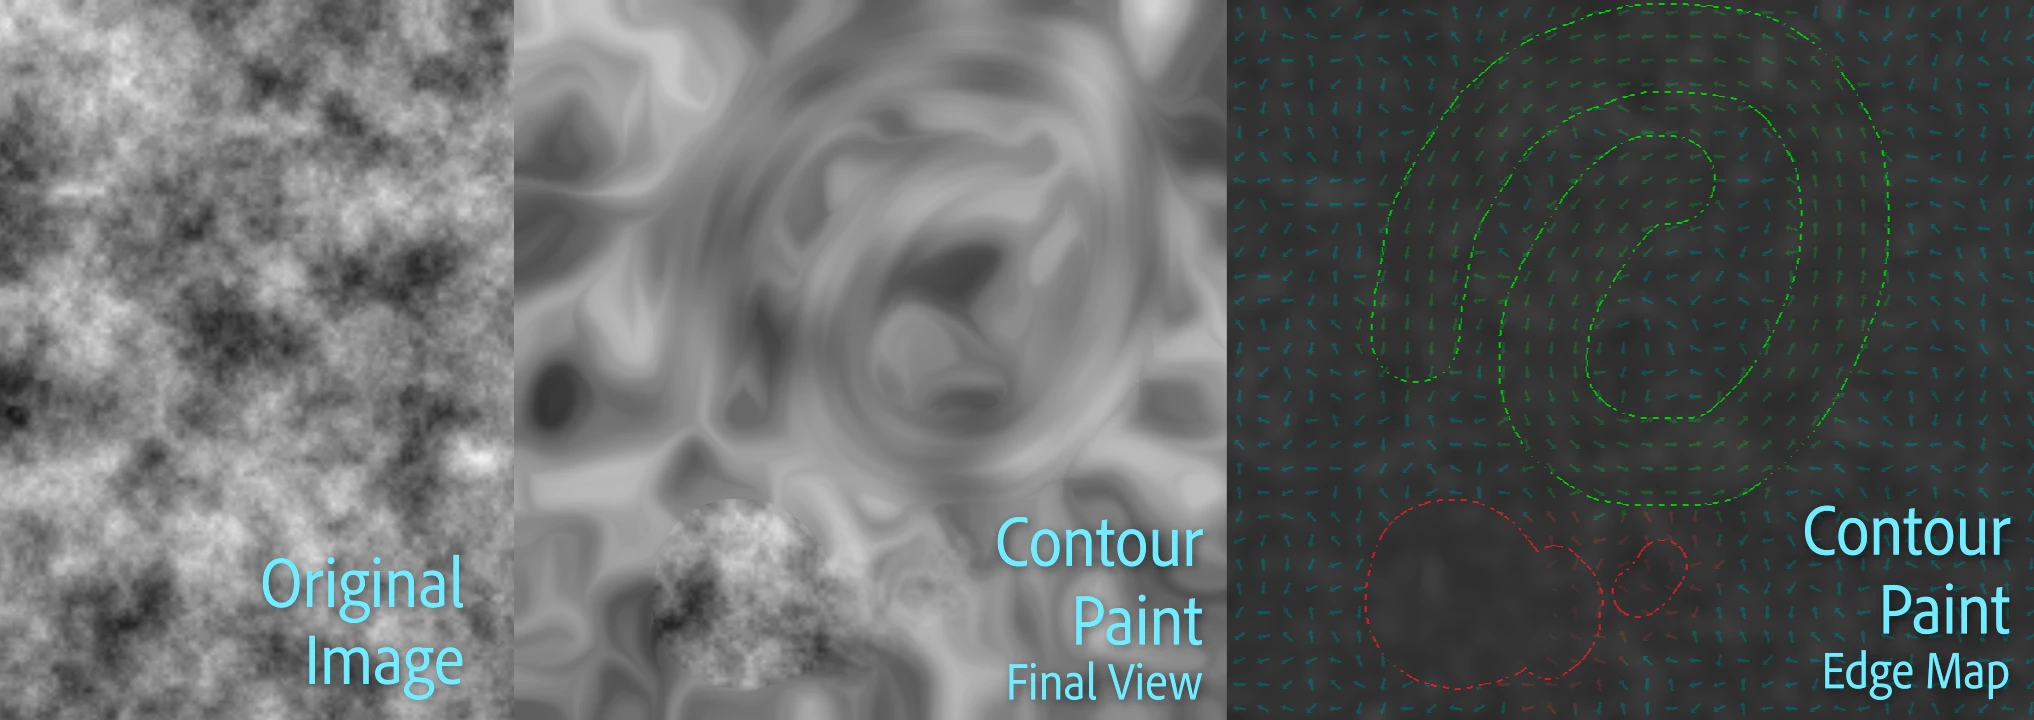
Change Contour Flow will allow you to push the directions on the flow map and are visible as green outlines in the Edge Map.
Remove Contour Flow will nullify the flow map where the strokes are present. At full opacity, it will remove the flow and your image will not smear in those areas. At a low opacity, you can use this to reduce the magnitude of the direction. These strokes are visible as red outlines in the Edge Map.
Delete Strokes Lets you click on existing strokes to remove them. The strokes are individual objects and a single click will remove an entire stroke.
Keyframing Similar to the Custom Color Set, you can keyframe the Freehand Flow Adjustments using the Freehand Flow Adjustment property. The strokes themselves will not animate along as if they're being drawn, but they willinterpolate.
Other Effects That Play Well With Contour Paint
Because Contour Paint uses the input pixels to drive a lot of looks, a lot of those decisions can be affected by adding effects before Contour Paint.
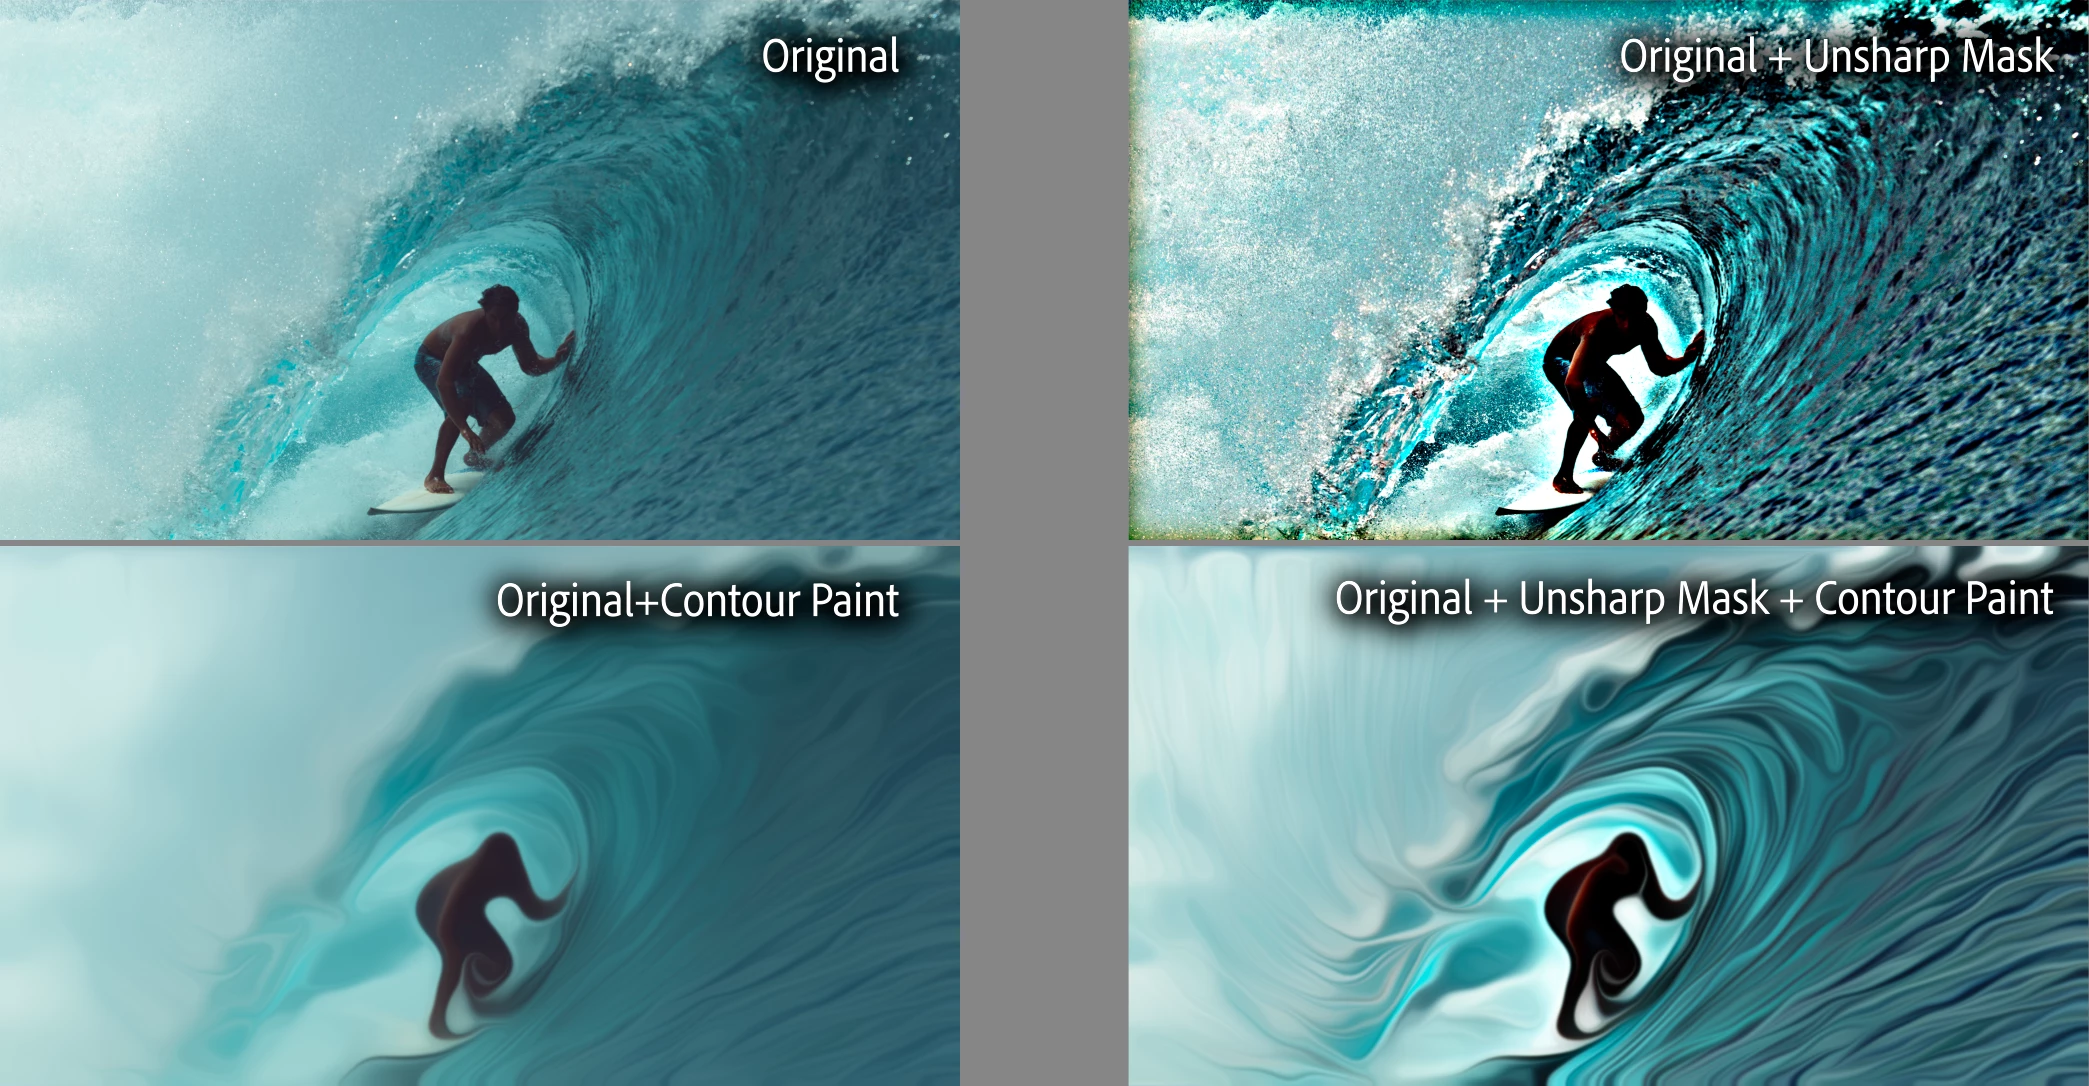
Unsharp Mask (or any other Sharpening effect)
Because Contour Paint works on the edges it finds in the image, using a sharpening effect to emphasize edges, you can get very different effects. You can see here that our surfing shot's colors and shapes are much more stylized if we pre-process by adding an Unsharp Mask effect beforehand.
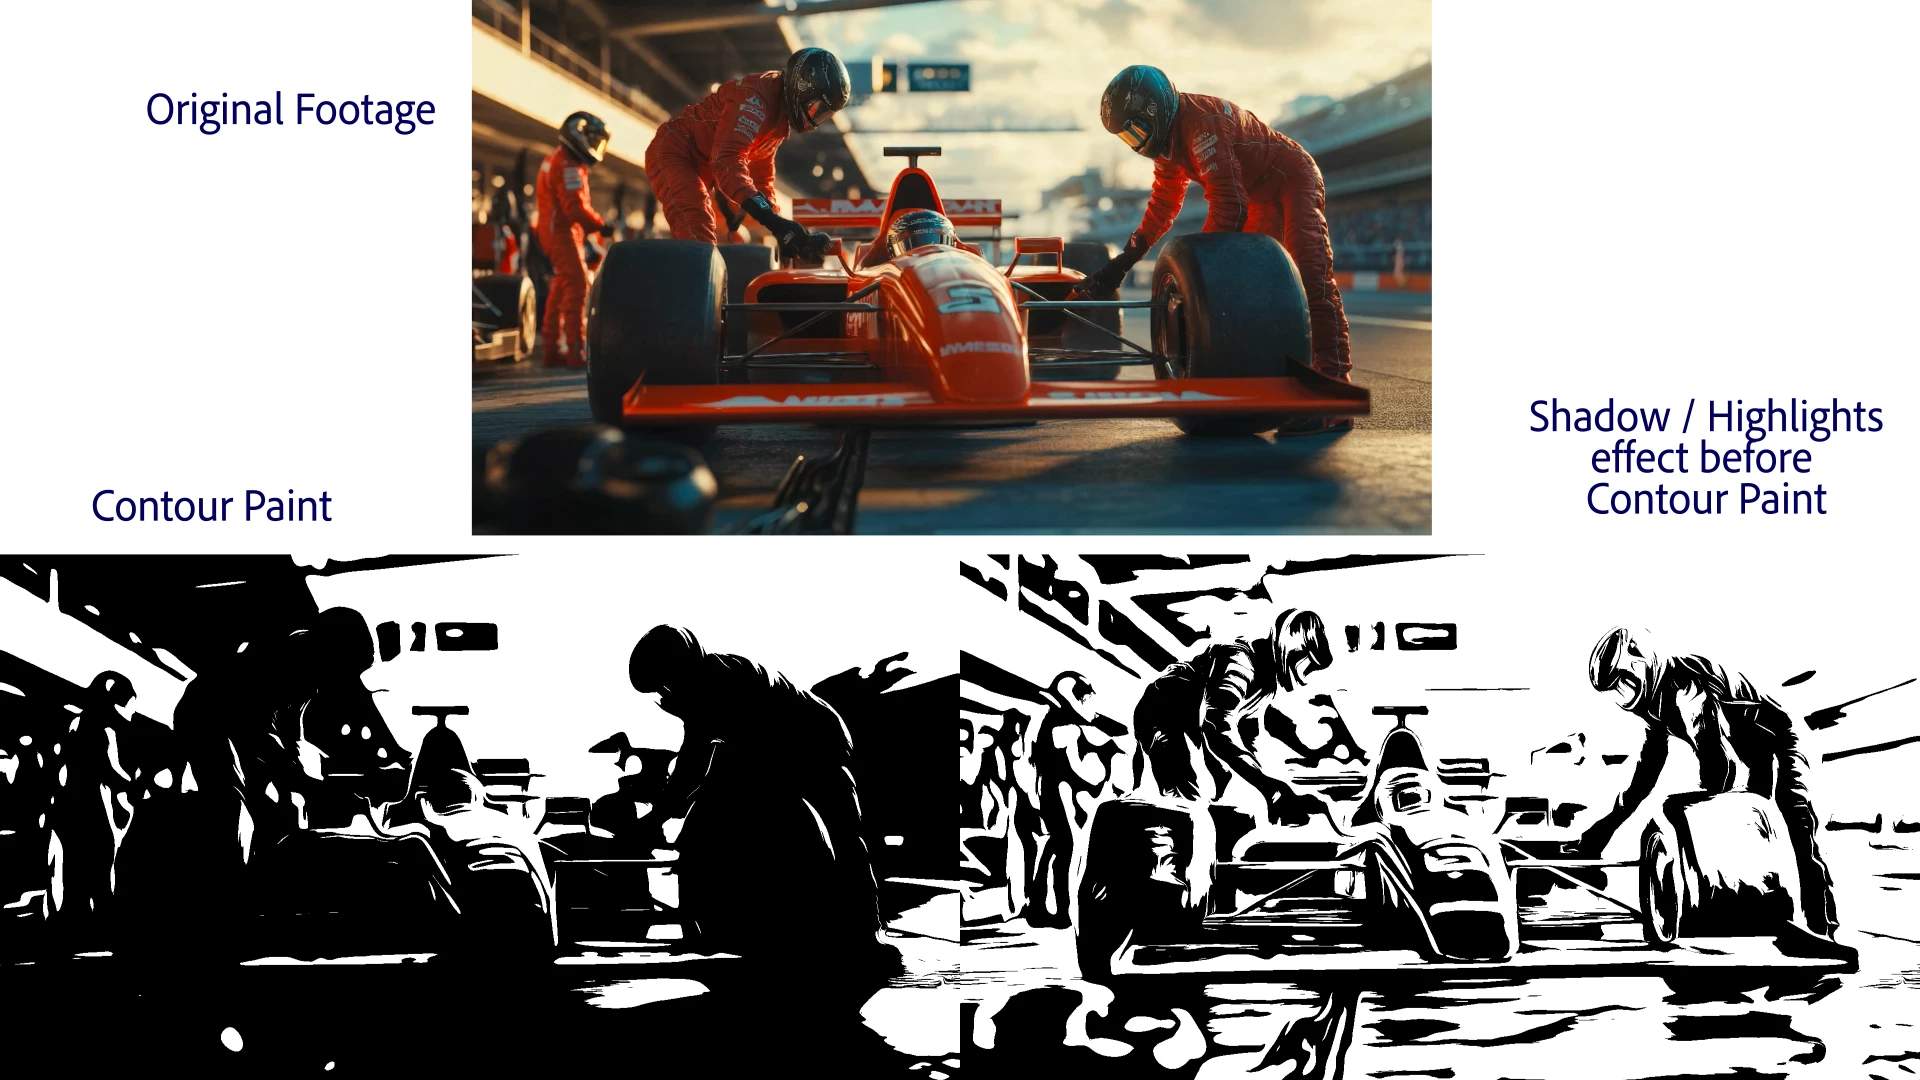
Shadow / Highlights
Shadow/Highlights is an underutilized effect that will brighten the dark areas of your frame and darken the light areas of your frame. This can add a lot more detail to an image that is being modified by Contour Paint.
Thank You!
Thank you so much for coming on this tour of Contour Paint. This is in Beta so we really welcome your feedback on changes you’d like to see before this becomes an official release. We really hope you love using Contour Paint as much as we've loved creating it. Happy smearing!


 AdChoices