





How to Create Stunning Splatter Brush Effects in Photoshop

Let’s create some Splatter Brush effects using Adobe Photoshop!
Designing with splatter brushes in Photoshop can be a lot of fun! Though, knowing how to adjust the application of these brushes and how to best apply them to your subject can take some additional know-how rather than simply splattering all over the place… and what about when something unexpected happens? We're going to have a quick look at all these considerations when using splatter brushes.
How to Create this Effect in Photoshop:
Get the Brush
First, we'll need to access the Brush tool and choose a splatter brush.
- In Photoshop, select the Brush tool and open the Brushes panel - you can find that under Window > Brushes.
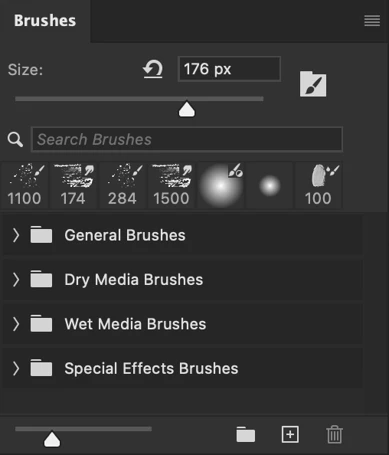
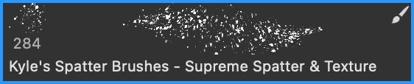
- Photoshop comes loaded with all sorts of brushes - including splatter brushes. In the Brushes panel, expand the Special Brushes folder and select a splatter brush you find interesting. I've chosen Kyle's Spatter Brushes - Supreme Spatter & Texture.
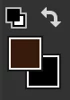
- Choose the brush color by changing the Foreground Color in the toolbar. Your splatter brush is now ready to use.
Note: You can also import splatter brushes into Photoshop as .abr files. You can find all sorts of brushes provided by Adobe through your web browser.
Control the Brush
While you can certainly use the selected splatter brush without making any changes to it, you do have access to things like scattering, texture, tip shape, and other properties through the Brush Settings panel.
- Open the Brush Settings panel by choosing Window > Brush Settings from the application menu.
- This panel will display all of the settings for the selected brush. Active settings have an active checkbox next to them and inactive settings display an inactive checkbox.
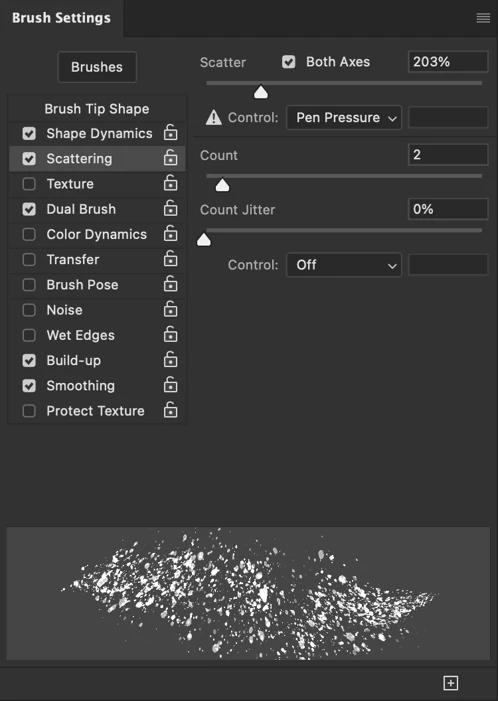
- Clicking on the name of any setting will give you access to adjust each setting's properties. Some settings have no properties beyond being on or off and therefore will display nothing when clicked.
- You can also adjust properties of the brush such as size and blend mode through Photoshop's Options bar when the Brush Tool is selected. The Brush Settings panel can also be accessed directly from the Options bar!
Note: You can get access to both the Brush panel and Brush Settings panel immediately by choosing the Painting workspace.
Create the Effect
Let's put the splatter brush to use and design a splatter composition using an image from the Adobe Stock free library.
- Open the .jpeg image file in Photoshop and choose File > Save As from the application menu to save the file as a .psd to your local computer.
- Choose Select Subject from the Contextual Task Bar. A selection will appear around the figure.

- We will want to invert this selection so that she is isolated from the effects of our brush. Choose Invert Selection from the Contextual Task bar and the selection is inverted so that all content except for the figure is selected.

- Select the Brush Tool and choose a splatter brush to use. Adjust any brush properties as desired. Be sure to adjust the size of your brush.

- In the Layers panel, click the New Layer button to create an empty pixel layer above the background. Ensure this layer is selected so that any brushing will be contained in this new layer.
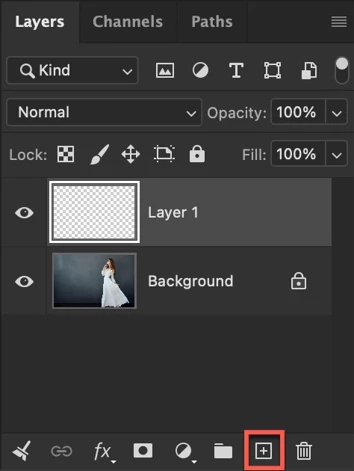
- Choose a Foreground Color from the toolbar and begin thoughtfully painting around the subject. Notice that the brush only affects the areas that are encompassed by our selection and does not overlay the figure.
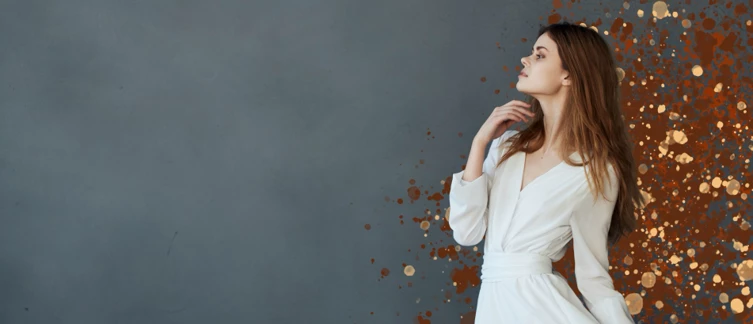
Tip: Clear your selection, add a new pixel layer, and add in additional splatter to the new layer to create a parallax effect with the figure existing between and among the splatter surfaces.
Go Further
We now have the basics down for creating a neat photographic splatter composite in Photoshop, but we can take this even further with additional techniques. Let's use our splatter brush to create a nifty portrait effect using masks. I'll once again be using an image from the Adobe Stock free library.
- We'll first remove the background so that we are only working with the figure. Choose the Remove Background option from the Contextual Task Bar. The subject is selected and a mask is applied to the image, hiding the background.

- Select the Brush Tool and choose a splatter brush to use. Adjust any brush properties as desired. Be sure to adjust the size of your brush.

- Choose black (#000000) as the Foreground Color from the toolbar. When dealing with masks - white represents 100% opacity, black represents 100% transparency, and shades of grey allows for semi-tranparency.
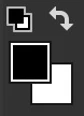
- Ensure that the mask attached to your layer is selected by clicking upon it. We want to paint within the mask and not across the actual pixels of the image.
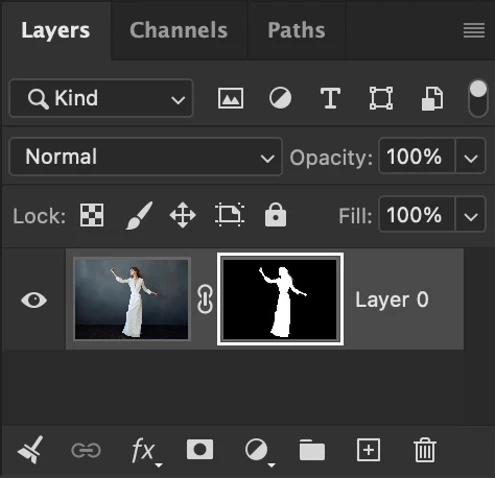
- From the bottom of the image, paint with your splatter brush so that the figure is given the appearance of dissolving from the waist down. You'll need to paint over these areas multiple times to achieve this effect.
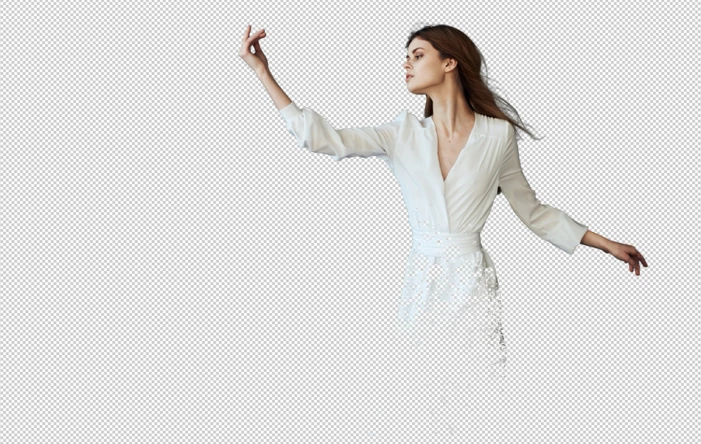
- Finally, either add the background back or bring in a new background to composite your portrait against.

Note: Whenever using slatter brushes, there is always an element of randomness and chance involved.
Fixing Common Problems
Like any process, you may encounter some problems when exploring splatter brushes. Here are a set of things to check or adjust to get around common problems designers can encounter.
Check Blend Modes: If your brush or layer blend mode is set to Dissolve, Clear, or another setting, the splatter effect may look broken or fail to appear. If this is the case, switch the blend mode dropdown in the Options bar to Normal.

Verify Opacity and Flow: Ensure both Opacity and Flow are set to 100% in the Options bar. Low flow setting values can make complex textured or splatter brushes look faint or completely invisible.

Check the Active Layer: Make sure you are on a normal, unlocked, visible pixel layer or a mask connected to such a layer. Note that you cannot paint directly on Smart Objects or locked background layers.
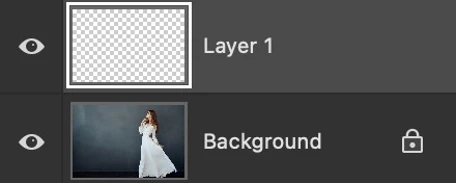
Deselect Active Selections: As seen in this article, if you have an active selection area elsewhere on your canvas, your brush will be restricted to it.

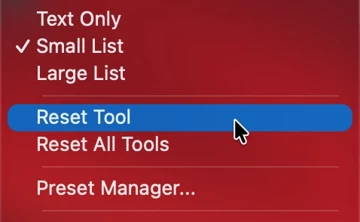
Reset the Brush Tool: Right-click the brush icon on the top-left tool menu and select Reset Tool to clear customized glitchy states. If all else fails - this can be a quick solution!
Join the conversation
Please feel free to share what you’ve created using the Splatter Brush! I hope these tips were helpful. If you have any more questions or need further assistance, feel free to reply here.
 AdChoices