



[Now Released]: Generate Sound Effects and Video in the Premiere Timeline
We’re excited to introduce a new generative workflow in Premiere.
The new Generative Media Tool lets you generate sound effects and video exactly where you need them, directly in your timeline.
Simply select a range in your timeline, describe what you want, and you can generate media directly into your edit. Whether you need missing ambience, a custom sound effect, b-roll, a cutaway or an establishing shot, you can stay focused on editing without switching applications. To add the visual context of your project, use the eyedropper to sample reference frames without leaving the timeline.
Generate Sound Effects in Context
Now you can generate custom sound effects directly in the Premiere timeline.
Select any audio range, describe the sound you want, and generate multiple variations that match the duration of your selection.
Need more control? You can use your voice to guide the timing and intensity of the sound effect, making it easier to create sound effects that feel natural in your edit.
Generating Sound Effects
- Select the Generative Media Tool from the toolbar.
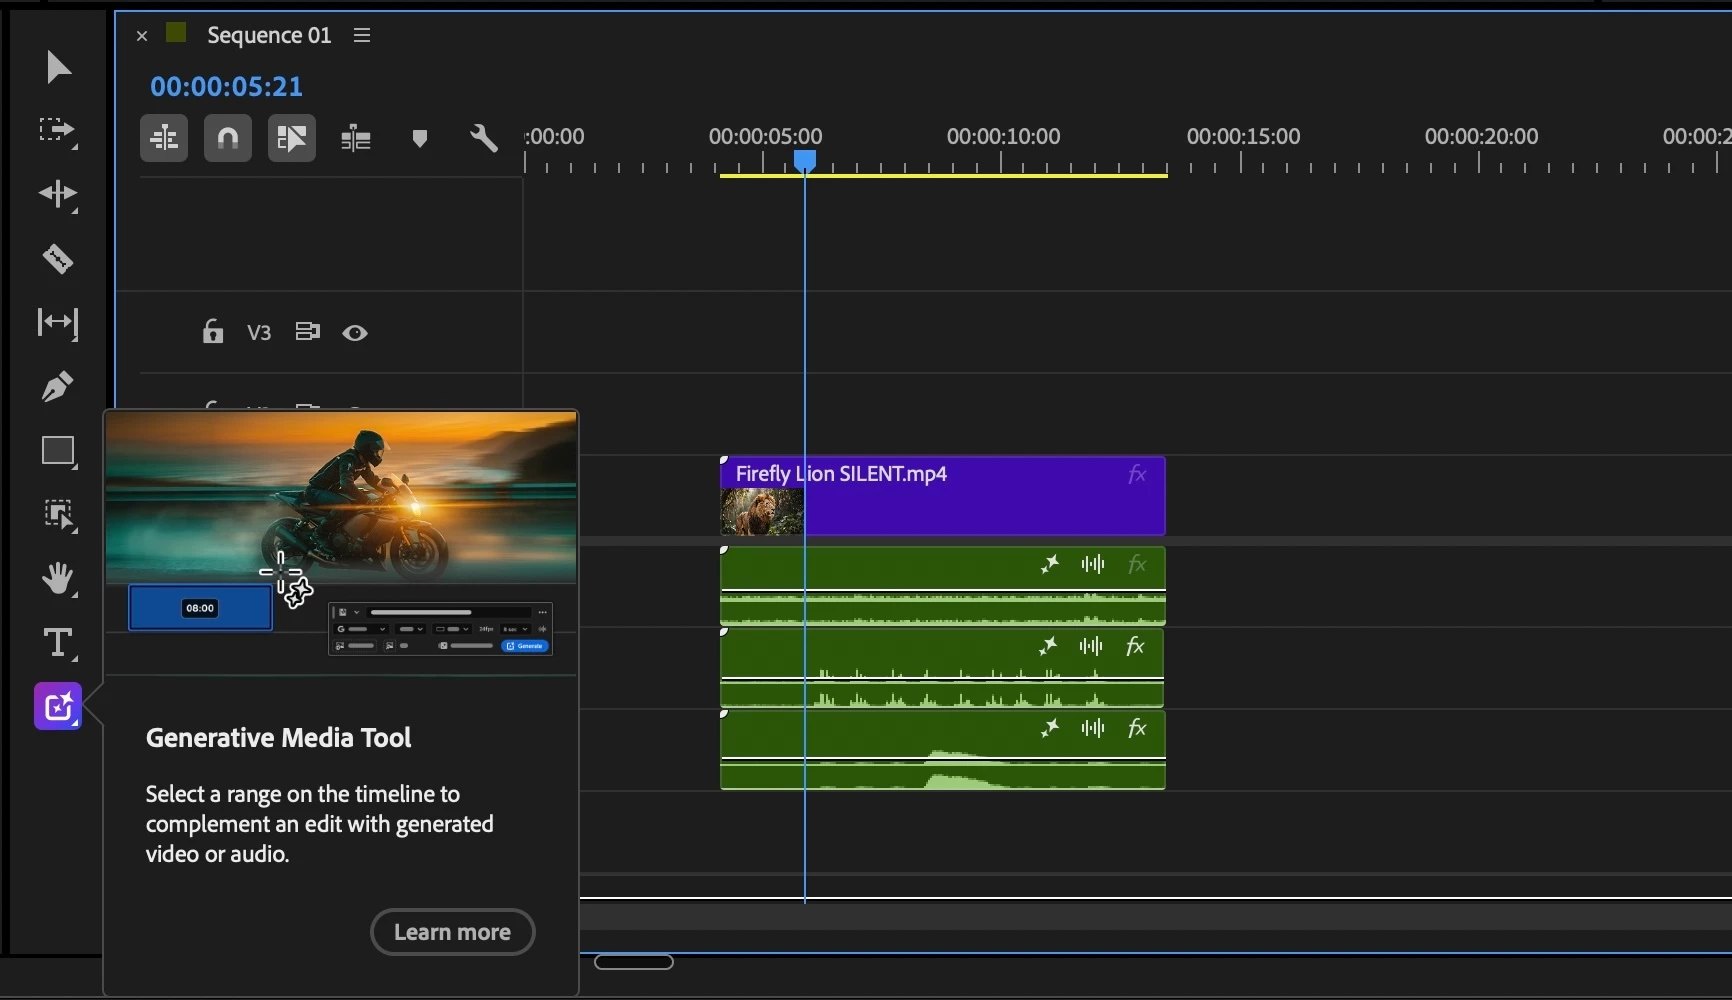
- Drag across any audio track or double-click an audio gap to select the duration you want to generate.
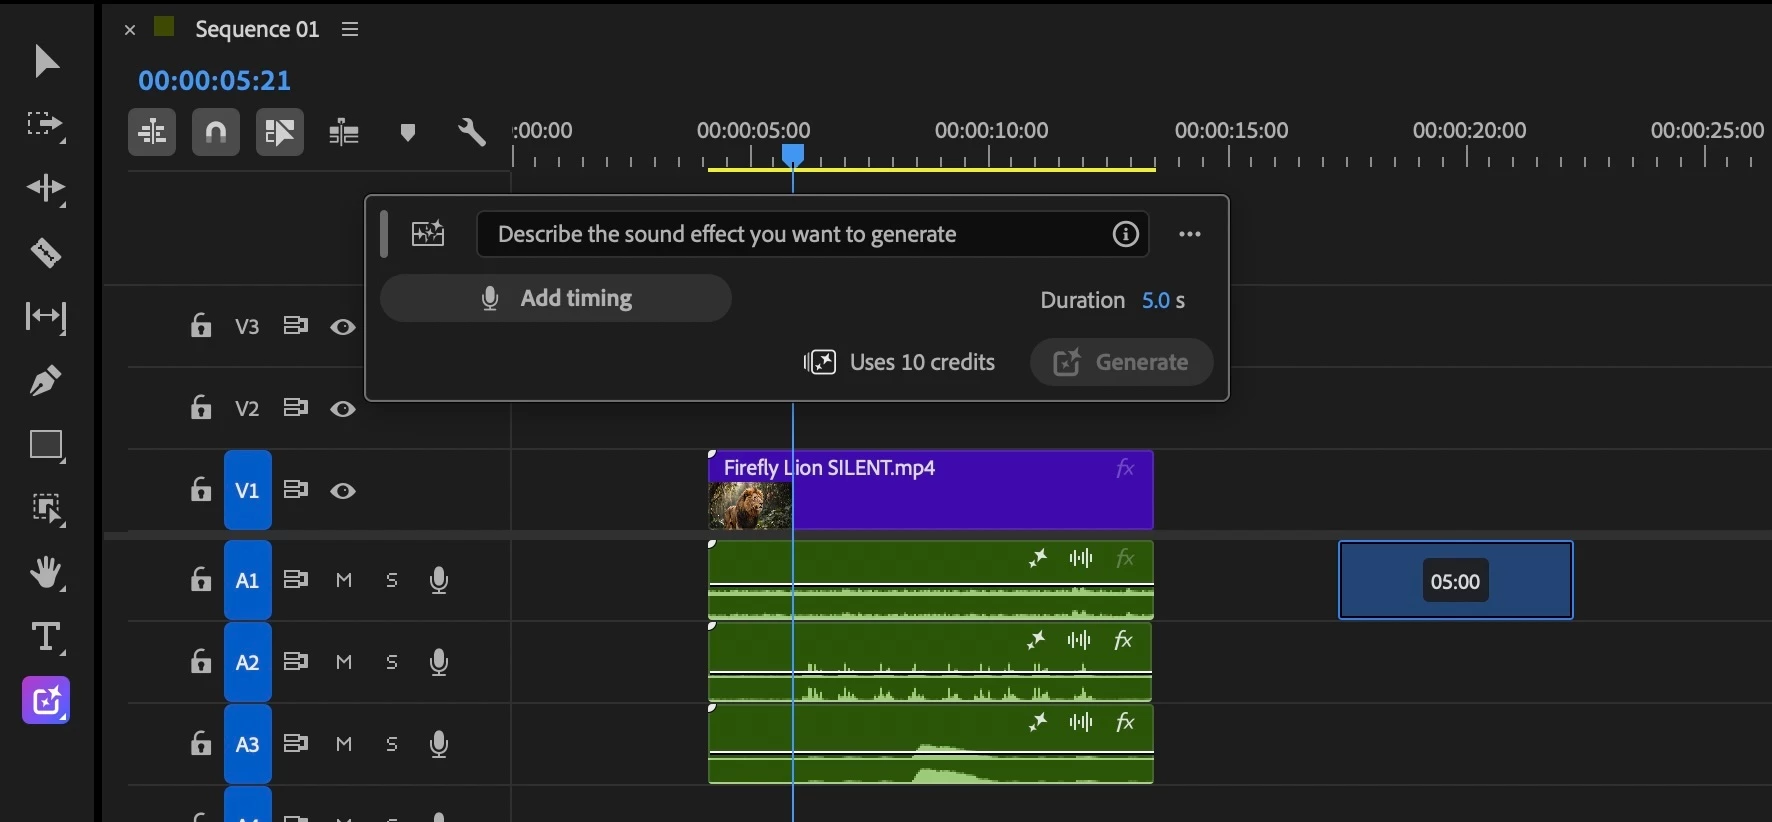
The range can be trimmed or moved to any audio track.
- Describe the sound effect you want to generate.
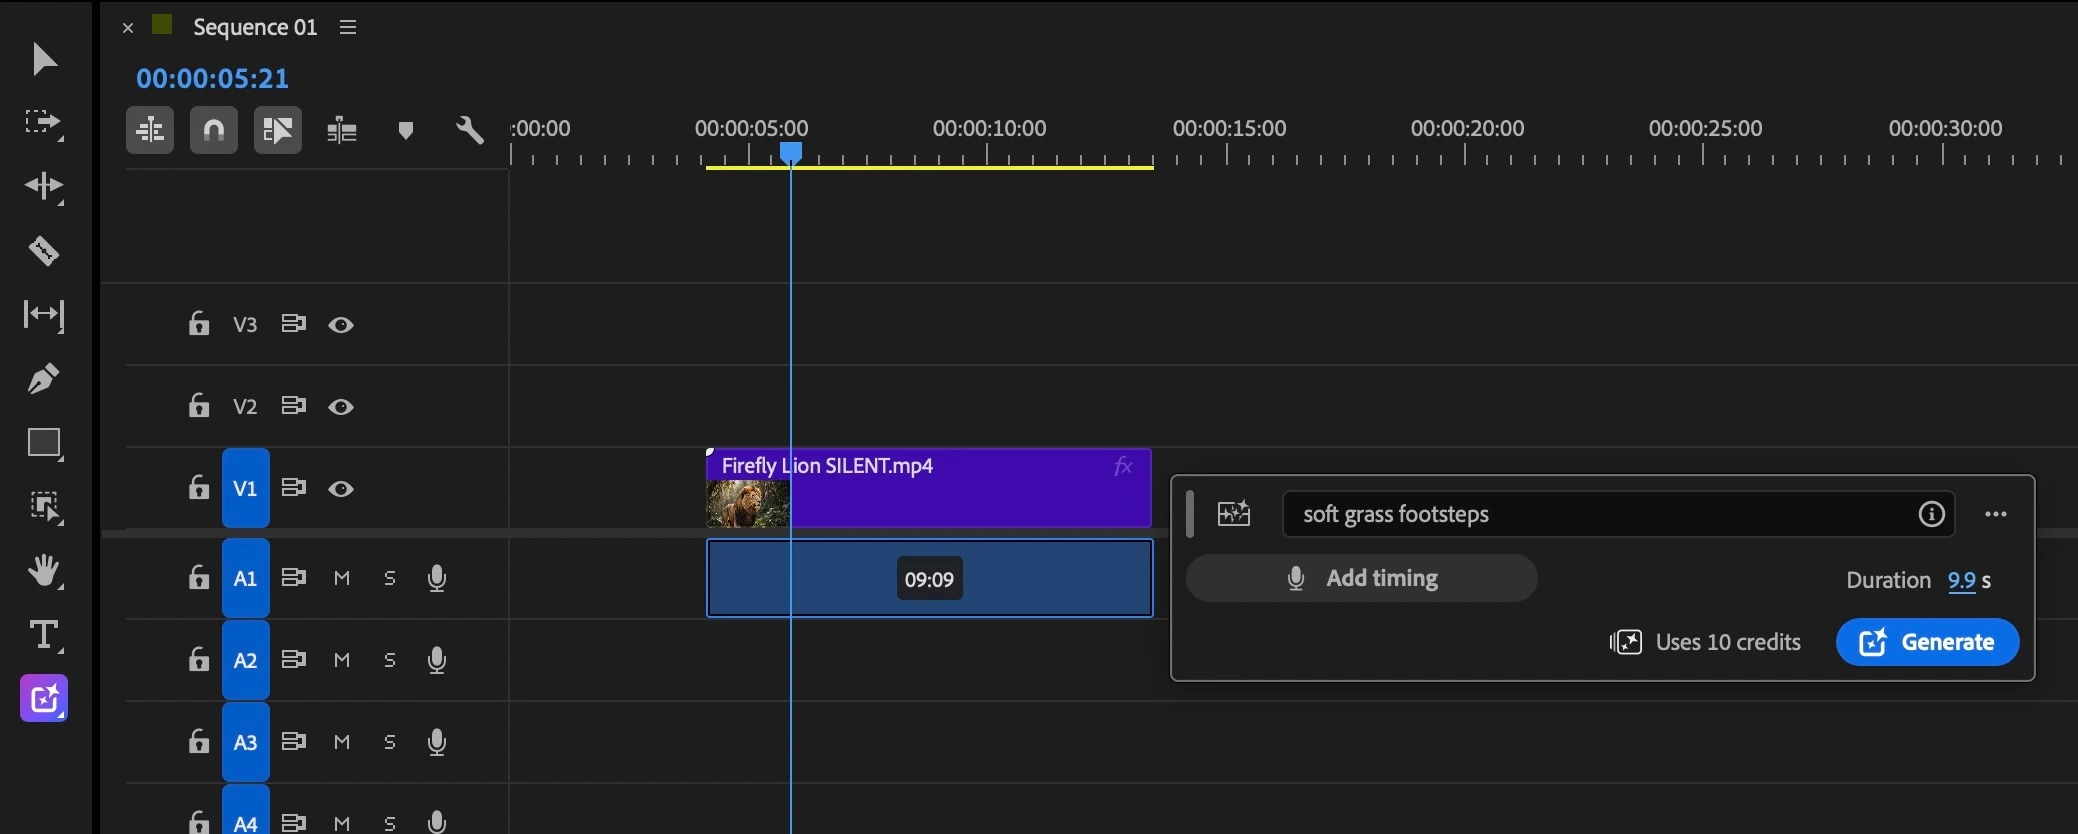
- (Optional) Record your voice to guide timing and energy, then select Generate.
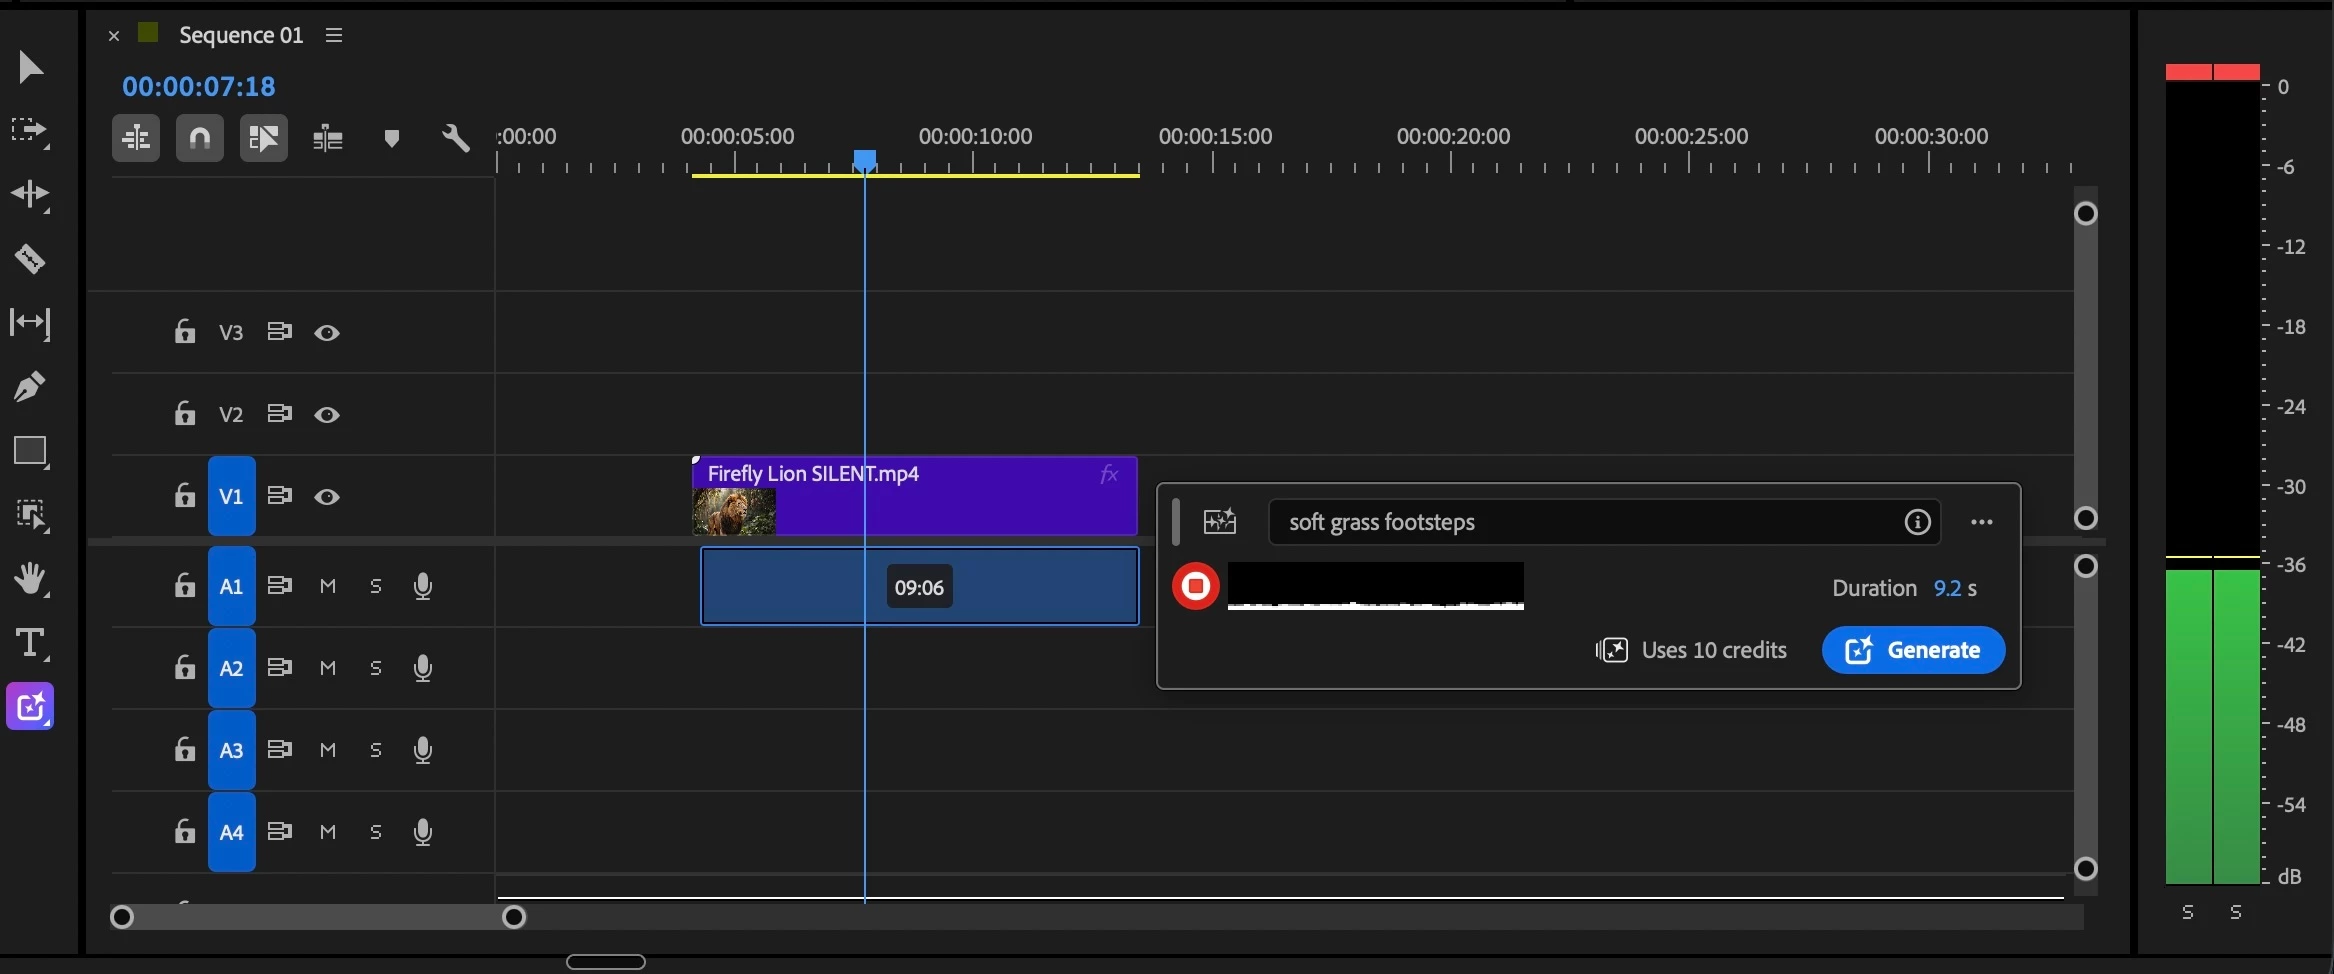
- Review multiple generated variations and choose your favorite by clicking on the AI badge.
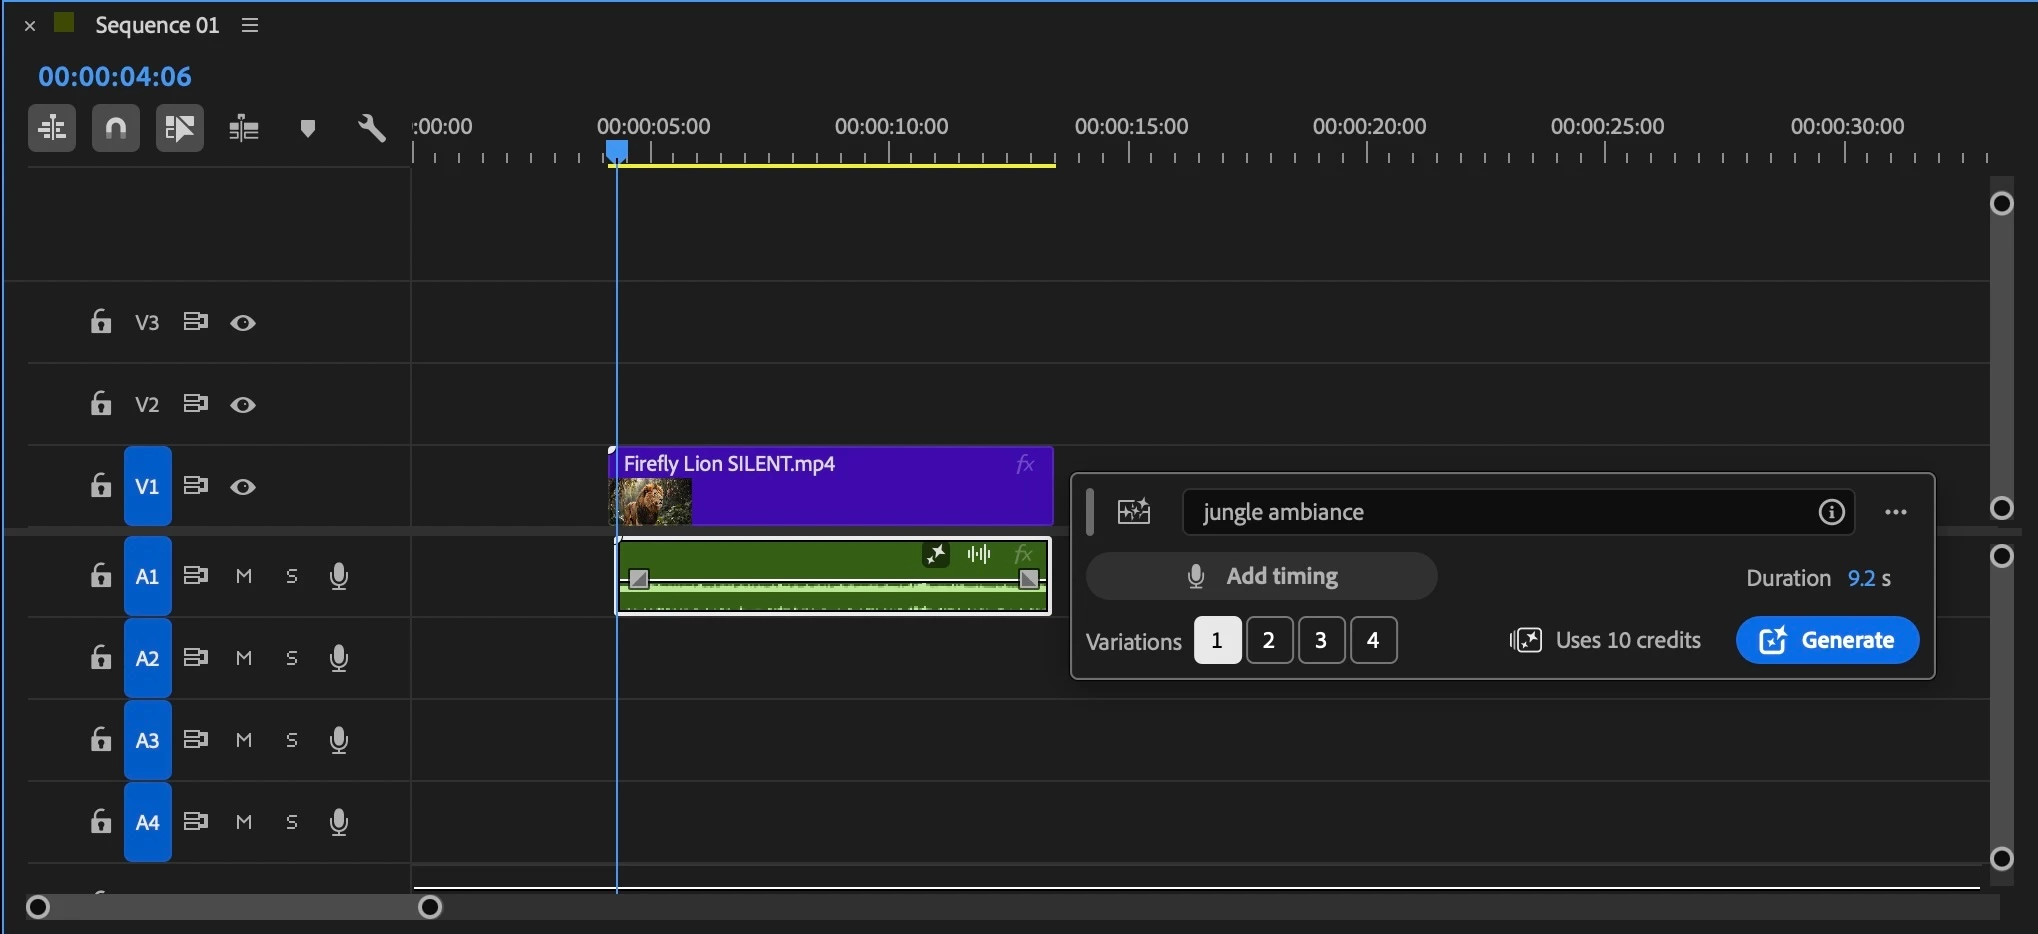
Tip: You can continue creating range selections while previous generations are still processing.
Generate Video without leaving the timeline
Need b-roll, a cutaway, an establishing shot, or to fill a gap in your edit? Generate video directly from your timeline using Adobe Firefly or supported partner models.
Select a range, choose your model, add optional reference frames, describe what you want, and Premiere inserts the generated clip into your sequence.
Generating Video
- Select the Generative Media Tool from the Toolbar.
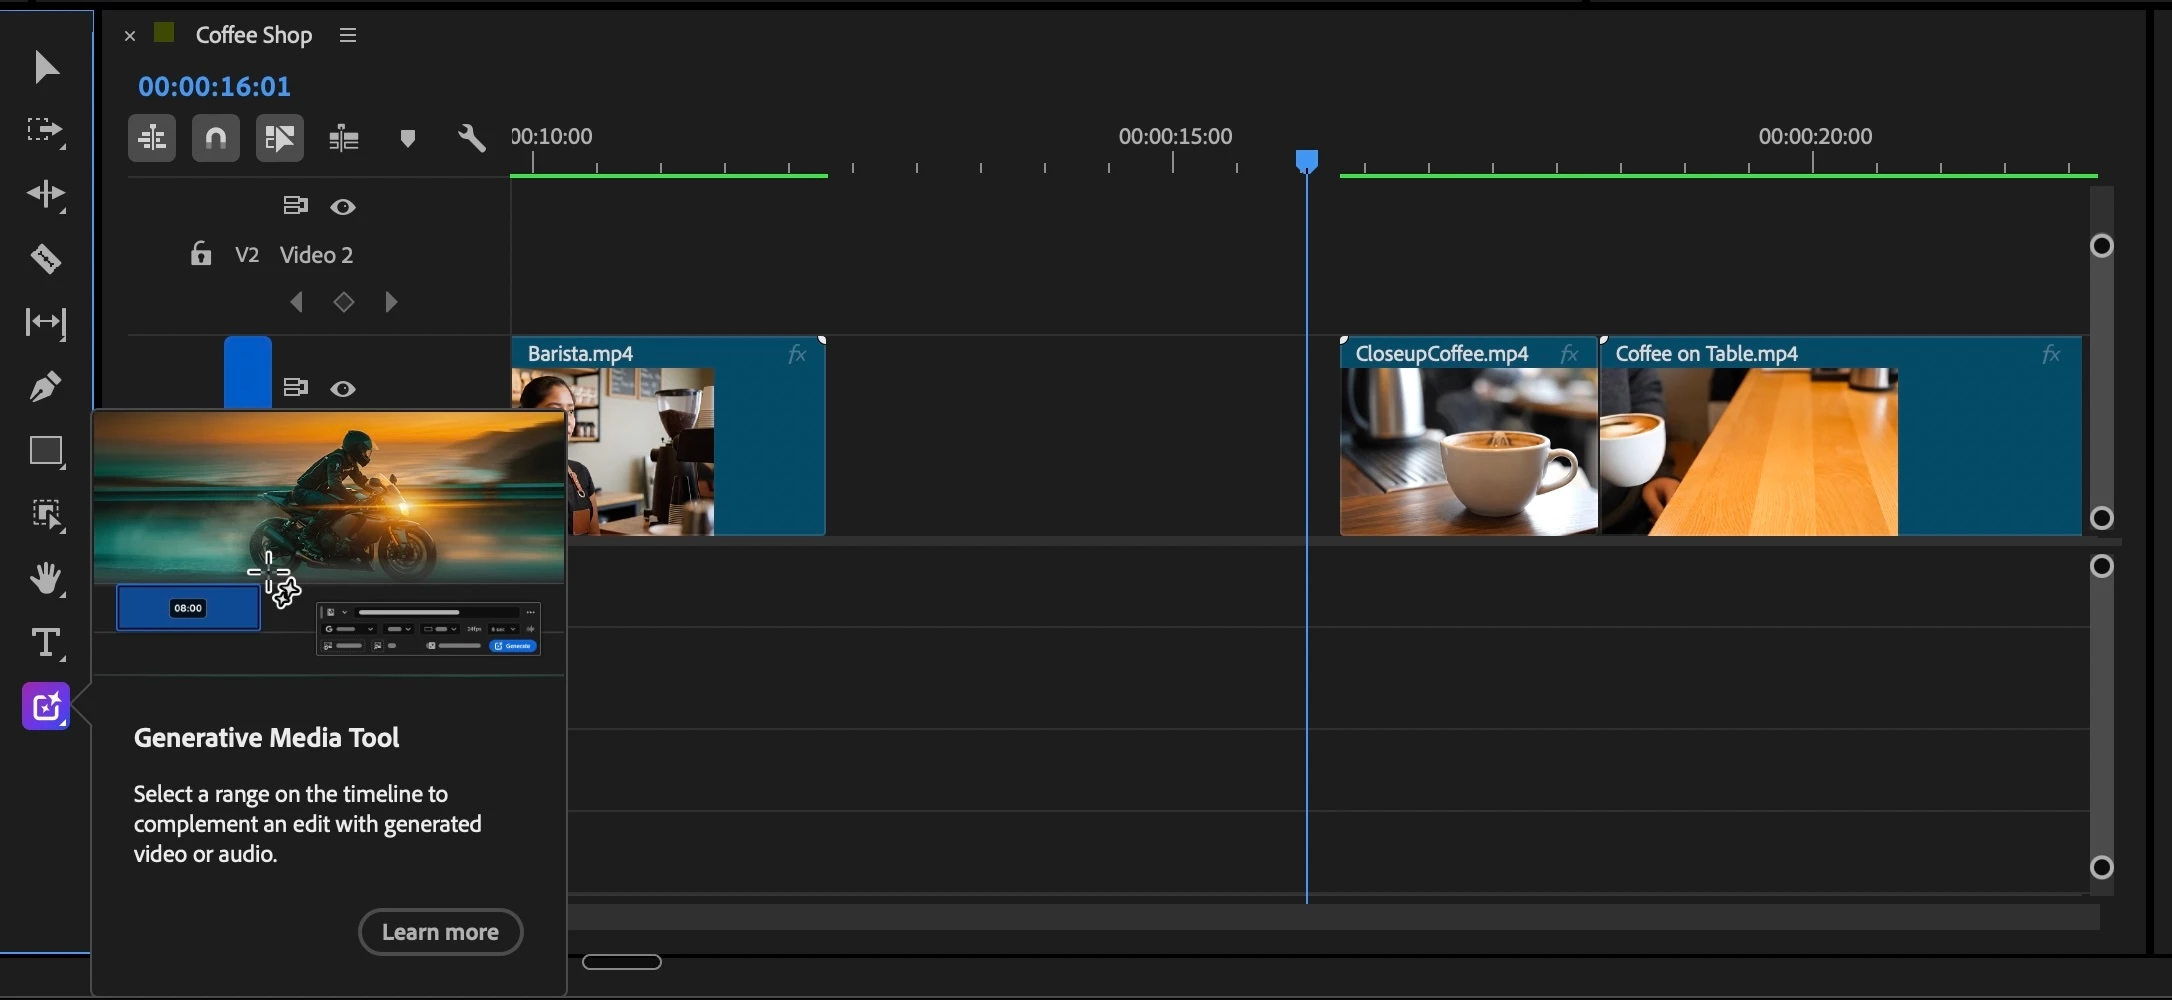
- Drag across any video track or double click a gap to select the duration you want to generate.
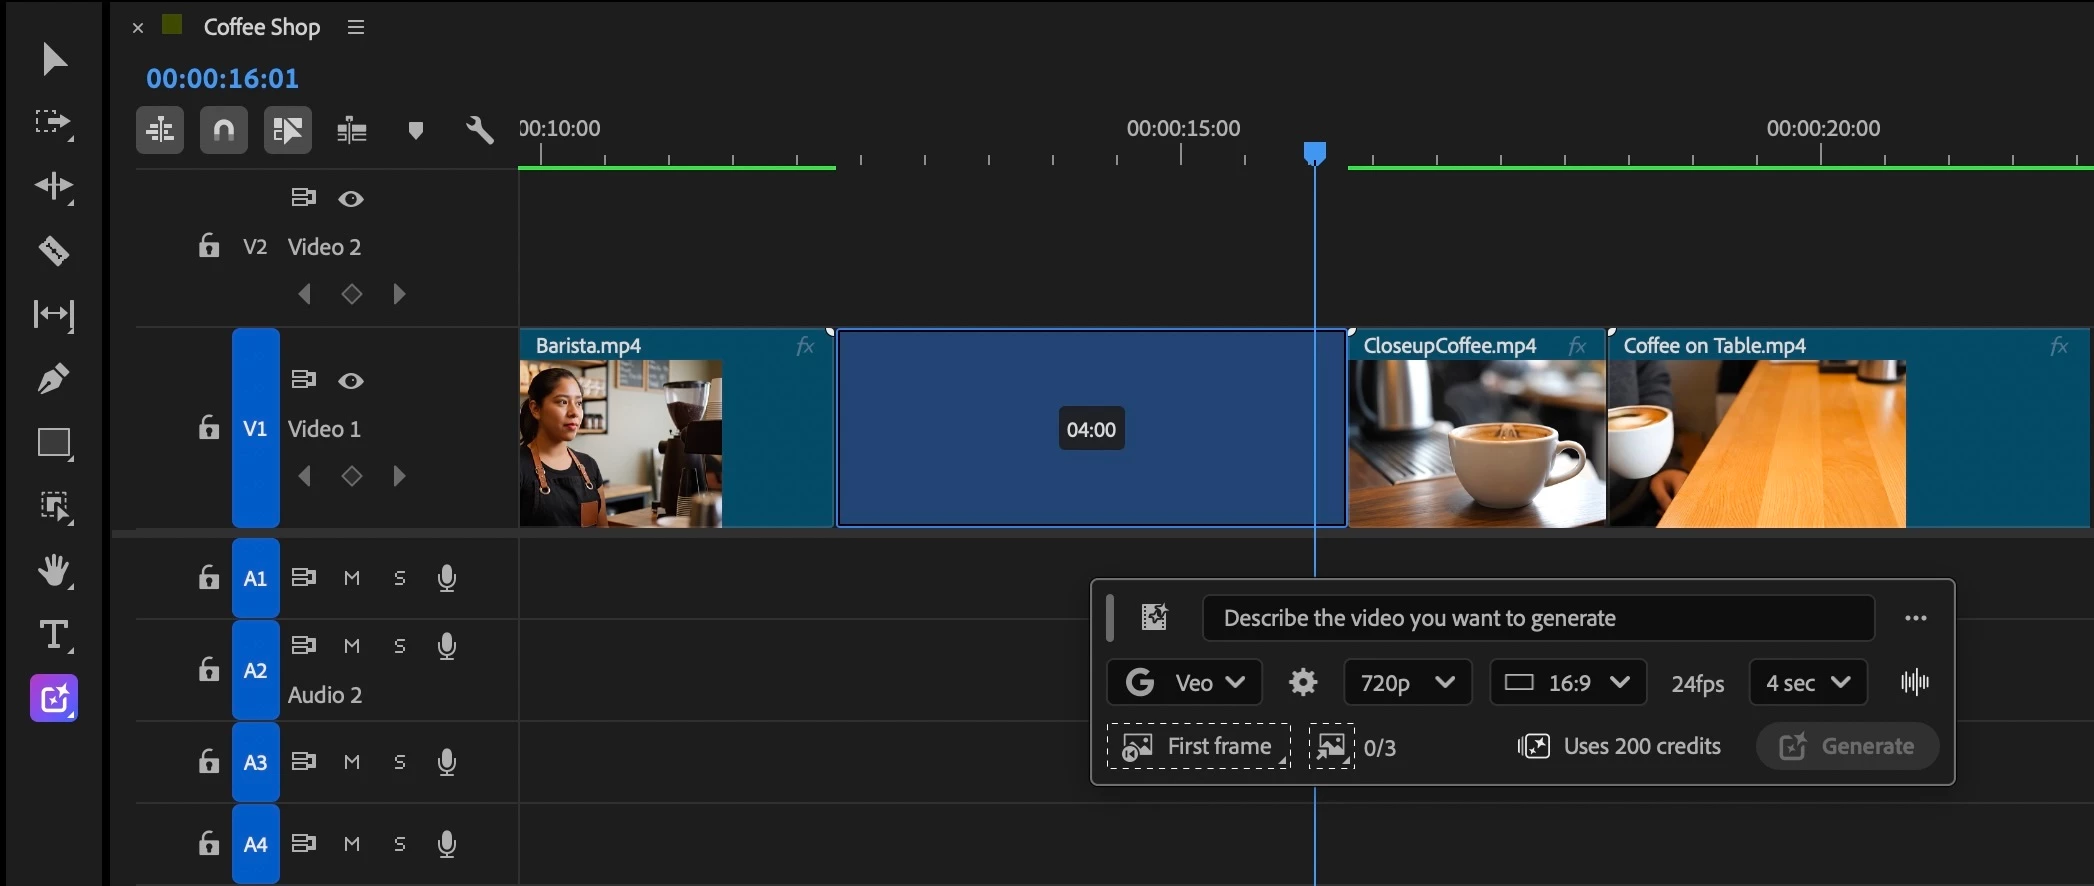
- Select your model, select any reference images (first, last, previous, next or reference), enter your prompt and generate.
- The Generative task bar supports Adobe Firefly Video Model and Partner models.
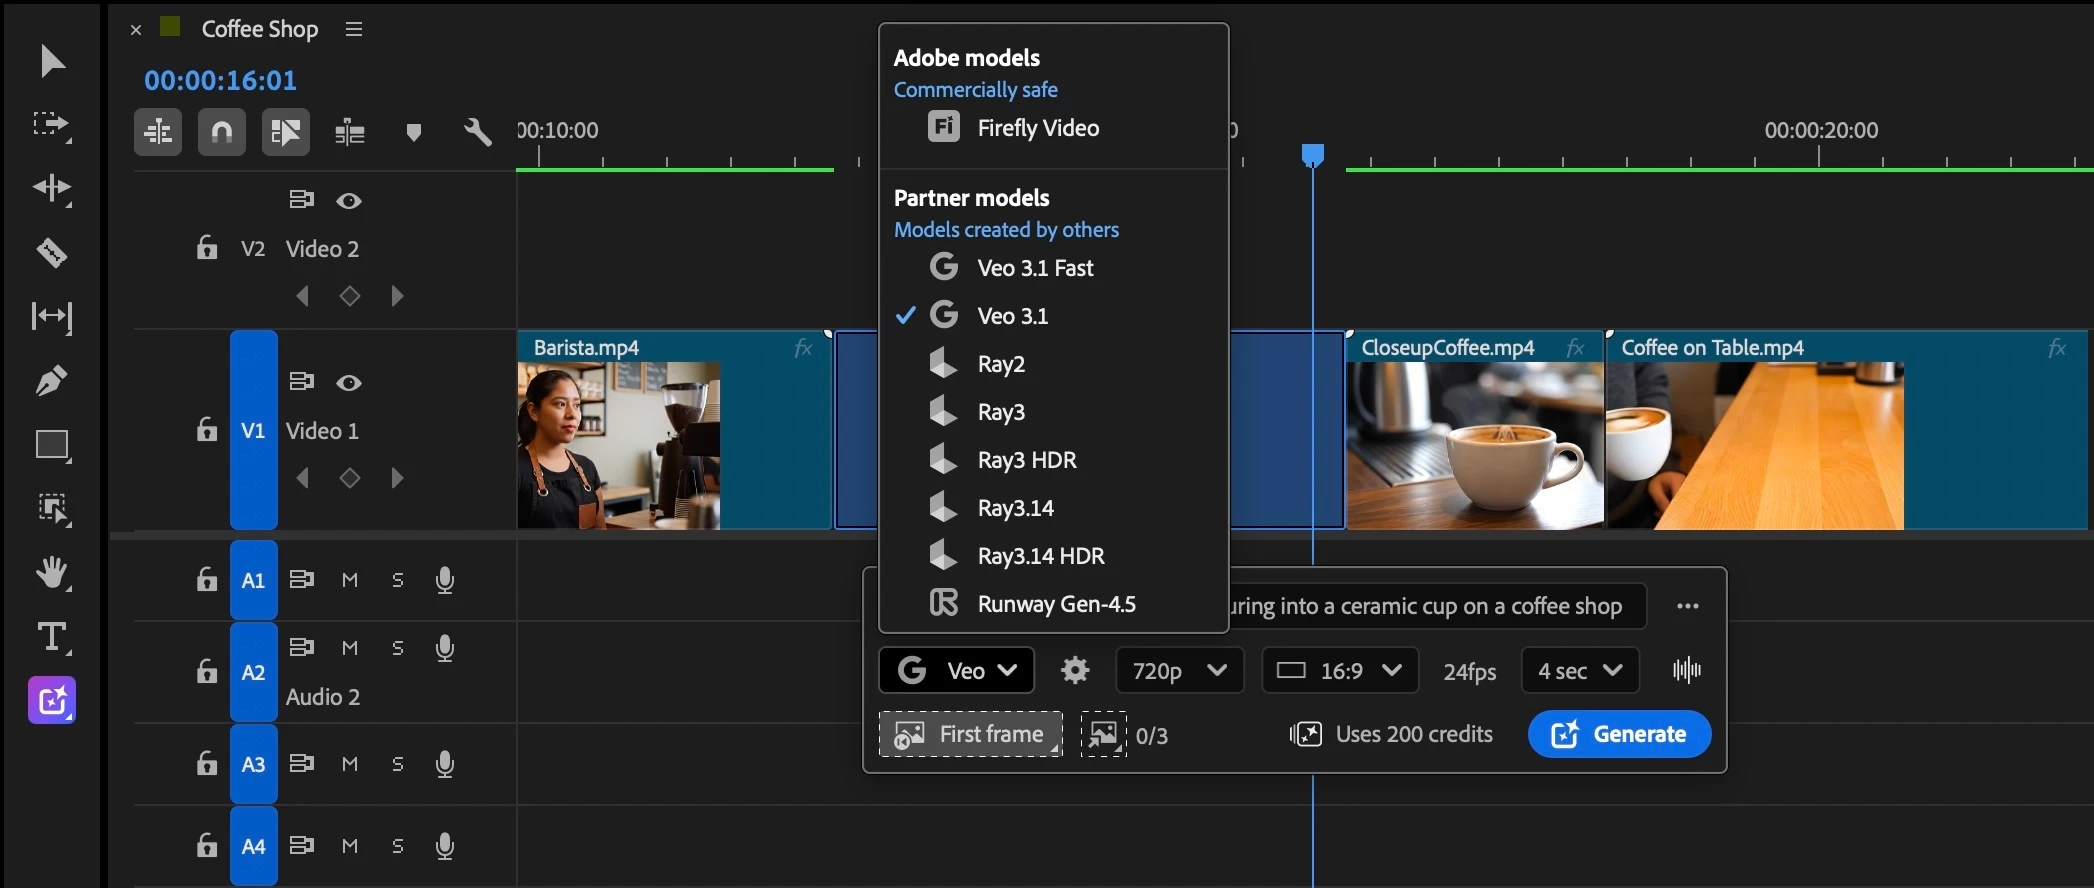
The default model on the Generative task bar is Veo 3.1.
- You can use First Frame, Last Frame, Previous Frame, Next Frame or Reference Frames (for supported models) to guide video generation. Input frames can be sampled from the Program Monitor, Source Monitor, or Project Panel. For gaps, Previous Frame and Next Frame automatically use the adjacent clips on either side of the gap. We recommend using input frames for more accurate results.
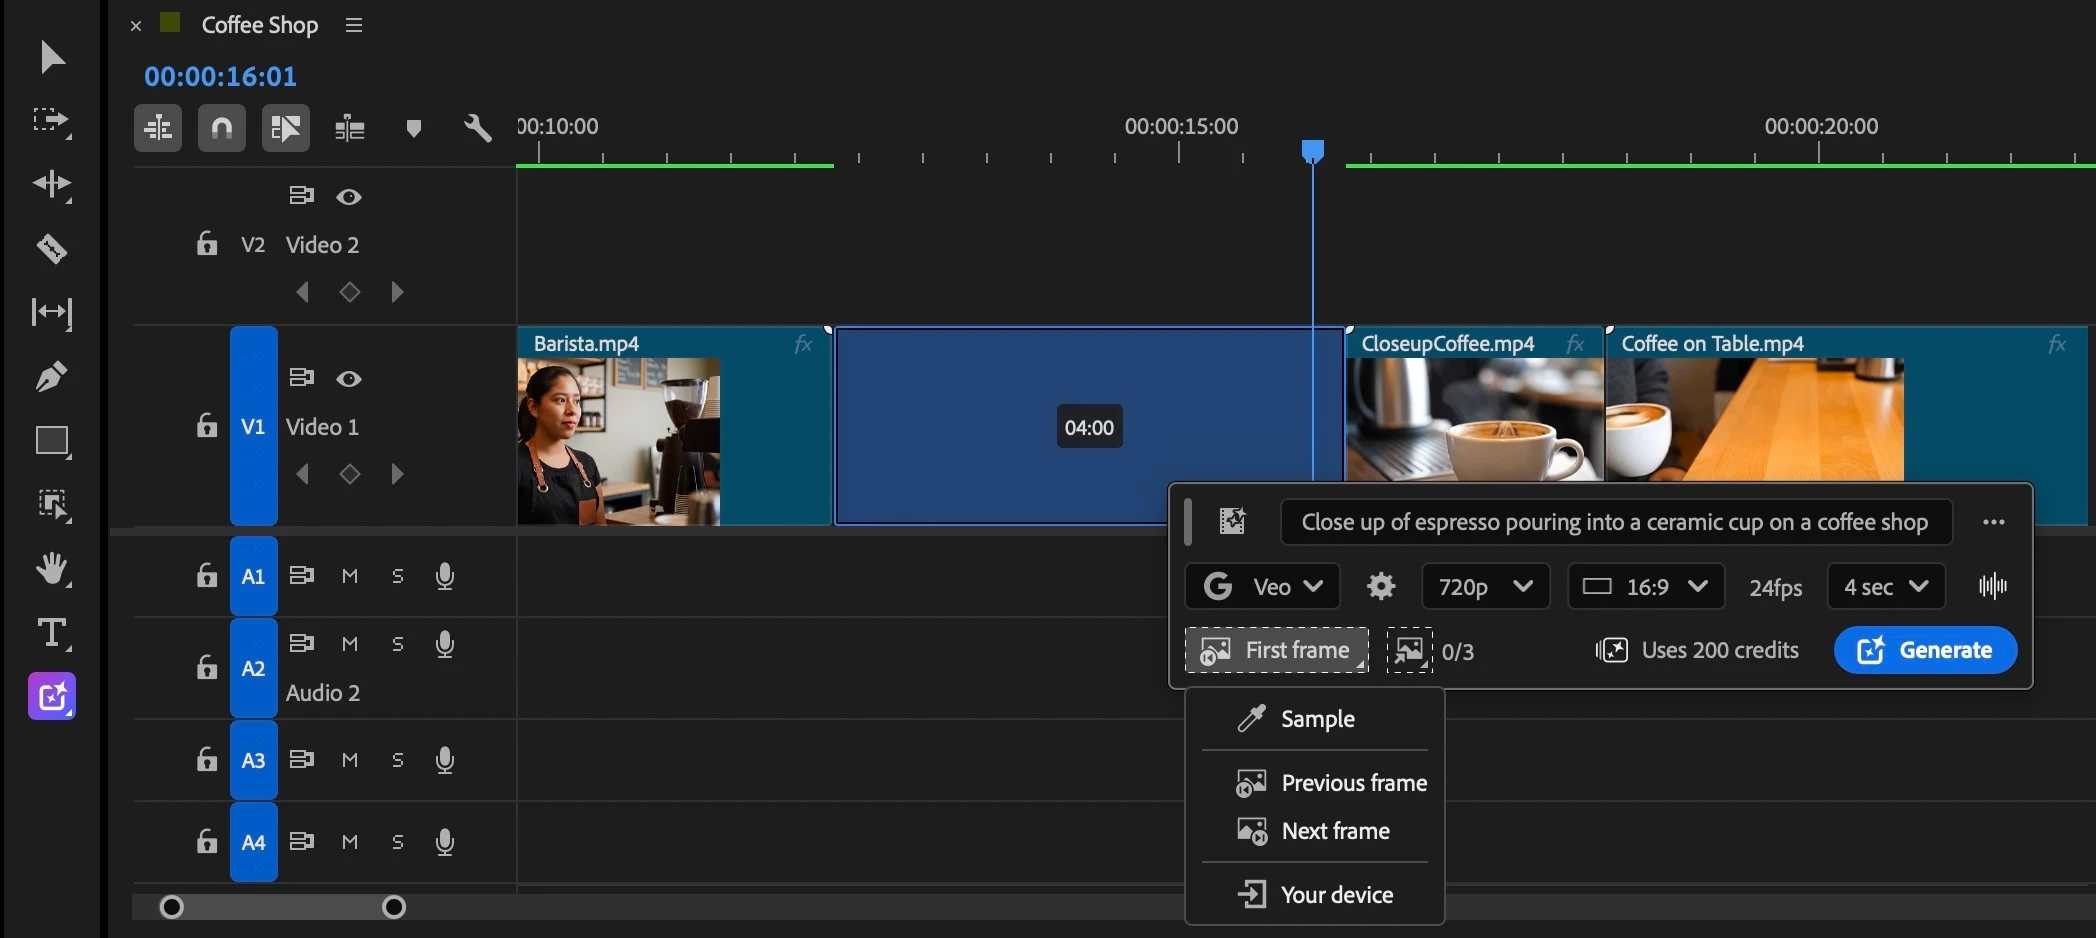
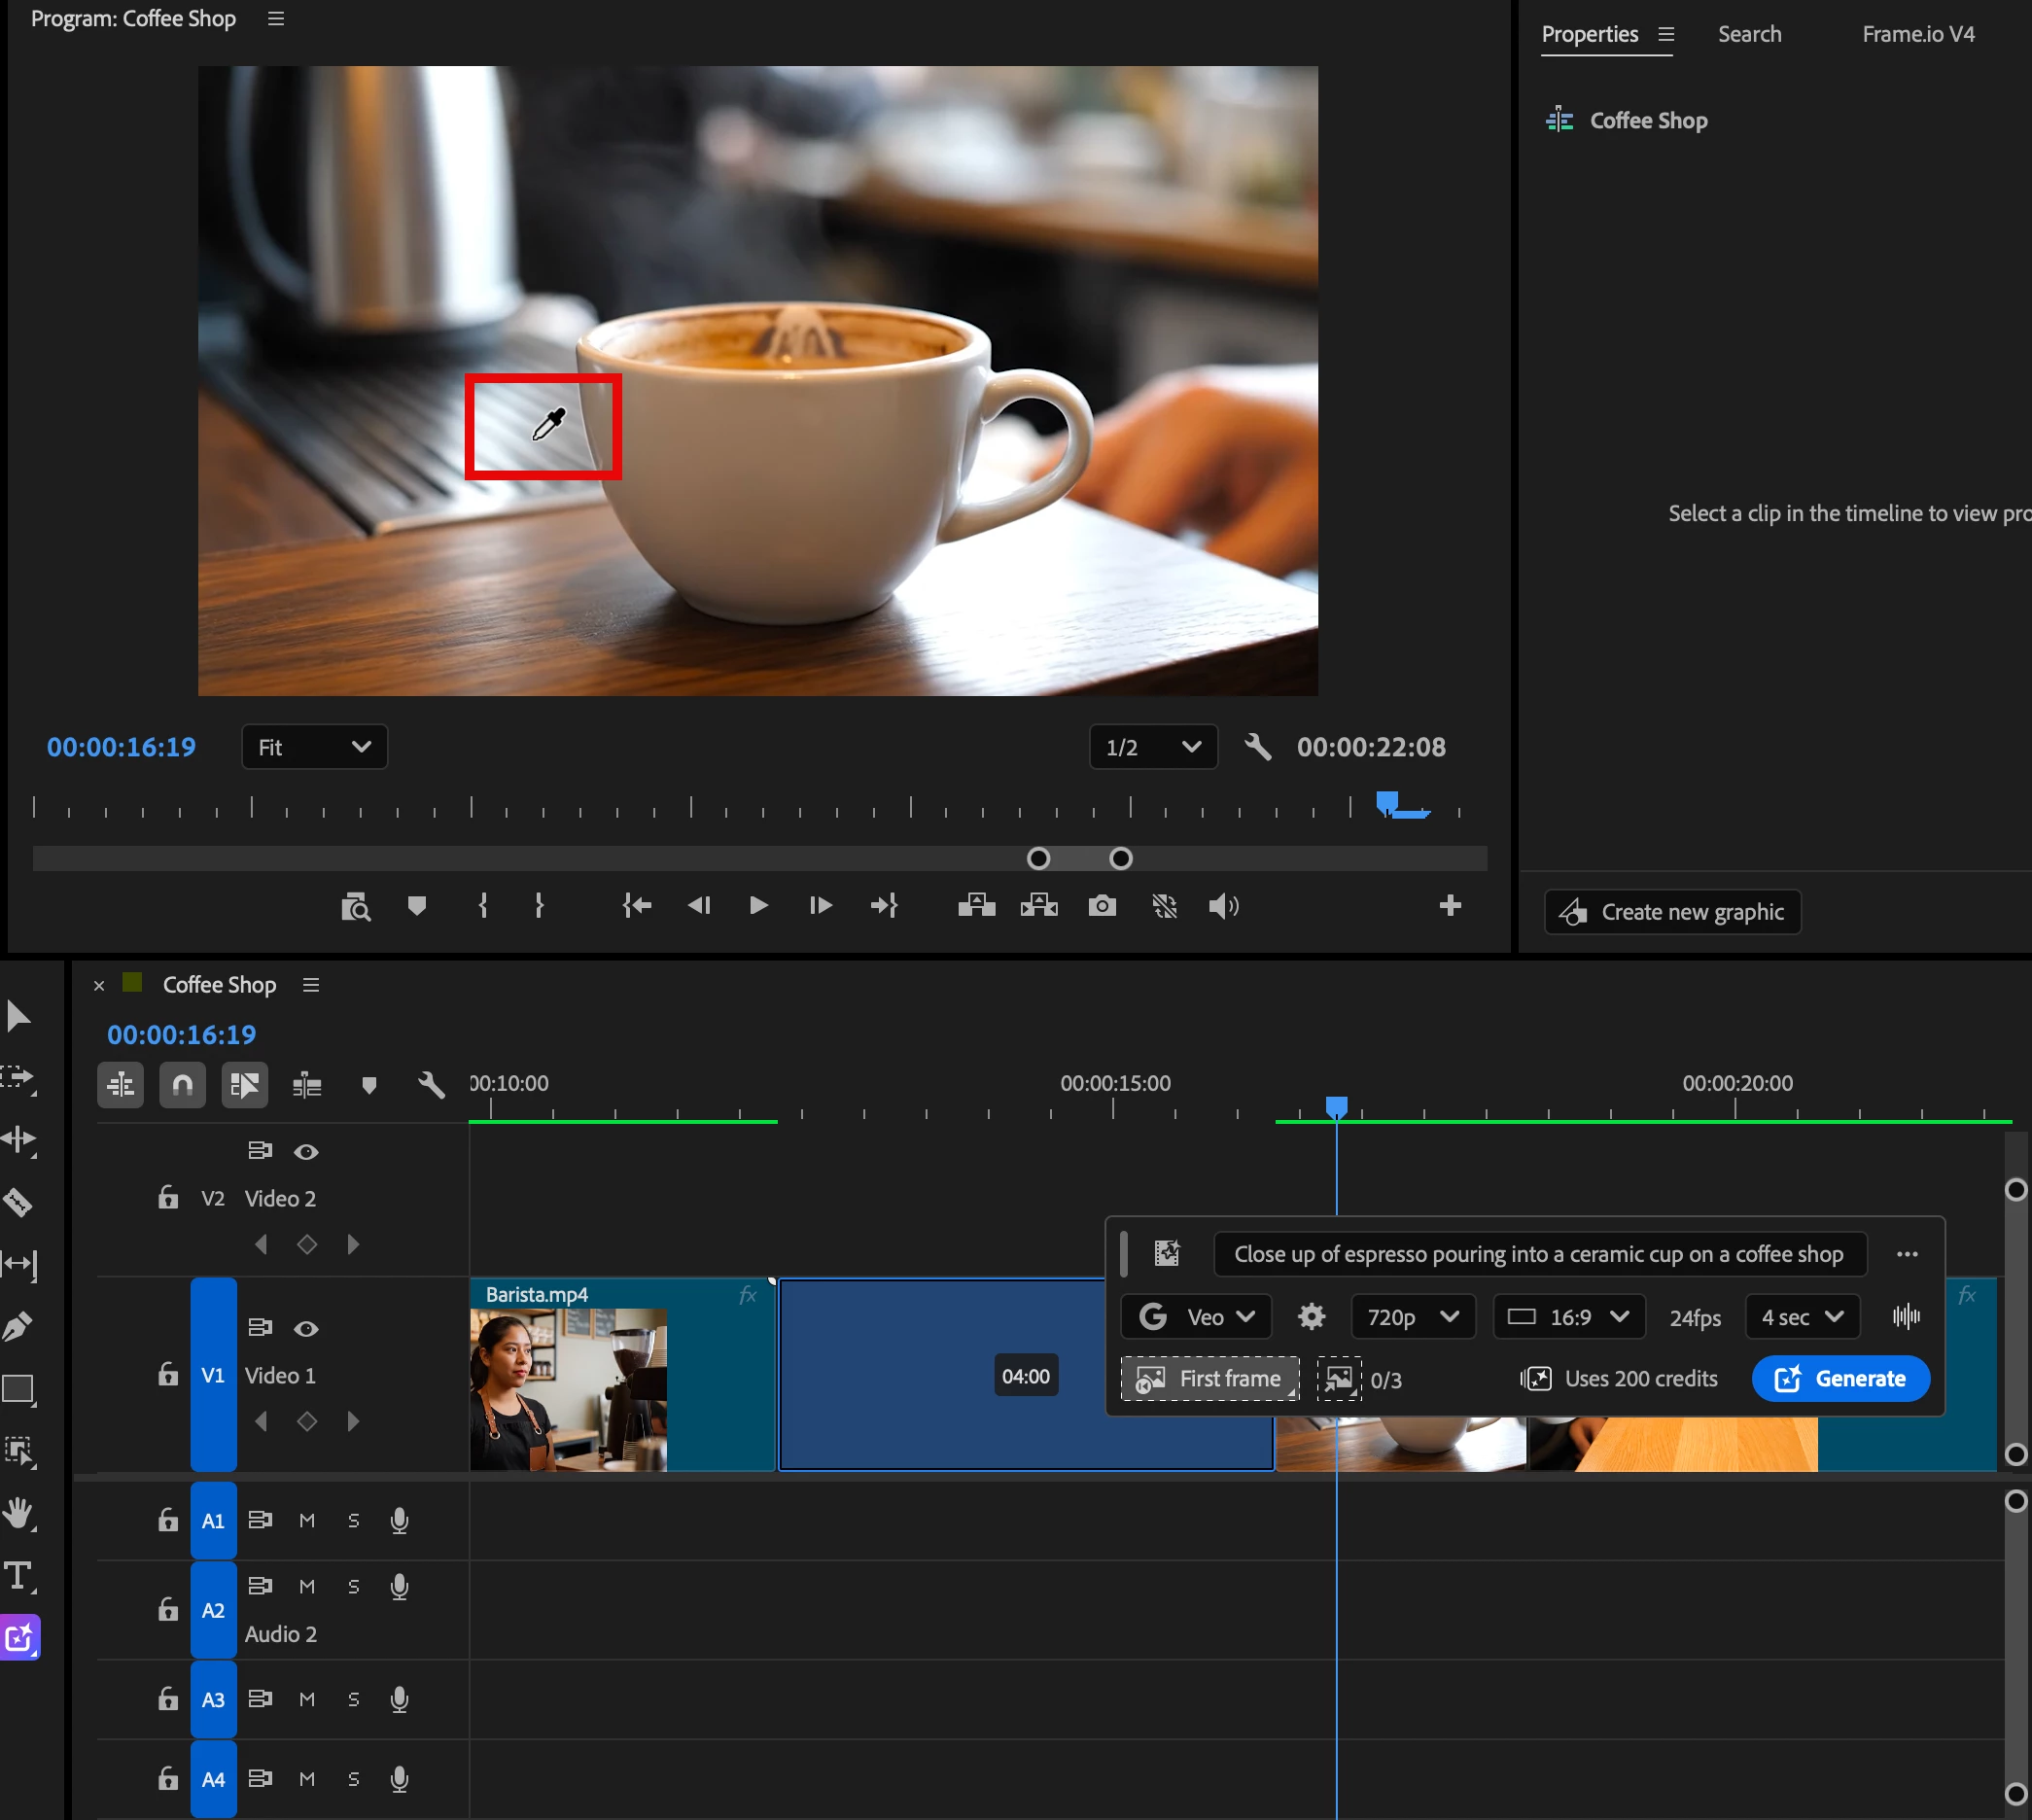
The eyedropper lets you input frames from the program monitor, the source monitor or from the project panel. Tip: Veo 3.1 (the default model) only supports reference frames for 8 second generations and 16:9 aspect ratio.
- Enter your prompt, check your setting and click generate. The Generative task bar displays the settings used for generation, including resolution, aspect ratio, frame rate and duration. Premiere automatically selects the closest model settings that match your sequence wherever possible.
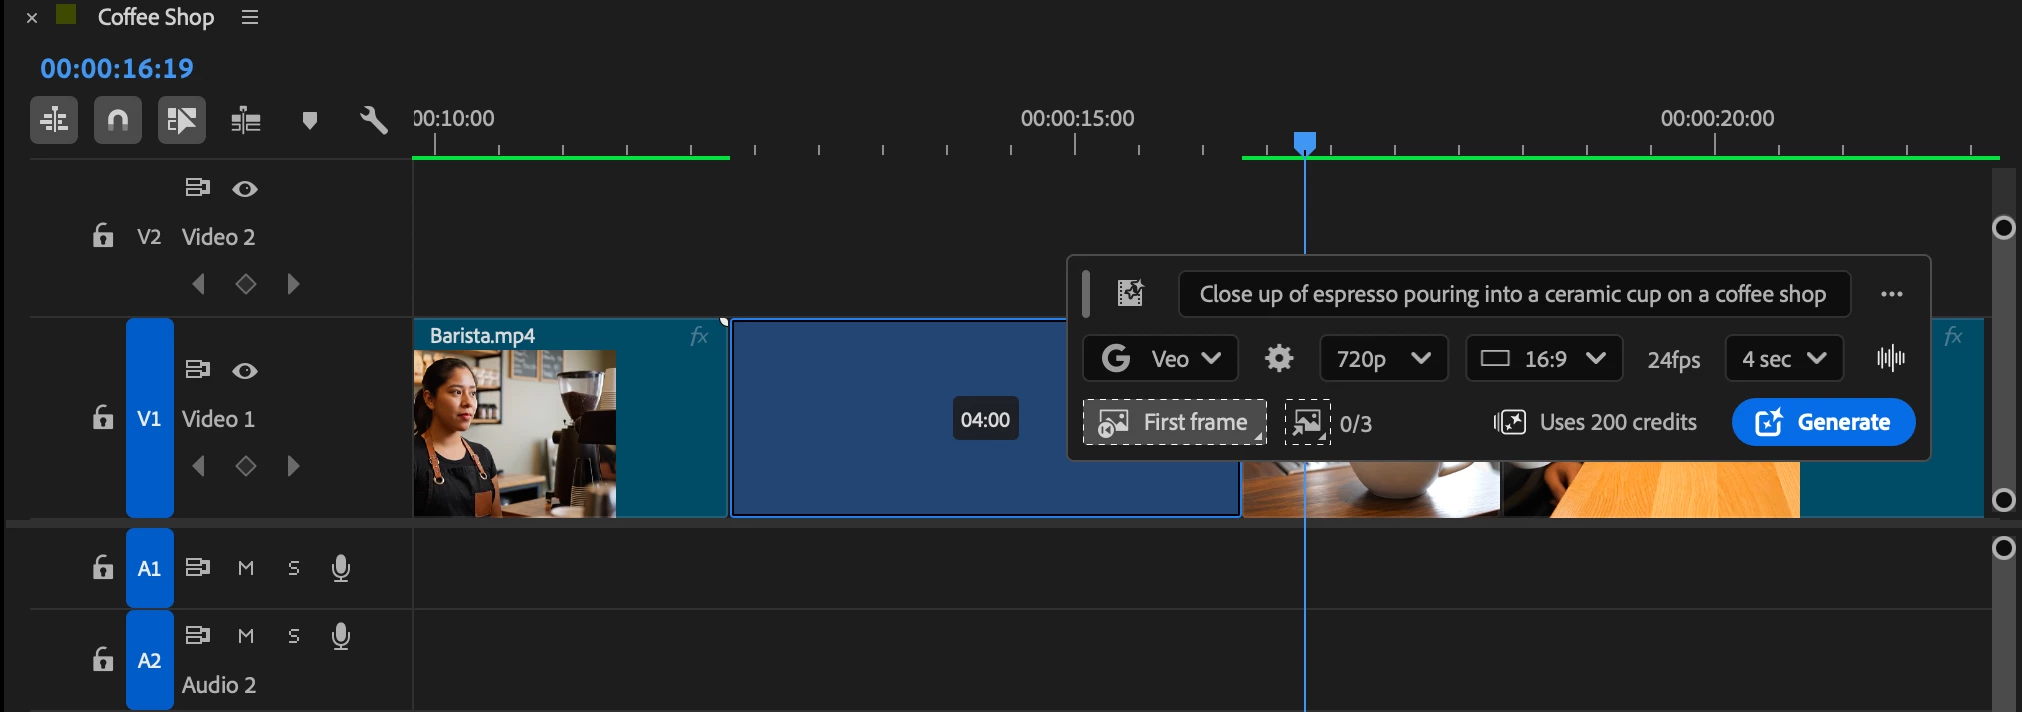
- The Generative task bar supports Adobe Firefly Video Model and Partner models.
Content that includes AI-generated media or has been edited using generative AI tools will automatically receive Content Credentials at export to indicate the use of generative AI.
We look forward to your feedback and questions.
Abhi Singh
Principal Product Manager
Premiere Desktop
 AdChoices