(Thanks, Devendra Nath Mishra, Technical Support Consultant -- for calling me and patiently walking me through the NOT-SO-INTUITIVE STEPS).
I'll do my best to summarize this process here, but, I strongly encourage Adobe Prime team to begin releasing documentation around features like this, that, frankly are not intuitively discovered and are the instructions are not publically available. PLEASE ADOBE.
**Side, note: I'm fighting hard internally, to keep using the Adobe Captivate Prime platform. But, Adobe does not make it easy when my VP asks me for a report of learners' transcripts filtered down to geographic location or by department and I say "okay I'll create that for you and get it right back to you" -- then I find out, it's not so simple. I'm a Prime fan, but, you all don't make it easy. Hire me to support the Adobe team in their documentation efforts. I'm glad to help.**
Okay, back to this process:
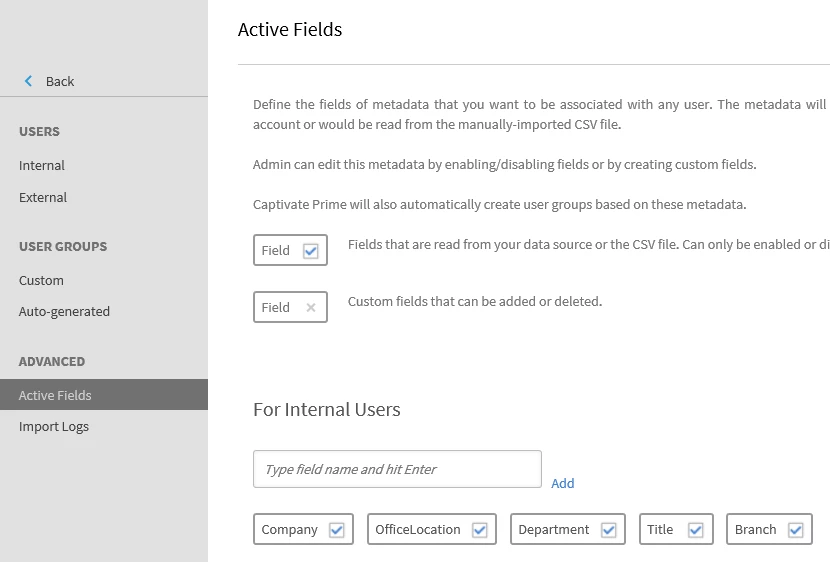
- Any categories/fields/columns you want to see in reports, you have to create them.
- In your CSV file (used to bulk upload your learners into Prime) add the columns (example: department).
- When this CSV is uploaded, Prime acknowledges the column.
- Then go to Active Fields (users-->active fields), check the boxes for the fields you want available in your reports, and click add.
- THEN, RE-UPLOAD THE CSV, for Prime to hold the columns in long-term memory.
- NOTE: there are instructions on the Active Field screen that state you can create your custom/active fields from that screen, but I have not tested that technique.
[This is a down and dirty explanation, hopefully we site admins will have a set of guides we can refer to for this kind of stuff soon. Based on my trial and error, I'll gladly share what I know with the other site admins in the forum.]
Regards,
Thomas H.
Master Electronics

