
Clean up Scans in a Snap.
Erase creases, folds, stains, smudges, stray pen marks and more with an industry-first cleanup tool in Adobe Scan.
With the swipe of your finger, you can erase unwanted artifacts, fuzzy images, or any other unwanted content. The “erase” action is essentially filling a selected area with a color you select (thus hiding that area).
You can perform image cleanup on a new scan or clean up the image on an existing scan.
Here’s how to get started:
- For an existing scan, enter the modify scan mode:
- On any thumbnail on a file list, tap
 overflow and then tap
 , or
, or - In an open file, tap
in the bottom menu.
- Navigate to the page you want to modify.
- Tap

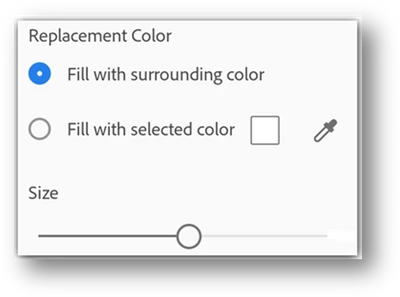
- Select your fill color:
- Fill with surrounding color: Use an app-selected background image as a brush color.
- Tap the square: Choose a color from the color picker popup.
- Tap the eyedropper: When the moveable eyedropper appears, move it over color and tap

- Zoom the image in and out as needed.
- Swipe your finger over the area to erase an area.
- Tap

Here is a small video for you to know more about the Cleaning scans in a snap.
Tell us if these helped you using Protect PDF Files service better. Join the conversation here. We are listening!
To discover a host of other great features – Go straight to: Working with Scans | Finding files and content | Edit your scans using Adobe Scan app
