SpectacularKevin
Inspiring
May 23, 2023
Answered

Assigning a Numerical Value to your Brightness for Writing Code

  • May 23, 2023
  • 2 replies
  • 1594 views

I have several lightning effects flashing on screen and I want to add some lens grit and dirt but I only want that lens grit and dirt layer to show up when the lightning is flashing at it's brightest. I know I can just keyframe the opacity of the grit and dirt layer but there is so much flashing it would be much easier to code it.


Is there a way I can assign a numerical value to the brightness of a frame and pick whip the opactiy of my grit and dirt layer into that number? This way, when the frame's brightness value is at 100% (it's brightest point) so is the opactiy of the grit and dirt layer (meaning the grit and dirt is completely visible) but as the brightness drops, the opacity of the grit and dirt layer also drops.


I'd love any suggestions. 


Thank you.

This topic has been closed for replies.
Correct answer Rick Gerard

Now that I understand what you are working with, I can suggest this workflow.


Your main comp should contain the grunge layer on top, the light effects or light flashes layer below that, then the background footage.


When you have the composition arranged that way, and you are satisfied with your Lightning layer, you need to duplicate the layer, then pre-compose it moving all attributes to a new composition. Name that Pre-comp Flashes for now. Open the new Flashes comp and select the layer or layers that create the flash and scale them down until they are about 200 X 200 pixels. Add Gaussian Blur and maybe levels so that the pulsing bright pixels come close to white if you can get them there.


 Back in the main comp, turn on the top Grunge layer and add this expression to Opacity:

ref = thisComp.layer("Flash");
clr = ref.sampleImage([thisComp.width/2, thisComp.height/2], radius = [100, 100], postEffect = true, t = time);
t = rgbToHsl(clr)[2];
linear(t, .1, .78, 0, 100)

The expression looks at a 200 by 200 square in the center of the comp and creates a variable "t" for the luminance value of the average in all the pixels in that area. The linear method will animate the opacity of the Grunge layer from 0 to 100% as the luminance value increases. In the sample comp that I created .1 was a good starting point to give me 0% opacity, and .78 gives me 100% opacity.


The last step is to change the Blend mode of the Grunge layer to Add or Screen so the lighter parts show up on top of the original image and the lightning. I just used some Optical Flares and a solid layer to demonstrate opacity changes controlled by average brightness of the scaled and blurred pre-comp.


This is the pre-comp:
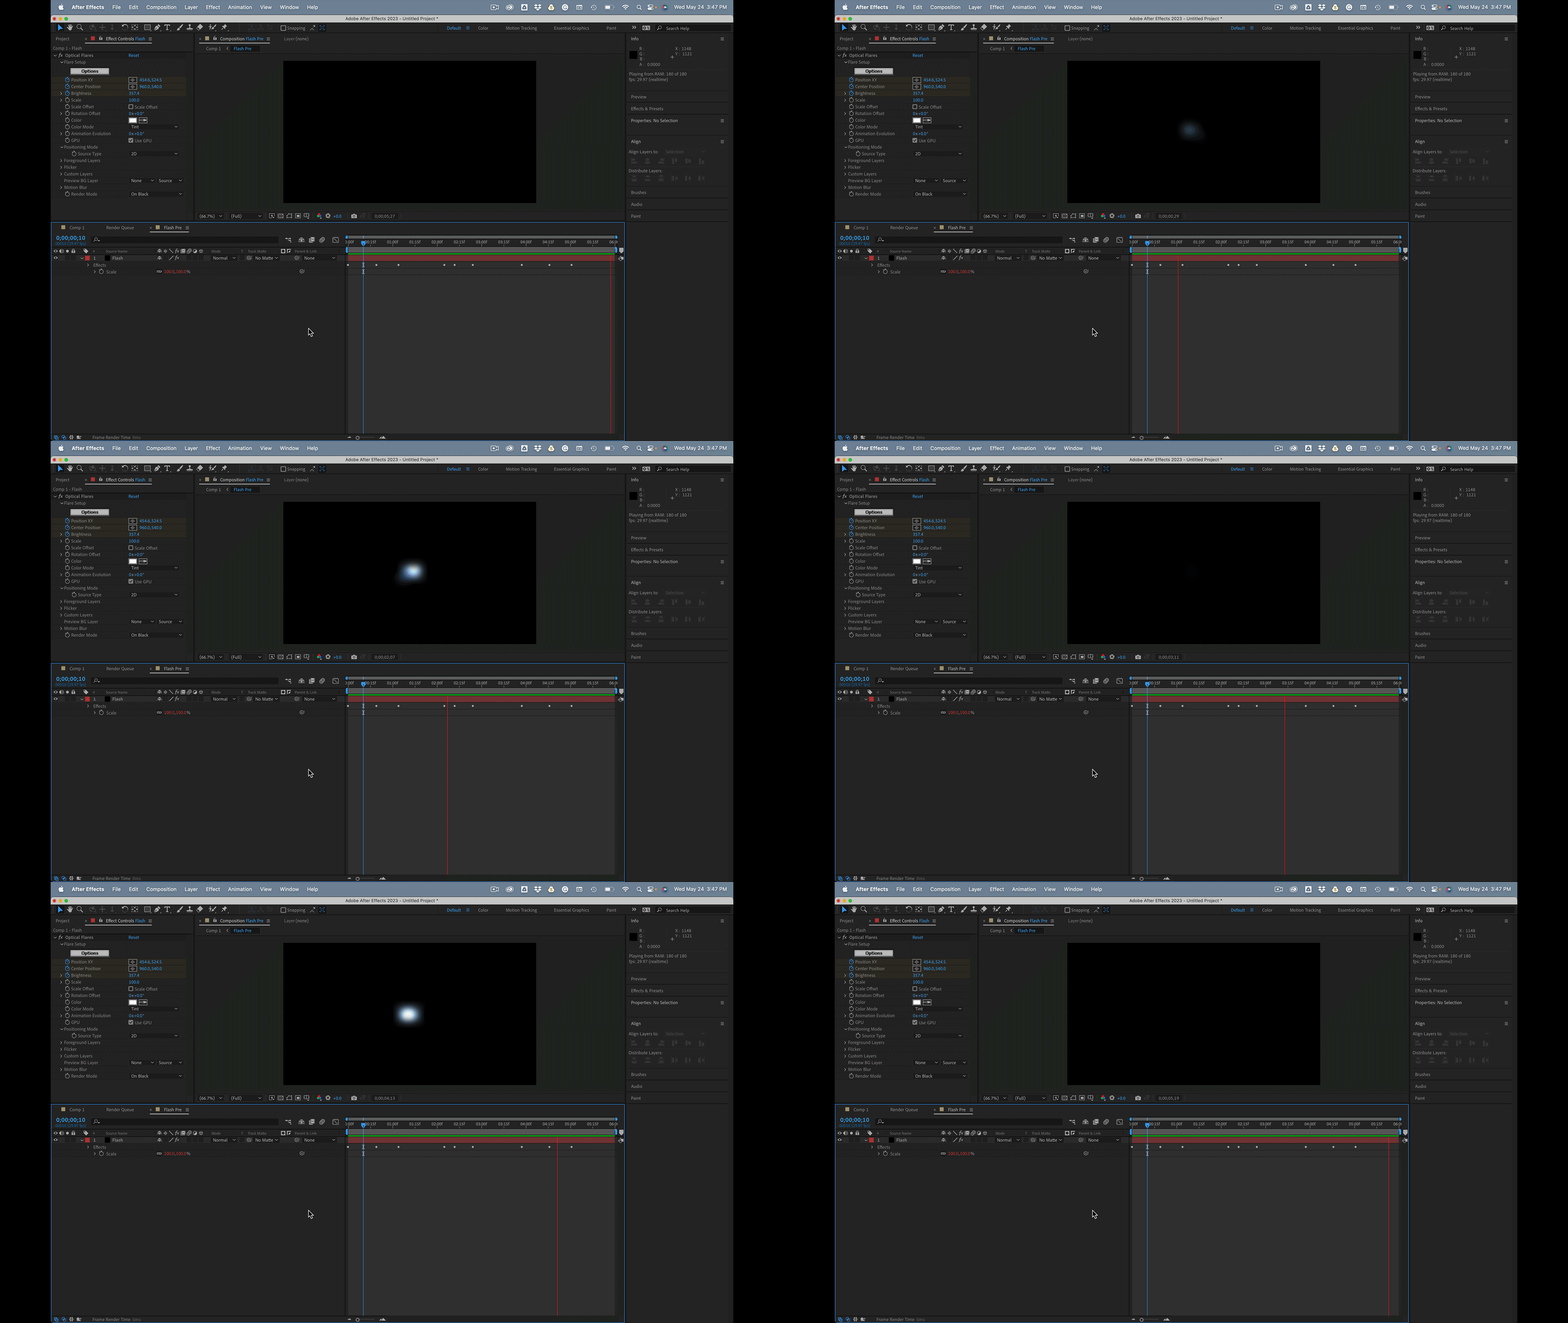
This is the main comp:
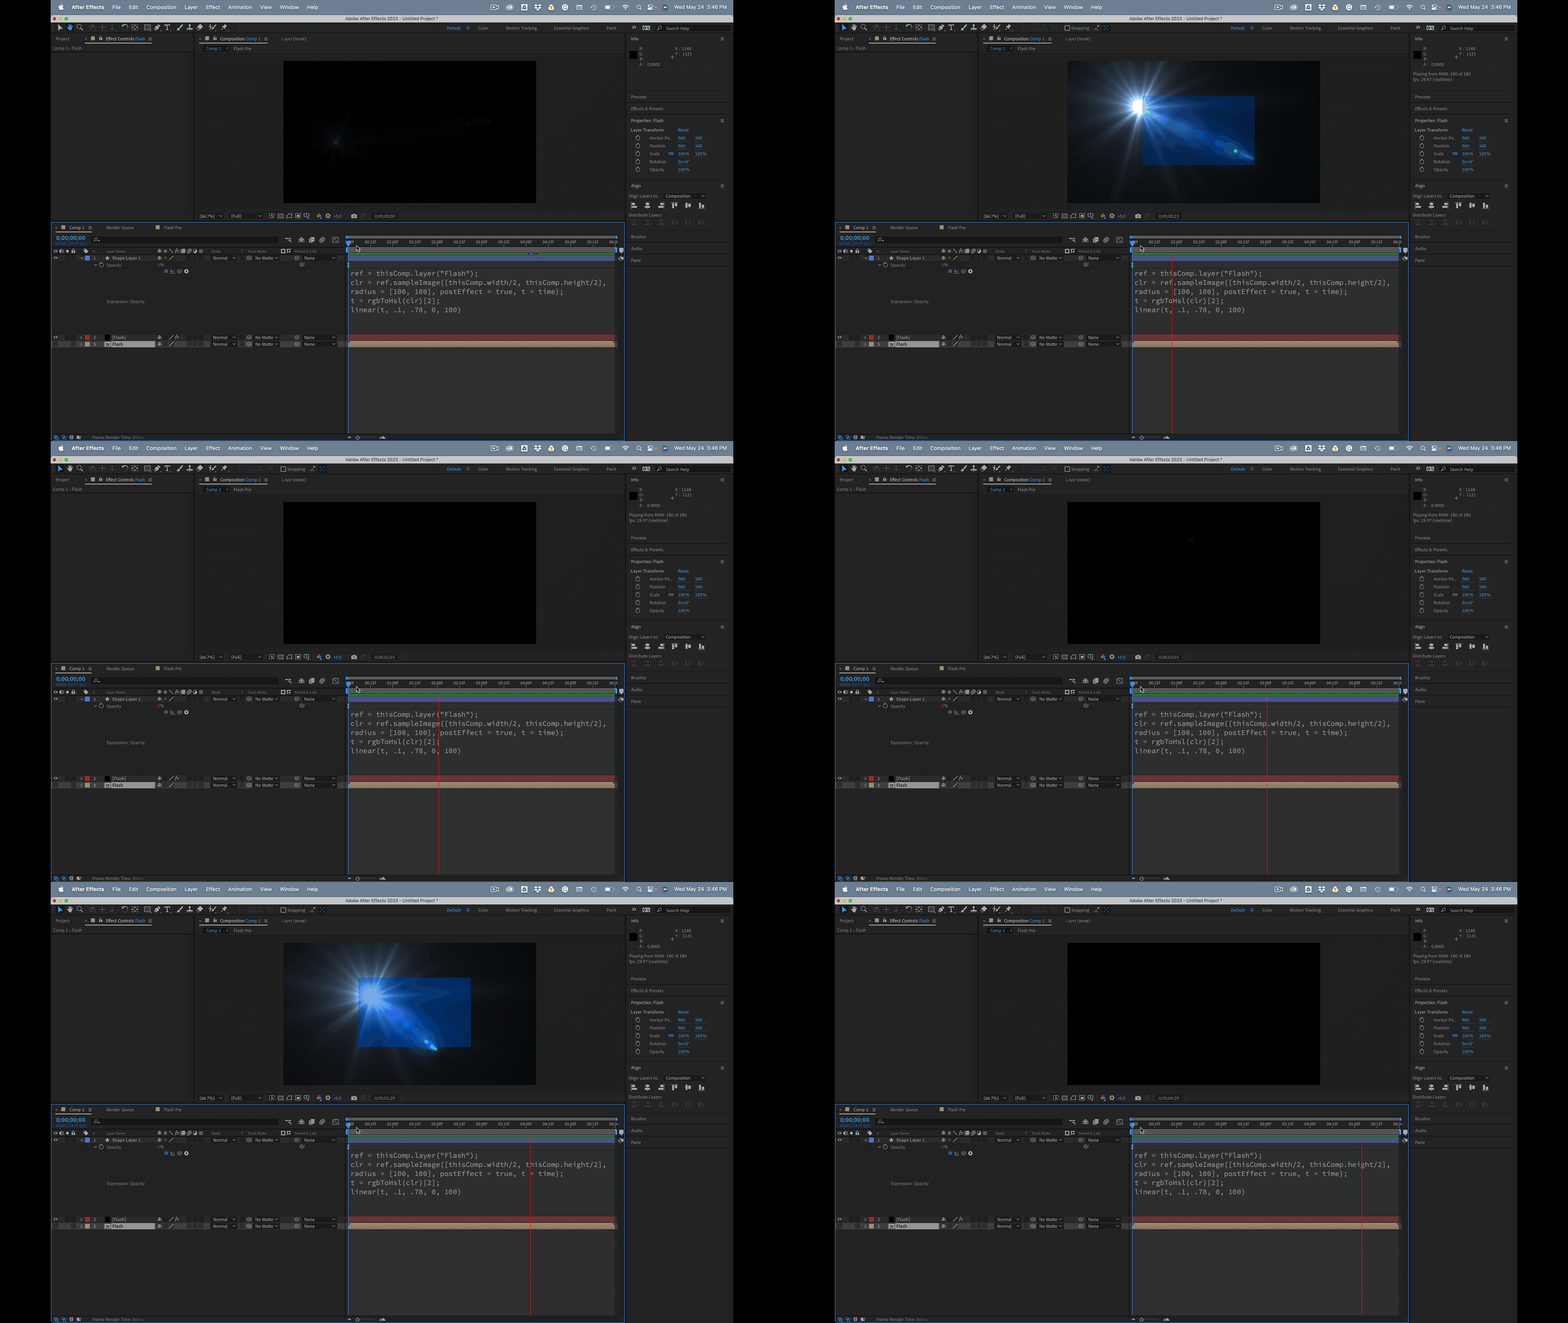
You should be able to get your comps to work if you follow this workflow.



2 replies

Rick GerardCommunity ExpertCorrect answer
Community Expert
May 24, 2023

Now that I understand what you are working with, I can suggest this workflow.


Your main comp should contain the grunge layer on top, the light effects or light flashes layer below that, then the background footage.


When you have the composition arranged that way, and you are satisfied with your Lightning layer, you need to duplicate the layer, then pre-compose it moving all attributes to a new composition. Name that Pre-comp Flashes for now. Open the new Flashes comp and select the layer or layers that create the flash and scale them down until they are about 200 X 200 pixels. Add Gaussian Blur and maybe levels so that the pulsing bright pixels come close to white if you can get them there.


 Back in the main comp, turn on the top Grunge layer and add this expression to Opacity:

ref = thisComp.layer("Flash");
clr = ref.sampleImage([thisComp.width/2, thisComp.height/2], radius = [100, 100], postEffect = true, t = time);
t = rgbToHsl(clr)[2];
linear(t, .1, .78, 0, 100)

The expression looks at a 200 by 200 square in the center of the comp and creates a variable "t" for the luminance value of the average in all the pixels in that area. The linear method will animate the opacity of the Grunge layer from 0 to 100% as the luminance value increases. In the sample comp that I created .1 was a good starting point to give me 0% opacity, and .78 gives me 100% opacity.


The last step is to change the Blend mode of the Grunge layer to Add or Screen so the lighter parts show up on top of the original image and the lightning. I just used some Optical Flares and a solid layer to demonstrate opacity changes controlled by average brightness of the scaled and blurred pre-comp.


This is the pre-comp:

This is the main comp:

You should be able to get your comps to work if you follow this workflow.


SpectacularKevin
Inspiring
May 24, 2023

This worked beautifully! Thank you so much.


Could you explain the second part of the expression:

radius = [100, 100], postEffect = true, t = time);
t = rgbToHsl(clr)[2];
linear(t, .1, .78, 0, 100)

It is working but I want to understand it a little better.

*radius = [100,100] <I am assuming this is the search area of the sample

*t = rgbToHsl(clr)[2] <I know this is converting the rgb to hsl but I am not sure what (clr)[2] is doing? Is that making it an average?

*Are the ".1" and ".78" essentially the tolerance of what equals 0 and what equals 100

Community Expert
May 25, 2023

To generate the "t" value in a linear expression that is written linear(t, tMin, tMax, value1, value2), you need one value. Color values are RGBA. Red would be [0[ and Blue would be [2].  When you convert RGBA to HSL, you get Hue, Saturation, and Lightness. Lightness is [2], or the third value. 


The Sample image function looks for a point on a layer to sample the colors, that point has a radius, and there are switches to look after the effects have been added and another switch for time. The way you write that in plain English is:

   For The layer named "Flash," sample an area at the defined position that is this big after all effects and at the current time.


I could have simplified that line by just writing it like this:

ref = thisComp.layer("Flash");
clr = ref.sampleImage([960, 540], radius = [100, 100]);

The Post and Time variables may be eliminated if you don't need them. That line would have taken an RGBA sample of the ref (reference) layer at 960, 540, which was 200 pixels in diameter.  I chose to scale down the layers in the Ref comp ("Flash") to fit inside a 200 X 200 box to speed up processing time. There would be fewer pixels to average, and I figured it would help average out the brightness of the scene to blur it a bit and increase the exposure so there was a bigger range of values to work with. I chose half the comp width and half the comp height so it would be easy to hit the center of the nested comp no matter what size it was. You could also have used the position of a null or the position of another layer as the sample point. I usually use nulls for the sample point, but it just over-complicated the comp in this case. 


I converted the color values to Hue Saturation and Lightness because lightness was an easier value to work with. Color and HSL values are always from zero to one. 


I hope this clears things up. All the building blocks for the expression are in the Expression Language Menu in the Timeline.


Community Expert
May 23, 2023

You can sample a group of pixels, convert the RGBA values to HSL, then use the HLS value to drive an if/else argument that animates opacity. You will need one sampler for each of the flashes.


You can use a copy of the light flashes layer, or pre-composed light flashes layers, with a combination of curves, levels, threshold, or other effects that changes the flashing from the all-black to a black-and-white layer when it hits a certain threshold. Then you could use that as a track matte for your grunge layer. That would probably be an easier solution.


A screenshot of your entire UI embedded instead of attached, so we can see what the comp looks like when you want the dirt layer to appear, would help us help you find the most efficient workflow. I think the most efficient approach is a copy of the flashing layer or layers as a track matte for the lens grit and dirt layer.


SpectacularKevin
Inspiring
May 23, 2023

I am not sure how to send and embedded screen shot but this does sound like a solution that can work for me. 


Are you able to provide a little more insight on the setup?


I have my whole comp precomposited and I duplicated that pre-composit and used some adjustments to get the bright frames to be very bright and the dark frames to be darker. From here, how would I go forward with your method? 

Community Expert
May 23, 2023

All you have to do is drag a screenshot to the reply field or use the toolbar. The Attach button uploads a file, and it's a pain to look at them. Show me a screenshot so I can see what the comp looks like.  It might be as simple as a copy of the main comp with Threshold applied used as a track matte for the grunge layer.